Haynes Ford Fiesta 1976 to February 1989 Handbook & Drivers Guide 1850108161, 9781850108160
“160 pages : 23 cm "Produced in association with RoSPA."”.
139 39
English Pages 164 Year 1992
Recommend Papers


- Author / Uploaded
- Steve Rendle
- Royal Society for the Prevention of Accidents
- Similar Topics
- Technique
- Transportation: Cars, motorcycles
File loading please wait...
Citation preview
HAYNES
LLWF—_>SSSSN N
‘Zz,
Senasca
FORD
FIESTA 1976 to February 1989
Roadside Emergencies @ Bad Weather Driving @ MOT Preparation Controls & Equipment @ Buying and Selling @ First Aid General Driving Hints and Tips @ Advice for Women Drivers Produced in association with RoSPA — The Royal Society for the Prevention of Accidents
me) ND
FIESTA 1976 to February 1989 All Ford Fiesta models except Diesel engine versions. Does not cover revised Fiesta range introduced in February 1989
(1816 — 1W1)
fs oN
oS
E\OO NWN A Haynes Handbook and Drivers Guide © Haynes Publishing 1994 ° Printed and published by . JH Haynes & Co Ltd Sparkford Nr Yeovil Somerset BA22 7JJ England ISBN 1 85010 816 1
HANDBOOK & DRIVERS by Steve Rendle
GUIDE
Full details of all servicing and repair tasks for the models covered by this Handbook can be found in the relevant Owners Workshop Manual OWM 334 Ford Fiesta (1976 to 1983), or OWM 1030 Ford Fiesta (August 1983 to February 1989). ABCDEFGHJKLMNO™
British Library Cataloguing in Publication Data. A catalogue record of this book is available from the British Library
All rights reserved. No part of this book may be reproduced or transmitted in any form or by any means, electronic or mechanical,
including photocopying, recording or by any information storage or retrieval system, without permission in writing from the copyright holder
2
ACKNOWLEDGEMENTS We gratefully acknowledge the assistance of RoSPA in compiling the information used in this Handbook. Thanks are also due to Duckhams Oils who provided lubrication data and to Britax who supplied the information on child safety. Certain illustrations, including
the cover photography, are the copyright of the Ford Motor Company Limited and are used with their permission. Additional photographs supplied by Quadrant Picture Library/Auto Express. Thanks are also due to all those people at Sparkford who helped in the production of this Handbook.
We take great pride in the accuracy of information given in this Handbook, but vehicle manufacturers make alterations and design changes during the production run of a particular vehicle of which they do not inform us. No liability can be accepted by the authors or publishers for loss, damage or injury caused by any errors in, or omissions from, the information given.
FOR DoE LESwisA
CONTENTS
About this Handbook
The Fiesta family Buying and selling General tips on buying
5 7 9 9
Car crime prevention Service specifications Regular checks Checking oil level
59 61 65 66
Points to look for when buying
10
Checking coolant level
67
General tips on selling
11
Checking brake fluid level
68
Dimensions and weights
13
Checking tyres
68
Controls and equipment
15
Checking washer fluid level
70
Driver's instruments and controls
19
Checking battery electrolyte level
70
Interior equipment
26
Checking wipers and washers
7A
Exterior equipment
28
Checking lights and horn
72
Accidents and emergencies How to cope with an accident
29 29
Checking for fluid leaks ~=Servicing
72 73
First aid
30
Service schedule
74
Requirements of the law
a2
Safety first!
78
Essential details to record
32
Buying spare parts
82
Accident report form
33
Service tasks
83
How to cope with a fire
36
How to cope with a broken windscreen
36
Tools
104
What to do if your car is broken into
36
. What to buy
104
Breakdowns
37
Breakdowns on an ordinary road
37.
Motorway breakdowns
38
Changing a wheel
38
Towing
40
Starting a car with a flat battery
41
Seasonal servicing
Care of your tools
Bodywork and interior care
101
104
105
Cleaning the interior
105
Cleaning the bodywork
105
; Dealing with scratches
_ Bulb, fuse and relay renewal
106
107
What to carry in case of a breakdown 42
Bulbs — exterior lights
108
43
Bulbs — interior lights
114
Driving safety Before starting a journey
43
Driving in bad weather
44
_ Fuses Relays
Preparing for the MOT test Fault finding Car jargon __Local radio frequencies
114 116
119 121 127 137
Motorway driving Towing a trailer or caravan Alcohol and driving Skid control
45 46 48 48
Advice to women drivers
49
Conversion factors
142
51
Distance tables
144
53 57
Index
146
Child safety
Driving abroad Reducing the cost of motoring PO RD
PFTESTA
ABOUT THIS HANDBOOK
senpeneaisiesenentesseseianye
FO) RDS Fil ESea,
|
ABOUT THIS HANDBOOK
The idea behind this Handbook is to help you to get the most out of your motoring. Apart from the things that every owner needs to know, to deal with unexpected mishaps like a puncture or a blown light bulb, you'll find clearly-presented information on road safety, hints on driving abroad, and tips on how to prepare your car for the _ MOT test. We've also included details of local radio frequencies to help you avoid those inevitable ‘jams’, and there’s a section on what to do in the unfortunate event of | an accident. | For those not familiar with their car, there’s a Section to explain the location and the | operation of the various controls and instruments. Additionally, there’s a Section on
| fault finding, and a useful glossary of car jargon. Garage labour charges usually form the major part of any car servicing bill, and we | hope to help you to reduce those bills by carrying out the more straightforward routine | servicing jobs yourself. If you're about to start carrying out your own servicing for the | first time, we aim to provide you with easy-to-follow instructions, enabling you to carry | out the simpler tasks which perhaps you've left to a garage or a ‘car-minded’ friend in | the past. Even if you prefer to leave regular servicing to a suitably qualified expert, by | using this book you'll be able to carry out regular checks on your car to make sure that your motoring is safe and hopefully trouble-free. You'll also find advice on buying suitable tools, and safety in the home workshop. Some readers of this Handbook may not yet have bought a Fiesta, so we've included _ abrief history of the range, and some useful tips on buying and selling. All in all, we hope that this book will prove a handy companion for your motoring adventures, and hopefully we'll help to reduce the problems which inevitably crop up | in everyday driving. If you're bitten by the DIY bug, and you're keen to tackle some of the more advanced repair jobs on your car, then you'll need our Owners Workshop Manual for your particular model (OWM 334 for Fiesta ‘Mark 1’ models, or OWM 1030 for Fiesta ‘Mark 2’ models). These manuals give a step-by-step guide to all the
repair and overhaul tasks, with plenty of illustrations to make things even clearer.
Happy motoring!
LNO SIH MOO . FORD
FPFESTA
ce
g
PRESS
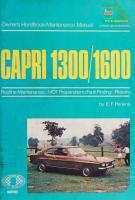
A Fiesta 1.1 L (1984)
FOR DF KeSaiA
THE FIESTA FAMILY The Fiesta was first introduced into the UK in February 1976, and was especially significant, as it was the first front-wheel-drive production car to be marketed by Ford in the UK. All models in the Fiesta range are of 3-door Hatchback design. To begin with, only 950 cc & 1.1 litre engines were available, but a 1.3 litre engine was soon introduced to provide more power, and in 1981 the high performance XR2 model was introduced, powered by a 1.6 litre engine. In August 1983, the whole range was facelifted and revised to incorporate many improvements over the original design, and these later Fiesta models are often referred to as ‘Mark 2's. The major changes introduced with the ‘Mark 2’ models were the smoother, more aerodynamic body shape, and the 1.3 & 1.6 litre CVH type engines, which replaced the older OHV type 1.1 & 1.3 litre engines used in the ‘Mark 1’ models. In 1986, a 1.4 litre CVH type engine superseded the 1.3 litre CVH type. Models were produced with 4- and 5-speed manual gearboxes and CTX automatic transmission, and with a number of different trim levels, from the Base 950 cc model, to the sporting XR2 model. All members of the Fiesta family share a similar mechanical layout, and they all share the same family of engines and gearboxes, although many detailed modifications and improvements were made during the 13 years of production. Most of the mechanical components of the vehicles are fairly conventional, and the main systems are designed to keep servicing time and costs as low as possible. The clutch, brakes, wheel bearings, etc are all routine-maintenance-free, and should only require attention when certain Items need to be renewed. All the engines are of 4-cylinder in-line layout, and are mounted transversely at the front of the car, with the gearbox positioned on the left-hand end of the engine (when viewed from the driver’s seat).
With the wide availability of spare parts, these cars are ideal for the enthusiastic amateur mechanic, who wants to keep running costs to a minimum.
A Fiesta 1.3 Ghia (1984)
FORD
FIESTA
WLS SHL
A Fiesta XR2 (1981)
*
A Fiesta XR2 (1985)
FORD:
FTES A
BUYING AND SELLING
on
GENERAL TIPS ON BUYING @ @ @ @
Don’t rush out and buy the first car to catch your attention Always buy from a recognised dealer in preference to buying privately Have the car checked over by someone knowledgeable before you buy it In general, you get what you pay for!
Before buying a second-hand car, it’s worthwhile doing some homework to try and avoid some of the pitfalls waiting for the unwary. First of all, don’t rush out and buy the first car to catch your attention (all that glitters is not gold!), and remember that much of the responsibility is yours when it comes to the soundness of the deal, especially when buying a car privately. Wherever possible, buy from a recognised dealer, and check that the dealer is a member of the Retail Motor Industry Federation, as this will provide you with certain iegal safeguards if you have any problems. If you buy from a dealer, you are covered by the Sale Of Goods Act, which in summary states that the goods must be fit for their intended purpose, the goods must be of proper quality, and the goods must be as described by the seller. If you're buying a car privately, ask to see the service receipts and the MOT certificates going back as long as the car has been in the possession of the current owner (this will help to establish that the car hasn't been stolen, and that
the recorded mileage is genuine), and always ask to view the car at the seller's private address (to make sure that the car isn’t being sold by an unscrupulous dealer posing as a private seller). Check the vehicle documents for obvious signs of forgery and, if in doubt, contact the DVLA and give them details of the Registration Document, as they will be able to run a check on its authenticity. As far as the soundness of the car itself is concerned, a genuine service history is helpful. This is provided by the service book supplied with the car when new, which should be completed and officially stamped by an authorised garage after each service. Cars with a full service history (fsh) usually command a higher price than those without. To check the condition of a car, a professional examination is well worthwhile, if you can afford it, and organisations such as the AA and RAC will be able to provide such a service. Otherwise, you must trust your own judgement, and/or that of a
BOR DOPIES
TA
SNIT 8SNI..
10
BOP
saallc
service. Otherwise, you must trust your own judgement, and/or that of a knowledgeable friend. Although it’s tempting, try not to overlook the mechanical soundness of the car in favour of the overall appearance. It’s relatively easy to clean and polish a car every week, but when were the brakes and tyres last checked? Above all, safety must always take priority. Don’t view a car in the wet, as water on the bodywork can give a misleading impression of the condition of the paintwork. First of all, check around the outside of the car for rust, and for obvious signs of new or mismatched paintwork which might show that the car has been involved in an accident. Check the tyres for signs of unusual wear or damage, and check that the car ‘sits’ evenly on its suspension, with all four corners at a similar height. Open the bonnet and check for any obvious signs of fluid leakage (oil, water, brake
fluid), then start the engine and listen for any unusual noises — some background noise is to be expected on older cars, but there should be no sinister rattles or bangs! Also listen to the exhaust to make sure that it isn’t ‘blowing’ indicating the need for renewal, and check for signs of excessive exhaust smoke. Black smoke may be caused by poorly adjusted fuel mixture, which can usually be rectified fairly easily, but blue smoke usually indicates worn engine components, which may prove expensive to repair. Finally, drive the car, and test the brakes, steering and gearbox. Make sure that the car doesn’t pull to one side, check that the steering feels positive, and ensure that the gears can be selected satisfactorily without undue harshness or noise. Listen for any unusual noises or vibration, and keep an eye on the instruments and warning lights to make sure that they are working and indicating correctly. If all proves satisfactory, try to negotiate a suitable deal, but remember that a dealer has to work to a profit margin, and it’s unlikely that you'll find a good car for a silly price. Always obtain a receipt for your money. On the whole, it’s true to say that you get what you pay for. Above all, don’t be rushed into making a hasty decision.
POINTS TO LOOK FOR WHEN BUYING A FIESTA Generally, the Fiesta is a reliable car, and is easy to drive and maintain. Performance is average for this class of car, although Fiestas tend to be less economical than many of their rivals. The 5-speed gearbox introduced with the ‘Mark 2’ models can give a noticeable improvement in fuel economy compared with the 4-speed gearbox. In general, the later ‘Mark 2’ models built
from August 1983 are an all-round improvement on the earlier models, and will
prove a better buy if your budget allows. Corrosion can be a problem on early models, and there are one or two particular problem areas which should be checked. Generally, the later ‘Mark 2’ models are less prone to rust than their earlier ‘Mark 1’ counterparts. The biggest problem area for rust is underneath the car. Look under the floor, just in front of each rear wheel arch, where the floor panel joins the panel which curves up under the rear seats. If any serious rust is visible, it’s likely that the car will fail the MOT
test. Although the damage can be repaired by welding, repairs can be expensive, and it’s best to reject the car if rust is apparent. Open the bonnet and check the inside
ROR DE ERE S iA
|
BUYING AND SELLING
| | |
| | surfaces of the front wings either side of the |
engine compartment. At the same time, check the area around the battery, which is prone to corrosion due to battery acid being washed over the metal by rain water. Other potential problem areas are the front and rear body panels behind the bumpers, the sill panels below the front doors, and the bottoms of the doors themselves. The headlight reflectors are also prone to corrosion, and this can be expensive to repair, as the only way to solve the problem is to fit a new _ headlight. It should not be difficult to find a rust-free car, and if you find more than two problem areas, it’s best to reject the car. The engines fitted to Fiestas are generally reliable, and may be of either OHV or CVH type (refer to ‘Servicing’ on page 83 for details of how to identify engines). On models with OHV type engines, open the bonnet and check for obvious signs of oil or coolant leakage, particularly around the top of the engine (through the cylinder head gasket). Start the engine and listen for a pronounced rattling noise. Some noise is to be expected on high-mileage engines, but if the noise is excessive, the engine will almost certainly require attention, and the car should be rejected. CVH type engines are prone to problems with a build-up of black sludge inside the engine if regular oil changes are not carried out. To check for this, remove the oil filler cap from the top of the engine and run a finger around the inside of the hole. If sludge is present, reject the car. Another point to note for CVH engines is that the camshaft drivebelt should be renewed after 36 000 miles. If you're not sure whether this has been done, it’s sensible to have the necessary work carried out as soon as you buy the car, as if the drivebelt breaks in service, very serious and expensive
engine damage can occur. On XR2 models, the front brake and
suspension components are prone to wear. To check for this, apply the brakes firmly when driving at speed, and if the car vibrates, particularly through the steering wheel, reject the car. The Ford carburettor fitted to some models can cause starting problems and poor fuel
FORD
"FLESTA
economy, and it’s common practice to replace this type of carburettor with a Weber type. This is a worthwhile modification, and is relatively inexpensive. Other possible problem areas are the contact breaker type distributor on early models which is prone to failure, and the self-adjusting clutch mechanism (fitted to all models) which can cause problems when the components wear. Fiestas are plentiful on the secondhand market, and it shouldn't be difficult to find a good car which will give trouble-free service.
GENERAL TIPS ON SELLING @ Make sure that the car is clean and tidy @ Make sure that all of the service documents, registration document etc, are available for inspection @ Ask yourself ... ‘Would | buy this car?’
Obviously when selling a car, bear in mind the points which the prospective buyer should be looking for, as described in the above sections. It goes without saying that the car should be clean and tidy, as first impressions are important. Any fluid leaks should be cured, and there’s no point in trying to disguise any major bodywork or mechanical problems. If you're trading the car in with a dealer, you will always get a lower price than if you sell privately, but you can be fairly sure that there will be less comeback to you should any unexpected problems develop. If selling privately, don’t allow the buyer to take the car away until you have his/her money, and it’s a good idea to ask him/her to sign a piece of paper to say that he/she is happy to buy the car as viewed, just in case any problems develop later on. Give a receipt for the money paid.
11
12
DIMENSIONS AND WEIGHTS
(Werry Davey )
Ouaynes
FOR DAF LES PA
DIMENSIONS AND WEIGHTS
13
| |
|
||
|| ||
Note: All figures are approximate, and will vary depending on model
|DIMENSIONS
[mm (in)]
Overall length |‘Mark 1’ models (without bumper overriders) | | |
‘Mark 1’ models (with bumper overriders) ‘Mark 2’ models except XR2 (without bumper overriders)
3565 (140.5)
3609 (142.2) 3648 (143.7)
| ‘Mark 2’ models except XR2 (with bumper overriders)
3695 (145.6)
| ‘Mark 2’ XR2 models
3712 (146.3)
| Overall width ‘Mark 1’ models
1567 (61.7)
‘Mark 2’ models except XR2
1585 (62.4)
‘Mark 2’ XR2 models
1620 (63.8)
Overall height | All models
1314 to 1334 (51.8 to 52.6)
WEIGHTS [Ig (|b)] Nominal kerb weight “Mark 1’ models
700 to 780 (1544 to 1720)
‘Mark 2’ models
760 to 840 (1676 to 1852)
Maximum
roof rack load
All models Maximum
75 (165) towing weight (for trailer or caravan)
All ‘Mark 1’ models except 950 cc models
950 cc ‘Mark 1’ models
800 (1764)
540 (1191)
~ ‘Mark 2’ models with 4-speed manual gearbox
540 (1191)
_'Mark 2’ models with 5-speed manual gearbox
800 (1764)
Note: Towing is not recommended for models fitted with CTX automatic transmission
Maximum trailer/caravan noseweight All models
FeOUR.D. =F MESs RA
50 (110)
SLH 8SNO
U © 2 f=ce O olVv)
=) =
=
ELI= =
re
BOO
INK
x ii Sitlonws
LL o
a
PP
§= Q
FO:RID #F VESTA
| |
CONTROLS AND EQUIPMENT
15
For those not familiar with the Fiesta models, this Section will help to identify | the instruments and controls. Typical instrument panel layouts are shown in | the accompanying illustrations. The operation of most equipment is self_ explanatory, but some items require further explanation to ensure that their __use is fully understood. Note that not all items are fitted to all models.
|
|
was
Vy @) @) @) @) © A Typical instrument panel layout for ‘low series’ Fiesta ‘Mark 1’ models 10 Rear foglight switch Speedometer Windscreen washer pump Fuel gauge Low oil pressure warning light Temperature gauge Handbrake ‘on’ warning light Hazard flasher switch Direction indicator warning light Heating and ventilation controls Headlight main beam warning light Tailgate wash/wipe switch Ignition warning light Heated rear window switch Bonnet release lever Cigarette lighter Ashtray DAUMAWNHm WOMAN
FORD
FESTA
LNSI STO 8
16
CONTROLS AND EQUIPMENT
Di
=
—oon
Ne
A Typical instrument panel layout for ‘high series’ Fiesta ‘Mark 1’ models Hazard flasher switch Heating and ventilation controls Cigarette lighter Trip meter reset button Speedometer
Low oil pressure warning light Handbrake ‘on’ warning light Temperature gauge DUNARWN WAN Fuel gauge
10 Headlight main beam warning light 11 Ignition warning light 12 Tachometer (‘rev. counter’)
Instrument illumination control
Rear foglight switch Ashtray Clock Radio
Tailgate wash/wipe switch Heated rear window switch Choke control
Direction indicator warning light Ignition switch/steering lock Bonnet release lever
LORD
ERE STA
CONTROLS AND EQUIPMENT |
|
© |e] > |e Z9y—
&
A Typical instrument panel layout for ‘low series’ Fiesta ‘Mark 2’ models 1 2 3 4 5 6 7 8 9 10 11
Digital clock
13 Ignition switch/steering lock
Headlight main beam warning light Sidelight/tail light warning light Temperature gauge Fuel gauge Glow plug warning light (Diese! models only) Speedometer Heated rear window switch Tailgate wash/wipe switch Rear foglight switch Fusebox
14 15 16 17 18 19 20 21 22 23
12. Choke control
FORD
FIESTA
Ignition warning light Hazard flasher switch Direction indicator warning lights Low oil pressure warning light Low brake fluid level warning light Ashtray Cigarette lighter Booster fan switch Air temperature control Air distribution control
17
18
CONTROLS AND EQUIPMENT
NI [4
?
a
A Typical instrument panel layout for ‘high series’ Fiesta ‘Mark 2’ models 1 Radio 2 = Sidelight/tail light warning light 3 Headlight main beam warning light 4 5
Tachometer (‘rev. counter’) Temperature gauge
6 Fuel gauge 7 Speedometer 8 Trip meter reset button 9 Heated rear window switch 10 Tailgate wash/wipe switch
11 Rear foglight switch 12 Fusebox 13 Choke contro!
Ignition switch/steering lock Low oil pressure warning light Direction indicator warning lights Hazard flasher switch Ignition warning light Handbrake ‘on’ warning light Low brake fluid level warning light Loudspeaker balance control Air temperature control Booster fan switch Air distribution control Ashtray Cigarette lighter
7
FORD
FlES Te
CONTROLS AND EQUIPMENT DRIVER’S INSTRUMENTS AND CONTROLS Speedometer Indicates the car’s road speed, and incorporates a mileage recorder. Some models have a trip meter, which can be reset by pressing the button protruding from the instrument.
Tachometer (‘rev. counter’) Indicates engine speed in revolutions per minute (rpm or rev/min). For normal driving and the best fuel economy, the engine speed should be kept in the 2000 to 4000 rpm range. The red band indicates the maximum permissible engine speed.
Fuel
On models with a roof-mounted clock, the time is displayed in the 24-hour format, and
the display is illuminated with either the ignition or the lights switched on. To adjust the time, switch on the ignition. Press the button on the left to change the hour setting, and press the button on the right to change the minutes setting. To synchronise the clock with an exact time signal, press and hold both buttons, then release the buttons at the time signal, and set the time as described
previously. On some models, a pointed instrument such as a ballpoint pen may be required to press the adjustment buttons.
gauge
Indicates the quantity of fuel remaining in the tank. On ‘Mark 1’ models, when the needle
enters the orange band, there are approximately 4.5 litres (1 gallon) of fuel remaining. On ‘Mark 2’ models, when the
needle enters the red band, there are approximately 8 litres (1.8 gallons) of fuel remaining.
A Digital clock h Hours adjustment button m Minutes adjustment button
Temperature gauge Indicates the engine coolant temperature. As the engine warms up, the needle should move from the blue (cold) end of the scale into the middle region. If the needle remains in the blue section, or enters the red (hot) section, a fault is indicated, and advice should be sought (refer to ‘Fault finding’ on page 123). Do not continue to run an engine which shows signs of overheating
Clock ANALOGUE
TYPE
To adjust the time, push in the button and turn it.
DIGITAL TYPE On models with a facia-mounted clock, the time is displayed in the 12-hour format, and can be viewed with the ignition switched off by pressing and holding the left-hand adjustment button.
BORD
FIESTA
MULTI-FUNCTION (EARLY MODELS)
DIGITAL TYPE
The clock can display the date, and has a timer feature. To operate the clock, the ignition must be switched on.
Adjusting time To change the hours setting, press the upper recessed button (F) once, using a pointed instrument such as a ballpoint pen. The display will show the hour number on the left, and either ‘A’ for am or ‘P’ for pm on the right. The hour number will increase by one each time the button is pressed again. Four seconds after the button is last pressed, the display will show normal time, but with the newly-selected hour number. To change the minutes setting, press the lower recessed button (G) once. The display will still show normal time, but the clock will have stopped, and the minute number will
yk)
20
Mee
ieee
aay
eel
increase by one each time the button is pressed again. To restart the clock after setting the time, press the stop/start button (C). If the
clock is set slightly ahead of actual time, it can be synchronised with a time signal by pressing the stop/start button on the signal.
off. If the ignition is switched off when the timer is still running, it will continue to count until the ignition is switched on again and the timer is stopped or reset; the timer can therefore be used to record actual journey time.
Date display To display the date, press the select button (A) once. The date will be displayed for four seconds, after which the time will reappear.
Adjusting date To set the date, obtain the date display as described previously. To set the day, immediately press the top recessed button (F)
once. The date will increase by one each time the button (F) is pressed. To set the month,
press the bottom recessed button (G) immediately after obtaining the date display. The month number will increase by one each time button (G) is pressed. Four seconds after either recessed button is released, the display will show normal time. Timer
To operate the timer, with the display showing the time, press the select button (A) twice. The timer can now be started by pressing the stop/start button (C). Pressing the stop/start
button again will stop the timer and freeze the display. A third press will restart the timer from where it stopped. The timer will count to 59 minutes 59 seconds, and then roll over to 1 hour 00 minutes and continue to count at one minute intervals. When the timer reaches 59 hours 59 minutes, it automatically resets to 0 and continues counting. Either of the two other displays can be selected when the timer is working. To display the time, press the select button once, and to display the date, press the select button again. To reset the timer to zero with the clock showing time, press the select button twice to display the timer, then to zero the timer press the reset button (B). The display can now be set to show the normal time by pressing the select button, or the timer can be restarted by pressing the stop/start button. The recorded time, when the timer was stopped, will be stored in the memory until the timer is restarted again, even if the ignition is switched
A Multi-function digital clock A Select button B Reset button C D E F G
Stop/start button Timer symbol
Colon Recessed adjustment button (early models only) Recessed adjustment button (early models only)
MULTI-FUNCTION (LATER MODELS)
DIGITAL TYPE
The clock can display the date, and has a timer
feature. On models up to 1986, no display is shown with the ignition switched off, but the display can be recalled for four seconds by pressing the select button (A). One press will
display time, and further presses will display the date and timer. On models from 1986, the
display is illuminated with either the ignition or the lights switched on, and the date and timer
functions can be displayed by pressing the select button as described previously. The ignition must be switched on to carry out all setting and adjustments.
Adjusting time and date The time and date must be set using the following sequence. With the display showing the time, press the reset button (B) once. The
display should flash showing ‘12H’ or ‘24H’ depending on whether the display has been set to the 12- or 24-hour format. Press the stop/start button (C) to change the format. Press the reset button again. The hour number
FORD:
FIESTA
S —
——
CONTROLS AND EQUIPMENT on the left will flash. If the 24-hour format was selected, the minute number on the right will remain stationary, but if the 12-hour format was selected, an ‘A’ for am or ‘P’ for pm will appear in place of the minutes. Press the stop/start button to increase the hour number as required. Press the reset button again. The minute number on the right of the display will now flash. Press the stop/start button to increase the minute number. Press the reset button again. The date will now be displayed, with the day number flashing on the left, and the month number stationary on the right. Press the stop/start button to increase the day number. Press the reset button again. The display now shows the date with the day Stationary on the left, and the month number flashing on the right. Press the stop/start button to increase the month number. When the adjustments are complete, press the reset button to return to the time display. To return to the time display at any point during the procedure, press the select button.
Date display To display the date, press the select button (A) once. The date will be displayed for four seconds, after which the time will reappear. Timer
HANDBRAKE
‘ON’ WARNING
LIGHT
Warns that the handbrake is applied. Note that on some ‘Mark 1’ models, this light also acts as a low brake fluid level warning light.
LOW OIL PRESSURE WARNING
LIGHT
Warns that the engine oil pressure is low. If the light stays on for more than a few seconds after start-up, it’s likely that the engine is worn, and advice should be sought. If the light comes on whilst driving, switch off the engine immediately and seek advice.
IGNITION WARNING
LIGHT
Acts as a reminder that the ignition circuit is switched on if the engine isn’t running, and
acts as a no-charge warning light. If the light stays on after starting, or comes on whilst driving, the battery is not charging properly. The battery may therefore become fully discharged (resulting in a ‘flat’ battery), and the best course of action is to stop and seek advice.
HEADLIGHT MAIN BEAM WARNING LIGHT Acts as. a reminder that the headlight main beam is switched on.
SIDELIGHT/TAIL LIGHT WARNING LIGHT
The operation of the timer is the same as described for the earlier type of multi-function clock.
Acts as a reminder that the sidelights and tail lights are switched on.
Warning lights
DIRECTION INDICATOR WARNING LIGHT(S)
These lights warn the driver of a fault, or inform the driver that a particular device is in operation.
Show(s) that the direction indicators are switched on.
LOW BRAKE FLUID LEVEL WARNING LIGHT Warns that the brake fluid level is low. If the light comes on while driving, stop immediately and check the brake fluid level (refer to ‘Regular checks’ on page 68). Do not continue to drive the car if a brake fluid leak is suspected.
These lights provide a rough indication as to how economically the car is being driven. As a guide, aim to drive so that the lights come on only momentarily, or not at all. The amber light will come on when the car is being driven less economically, and the red light will come on when the car is being driven uneconomically. In
BORD
FIESTA
ECONOLIGHTS
practice, it will be very difficult to drive without
causing the lights to come on at some stage, especially when accelerating.
21
»>yIm
CONTROLS AND EQUIPMENT Ignition switch/steering lock The switch has four positions as follows: O Ignition off, steering locked 1 Ignition off, accessory circuits on, steering unlocked Il Ignition on, and all electrical circuits on lll Starter motor operates (release the key immediately the engine starts)
A Ignition switch/steering lock key positions
= ‘Mark 1’ models Reverse is positioned to the left of 1st gear. Reverse is selected by moving the lever fully left from the neutral position, then pressing down against spring pressure and pushing further left and forwards. ‘Mark 2’ models 4-speed gearbox — Reverse gear is positioned to the left of 1st gear. Reverse is selected by moving the lever fully left from the neutral position, then pressing down against spring pressure and pushing the lever forwards. 5-speed gearbox — Reverse gear is positioned opposite 5th gear. On models built before February 1987, reverse is selected by moving the lever fully right from the neutral position, then pushing down against spring pressure and pulling rearwards. On models built after ; February 1987, reverse is selected by moving
Choke The choke control should be pulled out as necessary to start a cold engine, and should be gradually pushed in as the engine warms up, until the car can be driven smoothly with no choke. A warning light incorporated in the choke control knob indicates that the choke is in operation. Note that some models have an automatic choke.
Gearbox MANUAL
GEARBOX
Either a 4- or 5-speed gearbox may be fitted. The gear positions follow the usual ‘H’ pattern, but the method of selecting reverse gear varies depending on model:
@®-
OOs
10° R
—— Ee A Gear lever positions (‘Mark 1’ models)
A Gear lever positions (‘Mark 2’ models) A 4-speed gearboxes B 5-speed gearboxes up to February 1987 C 5-speed gearboxes from February 1987
EO RID
Kes A
| |
CONTROLS AND EQUIPMENT [mpd;
the lever fully right from the neutral position against spring pressure before pulling
Exterior lights switch
_ fearwards.
Controls the sidelights/tail lights and headlights.
_CTX AUTOMATIC TRANSMISSION There are five selector positions: P — locks the transmission, and should be used when parking. The engine can be started. | Only select P after parking when the car is | Stationary, and always apply the handbrake. R — selects Reverse gear. N — selects Neutral. The engine can be started. No power is transmitted to the wheels. D - selects Drive. The transmission will infinitely vary the gear ratio between the lowest and highest available. L — gives increased engine braking. Should be used when driving up or down steep slopes. The handbrake or footbrake must be applied before selecting R, D, or L when the car is stationary. To select positions R and P, the selector lever must first be pushed down in the _N position. The lever must also be pushed down to move it out of the P position. To move out of the other positions, the selector
lever must be moved sideways first.
A Exterior lights switch 1 Sidelights/tail lights 2 Headlights
Windscreen wash/wipe switch Controls the windscreen wipers and washers. Where fitted, the headlight washers will operate at the same time as the windscreen washers, provided the headlights are switched on.
Multi-function switch Controls the direction indicators, headlight
~ flash & main beam, and horn. On models
fitted with driving lights, the driving lights - operate with the headlight main beam and headlight flash.
A Windscreen wash/wipe switch 1 Normal wiper speed 2 Fast wipe
3 Single wipe or intermittent wipe (depending on model) 4 Windscreen washers (not applicable to certain ‘Mark 1’ models)
A Multi-function switch 1 Horn
2 3 4 5
Right direction indicator Left direction indicator Headlight main beam Headlight flash
BORD
FILES TA
Tailgate wash/wipe switch Depress the switch to the first position to operate the wiper. Depress the switch further and hold it depressed to operate the washer (Note that some ‘Mark 1’ models have a footoperated windscreen washer pump).
24.
Bree) nite) Rw
om elU
Windscreen washer pump (‘low series Mark 1’ models) On some ‘Mark 1’ models, the windscreen washer pump is foot-operated, and is fitted to the left of the clutch pedal.
Heating and ventilation controls (‘Mark 1’ models) Upper lever — controls the temperature: left for
aa position for high boost. . Knob C — controls the temperature: anticlockwise (when viewed from the passenger's seat) for hot air, and clockwise for cold air, with variable settings in between. The airflow through the louvred vents at the sides of the facia is controlled independently using the lever below each vent to increase or decrease the amount of air, and by moving the position of the slats to control the direction.
hot, and right for cold, with variable settings in
between. Lower lever — controls the distribution of the air between the windscreen (right) and the car interior (centre position) with variable settings
in between. Moving the lever to the left will decrease the quantity of air, until the airflow is shut off with the lever moved fully to the left. Booster fan switch — The booster fan has two speeds. Press the switch to the first position for low boost, and to the second position for high boost. The facia side vents supply unheated fresh air from outside the car. The vents are opened by turning the thumb wheels underneath the vents towards the centre of the car. The vents can be swivelled to control the direction of the fresh air. The airflow is increased when the lower heater control lever is moved fully left. Maximum airflow is obtained with the booster fan operating. The facia centre vent can be opened by lifting the front edge, and supplies a controlled flow of air from the heater. The vent should be closed when demisting the windscreen.
Heating and ventilation controls (‘Mark 2’ models) “LOW SERIES’ MODELS Knob A — controls the distribution of the air between the windscreen (centre position) and the floor area (fully anti-clockwise when viewed from the passenger's seat), with
variable settings in between. Moving the knob clockwise (when viewed from the passenger's seat) from the centre position will decrease the
quantity of air, until the airflow is shut off with the knob moved fully clockwise. Switch B — controls the booster fan, which
has two speeds. Press the switch to the first position for low boost, and to the second
A Heating and ventilation controls (‘low series Mark 2’ models) A Air distribution control B Booster fan switch C Air temperature control
“HIGH SERIES’ MODELS Knob A — controls the distribution of the air between the windscreen (centre position) and the floor area (clockwise), with variable
positions in between. Moving the knob anticlockwise from the centre position will reduce the flow of air to the floor area, until the airflow is shut off with the knob moved fully anti-clockwise. Knob B — controls the booster fan, which has three speeds. Turn the knob clockwise to switch on the booster fan. Continue to turn the switch clockwise to increase the fan speed. Knob C — controls the temperature: clockwise for hot air, and anti-clockwise for cold air, with variable settings in between. The airflow through the louvred vents at the centre and sides of the facia is controlled independently using the lever below each vent
FORD
PRES
TAX
|
SEP
to increase or decrease the amount of air, and
by moving the position of the slats to control the direction.
Sia
Instrument illumination control Adjusts the brightness of the instrument illumination when the exterior lights are switched on.
ee aN :RRR) Ca ‘
a
Remote tailgate release
iiN ‘ ‘ \
UPR
wove
Lad
switch
SM eeeee
Mounted on the centre console behind the gear lever. Operates provided that the engine is not running.
Loe
‘
, WN ‘ SW
i
SS. RSS SSS
SS
A Heating and ventilation controls (‘high series Mark 2’ models) A Air distribution control B Booster fan switch C Air temperature control
|
:
A Remote tailgate release switch location (arrowed)
Hazard flasher switch Operates all the direction indicator lights
Bonnet release lever
simultaneously, regardless of the position of the ignition switch.
Mounted under the facia on the passenger's side of the car on ‘Mark 1’ models, and under the steering column on ‘Mark 2’ models. Pull the lever to release the bonnet, then lift the rear edge of the bonnet and tilt it fully forwards to the vertical position. A safety spring mechanism will hold the bonnet in position: do not push the bonnet beyond its rest position. When closing the bonnet, allow it to drop the last few inches to the closed position.
Rear foglight(s) switch Operates the rear foglight(s), provided that the sidelights or headlights are switched on. A warning light incorporated in the switch indicates that the foglight is switched on.
Heated rear window
switch
Operates the heated rear window provided that the ignition is switched on. It’s recommended that the device is switched off as soon as demisting is complete, as drain on the battery is very high (some models are fitted with a timer which switches the element off automatically after 10 minutes).
Loudspeaker balance control Adjusts the sound balance between the front, rear, left, and right of the car by moving the joystick in the required direction. A Bonnet release lever (‘Mark 2’ models)
BORD:
FIESTA
25
26 Mee
ieee
eee
a
INTERIOR EQUIPMENT Cigarette lighter Operates regardless of the position of the ignition switch. Press the lighter in, then release it, and
wait until it pops out ready for use.
OPENING FRONT QUARTERLIGHTS (‘MARK 1’ MODELS) On some models, the front quarterlights can be opened after pressing the catch locking tab (1) and turning the catch (2).
A Push the links (B) together ... A Opening front quarterlight (‘Mark 1’ model) For (1) and (2) see text
Sunroof The sunroot is of the tilt/removable type. To open the sunroof, pull the lever (A) down, then swivel the lever forward and push it up to raise the panel. To remove the roof panel, pull lever (A) down, and push the links (B) together to release them from the roof recess. From outside the left-hand side of the car, lift the edge of the panel slightly and release the safety clip (C). Lift the panel to disengage the front guides from the roof, then remove the panel and store it in its protective cover in the boot. The ends of the rubber retaining straps should be pushed into the slots provided in the floor of the boot to hold the panel in place. When refitting the roof panel, make sure that the front guides engage in the slots in the roof, then engage the safety clip (C) and engage the links (B) in the roof recess by pushing them together and releasing when in position.
A... and release the safety clip (C) to remove the sunroof panel
FeOuRD)
F WES:A
:
CONTROLS AND EQUIPMENT
4 Dipping
rear view mirror
Pull back the lever under the mirror to reduce the glare from the lights of following vehicles.
Seat belts “MARK 1’ MODELS Static seat belts | To wear the belt, remove the tongue from the clip on the door pillar, and push the tongue into the buckle until a click is heard. To loosen the belt, turn the adjuster at right_ angles to the belt, and pull it away from your body. Move the plastic clip to hold the end of the belt. To tighten the belt, simply pull the webbing through the adjuster.
Inertia reel seat belts The operation of these seat belts is self_ explanatory, noting that the belt should be / pulled slowly out of the reel. Ideally, the car _ should be parked on level ground, otherwise the reel may lock. If the car is parked on a slope, it may not be possible to fit the seat belts until the car is moved onto level ground. The locking mechanism can be checked by giving the webbing a sharp tug, when the reel should lock.
/*MARK 2’ MODELS
Rear seat belts The side belts are of the inertia reel type as described previously. Where fitted, the centre rear seat belt is of the lap type, and must be manually adjusted for fit by the wearer. The tongue and the buckle of the lap strap are identified by a white spot, and the lap strap tongue should never be locked into a buckle which does not have this identifying spot. To tighten the belt, pull the webbing through the adjuster, and move the plastic clip to hold the end of the belt. To lengthen the belt, turn the adjuster at rightangles to the belt, then press the tongue into the adjuster housing and pull the webbing through the adjuster.
Front seat adjustment SEAT SLIDING CONTROL To move a seat backwards or forwards, pull the
lever located under the front of the seat to the right, then slide the seat to the required position. Release the lever, and ensure that the seat has locked in position by gently rocking it backwards and forwards.
SEAT BACK RELEASE Pull up the lever on the side of the seat, and tilt the seat back forwards to allow access to the rear seats.
Front seat belts
SEAT RECLINING CONTROL
The front seat belts are of the inertia reel type,
- the belt has moved to the front of the bar, and
Turn the wheel on the bottom edge of the seat to alter the angle of the seat back. The wheel may be located on the inside or the outside edge of the seat, depending on model. If the seat is moved fully forwards, it is possible to recline the seat back further.
| has not been prevented from sliding forward _ by a rear seat passenger, or by luggage behind
Adjustable head restraints
| as described for ‘Mark 1’ models. On some models, the outer lower end of the
| belt is free to slide along a steel bar. When | putting the belt on, it’s essential to ensure that
_ the seat. Similarly, when the belt is released, { ensure that it returns to the rear of the bar and
does not lie in the door aperture. On some models, the outer lower end of the
_ belt is attached to a bracket which is free to | swivel around its mounting bolt. When putting _ on this type of belt, it’s essential to make sure that the bracket is pulled forwards and upwards by the belt, to avoid any slack in the
~ webbing.
PORD! FIESTA
The head restraints can be adjusted for height by pulling up or down (do not force the head restraint beyond the upper stop position). On some models, the angle can be adjusted by tilting backwards or forwards.
Folding rear seats Either a full-width or a split rear seat back may be fitted, depending on model. On ‘Mark 1‘ models, the rear parcel shelf
[Py;
28
Mee
ier Wem seleuia
cords must be unhooked from the tailgate, or the parcel shelf must be removed completely, before the seats can be folded. To fold the seats, pull the relevant release lever(s) on the top of the seat back(s) (pull both levers simultaneously in the case of full-width bench type seats), then push the seat back(s) forward.
EXTERIOR EQUIPMENT Door locks ‘MARK 1’ MODELS To lock a door from outside, close it and turn the key in the lock. Alternatively, with the door open, lift the handle, press the lock interior plunger (located at the top of the door below the window), then release the handle and close the door. Note, however, that this second method of locking can result in the car keys being locked inside the car! To lock a door from inside, simply press the lock interior plunger.
"MARK 2’ MODELS To lock a door from outside, close it and turn the key in the lock. Alternatively, with the door open, press the lock interior plunger (located at the top of the door below the window), then close the door, making sure that the exterior handle is held up. Note, however, that this second method of locking can result in the car
keys being locked inside the car! To lock a door from inside, simply press the lock interior plunger.
Tailgate lock A Folding a split rear seat back
On models fitted with rear seat belts, when returning the seat back(s) to the normal
To open the tailgate, insert the key in the lock and turn it clockwise. Some models are fitted with a knob which enables the tailgate to be opened without using the key (assuming the tailgate is unlocked) by turning the knob clockwise.
position, hold the top(s) of the rear seat belt(s) forwards to avoid trapping, and make sure that the seat back locking catch(es) engage properly.
Rear parcel shelf On models with can be removed the tailgate, and on the seat back pulling the shelf
a rear parcel shelf, the shelf by unhooking the cords from pressing the retaining catches on ‘Mark 1’ models, or by rearwards from the supports
at the side of the boot on ‘Mark 2’ models.
ROR D: FIESTA
ACCIDENTS AND EMERGENCIES
29
| In the event | |
|
of an accident, the first priority is safety. This may seem obvious, but in the heat of the moment, it’s very easy to overlook certain points which may worsen the situation, or even cause another accident. The course of action to be taken will vary depending on how serious the accident is, and whether anyone is injured, but always try to think clearly, and don't panic. We don’t suggest that you consult this Section at the scene of an accident, but hopefully the following advice will help you to be better prepared to deal with the situation should you be unfortunate enough to appear on the scene of an accident or become involved in one yourself.
HOW TO COPE WITH AN ACCIDENT Deal with any possible further danger Further collisions and fire are the dangers in a road accident.
:@
If possible warn other traffic Where possible, switch on the car’s hazard warning flashers. If a warning triangle is carried, position it a reasonable distance away from the scene of the accident, to give approaching drivers sufficient warning to enable them to slow down. Decide from which direction the approaching traffic will have least warning, and position the triangle accordingly. If possible, send someone to warn approaching traffic of the danger which exists, and to encourage the traffic to slow down.
@ Switch off the ignition and impose a ‘No Smoking’ ban This will reduce the possibility of fire, should there be a petrol leak.
Call for assistance Send someone to call the emergency services (dial 999), and make sure that all the necessary information is provided to the operator. Give the exact location of the
accident, and the number of vehicles and if applicable the number of casualties involved. Refer to the ‘Motorway breakdowns’ Section on page 38 for details of how to call for assistance on a motorway.
@ Call an ambulance If anyone is seriously injured or trapped in a vehicle.
@ Call the fire brigade If anyone is trapped in a vehicle, or if you think that there is a risk of fire.
@ Call the police If any most none of an
of the above conditions apply, or if the accident is a hazard to other traffic. In cases, the accident must be reported to the police within 24 hours even if of the above conditions apply (refer to ‘Requirements of the law in the event accident’ on page 32).
Administer first aid Refer to ‘First aid’ on page 30.
Provide your details If you are involved in the accident as a driver or car owner, provide your personal and vehicle details to anyone having reasonable grounds to ask for them. Also inform the police of the details of the accident as soon as possible, if not already done.
FORD
FILES TA
SLN
30
BeXeeb
see
EMERGENCIES
FIRST AID Always carry a first aid kit
_ Ambulance If possible, learn first aid by attending a suitable course — contact the St John in your Society Cross Red British the or Association Association or Brigade, St Andrew’s Ambulance in heart training further provide to able be also will organisations These details. for local area life in an massage and mouth-to-mouth resuscitation which could enable you to save someone’s emergency. Before proceeding with any kind of first aid treatment, deal with any possible further danger, and call for assistance, as described previously in this Chapter. To help remember the sequence of action which should be followed when dealing with a seriously injured casualty, use the ABC of emergency first aid.
Casualties remaining in vehicles Any injured people remaining in vehicles | should not be moved unless there is a risk | of further danger (such as from fire, further collisions etc).
Casualties outside the vehicles. Recovery position To prevent the possibility of an unconscious but breathing casualty
choking or suffocating, he/she must be —_& The recovery position placed in the recovery position. Lie the casualty on his/her side. Bend the leg and position the arms as shown to support the head.
First aid for other injuries Always treat injuries in the following order of priority: @ Ensure that the casualty has a clear airway. If not treat as described opposite. @ Put any breathing, unconscious casualty into the recovery position as described previously. @ Treat any severe bleeding by applying direct pressure to the wound. Maintain the pressure for at least 10 minutes and apply a suitable clean dressing. If the wound continues to bleed, apply further pressure and dressings over that already in place. If bleeding from a limb, and as long as the limb is not broken, lift the affected limb to reduce the bleeding. @ Broken limbs should not be moved, unless the casualty has to be moved in order to avoid further injury. Support the affected limb(s) by placing blankets, bags, etc, alongside. @ Burns should be treated with plenty of cold water as soon as possible. Don’t attempt to remove any clothing, but cover with a clean dressing.
Reassurance The casualty may be in shock, but prompt treatment will minimise this. Reassure the casualty confidently, avoid unnecessary movement, and keep him/her comfortable and warm. Make sure that the casualty is not left alone. Give the casualty NOTHING to eat, drink or smoke.
E-OrikiDeak ESA
Peewee
ites (ei
Airway @
Check for breathing
Check that the airway is clear. If the casualty is breathing noisily or appears not to be breathing at all, remove any obvious obstruction in the mouth and tilt the head back as far as possible. Breathing may then start.
Breathing @
If breathing has stopped
If after clearing the airway the casualty still appears not to be breathing, look to see if the chest or abdomen is moving. Place your ear close to the casualty’s mouth to listen and feel for breathing, and look to see if there’s any movement of the chest. If you can’t detect anything, you must start breathing for the casualty (mouth-to-mouth resuscitation). To do this, pinch the casualty’s nostrils firmly, keep his/her chin raised, and seal your lips around the casualty’s mouth. Breathe out through your mouth into the casualty until the chest rises, then remove your mouth and allow the
casualty’s chest to fall. Give one further breath. If giving mouth-to-mouth resuscitation to a child, remember that an adult's lungs are significantly larger than those of a child. Care must be taken not to overinflate a child’s lungs, as this may cause injury.
@
Check for a pulse at the base of the neck
If the heart is beating, continue to breathe into the casualty at a rate of one breath every 5 seconds, until he/she is able to breathe unaided, then place the casualty in the recovery position (refer to ‘Recovery position’ opposite).
Circulation @
If the heart has stopped
If there is no pulse at the neck, then external chest compression (heart massage) must be started. To do this, if the casualty is still in the vehicle, he/she must be removed and
laid on his/her back on the ground. Kneel down on one side of the casualty. Feel for the lower half of the casualty’s breastbone and place the heel of one of your hands on this part of the bone, keeping your fingers off the casualty’s chest. Cover this hand with your other hand, interlocking your fingers. Keeping your arms straight and vertical, press the breastbone down about 4 to 5 centimetres (1% to 2 inches). The pressure should be smooth but not jerky. Do this 15 times, at the rate of just over once a second. It may help you to count aloud as you press. Follow this by 2 breaths as described under ‘Breathing’. Repeat the cycle of 2 breaths followed by 15 compressions, twice more, ending with 2 breaths, then re-check the pulse.
@
lf there is still no pulse
|
Repeat the cycle 9 times and then check the pulse. Continue this procedure until there is a pulse or until professional help arrives.
HOmD
TF LESTA
SF
32
Wee ster
ee
REQUIREMENTS OF THE LAW IN THE EVENT OF AN ACCIDENT The following is taken from the Road Traffic Act of 1988.
If you are involved in an accident — which causes damage or injury to any other person, or another vehicle, or any animal (horse, cattle, ass, mule, sheep, pig, goat or dog) not in your vehicle, or roadside property: You must
@ stop; @ give your own and the vehicle owner's name and address and the registration mark of the vehicle to anyone having reasonable grounds for requiring them; @ if you do not give your name and address to any such person at the time, report the accident to the police as soon as reasonably practicable, and in any case within 24 hours; @ if anyone is injured and you do not produce your certificate of insurance at the time to the police or to anyone who has with reasonable grounds required its production, report the accident to the police as soon as possible, and in any case within 24 hours, and either produce your certificate of insurance to the police when reporting the accident or ensure that it is produced within seven days thereafter at any police station you select.
ele ESSENTIAL DETAILS TO RECORD AFTER AN ACCIDENT If you’re involved in an accident, note down
the following details which will help you to complete the accident report form for your insurance company, and will help you if the police become involved. @ The name and address of the other driver and those of the vehicle owner, if different. @ The name(s) and address(es) of any witness(es) (independent witnesses are
particularly important). @ A description of any injury to yourself or others. @ Details of any damage caused to the vehicles involved or other property. @ The name and address of the other driver's insurance company and, if possible, the number of his/her certificate of insurance. @ The registration number of the other vehicle (check this against the tax disc if possible). @ The number of any police officer attending the scene. @ The location, time and date of the accident. @ The speed of the vehicles involved. @ The width of the road, details of road markings and signs, the state of the road surface, and the weather conditions. @ Any marks or debris on the road relevant to the accident. @ A rough sketch showing the vehicle positions before and after the accident. It’s helpful to make a note of the vehicle positions in terms of distance from fixed landmarks, such as lamp posts, buildings, etc.
@ Whether any of the other vehicle occupants were wearing seat belts. @ If the accident occurred at night or in poor visibility, whether vehicle lights or street lights were switched on. @ If you have a camera, take a picture of the vehicles and the scene. If the other driver refuses to give you: his/her name and address, or if you consider that he/she has committed a criminal offence, inform the police immediately.
FORD
FIESTA
ACCIDENT REPORT DETAILS Use this page to record all the relevant details in the event of an accident. You should transfer all the information recorded on this page onto the Motor Vehicle Accident Report form which you can obtain from your insurance company.
OTHER DRIVER DETAILS FULL NAME OF DRIVER: ADDRESS:
POST CODE: HOME TELEPHONE:
WORK TELEPHONE:
DRIVING LICENCE NUMBER: DATE OF BIRTH:
ISSUED: DATE DRIVING TEST PASSED:
TYPE OF LICENCE: (tick box) Full L_] Provisional L_] Heavy Goods L_]
PERMITTED GROUPS: FULL NAME OF OWNER: ADDRESS:
POST CODE: TELEPHONE: INSURANCE COMPANY: POLICY NUMBER: AGENT OR BROKER: TELEPHONE: OTHER VEHICLE DETAILS MAKE: YEAR: REGISTRATION NUMBER:
BORD
FIESTA
MODEL: hee
33
34.
BXee)
secede
CIRCUMSTANCES OF ACCIDENT TIME:
DATE:
am/pm
PLACE: (Street or Road) TOWN:
COUNTY:
SPEED:
WERE THE POLICE CALLED? Yes fil No L]
If ‘Yes’ give details of Police Constabulary concerned:
DETAILS OF WHAT HAPPENED (Please use the page opposite to make a rough sketch map)
WHAT WAS THE WEATHER LIKE? INDEPENDENT WITNESS 1
TELEPHONE: INDEPENDENT WITNESS 2
TELEPHONE: DETAILS OF ANY INJURIES SUSTAINED BY EITHER PARTY:
FORD
Fhe Se
ACCIDENT REPORT SKETCH MAP
: | |
Essential items to include in your sketch map: @ The layout of the road and its approaches. @ The directions and identities of both vehicles. @ Their relative positions at the time of impact. @ The road signs and road markings. @ Names of the Streets and Roads.
FORD
FIESTA
fit}
36
Wee
see Wee
sists
HOW TO COPE WITH A FIRE Fire is unpredictable, and particularly dangerous when cars are involved because of the presence of petrol, which is highly inflammable. It's sensible to carry a fire extinguisher on board your car, but bear in mind that the average car fire extinguisher is suitable for use only on the smallest of fires. In the event of your car catching fire:
tel
Obviously, if the windscreen is damaged, it should be replaced at the earliest opportunity, but there is no need to curtail your journey unless the damage is particularly serious. @ Some older cars may be fitted with toughened windscreens. If a toughened windscreen suffers an impact, the glass will normally stay intact, but severe ‘crazing’ will usually occur which is likely to seriously affect the driver's vision. If a toughened windscreen breaks, stop immediately, and seek assistance. DO NOT
@ Switch off the ignition. @ Get any passengers and yourself out of the car and well away from danger. @ Impose an immediate ‘No Smoking’ ban. @ DO NOT expose yourself, or anyone else, to unnecessary risk in an attempt to control the fire. Minor fires can be controlled using a suitable extinguisher, but always use an extinguisher at arms-length, and bear in mind that a small vehicle fire can develop into a serious situation without warning. @ Call for assistance, if necessary — refer to ‘How to cope with an accident’ on page 29.
HOW TO COPE WITH A BROKEN WINDSCREEN There are a number of national specialist companies who offer roadside assistance to drivers who suffer broken windscreens, and it’s a good idea to carry the ‘phone number of a suitable specialist in your car for use in such situations. Some car insurance policies enable the use of such companies at preferential rates, and it’s worth enquiring about this when obtaining insurance quotes.
attempt to knock the broken glass out of the windscreen frame, as this is likely to result in injury to yourself, and damage to the car. Driving without a windscreen is extremely dangerous and should not be attempted.
WHAT TO DO IF YOUR CAR IS BROKEN INTO OR VANDALISED If you are unfortunate enough to have your car broken into or vandalised, do not attempt to drive your car away from the scene unless you are Satisfied that no damage has been caused which could affect the car’s safety. Where possible notify the police before moving your car, and inform your insurance company at the earliest opportunity.
@ Most of the windscreens fitted to modern cars are of the laminated type. Laminated windscreens are made from layers of glass and plastic (usually two layers of glass sandwiching a layer of plastic) which prevents the windscreen from shattering, and preserves the driver's vision in the event of the screen suffering an impact. A sharp impact may crack the outer glass layer, but clear vision is usually maintained.
FORD
FIESTA
BREAKDOWNS
twwl
In the unfortunate event of a breakdown, the first priority must always be safety - never risk causing an accident by attempting to move the car or trying to work on it if it’s in a dangerous position. Joining one of the national motoring organisations such as the AA or the
RAC can provide you with a recovery and assistance service should you break down. It may also save you money, as local garages often charge high rates to provide a recovery service. This Section provides advice on the course of action to follow should you break down. There are also Sections covering the procedure to follow for towing, and on how to cope with two of the more common causes of breakdowns — a puncture, and a flat battery.
Breakdowns on an ordinary road (not a motorway) Most importantly of all, common sense must be used, but the following advice should prove helpful. @ Warn approaching traffic, to minimise the risk of a collision. Where possible, switch on the car's hazard warning flashers, and at night leave the sidelights switched on. If a warning triangle is carried, position it a reasonable distance away from the scene of the breakdown, to give approaching drivers sufficient warning to enable them to slow down. Decide from which direction the approaching traffic will have least warning, and position the triangle accordingly. Place the warning triangle on the road surface, out from the edge of the road, where it can be easily seen. If possible, send someone to warn
approaching traffic of the danger which exists, and to encourage the traffic to slow down.
@ Get the passengers out of the car as a precaution should the car be hit by another vehicle. The passengers should move well away from the car and approaching traffic; up (or down) an embankment, or into a nearby field for example. @ If possible, move the car to a safe place. If the car cannot be safely driven or pushed to a place of safety, call a recovery service to provide assistance. Don’t expose yourself or anyone else to unnecessary danger in order to move the car. @ If the car can’t be safely moved, turn the steering wheel towards the side of the road. If the car is hit, it will then be pushed into the side of the road, not into the path of traffic. @ Try to find the cause of the problem. Only attempt this if the car is in a safe position away from traffic. Refer to ‘Fault finding’ on page 121 for details. @ If necessary call for assistance from one of the national motoring organisations if you're a member, or from a local garage who can provide a recovery service.
FORD
FESTA
SNM
38
Ble is Motorway breakdowns In the event of a motorway breakdown, due to the speed and amount of traffic there are a few special points to consider, and the following advice should be followed. @ If possible, switch on the car’s hazard warning flashers, and at night leave the sidelights switched on. @ DO NOT open the doors nearest to the carriageway, and DO NOT stand at the rear of the car, or between it and the passing traffic. @ Get the car off the carriageway and onto the hard shoulder as quickly as possible, and as far to the left as possible — never forget the danger from passing traffic. Turn the steering wheel to the left so that the car will be pushed away from the carriageway if hit from behind. @ If you can’t move the car off the carriageway — get everyone out of the car and well away from the carriageways (up/down an embankment, or into a nearby field for example) as quickly as possible. Never forget the danger from passing traffic. Call for assistance as described below. Attempt to warn approaching traffic of your car's presence by signalling from well to the back of the hard shoulder, NOT the carriageway. DO NOT put yourself at risk. Face the approaching traffic, and be prepared to move quickly clear of the hard shoulder onto the verge if any vehicles pull onto the hard shoulder. @ Get the passengers out of the car — as a precaution should the car be hit by another vehicle. The passengers should move well away from the car and approaching traffic, up (or down) an embankment, or into a nearby field for example. If animals are being carried, it may be advisable to leave them in the vehicle. In any case, animals and
children must be kept under tight control. @ Call for assistance — using the nearest emergency telephone on your side of the carriageway. NEVER cross the carriageways to use the emergency telephones. The direction of the nearest telephone is indicated by an arrow on the marker post behind the hard shoulder (the marker posts are positioned 100 metres/300 feet apart).
Each telephone is coded with details of its location, and the operator will automatically
be informed of your position on the motorway when you make the call. Give the operator details of your car type and registration number and, if you're a member of one of the motoring organisations, ask the operator to arrange assistance. @ Don't leave your car unattended for a long period.
Changing a wheel @ First of all, make sure that the car is ina safe position. It may be safer to drive the car slowly forwards and risk damaging the wheel, than to risk causing an accident. @ If you’re in any doubt as to whether you can safely change the wheel without putting yourself or other people at risk, call for assistance. @ All the tools required to change a wheel are kept in the boot. However, if you're carrying any luggage in the boot, you'll need to move it for access to the spare wheel. Where applicable, lift up the floor mat, then remove the left-hand cover panel from the floor of the boot to expose the spare wheel. On later models, the cover panel may be secured with a clip. The clip must be lifted and turned, so that it can pass through the slot in the cover panel, before the cover panel can be lifted. Lift the cover panel over the clip, and pull it (towards the back of the car) from the retaining tabs. The spare wheel is secured in place with a bolt which must be unscrewed before the wheel can be lifted out. The jack and the wheel brace (a spanner for unscrewing the wheel bolts) may be located under the spare wheel, or under the right-hand boot floor cover panel, depending on model. The wheel brace fits inside the tubular body of the jack. To remove the wheel brace for use, turn the. jack handle several turns. @ Lift the spare wheel and the tools out of the boot, and place them on the ground. Don't put any luggage back in the boot yet, because the wheel with the punctured tyre will have to be fitted in the spare wheel well.
FORD
FIESTA
BREAKDOWNS
A To remove a boot floor cover panel, lift the retaining clip (A) and turn it to align with the slot (B) -
later models A Jacking points for use with the car jack (arrowed)
A Spare wheel, jack and wheel brace locations (spare wheel securing bolt arrowed)
jack, and try to find something to chock the wheel diagonally opposite the one to be changed (two large stones or pieces of wood). @ The jacking points are located centrally on each side of the car, underneath the door sills. Both wheels on that side of the car will be raised when the jack is used. Slide the arm of the jack into the jacking point bracket, making sure that the arm slides fully into place, and is not restricted by mud or other debris in the bracket. Unfold the jack handle, then, holding the top of the jack as close as possible to the side of the car, turn the handle until the plate on the bottom of the jack is resting evenly on the ground. Carry on turning the jack handle slowly to raise the car until the wheel is clear of the ground, making sure that the car doesn’t
move on the jack.
@ Make sure that the handbrake is applied, and select reverse gear on models with a manual gearbox, or position P on models with automatic transmission. @ Prise off the wheel trim (where
applicable), on the wheel blade-shaped @ Slacken the
which covers the wheel bolts with the puncture, using the end of the wheel brace. four wheel bolts by at least
half a turn, with the wheel on the ground,
using the wheel brace. If you carry a length of piping for just such emergencies, slide it over the end of the wheel brace to make it easier to unscrew the bolts. ® Before jacking the car, make sure that the ground is solid enough to safely support the
AOR Di FLES TA
A Using the car jack
39
Biterits
40
@
@
@
@
@
Slide the spare wheel under the door sill panel for the time being, on the side nearest the punctured wheel. This will break the car's fall (and minimise the risk of injury to you) if the car slips off the jack or the jack collapses. Unscrew the wheel bolts, then remove the punctured wheel. Sometimes it may be necessary to tap the wheel in order to remove it, but if this is done, make sure that the car doesn’t move on the jack. Put the punctured wheel under the door sill panel, in place of the spare wheel. Fit the spare wheel to the car, then turn the wheel until the threaded holes in the wheel hub on the car line up with the holes in the wheel. Fit the wheel bolts and tighten them evenly in a crosswise order, but do not try to fully tighten the bolts with the car still raised. Remove the punctured wheel from under the side of the car, then slowly lower the car to the ground. Remove the jack, and fully tighten the wheel bolts. There is no need to strain yourself doing this, just make sure that the bolts are tight. If you're unsure of the tightness of the wheel bolts, have them checked at a garage or service station as soon as possible. Refit the wheel trim, where applicable, making sure that it’s correctly aligned and securely fitted (some wheel trims have a
hole towards their outer edge which must be aligned with the tyre valve). @ Stow the punctured wheel in the boot, together with the jack and wheel brace. @ Remove the wheel chocks, and make a final check to ensure that all tools and debris have been cleared from the roadside. @ Select neutral, where applicable, before Starting up and driving away.
Towing If your car needs to be towed, or you need to tow another car, special towing eyes are provided at the front and rear of the car. ‘Mark 1’ models — Where fitted, the towing
eyes are positioned on the car underbody. If no towing eyes are fitted, the tow rope must be attached as shown in the accompanying illustration. At the front of the car, the tow
A Tow rope attachment points for ‘Mark 1’ models (arrows indicate towing eyes when fitted) A Front of car B Rear of car
rope can be attached to the right- or left-hand suspension tie-rod. At the rear of the car, the tow rope must only be attached to the lefthand end of the axle tube, to avoid damage to the suspension or brake components. ‘Mark 2’ models — The towing eyes are shown in the accompanying illustration. On XR2 models, the front towing eye consists of two hooks; the upper hook is designed for towing the car, and the lower hook must not be used for towing. Before using the front towing eye on XR2 models, a plastic cover must be removed from the upper hook by grasping the front edge of the cover and pulling forwards and down. When refitting the cover, locate the lower legs in the grooves provided, and then push the upper edge towards the car. When being towed, the ignition key should be turned to position Il (steering lock released, and ignition warning light on). This is necessary for the direction indicators, horn and brake lights to work.
ROR D? FIESTA
|
TIoVdoleiitme
|
An ‘On tow’ notice should be displayed prominently at the rear of the car on tow to warn other drivers. Make sure that both drivers know details of the route to be taken before moving off, as it is difficult, and dangerous, to try to communicate
once under way. Before moving away, the tow car should be driven slowly forwards to take up any slack in the tow rope. The driver of the car on tow should make every effort to keep the tow rope tight at all times, by gently using the brakes if necessary, particularly when driving downhill. Drive smoothly at all times, particularly when moving away from a standstill. Allow plenty of time to slow down and stop when approaching junctions and traffic queues.
Starting a car with a flat battery
A Removing the front towing eye cover — ‘Mark 2’ XR2 models A Cover lower legs B Grooves in front spoiler
Note that on models fitted with a brake vacuum servo models), when does not work running). This
(all except some 950 cc engine being towed, the brake servo (because the engine is not means that the brake pedal will
have to be pressed harder than usual to operate the brakes, so allowance should be made for greater stopping distances. If the breakdown doesn’t prevent the engine from running, the engine could be started and allowed to idle so that the servo operates while towing.
Apart from old age (most batteries should last for at least three years), a battery will normally only go flat if there is a fault in the charging circuit (indicated by a continuously glowing ignition warning light), or when a particular circuit (eg headlights) is left on for a long time with the engine switched off. To start a car with a flat battery, you can either use a push- or tow-start (models with
manual gearbox only), or a set of jump leads.
TOW/PUSH-STARTING The method used to start the engine is the same whether the car is being towed or being pushed but, if the car is to be towed, first read the previous Section on towing for details of where to connect the tow rope. Proceed as follows: 1 Turn the ignition key to position Il to switch on the ignition. 2 If the engine is cold, on models with a manual choke, pull out the choke control.
When a car with an automatic transmission Is being towed, the gear selector lever should be moved to the ‘N’ position. To avoid damage to
3 Depress the accelerator pedal. 4 Depress the clutch pedal and select third gear. Hold the clutch pedal down. 5 Tow or push the car, and slowly release the clutch pedal. The engine will turn over, and
the transmission, do not tow the car any faster
should start (don’t worry about the car
than 30 mph (50 km/h) or any further than 30 miles (50 km). Ideally, the car should be towed with the front wheels off the ground, especially if transmission damage is suspected.
‘juddering’ as the engine being towed, as soon as depress the clutch pedal car so that you don’t run
BORD
FIESTA
turns). If the car is the engine starts, and gently brake the into the tow vehicle.
Aq
42
BVO
itis
STARTING USING JUMP LEADS Note: Starting using jump leads can be dangerous if done incorrectly. If you’re uncertain about the following procedure, it’s recommended that you ask someone suitably qualified to do the jump starting for you. Before attempting to use jump leads, there are a few important points to note. First of all, use only proper jump leads which have been specifically designed for the job. Make sure that the booster battery (the fullycharged battery) is a 12-volt type.
Position the two vehicles close enough together to connect the leads, but do not allow the vehicles to touch. Turn off all electrical circuits. DO NOT allow the ends of the two jump leads to touch at any time during the following procedure. Proceed as follows. 1 Open the vehicle bonnets, and connect one end of one of the jump leads (usually the red one) to the positive (+) terminal of the flat battery, and the other end to the positive terminal of the booster battery. 2 Connect one end of the other jump lead to the earth/negative (-) terminal of the booster
NEGATIVE
BATTERY
battery, and connect the other end to a suitable earth point on the car with the flat battery at least 50 cm (18 in) away from the battery (eg a clean, bare metal area on the
engine block or body). Make sure that all the lead clips are secure. 3 Start the engine of the vehicle with the booster battery and let it run for a few minutes, then start the engine of the car with the flat battery in the normal way. 4 When the engine is running smoothly, disconnect the jump leads in exactly the reverse order to that in which they were connected.
What to carry in case of a breakdown Carrying the following items may help to reduce the inconvenience and annoyance caused if you’re unlucky enough to break down during a journey: @ Alternator drivebelt (refer to ‘Servicing’ on page 95 for details of renewal) @ Spare fuses (refer to ‘Bulb, fuse and relay renewal’ on page 114 for details of renewal ) @ Set of principal light bulbs (refer to ‘Bulb, fuse and relay renewal’ on page 107 for details of renewal) @ Battery jump leads @ Tow-rope (refer to ‘Towing’ on page 40 for details of towing procedure) @ Litre of engine oil (refer to ‘Regular checks’ on page 66 for details of checking oil level ) ®@ Torch
BOOSTER BATTERY
A Jump start lead connections for negative earth vehicles — connect leads in order shown
FORD
FIESTA
|
:
DRIVING SAFETY
etid
In the UK, more people are injured or killed every year due to road accidents than through any other single cause. Car manufacturers are paying more attention to passive safety when designing new cars, but drivers must ultimately take active responsibility of ensuring the safety of themselves, their passengers, and just as importantly, other road users. There will always be accidents on the roads, but taking the time to read the following advice may help you to avoid such a mishap. The following Sections aim to give advice which will help you to reduce the risk of becoming involved in an incident when driving, not necessarily by changing the way that you drive, but simply by making you aware of some of the potential risks which can easily be avoided. For more information and practical advice on road safety, it is well worth considering taking part in one of the various courses provided by organisations such as RoSPA and the Institute of Advanced Motorists.
BEFORE STARTING A JOURNEY As a driver, comfortable distractions. will help to
before beginning a journey it’s important to make sure that you're so that you can concentrate on driving without any unnecessary Spending a few moments carrying out a few simple checks and adjustments make your journey more relaxing, safer and hopefully trouble-free.
Driver comfort Before driving, make sure that you’re comfortable, and that you can operate all the controls easily, particularly if someone else has recently driven the car.
@ Seat Make sure that the seat is positioned a comfortable distance from the steering wheel and the pedals, so that you can operate all the controls comfortably
@ Seat back Make sure that the seat back is adjusted to give your back plenty of support. Your back should rest against the seat, and there should be no need to lean forwards from the seat back. You should be able to reach the steering wheel comfortably, and you should be able to turn the wheel easily without stretching.
@ Head restraint lf a head restraint is fitted, it should be adjusted to support your head in the event of an accident. Your head should not rest against the restraint during normal driving and, as a rough guide, the restraint is correctly positioned when its top is in line with your eyes. Similarly, make sure that any passenger head restraints are adjusted correctly if passengers are being carried.
@ Mirrors
All the mirrors should be adjusted so that they give a clear view behind the car without the need to move your head unnecessarily.
@ Steering column
If the car is fitted with an adjustable steering column, adjust the column so that the steering wheel can be reached comfortably, and the wheel can be turned easily without stretching.
Checks If you're planning a long journey, refer to ‘Regular checks’ on page 65, and make sure that you carry out all the checks mentioned before setting off. Also make sure that you know where the spare wheel and the tools required for wheel changing are located (refer to ‘Breakdowns’ on page 38).
FORD!
‘FIESTA
DNIA ALA
44
Bice
aa @ Be particularly careful after a long period of dry weather. Under these conditions, rain can make the road surface very slippery. @ Don't use rear foglights unless visibility is seriously reduced (generally less than 100 metres/300 feet). Foglights can dazzle drivers following behind, especially in motorway spray.
Fog
DRIVING IN BAD WEATHER When driving in bad weather, always be prepared. Bad weather should never take you by surprise. Listen to a weather forecast: you should always be aware of the possibility of poor conditions on your intended journey. Driving in bad weather requires more concentration, and is more tiring than driving in good weather conditions. Never allow yourself to be distracted by talkative passengers or loud music in the car and, if you feel tired, stop at the next opportunity and take a break. Always look well ahead, so that you're aware of the condition of the road surface, and any obstacles; slow down if necessary. The following advice is intended to help you to drive more safely in various bad weather conditions. However, above all, use
common sense.
Rain @ Use dipped headlights in poor visibility. @ Slow down if visibility is poor or if there is a lot of water on the road surface. @ Keep a safe distance from the vehicle in front (stopping distances are doubled on a wet road surface).
@ Slow down. Fog is deceptive, and you may be driving faster than you think. Fog can also be patchy, and the visibility may suddenly be reduced. Always drive at a speed which allows you to stop in the distance you can see ahead. @ Use dipped headlights. Using main-beam headlights will usually reduce the visibility even further, as the fog will scatter the light. @ Use foglights (where they are fitted) if it’s genuinely foggy (generally, where visibility is reduced to less than 100 metres/300 feet), and not just misty. @ Keep a safe distance from the vehicle in front. @ Use your windscreen wipers to clear moisture from the windscreen.
Snow @ Don't start a journey if there is any possibility that conditions may prevent you from reaching your destination. Listen to a weather forecast before setting off. @ Before starting a journey, clear all snow from the windscreen, windows and mirrors.
@ @
@
@
@
Don't just clear a small area big enough to see through. Slow down. Keep a safe distance from the vehicle in front (stopping distances can be trebled or even quadrupled on a snow-covered or icy surface). Drive smoothly and gently. Accelerate gently, steer gently and brake gently. Don't brake and steer at the same time — this may cause a skid (refer to ‘Skid control’. on page 48). When moving away from a standstill, or manoeuvring at junctions, etc, in a car with a manual gearbox use the highest possible gear that your car will accept to move away, and change up to a higher gear earlier than
POR Di FE S.A
PMc
aaa
usual. In a car with automatic transmission move the selector lever to prevent the transmission from using all the gears (position ‘L’ — refer to ‘Controls and equipment’ on page 23). This will provide more grip and will help to reduce wheelspin. @ Use main roads and motorways where possible. Major roads are likely to have been ‘gritted’ and are usually cleared before minor roads. @ Use dipped headlights in poor visibility. @ Don't use rear foglights unless visibility is seriously reduced (generally less than 100 metres/300 feet) — foglights can dazzle drivers following behind.
Ice and frost @ Follow the advice given for driving in snow. @ Be prepared for ‘black ice’. Although you can’t see ‘black ice’, reduced road noise
from the tyres will usually tell you it’s there.
Severe winter weather The best advice in severe winter weather is to stay at home but, if you must drive your car, in addition to following the advice given for driving on snow and ice, there are a few additional pieces of advice which you should bear in mind before setting out on a journey. @ Make sure that you tell someone where you're going, and tell them roughly what time you're expecting to arrive at your destination, and what route you’re taking. @ Keep a can of de-icer fluid, a scraper, a set of jump leads and a tow rope in the car at all times. @ Carry plenty of warm clothes and blankets. @ Make sure that you have a full tank of petrol before starting your journey. This will allow you to keep the engine running, without fear of running out of petrol, to provide warmth through the car’s heating system should you be delayed by conditions, or worse still stuck. @ Pack some pieces of old sacking or similar material, which you can place under the driving wheels to give better traction if you get stuck. @ Carry a shovel, in case you need to dig yourself or someone else out of trouble.
BOR DI FIESTA
MOTORWAY
DRIVING
Motorway driving requires a great deal of concentration and awareness. Motorways are generally busier than ordinary roads, and the traffic moves faster, so there is less time to react to any changes in road conditions ahead. This Section covers the fundamental rules for safe motorway driving, and will help you to avoid many of the problems which occur on today’s busy motorways. Remember that lack of common sense is probably the biggest cause
of accidents on motorways. Full rules and regulations for motorway driving can be found in ‘The Highway Code’.
Joining and leaving a motorway When you join a motorway, you will normally approach from a ‘slip-road’ on the left. You must give way to traffic already on the motorway. Watch for a safe gap in the traffic, and adjust your speed in the acceleration lane so that when you join the left-hand lane of the motorway you're already travelling at the same speed as the other traffic. Indicate before pulling onto the motorway. After joining the motorway, allow yourself some time to get used to the speed of the traffic before overtaking. When you leave a motorway, indicate in plenty of time, and reduce your speed before
aS
46
Betis e you enter the slip-road — some slip-roads and link-roads between motorways have sharp bends which can only be taken safely by slowing down. Be very cautious immediately after leaving a motorway, as it can be difficult to judge speed after a long period of fast driving.
Rules for safe motorway driving @ Concentrate and think ahead — Always be prepared for the unexpected, and look well ahead. You should be aware of all the traffic in front and behind, not just the vehicle in front of you. If you’re concentrating properly, nothing should take you by surprise on a motorway. @ Always drive at a speed to suit the road
as soon as possible, but without cutting in. @ Take note of direction signs — You may need to change lanes to follow a certain route, in which case you should do so in plenty of time. @ Stop as soon as practicable if you feel tired — Driving on a motorway when feeling tired can be extremely dangerous. If necessary, wind down the window for fresh air. If you feel tired or drowsy, stop at the next service station, or turn off the
motorway at the next junction and take a break before continuing your journey. You must not stop on the hard shoulder of a motorway other than in an emergency. @ If you break down - Refer to ‘Breakdowns’ on page 37.
conditions — Don’t break the speed limit,
especially temporary speed limits which may apply to contra-flow systems or roadworks.
@ Slow down in bad weather conditions. Driving too fast in fog and motorway spray is a major cause of motorway accidents. @ Always keep a safe distance from the vehicle in front — The closer you drive to the vehicle in front, the less chance you have of avoiding an accident if something happens ahead. Remember that you need more space in bad weather conditions. @ Think — If the vehicle ahead suddenly stops, do you have enough space to stop without
hitting it?
@ Use your mirrors regularly — It’s just as important to be aware of what's happening behind you as it is in front. @ Always signal your intentions clearly and in plenty of time — Check your mirrors first, signal before you move, and change lanes smoothly and in plenty of time. Don’t make any sudden moves which are likely to affect traffic approaching from behind. @ Keep to the left — The left-hand lane is not the slow lane, and you should drive in this lane whenever possible. You can stay in the middle lane when there are slower vehicles in the left-hand lane, but return to the left-hand lane when you've passed them. The righthand lane is for overtaking only: it is not for driving at a constant high speed. If you use the right-hand lane, move back into the middle lane and then into the left-hand lane
TOWING A TRAILER OR CARAVAN When towing a trailer or a caravan, there are a few special points to bear in mind. There’s more to towing a trailer or caravan than just simply bolting on a towbar and hitching up!
The law Before using your car for towing, make sur e that you're familiar with any special legislation which may apply, particularly if you’re travelling abroad. Make sure that you know the speed limits applicable for towing. In some countries, including the Unite d
FORD
FIESTA
PW cey Vie Kingdom, there is a legal requirement to have a separate warning light fitted in the car to show that the trailer/caravan direction indicator lights are working. Always check on current regulations before you travel.
Before starting a journey Before attempting to use your car for towing, there are one or two points which should be considered. @ Make sure that your car can cope with the load which you’re towing @ Don’t exceed the maximum trailer or towbar weights for the car — Refer to ‘Dimensions and weights’ on page 13. @ Engine — Don’t put unnecessary strain on your Car's engine by trying to tow a very heavy load. Obviously, the smaller the engine, the less load the car can comfortably tow. Also bear in mind that the extra load on the engine when towing means that the engine’s cooling system may no longer be adequate. Some manufacturers provide modified cooling system components for towing, such as larger radiators, etc, and if you intend to use your car for towing regularly, it may be worth enquiring about the availability and fitting of these components. @ Suspension — Towing puts extra strain on the suspension components, and also affects the handling of the car, since standard suspension components aren't usually designed to cope with towing. Heavy duty rear suspension components are available for most cars, and it’s worth considering having these fitted if you intend to use your car for towing regularly. Special stabilisers are also available for fitting to most cars to reduce pitching and ‘snaking’ movements when towing. @ Make sure that you can see behind the trailer/caravan using the car’s mirrors — Additional side mirrors with extended arms
are available to fit most cars. The mirrors must be fitted with folding arms (so that they fold if hit), and should be adjusted to give a good view to the rear at all times. The mirrors can be removed when the car isn't being used for towing. @ Make sure that the tyre pressures are
FORD
FIESTA
correct — Unless a light, unladen trailer is being towed, the car tyres should be inflated to their ‘full load’ pressures. Also make sure that where applicable the trailer or caravan tyres are inflated to their recommended pressure.
@ Make sure that the headlights are set correctly — Check the headlight aim with the trailer/caravan attached, and if necessary adjust the settings to avoid dazzling other drivers. @ Make sure that the trailer/caravan lights work correctly — Make sure that the tail lights, brake lights, direction indicator lights and, where applicable, the reversing lights and fog lights all work correctly. Note that the additional load on the direction indicator circuit may cause the lights to flash at a rate slower than the legal limit, and in
this case you may need to fit a ‘heavy duty’ flasher unit. @ Make sure that the trailer/caravan is correctly loaded — Refer to the manufacturer's recommendations for details of loading. As a general rule, distribute the weight so that the heaviest items are as near as possible to the trailer/caravan axle. Secure all heavy items so that they can’t move. To provide the best possible control and handling of the car when towing, the manufacturers recommend an optimum noseweight for the trailer/caravan when loaded (refer to ‘Dimensions and weights’ on page 13 for details). The noseweight can be measured using a set of bathroom scales as follows: Place a stout piece of wood between the trailer/caravan tow hitch cup and the scales platform, and read off the weight with the trailer/caravan level. If necessary, redistribute the load, to arrive as close as possible to the recommended noseweight. Do not exceed the maximum recommended noseweight.
Driving tips Towing a trailer or caravan will obviously affect the handling of the car, and the following advice should be followed when towing. @ If possible, avoid driving with an unladen car and a loaded trailer/caravan — The uneven weight distribution will tend to make the car unstable. If this is unavoidable,
a7
48
Beery se, drive slowly to allow for the instability. @ Always drive at a safe speed — The stability of the car and the trailer or caravan decreases as the speed increases. Always drive at a speed which suits the road and weather conditions, and always reduce speed in bad weather and high winds — especially when driving downhill. If the trailer or caravan shows any sign of ‘snaking’, reduce speed immediately — never try to stop ‘snaking’ by accelerating.
@ Always brake in good time -— If you're towing a trailer or caravan which has brakes, apply the brakes gently at first, then brake firmly. This will help to prevent the trailer wheels from locking. In cars with a manual gearbox, change into a lower gear before going down a steep hill so that the engine can act as a brake, and similarly, in
cars with automatic transmission, move the selector lever to position ‘2’, or ‘1’ in the case of very steep hills. @ Don’t change to a lower gear unnecessarily — Unless the engine is labouring, stay in as high a gear as possible to keep the engine revs as low as possible. This will help to avoid the engine overheating.
UK is 80 milligrams per 100 millilitres. This doesn’t correspond to any particular quantity of drink, as the amount of drink required to reach
this level varies from person to person. The driving of many people who feel perfectly sober is seriously affected well below the legal limit. The penalties for driving over the legal limit are severe, and can mean losing your driving licence, a heavy fine, or imprisonment. It’s also important to realise that the laws abroad can be far more severe than in the UK, and some
countries have a total ban on driving after drinking alcohol. @ The safest course of action is not to drink and drive.
SKID CONTROL If you drive sensibly with due regard for the road conditions, you should never find yourself in a situation where your car is skidding. The following advice will help you to avoid situations which may cause a car to skid, and explains how to regain control of your car quickly should the need arise.
ALCOHOL AND DRIVING By far the best advice on drinking and driving is DON'T. You may feel fine, but it’s a proven fact that even one small alcoholic drink will impair your driving to some extent. Drinking alcohol has the following effects:
@ Reduces co-ordination @ Increases reaction time @ Impairs judgement of speed, distance and risk @ Encourages a false sense of confidence The risk of an accident increases sharply after drinking alcohol, and approximately one third of the total number of people killed in road accidents each year have blood alcohol levels above the legal limit for driving. Remember that you're putting other people as well as yourself at risk if you drive after drinking. The legal limit for blood alcohol level in the
PORDMEIES
RA
PMc A skid is caused by one or a combination of the following: _ ® Excessive speed in relation to the road conditions. @ Harsh or excessive acceleration. @ Sudden or excessive braking. @ Coarse or excessive steering. The most common basic cause of skidding is rough handling of the car's controls. Therefore the key to safe driving and preventing a skid is smooth, gentle handling of the car and its controls. Try to apply smooth pressure to the brake pedal, accelerator and steering wheel rather than just suddenly moving them a certain distance. When a car is skidding, the following things happen:
@ The car is out of control. You can take action to regain control, but while skidding, the car can’t be fully controlled. @ A car with the front wheels skidding can’t be steered. @ Acar with the rear wheels skidding is likely to spin round if any steering lock is applied. ®@ A car with all four wheels skidding will continue in a straight line in the direction it was travelling when the skid started, regardless of which way the car is pointing.
Prevention is better than cure. When approaching a corner, reduce speed early by smooth progressive braking in a straight line. In a car with a manual gearbox, brake to an
appropriate speed and select the correct gear for the corner. Turn into the corner early and smoothly, gently increasing the steering lock if necessary, and corner with your foot gently on the accelerator, so that the engine just ‘pulls’ the car through the corner, maintaining a constant speed. As you leave the corner,
accelerate gently and smoothly. If you follow the above advice, you should
avoid finding yourself in a situation where your car is skidding. However, should you be unfortunate enough to experience skidding, the basic rule for skid control is to remove the cause of the skid. If you cause a skid by accelerating, braking or steering, ease off, and, when the skid stops, re-apply the
FORD
FIESTA
lisa ae 49
accelerator, brake or steering control, but this time more gently and smoothly. If the front wheels are skidding, to regain steering control quickly, steer ‘into the skid’. This is often misunderstood, and it basically means look in the direction you want to be facing, and steer in that direction — and be prepared to reduce the steering quickly if necessary when the wheels regain their grip. Several organisations offer courses in skid control, using specially-equipped cars under carefully-controlled conditions. One of these courses could prove to be a very worthwhile investment, possibly helping you to avoid an accident.
ADVICE TO WOMEN DRIVERS Unfortunately, it’s a fact that women are more likely than men to be the subject of unwelcome attention when driving alone. There’s no reason to think that driving alone spells trouble, but it’s a good idea to be aware of certain precautions which will help to avoid finding yourself in an unpleasant situation. This Section aims to give advice which will help to reduce any risks when driving alone, and will help you to deal with the situation, should you be unfortunate enough to find yourself the subject of unwelcome attention. Several organisations (some local police authorities, AA, etc) run courses especially for women drivers, in which subjects such as basic car maintenance and self defence, etc, are covered.
Sensible precautions @ The car Make sure that you’re familiar with your car. Make sure that your car is regularly serviced. Refer to ‘Regular checks’ on page 65, and make sure that all the checks described are carried out regularly. This will minimise the possibility of a breakdown. Make sure that you know how to change a wheel, and make sure that the car jack is in good condition in case you have a puncture refer to ‘Breakdowns’ on page 38.
50
Bea
sas
@ The journey If you're planning to undertake a particularly long or unfamiliar journey, the following advice may be helpful. If you're travelling on an unfamiliar route, make a few notes before you set off, reminding yourself of the road numbers, where to turn, which junctions to use on motorways,
etc. Try to stick to main roads where possible. Always carry a map. Make sure that you have enough petrol for the journey. If you need to fill up during the journey, make sure that you do so in plenty of time, before the fuel level gets too low, and before petrol stations close if travelling at night. If you think that your family or friends may be worried, you may want to. ‘phone someone at your destination before setting off to tell them that you're leaving, and tell them what time you expect to arrive. Similarly, when you arrive, you may want to ‘phone someone at your starting point to confirm that you've arrived safely.
@ Driving in traffic Avoid attracting unnecessary attention. Avoid ‘jokey’ stickers in car windows, which may encourage unwelcome attention. Avoid eye contact with ‘undesirables’. If you're being followed, pull over and slow down, but don’t stop. Don’t drive to your home, but find a busy and well lit place. If the person following persists, blow your horn and flash your lights to attract attention. If you're stopped by traffic or another vehicle, lock the doors and close the windows. Don’t ram the other vehicle - damage to your car might prevent your escape.
@ Leaving your car Don't leave any clues that the car is being driven by a woman; make sure that any ‘feminine’ items are hidden from sight before leaving your car. Refer to ‘Car crime prevention’ on page 59 and take note of the advice given. Try to park in a well-lit, preferably busy area. If you park in a car park, try to park close to an exit, or close to the attendant’s station. Always reverse into a parking space, so that you can drive away quickly if necessary after
returning to your car. Take note of any ‘landmarks’ so that you can find your car quickly when you return. Always lock your car. When you return to your car, walk with a group of people, if possible. Have the keys ready so that you don’t have to spend unnecessary time outside your car searching for them, which may attract attention. Before getting into your car, briefly check for forced entry, and look into the car for any suspicious signs. Don’t get into the car if you notice anything suspicious.
@ Breakdowns Remember that you’re more likely to be injured in an accident than a personal attack. Refer to ‘Breakdowns’ on page 37 and take note of the advice given but, in addition, bear in mind the following advice. Always walk to ‘phone for assistance, don’t accept a lift. When you ‘phone for assistance, mention that you’re an unaccompanied woman. If someone stops while you're ‘phoning for help, give the operator details of the other vehicle's registration number and a brief description of the car and driver. If the driver approaches you, tell them that you have passed on his/her details to the police. If the driver's intentions are honourable, your reaction will be understood. If you decide to stay with, but outside the car, leave the nearside door unlocked and slightly open, so that you can get inside quickly to lock yourself in if necessary. If you decide to stay inside the car, sit in the Passenger seat and lock the door - this will give the appearance that you're accompanied. When help arrives, ask for some form of identification (even from a policeman) before giving any of your own details. If someone offers assistance, tell them the police have been informed and are arranging recovery. If you have not yet contacted the police, consider asking the person to do so on
your behalf, but if you're uncertain about the person's intentions, tell them that the police are aware and ask them to call the police again
for you.
FORD
FIESTA
|
DRIVING SAFETY
| @ Accidents Keep calm. Refer to ‘Accidents and emergencies’ on page 29 and take note of the advice given but, in addition, bear in mind the following advice.
If you're bullied or shouted at, lock yourself in your car (if it’s safe to do so), and wind the
~ windows up. Communicate through a small gap at the top of the window. If things get out of hand, refuse to talk to anyone except the police.
Self defence This is a last resort and should not be used unless all else has failed. There is no substitute for taking a properly supervised course in self-defence, but we aim to outline a few of the basic moves below. If you are approached, act in a composed manner and use a soft tone. In the event of an attack, stay calm - you can still safeguard yourself. @ If you’re held by one arm - Use your free hand to grasp the attacker's thumb and twist the thumb sharply back towards the wrist. @ If you're facing your attacker - If your shoulders are held, thrust your hands/arms
upwards and diagonally outwards to dislodge the attacker's grip. Use your knees or the blade of your hand to chop your attacker's groin, your feet to kick the shins, and your fingers to poke the eyes. @ If you’re attacked from behind - Quickly lean forward, twisting your head sideways into the attacker to keep your airway (for breathing) clear. Often this will cause the
attacker to lose balance. @ If you've been pulled backwards already - Turn your head as above, and chop hard with the blade of your hand or a clenched fist to the groin, or an elbow in the stomach. @ If you've been forced to the floor - Use your feet and legs to kick against the attacker's shins whilst swivelling your body to keep the attacker at bay. Be ready to run as soon as the attacker’s grip is released, and SCREAM!
BORD
FIESTA
CHILD SAFETY Every day, thousands of parents strap their offspring into child car seats, confident that they have done everything possible to protect their loved ones. However, a recent survey has shown that many young children are travelling in car seats which have been incorrectly fitted or are being incorrectly used, making them potentially dangerous should they be involved in an accident. The following advice will help you to make sure that you take every possible precaution to ensure the safety of your children when driving.
How to avoid unnecessary risks @ Never allow young children to travel in a car unrestrained, even for the shortest of journeys. @ Never carry a child on an adult's lap or in an adult's arms. Although you may feel that your baby is safer in your arms, this is not the case. An adult holding a child is far more likely to cause injury to the child than to give protection in the event of an accident.
31
52
DRIVING SAFETY
@ Never rely solely on an adult seat belt to restrain a child, and never sit a child on a cushion to enable a seat belt to fit properly. @ Always strap young children into a properly designed child car seat when carrying them in a car. The cost of a good car seat is a very small price to pay to save your child’s life.
Choosing a child car seat @ It’s vitally important to choose the correct type of car seat for your child. A wide range of child car seats is available, and it’s worth spending some time looking at the various seats on the market before deciding on the most suitable seat for your particular requirements. @ Although age ranges are often given by the manufacturers, these should be taken as a rough guide. It’s the weight of the child which is important; for example, a smaller than average baby could use a baby car seat for longer than a heavy baby of the same age. @ Never buy a secondhand child seat. This may sound like a ploy from the manufacturers to sell more seats, but all too often a secondhand seat is sold without the instructions, and sometimes there are parts missing. This often leads to secondhand seats being incorrectly fitted. A secondhand seat may have been damaged or weakened through carelessness or misuse, without necessarily showing any visible signs until it’s put to the test in an accident! @ Your baby’s first contact with the outside world is often on that first ride home from hospital, so make sure that you're prepared, and buy a car seat before your baby is born. @ Some seats are designed for babies from birth to a weight of around 22 pounds (10 kg), which for most babies is around nine months old. Usually, these first car seats are light and easy to transport through
the use of a handle. This means that a sleeping baby can be carried from the car into the house without waking. Some baby seats come complete with a built-in headrest, which is very important for the early weeks when a baby’s head needs to be supported.
Certain seats can be fitted so that the baby faces the back of the car (ie rearward facing seats). This may be considered to improve safety, as the baby is supported across the back rather than purely by the harness, if the car is involved in a frontal impact. Combination type seats can then be used forward facing when the child reaches approximately nine months old. Other types of seat may be designed to accommodate children up to around 40 pounds (18 kg) or approximately four years old. Alternatively, some seats use the car's seat belts to hold both the child seat and the child, and these seats are obviously easier to fit. Make sure that this type of seat is fitted with a seat-belt lock, so that the seat belt cannot be pulled out of place or slackened. Another advantage of these seats is that they can easily be transferred from car to car. @ Try to choose a seat which has an easily adjustable harness, as this makes it easier to ensure that the harness fits the child securely for each trip. If the harness can be quickly loosened, it makes getting a struggling child in and out a little easier.
Using a child car seat @ Firstly, make absolutely sure that the seat is properly fitted in accordance with the manufacturer's instructions. If you're unsure about any of the fitting procedure, contact the manufacturer for advice. @ To hold a child securely, the harness must be reasonably tight. There should be just enough room to slide your flat hand under the strap. Children may be wearing bulky clothes one day, and thin clothes the next, so it is vital that the harness is adjusted
before each journey to ensure a correct fit. @ If the seat is fitted using an adult's inertia reel seat belt, make sure that the seat is held firmly in position, and that the seat belt is securely locked to prevent it from loosening. Also, make sure that the seat belt buckle is not resting on the frame of the child seat. This is because the buckles are not design ed to withstand the impact of a heavy child seat and, in an accident, could break open.
FORD
FIESTA
DRIVING ABROAD
Driving abroad can be very different to driving in the UK. Besides the obvious differences, like climate and driving on the right-hand side of the road, various unfamiliar laws may apply, and it’s advisable to prepare yourself and your car as far as possible before travelling. This Section provides you with a guide which will help you to prepare for driving abroad, and will help you to avoid some of the pitfalls waiting for the unwary. It may be worthwhile considering hiring a car abroad, rather than driving your own car. In this case, make sure that the insurance cover arranged suits your requirements, and make sure that a damage waiver is included (otherwise you will have to pay for any damage to the hire car).
Insurance
@ Motoring Make sure that you have adequate insurance cover for your car and your luggage. Check on the legal requirements for insurance in the country you're visiting, and always inform your insurance company that you're taking your car abroad — they will be able to advise you of any special requirements. Most car insurance policies automatically give the minimum legally-required cover for driving in EC countries, but if you require the same level of cover as you have in the UK, you will normally need to obtain a ‘Green Card’ (an internationally-recognised certificate of insurance) from your insurance company.
@ Medical It’s always advisable to take out medical insurance for the car occupants. Not all countries have a free emergency medical service, and you could find yourself with a large unexpected bill in the event of yourself or one of your passengers being taken ill, or being involved in an accident (in some countries you may even have to pay for an ambulance). NHS form E111 (available by filling in a form at a Post Office) entitles you to receive
FORD
FIESTA
Vitad
GvO ONI
54
Byun the same health care that residents receive in EC countries, but this is by no means comprehensive, and additional insurance cover is usually advisable.
@ Breakdown Recovery and breakdown costs can be far higher abroad than in the UK. Most of the national motoring organisations (such as the AA and RAC) will be able to
provide insurance cover which could save you a lot of inconvenience and expense should you be unfortunate enough to break down.
Documents Always carry your passport, driving licence, car registration document, and insurance certificate (including ‘Green Card’ and medical
insurance, where applicable). Make sure that all the documents are valid, and that the car’s road fund licence (tax) and MOT don’t run out while you’re abroad. Before travelling, check with the authorities in the country you're visiting, in case any special documents or permits are required. You may need a visa to visit some countries, and an
International Driving Permit (available from the AA or RAC) is sometimes required.
Driving laws Before driving abroad, make sure that you're familiar with the driving laws in the country you're visiting, as there may be some laws which don’t apply in the UK, and the penalties for breaking the law may be severe. Fit a ‘GB’ plate to the back of your car, and make sure that it’s displayed all the time you're abroad. In some countries, you're legally required to carry certain items of safety equipment. These can include a first-aid kit, a warning triangle, a fire extinguisher, a set of spare bulbs/fuses, etc. Remember that if you're visiting a country where you have to drive on the right-hand side of the road, you'll need to fit neadlight beam deflectors or shields to avoid dazzling other drivers, or alternatively, it may be possible to have the headlight beams adjusted. Make sure that you're familiar with the speed limits, and note that in some countries there is an absolute ban on driving after drinking any alcohol.
Servicing Service your car before setting off on your trip, to reduce the possibility of any unexpected breakdowns. Pay particular attention to the condition of the battery, windscreen wipers and tyres (including the spare), noting that the tyre pressures will probably have to be increased from their normal setting if the car is to be fully loaded. If you're travelling to a cold country, check the condition of the cooling system and the strength of the antifreeze. Before setting off on your journey, refer to ‘Regular checks’ on page 65, and carry out all the checks described. Check that the jack and wheel brace are in place in the car (refer to ‘Breakdowns’ on page 38), and that the jack works properly.
Spares In addition to the items which must be carried by law in the country you're visiting, it’s a good idea to carry a few spares which may be difficult to obtain should you need them abroad (one of the national motoring organisations should be able to advise you). For example, you may want to carry clutch and throttle cable repair kits, as right-hand-drive components can be difficult to find outside the UK. If your Car uses a special oil, it’s a good idea to take a pack with you. It's also a good idea to carry a tow rope and a set of jump leads to help you out in case of a breakdown.
Fuel The type and quality of petrol available varies from country to country, and it’s a good idea to check on the availability of the correct petrol type before travelling (again, one of the national motoring organisations will be able to advise you). This is especially important if your car has a catalytic converter, as in this case you must only use unleaded petrol. Find out what petrol pump markings to look for to give you the correct type and grade of petrol for your car.
Security A foreign car packed with luggage is an inviting prospect for criminals, so refer to ‘Car
RO RD! ies gee
|
PMO
| 1
|| |
crime prevention’ on page 59, and don’t take any chances.
Route planning It’s always a good idea to plan your approximate route before travelling. A vast number of maps and guides are available, or the AA and RAC | can provide you with directions to your destination for a modest charge. Bear in mind that in some countries, you'll
ie) OMe 55
have to pay tolls to use certain roads, and this can add unexpectedly to the cost of travelling.
What to carry when driving abroad
The following list provides a guide to the items which it is compulsory to use or carry, or it is strongly recommended that you carry in your car when driving in various European countries.
In the following table ‘€’ indicates ‘Compulsory’ and ‘R’ indicates ‘Recommended’. COUNTRY
HEADLAMP DEFLECTORS
GB STICKER
SEAT BELTS
Cc
Cc
t
A
A
Austria
Belgium
WARNING TRIANGLE
FIRE EXTINGUISHER
FIRST AID KIT
SPARE BULBS
Cc
-
Cc
-
A
Cc
=
Bulgaria
Cc
Czechoslovakia Denmark
WHIA|A
Eire
{ Finland
France Germany
Greece
Holland Hungary
Italy
Luxembourg Norway
Poland Portugal Spain Sweden Switzerland
AIVHIAIASAIBTIDIAIASASAS|AS|AIA AJIAIASIASIASTATATASIASTATATAITAITATATATATA AJAIASJASASIATATAIASTASATATATA
United Kingdom Yugoslavia
FORD
FIESTA
A
A AIAJASASTATATITASTASIASATAITASIATATAIASTATA
{pl Ule |
(cms| eehy me)aafenmel iiiic
FORD!
+ LE Sia
REDUCING THE COST OF MOTORING
=Y|
Owning a car is always going to involve some expense, and the running costs can generally be divided into two main areas. The first concerns fixed costs which cannot be avoided, such as car tax and insurance (although obviously you can shop around for the best insurance quote). However, for most owners savings can be made in the second main area of expense, which covers fuel costs and servicing/maintenance bills. It’s surprisingly easy to reduce the amount of fuel used, simply by adapting _ your driving style to suit the prevailing conditions, and avoiding certain driving habits which tend to increase fuel consumption unnecessarily. A large proportion of the average servicing bill is made up of garage labour time, money which can be saved by carrying out the work yourself. Refer to ‘Servicing’ on page 73 for easy-to-follow instructions on how to carry out most servicing work. It’s also worth bearing in mind that maintenance costs can be cut significantly by reducing unnecessary wear-and-tear on the car. The following advice deals with the most significant causes of high fuel consumption and unnecessary wear-and-tear, and explains how to save money and reduce environmental pollution during everyday driving.
@ Don’t warm the engine up with the car standing still — Engine wear and pollution is at its highest when the engine is warming up, and the engine takes a long time to warm up when running at idle speed with the car stationary. To avoid excessive wear and pollution, drive off as soon as the engine starts, and don’t use more ‘revs’ than necessary.
® Oncars with a manual choke, don’t use the choke any longer than necessary — Push the choke control fully in as soon as the engine will run smoothly without it. When the engine is running with the choke applied, extra fuel is being used and so the fuel consumption is increased, and more pollution is produced. ® Avoid sudden full throttle acceleration — Sudden acceleration increases fuel consumption, engine wear and pollution.
® Don't drive at high engine speeds — Minimum fuel consumption and pollution is achieved at low engine speeds and in the highest possible gear. Lower engine speed also means less noise and engine wear. For maximum economy, stay in as high a gear as possible for as long as possible, without making the engine labour.
@ Don’t always drive at maximum speed - Fuel consumption, pollution and noise increase rapidly at high speeds. A small reduction in speed (particularly during motorway driving) can significantly lower fuel consumption and pollution. @ Look well ahead, and drive as smoothly as possible — By looking well ahead you will be able to react to any change in road conditions in plenty of time, allowing you to brake and accelerate smoothly. Unnecessary or harsh acceleration and braking increases fuel consumption and pollution. @ Where possible, avoid dense, slow-moving traffic — In these conditions, more frequent braking, acceleration and gear changing are required, which increase fuel consumption and pollution. @ Stop the engine during traffic hold-ups — Obviously if your engine has stopped it doesn’t use any fuel and there is no pollution.
FORD
FIESTA
TWO SNI
58
Bille
(cui seeks me) ence) tic
@ Check the tyre pressures regularly — Low tyre pressures increase the rolling resistance of the car, and therefore increase fuel consumption, as well as increasing tyre wear and causing handling problems.
@ Check the fuel consumption regularly — By | doing this you will be able to notice any significant increase in fuel consumption, and
any problem which may be causing it can be investigated before it develops into anything more serious.
@ Don’t carry unnecessary luggage - Weight has a significant effect on fuel consumption, especially in dense traffic where frequent acceleration is required. @ Don’t leave a roof rack fitted when not in use — The extra air resistance increases fuel consumption.
@ Switch off any unnecessary electrical circuits as soon as possible — Heated rear windows, foglights, heater blowers, etc,
consume a considerable amount of electrical power. The engine must work harder to provide this power by driving the alternator, and the fuel consumption is therefore increased.
@ Ensure that your car is serviced regularly — This will ensure that the car operates as efficiently as possible, reducing fuel consumption and pollution.
@ If your car engine is suitable, use unleaded petrol — This will reduce pollution. If in any doubt as to whether your car’s engine is suitable for use with unleaded petrol, seek advice from the car’s manufacturer, or from a recognised dealer.
FORD
Fla Sq
|
|
CAR CRIME PREVENTION
|
if
Crime against cars is a serious problem, and many owners suffer the consequences of theft or damage every year. The likelihood of your car _ becoming a target for criminals can be reduced by making it more difficult for your car to be broken into or stolen, and the following advice should | prove helpful. Some of the points may seem obvious, but the majority of cars are broken into or stolen in a very short space of time with little force or effort required. _ @ Always remove the ignition key -evenina garage or driveway at home. Always make sure that the steering column lock is engaged after removing the key. @ Always lock your car - even in a garage or driveway at home. Where fitted, ensure that ‘deadlocks’ are engaged before leaving the car and, where applicable, don’t forget to lock the fuel filler cover. Make sure that all the windows and the sunroof or folding roof, where applicable, are properly shut. If the car is in a garage, lock the garage. If your car is stolen or broken into while it’s unlocked, your insurance company may not pay for the full value of loss or damage. @ Never leave valuable items on display — Even if you're only leaving your car for a few minutes, move anything that might be attractive to a thief (even a coat or briefcase) out of sight, and preferably take it with you or lock it safely in the boot. Don’t leave valuable items (especially credit cards) in the glovebox. Don’t leave your vehicle documents in the car (registration document, MOT certificate, insurance
certificate, etc), as they could help a thief to sell it. ® Park in a visible and (preferably) busy area — This will deter thieves as they run a greater risk of being caught. If you're parking your car at night, try to leave it ina well-lit area. @ Put your radio aerial down (where applicable) when parking — Radio aerials can prove an attractive target for vandals. @ Protect any in-car entertainment equipment — The latest security-coded equipment won't work if someone tampers with it and disconnects it from the battery. Some equipment is specially designed so that you can remove the control panel or the entire unit, and take it with you when you leave the car. @ Fit lockable wheel nuts (or bolts, as applicable) — if your car is fitted with expensive alloy wheels. Alloy wheels are a favourite target for thieves. @ Have your car windows etched with the registration number — This will help to trace your car if it’s stolen and the thieves try to change its identity. Other glass
components such as sunroofs and headlamps can also be etched if desired. Many garages and specialists can provide this service, and it’s possible to buy DIY glass etching kits from motor accessory shops if you prefer to tackle the job yourself. @ Fit a vehicle immobiliser device — Many different types are available, but the most common types consist of a substantial metal bar which can be locked in place between the steering wheel and the pedals to prevent the car from being driven. @ Have an alarm fitted — Many different types are available, and some are expensive, but they will deter thieves. Some alarms have built-in immobiliser devices to prevent the car from being driven. If you have an alarm fitted, remember to switch it on even if you’re only leaving the car for a few minutes.
FORD
FIESTA
NOI SIN YYD
SERVICE SPECIFICATIONS
RORD?
+ESTA
SERVICE SPECIFICATIONS Recommended Component/system
lubricants and fluids Lubricant/fluid type and specification Multigrade engine oil, viscosity range SAE 10W/30
ENGINE (1)
COOLING SYSTEM ‘Mark 1’ models (2A) ‘Mark 2’ models (2B)
BRAKING SYSTEM (3)
61
Duckhams recommendation Duckhams QXR, QS,
to 20W/50, to API SG or better
Hypergrade Plus or Hypergrade
55% clean water and 45% antifreeze to Ford specification SSM-97B-9103-A
Duckhams Universal Antifreeze and Summer Coolant
Brake fluid to Ford specification
Duckhams Universal Brake and Clutch Fluid
SAM-6C 9103-A
MANUAL GEARBOX (4) _ Hypoid gear oil, viscosity SAE 80EP to Ford specification
Duckhams Hypoid 80
SQM-2C 9008-A
AUTOMATIC TRANSMISSION (5)
Automatic transmission fluid to Ford specification ESP-M2C
Duckhams Uni-Matic
166-H
H2373!
RORD?
FIRS
DA
SDIA SNOI
62
Bsiilew
seis
Vlei
Lubricant and fluid capacities [Litres (Pints)] Fuel tank capacity All models up to August 1984, except ‘Mark 2’ XR2
34
(7.5 gallons)
‘Mark 2' XR2 models, and all models from August 1984
40
(8.8 gallons)
Engine oil Quantity of oil required to bring level on dipstick
1.00
(1575)
from ‘MIN’ to‘MAX’ mark
Engine oil capacity (for oil and filter change) OHV type engines
3.25
(5.7)
CVH type engines
3.50
(6.2)
950 cc and 1.1 litre engines
5.25
(9.2)
1.3 litre and 1.6 litre engines
6.25
(11.0)
Coolant capacity (for coolant change) ‘Mark 1’ models:
‘Mark 2’ models: 950 cc and 1.1 litre engines
5.50
(9.7)
ihe and 1.4 litre engines
6.30
Gea)
1.6 litre engine
8.00
(14.1)
Tyre pressures - cold [bars (bf/in’)]
Note: The following is intended as a guide only. Manufa cturers frequently change tyre pressure recommendations, and it is suggested that a Ford dealer is consulted for latest recommendations. Up to 3 occupants: Front Rear 135 SR 12 tyres 1.9 (28) 1.9 (28) 145 SR 12 and 155 SR 12 tyres 1.6 (23) 1.8 (26) 135 SR 13 and 135 R 13-S tyres 1.8 (26) 1.8 (26) 155/70 SR 13, 165/65 SR 13, 155/70 R 13-S and 1.6 (23) 1.8 (26) 165/65 R 13-S tyres 185/60 SR 13, 185/60 HR 13 and 185/60 R 13-H tyres Fully laden:
135 SR 12 tyres 145 SR 12, 155 SR 12 and 155/70 SR 13 tyres 135 SR 13 and 135 R 13-S tyres 165/65 SR 13, 155/70 R 13-S and 165/65 R 13-S tyres 185/60 SR 13, 185/60 HR 13 and 185/60 R 13-H tyres
1.8 (26)
1.8 (26)
2.2 (32)
2.2 (32)
1.8 (26)
2.0 (29)
2.6 (38)
2.8 (41)
2.1 (30)
2.3 (33)
2.0 (29)
2.0 (29)
FORD!
FESTA
|
Wile
ae lsieVile)
‘Contact breaker points |Points gap [mm (in)] ‘Mark 1° models: |
Ford distributor
0.64
(0.025)
Bosch distributor
0.45
(0.018)
0.40 to 0.50
(0.016 to 0.020)
‘Mark 2’ models
Spark plugs Motorcraft
Champion
950 cc and 1.1 litre engine models
Type
.
AGRF 22
RS9YCC or RS9YC
1.3 litre OHV engine models with
AGR 12
RN7YCC or RN7YC
contact breaker points ignition
1.3 litre OHV engine models with electronic ignition
AGPR12C
RN7YCC or RN7YC
1.3 litre CVH engine models
AGPR22C
RC7YCC or RC7YC
1.4 litre engine models
AGPR 22C1_
RC7YCC or RC7YC
1.6 litre OHV engine models
AGPR12C
RC7YCC or RC7YC
1.6 litre CVH engine models
AGPR22C
= RC7YCC or RC7YC
Electrode gap [mm (in)] Motorcraft plugs: All ‘Mark 1’ models
0.60
(0.025)
All ‘Mark 2’ models except 1.4 litre engine models
0.75
(0.030)
1.4 litre engine models
1.00
(0.039)
0.80
(0.032)
RS9YC and RC7YC plugs
0.70
(0.028)
RN7YC plugs
0.60
(0.025)
Champion plugs: RS9YCC,
BORD
RN7YCC
IF LESTA
and RC7YCC
plugs
G3
REGULAR CHECKS
FORD
*F Ceo
|
REGULAR CHECKS
a PY
t
!
|Fo ensure that your car is reliable and safe to drive, there are one or two essential checks which are so simple that they’re often ignored. These checks only take a few minutes, and could save you a lot of inconvenience and expense. It’s a good idea to carry out these checks once a week, and certainly before you start off on a long journey. This Chapter explains how to carry out _the checks, and what to do if things aren't quite as they should be. | Whenever you’re carrying out checks or servicing jobs, safety must always _be the first consideration, and you should bear in mind the advice given in the ‘Safety first!’ notes on page 78 before proceeding.
CHECKS The following checks should be carried out regularly. The checks are explained in more detail in the following pages.
@ @ @ @ @ @ ® |@ | @
Check Check Check Check Check Check Check Check Check
the the the the the the the the for
oil level coolant level brake fluid level tyres washer fluid level battery electrolyte level (where applicable) wipers and washers lights and horn fluid leaks
ITEMS REQUIRED WHEN CARRYING OUT CHECKS | When carrying out the regular checks, it’s a good idea to have the following items
_ close-to-hand. You won't always need all the items, but it’s as well to have them _ available just in case.
| @ Small quantity of clean rag @ Tyre pressure gauge and foot pump @ Small _ screwdriver (for removing stones from tyres) @ Pin (for adjusting washer nozzles) | ® 1.0 litre pack of engine oil (of the correct type — refer to ‘Service specifications’ on page 61 @ Small quantity of coolant solution (made up from approximately onethird antifreeze and two-thirds clean water)
@ Small container of brake fluid (must
be an airtight container) @ Washer fluid additive @ Small quantity of distilled water ~ for models fitted with batteries which require topping-up | Note: For details of how to identify engine types, refer to ‘Servicing’ on page 83.
FEORD:
FIESTA
Na SMD dW
66
BiscUe ge ec
A Typical engine compartment - ‘Mark 1’ model A Brake fluid reservoir B Windscreen washer fluid reservoir C Cooling system expansion tank
D Cooling system filler/oressure cap
A Typical engine compartment ~
E Engine oil filler cap
CVH engine Mark 2 model
F Battery cell cap (remove for electrolyte check)
A Brake fluid reservoir
G Engine oil level dipstick
B C D E F
Battery (maintenance-free type shown) Engine oil filler cap Engine oil level dipstick Cooling system expansion tank and filler/pressure cap Windscreen washer fluid reservoir
Checking oil level To check the oil level, the car should be standing on level ground with the engine switched off. If the engine has just been run, wait for a few minutes to allow the level to settle before taking a reading. Open the bonnet, and look for the oil level dipstick, which is at the back of the engine on the right-hand side (when viewed from the driver's seat). Pull out the dipstick and wipe it clean (with a
clean non-fluffy cloth), then slowly push it back
A Typical engine compartment — OHV engine ‘Mark 2’ model A Brake fluid reservoir
B Battery (maintenance-free type shown)
C Engine oil filler cap D Automatic omath transmission nISSI fluid level dipstick E Engine oil level dipstick ;
F Cooling system expansion tank and filler/pressure cap G Windscreen washer fluid reservoir
into its tube and pull it out again. Note the oil level, which should never be allowed to drop below the ‘MIN’ mark. If the oil needs topping-up, pull the oil filler cap from the top of the engine, and top-up to the ‘MAX’ mark on the dipstick. Note that the amount of oil required to raise the level on the dipstick fr MIN’ : d i Z om the "MIN’ to the MAX’ mark approximately 1.0 litre (1.75 pints). Alway is s try tou ca a baPee
po
Cao Bele ee an ie OP UR ayer
FORD)
hE S aa
A Withdrawing the engine oil level dipstick — CVH engine model
On ‘Mark 1’ models, the cooling system pressure cap is fitted to the radiator, and when checking the coolant level, the cap should be removed so that the level in the radiator can be checked. The pressure cap should always be removed with the engine cold, but if it does prove necessary to check the level with the engine warm, take care to avoid scalding. Place a thick rag over the cap, and loosen the cap slowly in stages to gradually release the pressure in the system. The level should be within 30 mm (1.2 in) of the flange of the radiator filler neck. On ‘Mark 2’ models, the pressure cap is fitted to the expansion tank, and it is not possible to check the coolant level in the radiator. If topping-up is required, add coolant to the radiator and/or the expansion tank as necessary. On ‘Mark 1’ models, to remove the expansion tank cap, twist the cap anticlockwise, and pull it from the top of the tank. On ‘Mark 2’ models, remove the pressure cap from the expansion tank, bearing in mind the precautions described previously for removing the pressure cap on ‘Mark 1’ models. Topping-up should always be done with the engine cold, using a mixture of water and
antifreeze to the same strength as the mixture already in the system. Although plain water can be used, it’s unwise to make it a habit, as the strength of the antifreeze in the main system will gradually be diluted. If there’s any
Topping-up the engine oillevel - OHV engine model
might have been spilt, and make sure that the oil filler cap is correctly refitted. If the oil needs to be topped-up regularly, check for leaks, and if necessary seek advice.
Checking coolant level The coolant level can be checked visually by checking the level in the expansion tank when the engine is cold. When the engine is cold, the level should be up to the ‘MAX’ mark on the side of the tank. It is normal for the level to be above the ‘MAX’ mark when the engine is hot.
FORD
FIESTA
A Topping-up the coolant level in the radiator ‘Mark 1’ model
68
Bizarre the reservoir, but it will fall slightly as the brake’ friction material wears. The fluid level must never be allowed to drop below the ‘MIN’ mark. If topping-up is required, always use the correct type of fluid, which should always be stored in a full, airtight container. Don’t top-up using fluid which has been stored in a partlyfull container, as it will have absorbed moisture
from the air, which can reduce its performance.
i
Sh
: ea
A Topping-up the coolant level in the expansion tank ‘Mark 2' model
doubt about the strength of the coolant mixture, it’s better to add too much antifreeze than not enough. Normally, topping-up will rarely be required, and if the need for regular topping-up arises, it will probably be due to a leak somewhere in the system. Leaks are most likely to occur from the radiator or the various hoses. If no leaks can be found, it’s possible that there’s an internal fault in the engine, such as a crack in the cylinder head, or a blown cylinder head gasket, but in this case it’s best to seek specialist advice. It’s important to note that because of the different types of metals used in the engine, it’s vital to use antifreeze with suitable anti-corrosion additives all year round. Never use plain water to fill the whole system. On completion, make sure that the pressure cap is securely refitted. On ‘Mark 1’ models, make sure that expansion tank Cap is securely fitted, and that the end of the overflow tube runs to the bottom of the tank.
Checking brake fluid level Note: Refer to ‘Safety first’ on page 78 for special precautions which should be taken when handling brake fluid. Although some models are fitted with a low brake fluid level warning light, the fluid level should be checked visually whenever the oil and coolant levels are checked. The level should be up to the ‘MAX’ mark on the side of
A Topping-up the brake fluidlevel
Topping-up should hardly ever be required unless there’s a leak somewhere in the hydraulic system. If a leak is suspected, the car should not be driven until the braking system has been thoroughly checked. Never take any risks where brakes are concerned.
Checking tyres It's extremely important to carry out regular checks on the tyres, to make sure that the pressures are correct, and that the tyres are not damaged. The tyres are the only part of the car in contact with the road, and so their condition will affect the steering and general handling of the car, and therefore its Safety. To check tyre pressures accurately, the tyres must be cold, which means that the car must ~ not have been driven recently. Note that it can make a noticeable difference to the tyre pressures if the car has been standing out in the sun. This can be very noticeable when one side of the car is in the sun, and the other side is in shadow.
FORD
FKEGTA
|
Hace weie Cae 69
Note that the recommended tyre pressures vary depending on the size of tyres fitted — | refer to ‘Service specifications’ on page 62. The size of the tyre (eg 155 SR 13) is clearly marked
_ _
_ _ |
on the tyre sidewall, although the style of the tyre size marking may vary depending on the tyre manufacturer — consult a Ford dealer or a tyre specialist for further details of tyre size markings and the latest pressure recommendations. If the tyres are being checked after the car has been driven, for example when filling up with petrol during a journey, the pressures are bound to be higher than specified. It’s best to simply check that the pressures in the two front tyres are equal, and similarly for the two back tyres (remember that the specified pressure for the rear tyres may be different to the front). Never let air out of the tyres of a
car which has recently been driven to bring the pressures down to that specified (unless the
Shoulder wear
Centre wear
tyre pressures have been increased for a fully-loaded car, and the load has just been reduced).
When checking the tyre pressures, don’t forget to check the spare! With the tyres properly inflated, run your fingers around the edge of the tyre to check for any cuts and bulges in the tyre walls. Ideally, the car should be jacked up to visually check the tyres all round. Alternatively, the car can be moved backwards and forwards to enable you to check all round the tread. Check all round the tread for cuts, and remove any debris, such as small stones and broken glass, using a screwdriver or similar tool. Any large items such as nails which have penetrated the
surface of the tyre should be left in the tread (to identify the location of the damage) until the tyre has been repaired. Refer to ‘Breakdowns’ on page 38 for details of how to fit the spare wheel.
Uneven wear
Toe wear Feathered edge
NE NENT te ZANAN * YG
ber | Th”
Probable cause: Underinflation (wear on both
sides) Action: Check and adjust pressure
|
Probable cause: Hard cornering Action: Reduce speed
A Tyre wear patterns and causes |
Probable cause: Incorrect camber or castor Action: Repair or renew suspension parts Probable cause:
Probable cause: Incorrect wheel camber (wear on one side) Action: Repair or renew suspension parts
ESRD
Probable cause: Overinflation Action: Measure and adjust pressure
FIESTA
Malfunctioning suspension Action: Repair or renew suspension parts Probable cause Unbalanced wheel Action: Balance tyres
Probable cause: Out-of-round brake disc/drum Action: Machine or renew dis/drum
A
Probable cause: Incorrect toe setting
Action: Adjust front wheel alignment
10
Miscue gee Also check the tyre treads for wear. Uneven wear across one particular tyre may be due to a fault with the suspension or steering. By law, the tread depth must be at least 1.6 mm (0.06 in) throughout a continuous band comprising the central three-quarters of the width of the tyre tread around the full circumference of the tyre. If you find that any of the tyres is excessively worn or damaged, obtain a new tyre as soon as possible. It’s a good idea to try and stick to one type of tyre if possible, rather than mixing several different makes on the car. Generally, you'll find that it’s much cheaper to buy tyres from a tyre specialist, rather than an ordinary garage. Make sure that when you buy a new tyre you have the wheel balanced, otherwise you might find that the new tyre causes vibration when driving.
Checking washer fluid level On ‘Mark 1’ models, the windscreen washer fluid reservoir is located on the front left-hand side of the engine compartment (when viewed from the driver's seat), in front of the suspension strut top mounting. On ‘Mark 2’ models, the windscreen washer fluid reservoir is located towards the front right-hand side of the engine compartment
(when viewed from the driver's seat).
Where applicable, the tailgate washer fluid reservoir is located in the boot, under the lefthand boot floor cover panel. Where applicable, lift up the floor mat, then remove the left-hand cover panel from the floor of the boot to expose the reservoir. On later models, the cover panel may be secured with a clip. The
clio must be lifted and turned, so that it can pass through the slot in the cover panel, before the cover panel can be lifted. Lift the cover panel over the clip, and pull it (towards the back of the car) from the retaining tabs. If topping-up is necessary, pull the cap from the reservoir, and top-up as necessary with clean water. A suitable washer fluid additive will keep the glass free from smears, and will prevent the fluid freezing in winter.
Checking battery electrolyte level From approximately 1982, Ford cars have been fitted with a maintenance-free battery during production. The maintenance-free battery is ‘sealed for life’, and does not require toppingup with distilled water. A maintenance-free battery is usually clearly marked, and there will be no removable covers to enable topping-up. On early models with a standard or low maintenance type battery (or on later models where the battery has been replaced by one of this type from another source), the electrolyte level should be checked as follows. The battery is located at the front right-hand side of the engine compartment (when viewed from the driver's seat) on ‘Mark 1’ models, and at the front left-hand side of the engine
compartment on ‘Mark 2’ models. Remove the caps or the cover from the top of the battery, and check the level of the electrolyte fluid (with some types of battery you can see the fluid level through the battery case). The level should be just above the tops of the metal plates inside the battery, or in some cases up to a mark on the battery case.
A Removing a cap from the top of a battery to check the electrolyte level
KOR DI Fite ian
REGULAR CHECKS
If necessary, add distilled water (not ordinary tap water) to each cell, to bring the level just above the tops of the battery plates, or up to the marks, as applicable. With some types of | battery, distilled water is added to a trough in | the top of the battery until all the filling slots are full, and the bottom of the trough is just
On models where the rubber is secured by
inserts, slide the inserts from either side of the blade and remove the rubber. Note that when refitting the inserts, the cut-outs must face inwards towards the rubber. Fit the new rubber and/or the blade by reversing the removal operations.
covered. On completion, refit the caps or cover, and carefully wipe up any drops of water that were spilt. Topping-up should hardly ever be required, and the need for frequent topping-up indicates that the battery is being overcharged due to a _ fault in the charging circuit — seek advice from someone suitably qualified if this is the case.
Checking wipers and washers Check all the wipers and washers to make | sure that they're working properly. Don’t _ allow the wipers to work on dry glass for too long, as it will strain the motor and wear out the wiper blades. If necessary, the washer nozzles can be adjusted using a pin inserted ' into the end of the nozzle. If you're adjusting the windscreen washer nozzles, remember to aim them fairly high on the windscreen, as the airflow will usually deflect the spray down ' when the car is moving. Over a period of time, the wiping action of the wiper blades will deteriorate, causing smearing of the glass. The rubber may also crack, particularly at the edges of the blades. When this happens, the blades must be | renewed. This is a straightforward job, and is accomplished as follows: Pull the wiper arm away from the glass, against the spring pressure, until the arm clicks | into position. Press the small retaining clip on | the blade, then slide the blade out of the
A Press the retaining clip (A) and slide the wiper blade from the hooked part of the arm (B)
A Wiper blade rubber retaining spring clip
| hooked part of the arm. The blade can be
renewed complete, or the rubber insert can be renewed as follows: The rubber is held in the arm either by a metal spring clip at one end, or by two metal
|| inserts which run the whole length of the blade. On models where the rubber is secured by a spring clip, slide back the rubber from the end of the blade, then squeeze the spring clip and pull it from the blade. The rubber can now be slid from the end of the blade.
location of cut-outs
FORD
FIESTA
71
72
MSU
wee
Checking lights and horn Switch on all the lights and check that they’re working. Don’t forget to check the direction indicators and the brake lights (the ignition must be switched on to check these), either
with the help of an assistant, or by looking for the reflection in a suitable window or door etc. Check that the direction indicators work with the brake lights on, and that the brake lights work with the tail lights on. Some faults may cause the various rear lights to interact, which can be dangerous, as it may confuse or distract following drivers. Check the operation of the horn. A short ‘blast’ should be enough to prove that it at least works, but from time to time check its operation over several seconds. If any of the bulbs need renewing, refer to ‘Bulb, fuse and relay renewal’ on page 107.
Any other problems are likely to be caused by a faulty switch, or loose or corroded connections (especially earth connections), and it’s best to seek advice to solve these.
Checking for fluid leaks Check the ground where the car is normally parked for any stains or spots of fluid which may have been caused by fluid leaking from the car. Open the bonnet, and make a quick check of all the hoses and pipes, and the surfaces of all the components in the engine compartment. If there’s any sign of leaking fluid, try to find the source of the leak and seek advice if necessary. It can be difficult to identify leaking fluids, but if there’s obviously a major leak, or if you suspect even a slight brake fluid or petrol leak, don’t drive the car until the problem has been investigated by someone suitably qualified.
FORD
FIESTA
SERVICING Regular servicing will ensure that your car is reliable and safe to drive, and could save you a lot of money in the long run. Many of the unexpected expenses which can crop up if things go wrong with your car can be avoided by carrying out regular servicing. A significant proportion of the average garage servicing bill (well over 50% in many cases) is made up of labour costs, so obviously a lot of money can be _ saved by carrying out the work yourself. You'll find that most of the servicing jobs are very straightforward, and you don’t need to be a mechanical genius to ‘have a go’ yourself. Don’t be put off when you look under your bonnet; there are surprisingly few items which require frequent attention, and most of those which do are easily accessible without the need for anything more than basic tools. You'll discover that DIY servicing can be very rewarding, and will help you to understand what makes your car ‘tick’. The following chart lists all the servicing tasks recommended by the car manufacturer, and details of how to carry out the necessary work can be found in the subsequent pages. A few of the jobs require more extensive knowledge, or the use of special tools, and detailed explanation is beyond the scope of this Handbook. These more complicated tasks are identified on the chart, and details can be found in our Owners Workshop Manual for your particular model. Even if you decide to have the work done by a garage, the chart will enable you to check that the necessary work has been carried out. Whenever you’re carrying out servicing, safety must always be the first consideration, and you should read through the ‘Safety first!’ notes on page 78 before proceeding any further.
RORD
FUESTA
melid)
DNI
74
SERVICE SCHEDULE
ENGINE COMPARTMENT Check all components for fluid leaks, corrosion or deterioration
ENGINE Check engine oil level Renew engine oil and filter On OHV engine models, clean crankcase emission control filter On CVH engine models, renew crankcase emission control filter On OHV engine models, check/adjust valve clearances COOLING SYSTEM Check coolant level FUEL AND EXHAUST SYSTEMS Renew air cleaner filter element
Check/adjust idle speed & mixture On later OHV engine models, check carburettor throttle damper
IGNITION SYSTEM Clean distributor cap, coil & HT leads Check spark plugs On models with contact breaker distributor, lubricate distributor and check/adjust points gap Renew spark plugs On models with contact breaker distributor, renew points On models with contact breaker distributor, check ignition timing
MANUAL GEARBOX Check gearbox oil level AUTOMATIC TRANSMISSION Check transmission fluid level BRAKING SYSTEM Check brake fluid level
Check operation of low fluid level warning system Check handbrake Check front brake pads Check rear brake shoes
Renew brake hydraulic fluid
ROR Di € HES DA
|
} |
|
Regular
Weekly
SERVICE
6000 miles (10 000 km) 6 months
12 000 miles (20 000 km) 1 year
SCHEDULE
24 000 miles (40 000 km) 2 years
|
Pallei
36 000 miles (60 000 km) 3 years
22 Of 8
C] C)
ae
L]|L|
Lash
|e 2 ||
a ee
|e a | O/L|\
Items marked (] are considered to be beyond the scope of this Handbook, and details can be found in the Owners Workshop Manual for your car (OWM 334 for Fiesta ‘Mark 1’ models, or OWM 1030 for Fiesta ‘Mark 2’ models).
FORD
FIESTA
SIN | JIA
76
SERVICE SCHEDULE
SUSPENSION AND STEERING Check tyres for condition and pressure Check tightness of roadwheel bolts Check steering components Check front wheel alignment INTERIOR AND Check seat belts
BODYWORK
Lubricate hinges & locks Inspect paintwork & bodywork ELECTRICAL SYSTEM Check washer fluid level
Check battery electrolyte level (where applicable) Check wipers and washers Check operation of all lights and electrical equipment Check battery lead connections Check alternator drivebelt
CAR UNDERSIDE Check all components for fluid leaks, corrosion or deterioration ROAD TEST Check instruments and electrical equipment Check steering, suspension and general handling Check engine, clutch (where applicable), gearbox and driveshafts Check braking system
Note: /n addition to the tasks listed in the table, carry out the following: Every 24 000 miles (40 000 km) or 1 year,
renew the automatic transmission fluid (where applicable) — refer to a Ford dealer.
Every 36 000 miles (60 000 km), on CVH engines, renew the timing belt — refer to Owners Workshop Manual. Every 36 000 miles (60 000 km) or 2 years,
renew the coolant — refer to ‘Service tasks’ on page 98.
FORD
FESTA
SERVICE SCHEDULE Regular
6000 miles
12 000 miles
24 000 miles
36 000 miles
(10 000 km)
(20 000 km)
(40 000 km)
(60 000 km)
Weekly
6 months
1 year
2 years
3 years
Gi
ie i
& & ns
a i il
me vs) is
a | a
i w ae
a B Foal
is & =
@ By a a
a gz | &
a
| g & 8 &
| & @ x &
a
ai
a
8 i | |
|
I
77
Items marked are considered to be beyond the scope of this Handbook, and details can be found in the Owners Workshop Manual for your car (OWM 334 for Fiesta ‘Mark 1’ models, or OWM 1030 for Fiesta ‘Mark 2’ models).
JIA JIN C POR D) PLES: LA
718 ALWAYS wait until the engine has cooled down before draining the engine (and/or transmission) oil, or the coolant. Oil or coolant
that is very hot may scald you. If you can touch the engine sump/transmission/radiator (as applicable) without discomfort, the engine has
SAFETY FIRST! Professional motor mechanics are trained in safe working procedures. No matter how enthusiastic you may be about getting on with the job you have planned, take time to read this Section. Don’t risk an injury by failing to follow the simple safety rules explained here. The following is a guide to encourage you to be ‘safety conscious’ as you work on your car.
Essential points ALWAYS use a safe system of supporting your car when working underneath it. The car’s own jack (or a single hydraulic jack) is never sufficient. Once you've raised the car you should use a safe means of holding it up. Axle stands, ramps or substantial wooden blocks are good; concrete blocks and bricks may crack or disintegrate and should not be used. Make sure that you locate the supports where you know the car won't collapse and where they can't slip. ALWAYS loosen wheel nuts and other ‘high torque’ nuts or bolts (as applicable for the task to be carried out) before jacking up your car, or it may slip and fall. ALWAYS make sure that your car is in Neutral or in Park (in the case of automatic transmission), and that the handbrake is securely on before trying to start the engine. UNLESS the engine is cold, ALWAYS cover the cooling system’s pressure cap (radiator or expansion tank cap) with several thicknesses of cloth before trying to remove it. Release the pressure slowly or the coolant may escape suddenly and scald you.
probably cooled sufficiently to avoid scalding. ALWAYS allow the engine to cool before working on it. Many parts of the engine become very hot in normal operation and you may burn yourself badly. ALWAYS keep brake fluid, antifreeze and other similar liquids away from your car’s paintwork as it may damage the finish (or may remove the paint altogether). ALWAYS keep toxic fluids, such as fuel, brake and transmission fluids and antifreeze off your skin, and never syphon them by mouth. ALWAYS wear a mask when doing any dusty work, or where spraying is involved, especially when doing body repair and brake jobs. ALWAYS clean up oil and grease spills — someone may slip and be injured. ALWAYS use the right tool for the job. Spanners and screwdrivers which don't fit properly are likely to slip and cause injury. ALWAYS get help to lift and handle heavy parts — it’s never worth risking an injury. ALWAYS take time over the jobs you take on. Plan out what you must do, and make sure that you have the right tools and spare parts. Follow the recommended steps, and check over the job once you're finished. Leave ‘shortcuts’ to the experts. ALWAYS wear eye protection when using power tools such as drills, sanders and grinders, when using a hammer, and when working beneath your car. ALWAYS use a barrier cream on your hands when doing dirty jobs, especially when in contact with fuel, oils, greases, and brake and transmission fluids. It will help protect your skin against infection and will make the dirt easier to remove later. Make sure that your hands aren't slippery. The use of a suitable specialist hand cleaner will make dirt and grease easier to remove without Causing infection or damage to skin. Long term or regular contact with used oils and fuel can be a health hazard. ALWAYS keep loose clothing and long hair out of the way of any moving parts.
FORD
FIES
RS
eee ALWAYS take off rings, watches, bracelets and neck chains before starting _ work on your car, especially when working on the electrical system. ALWAYS make sure that any jacking equipment or lifting tackle you use has a safe working load which will cope with what you intend to do, and use the equipment exactly as recommended by the manufacturers. ALWAYS keep your work area tidy; someone may trip or slip on articles left lying around and be injured. ALWAYS get someone to check up on you from time to time if you’re working on the car alone, to make sure that you’re alright. ALWAYS do the work in a logical order, check that you've put things back together properly, and that everything is tightened as it should be. ALWAYS keep children and animals away _ from an unattended car, and from the area
~ where you’re working. ALWAYS park cars with catalytic converters away from materials which may burn, such as
dry grass, oily rags, etc if the engine has recently been run. Catalytic converters reach axtremely high temperatures, and any such materials close by may catch fire. REMEMBER that your safety, and that of your car and other people rests with you. If you are in any doubt about anything, get specialist advice and help right away. IF in spite of these precautions you injure yourself — get medical help immediately.
Asbestos Some parts of your car, such as brake pads and linings, clutch linings and gaskets contain asbestos, and you should take appropriate precautions to avoid inhaling their dust (which is hazardous to health) when working with them. If in doubt, assume that they do contain asbestos.
Fire Remember at all times that petrol is highly flammable. Never smoke, or have any kind of naked flame around, when working on the car. But the risk doesn’t end there — a spark caused by an electrical short-circuit, by two metal surfaces contacting each other, by careless use
of tools, or even by static electricity built up in
FORD!
FrESTA
your body under certain conditions, can ignite petrol vapour, which in a confined space is highly explosive. If a fuel leak is suspected, try to find the cause and seek advice as soon as possible, and never risk fuel leaking onto a hot engine or exhaust. Catalytic converters (where fitted) run at extremely high temperatures, and therefore can be an additional fire hazard — observe the precautions outlined previously in this Section. It's recommended that a fire extinguisher of a type suitable for fuel and electrical fires is kept handy in the garage or workplace at all times. Never try to extinguish a fuel or electrical fire with water.
Fumes Certain fumes are highly toxic and can quickly cause unconsciousness and even death if inhaled to any extent, especially if inhalation takes place through a lighted cigarette or pipe. Petrol vapour comes into this category, as do the vapours from certain solvents such as trichloroethylene. Any draining or pouring of such fluids should be done in a well-ventilated area. When using cleaning fluids and solvents, read the instructions carefully. Never use materials from unmarked containers — they may give off poisonous vapours. Never run a car engine in an enclosed space such as a garage. Exhaust fumes contain carbon monoxide which is extremely poisonous; if you need to run the engine, always do so in the open air, or at least have the rear of the car outside the workplace. Although cars fitted with catalytic converters produce far less toxic exhaust gases, the above
precautions should still be observed. If you're fortunate enough to have the use of an inspection pit, never run the engine while the car is standing over it; the fumes, being heavier than air, will concentrate in the pit with possibly lethal results.
The battery Never short across the two poles of the battery! (A battery is shorted by connecting the two terminals directly to each other, and this can happen accidentally when working under the bonnet with metal tools.) The heavy
a0 Sin:
1
discharge caused will create ‘gassing’ of hydrogen from the battery and this is highly explosive. Shorting across a battery may also cause sparks, and the combination can cause the battery to explode with potentially lethal results. A conventional battery will normally be giving off a certain amount of hydrogen all the time, so for the same reasons given above, never cause a spark or allow a naked flame close to it. Batteries which are sealed for life require special precautions which are normally outlined on a label attached to the battery. Such precautions usually relate to battery charging and jump starting from another vehicle (for details of jump starting refer to ‘Breakdowns’ on page 42).
If possible, loosen the filler plugs or cover when charging the battery from an external source. Don’t charge at an excessive rate, or
the battery may burst. Special care should be taken with the use of high charge-rate boost chargers to prevent the battery from overheating. Take care when topping-up and when carrying the battery. The battery contains dilute sulphuric acid which is very corrosive. It will burn and may cause long-term damage if in contact with skin, eyes or clothes. Similarly, corrosive deposits around the battery terminals may be harmful. Always wear eye protection when cleaning the battery to prevent the corrosive deposits from entering your eyes.
Mains electricity and electrical equipment When using any electrical equipment which works from the mains, such as an electric drill or inspection light, always ensure that the appliance is correctly connected to its plug and that, where necessary, it’s properly earthed. Always use an RCD (Residual Current Device, a safety device incorporating a circuit breaker) when using mains electrical equipment. Don’t use such appliances in damp conditions, and take care not to create a spark or apply excessive heat close to fuel or fuel vapour. Also make sure that the appliances meet the relevant national safety standards.
Ignition HT voltage A severe electric shock can result from touching certain parts of the ignition system, such as the spark plug HT leads, when the engine is running or being cranked, particularly if Components are damp or the insulation is faulty. Where an electronic ignition system is fitted, the HT voltage is much higher than that used in a contact breaker system, and could prove fatal, especially to wearers of cardiac pacemakers.
Disposing of used engine oil Used engine oil is a hazard to health and the environment, and should be disposed of safely and cieanly. Most local authorities provide a disposal site which will have a special tank for waste oil. If in doubt, contact your local council for advice on where you can dispose of oil safely — there may be a local garage who will allow you to use their specialised oil disposal tank free of charge. Remember that it’s not just the oil which causes a problem, but empty containers, old oil filters, and oily rags, so these
should be taken to your local disposal site too. Do not under any circumstances pour engine oil down a drain, or bury it in the ground.
Jacking and vehicle support The jack provided with the car is designed for emergency wheel changing, and should not be used for servicing and overhaul work. Instead, a more substantial workshop jack (trolley jack or similar) should be used. Whichever type is used, it’s essential that additional safety support is provided by means of axle stands designed for this purpose. Never use makeshift means such as narrow wooden blocks or piles of house bricks, as these can easily topple or, in the case of bricks, disintegrate under the weight of the car. Further information on the correct positioning of the jack and axle stands is provided at the end of this Section.
If you don’t need to remove the wheels, the use of drive-on ramps is recommended. Ensure that the ramps are correctly aligned with the wheels, and that the car is not driven too far
along them so that it promptly falls off the other end or tips the ramps.
FORD)
FES
Ta
I JACK AND AXLE STAND POSITIONS When using a trolley jack or other type of workshop jack to raise the front of the car, the jack head should be placed under the front longitudinal engine/gearbox support member on all ‘Mark 1’ models and ‘Mark 2' XR2
Axle stands should only be located under the double-skinned sections of the side or chassis members as shown in the accompanying illustrations. Note that when using axle stands to support the rear of the car, the axle stands must be located forward of the suspension trailing arms, not under them.
models, or under the centre of the front body
crossmember on all ‘Mark 2’ models except for the XR2.
To raise the rear of the car, the head of the jack should be placed under the centre of the rear axle tube. Great care must be taken not to damage the handbrake cable or the suspension Panhard rod, and to avoid this a wooden support should be made up to act as an insulator between the head of the jack and the axle tube. The support should have a V-shaped cut-out to ensure that it locates securely on the axle tube, and suitable dimensions for a support block are given in the accompanying illustration. The sides of the car can be jacked up by positioning the jack head under the central side jacking points which are used with the car jack when wheel-changing.
A When axle stands are used at the rear of the car, they must be located forward of the trailing arms (A), not under them (B)
A Dimensions for rear axle tube support block
A Jacking and support points on car underside A, Band C Axle stand positions D Front jacking point for use with workshop jack (all models except ‘Mark 2’ XR2) E Front jacking point for use with workshop jack (‘Mark 2’ XR2 models) F Side jacking points for use with workshop jack G Rear jacking point for use with workshop jack Note: At points (C) it is important that the car is only supported on the double skinned area of the chassis member
FORD
FIESTA
A B C D E F
133 mm (5.25 in) 108 mm (4.25 in) 51mm (2.0 in) 13mm (0.5 in) 38mm (1.5 in) 127mm (5.0 in)
A Underbonnet component locations on a ‘Mark 2’ OHV engine model (air cleaner removed for clarity) Battery earth terminal Radiator cooling fan Engine oil filler cap Carburettor Number 1 spark plug HT lead Alternator Windscreen washer fluid reservoir AUNAWH AN Brake fluid
9
Ignition coil
10 11 12 13 14
Oil filter Vehicle Identification Number (VIN) plate Distributor cap and HT leads Thermostat housing Engine oil level dipstick
15
Cooling system pressure cap
reservoir
BUYING SPARE PARTS When buying spare parts such as an oil filter, or an air filter, make sure that the correct replacement parts are obtained for your particular car. Many changes are made during the production run of any car, and when ordering spare parts, it will usually be necessary to know the year the car was built, the model
type (eg ‘Popular’ or ‘XR2') and engine size, and in some cases the Vehicle Identification Number (VIN). The VIN is stamped on a metal plate attached to the right-hand side of the
engine compartment bulkhead (when viewed from the driver's seat), or on the front crossmember directly behind the right-hand headlight. The VIN usually also appears on the Vehicle Registration Document. All of the components required for servicing will be available from an official Ford dealer, but most parts should also be available from good motor accessory shops and motor factors.
POR Dt Pies
A Underbonnet component locations on a ‘Mark 2’ CVH engine model (air cleaner removed for clarity)
Cooling system pressure cap Engine oil level dipstick Carburettor Oil filter (below carburettor)
Ignition coil Brake fluid reservoir Battery earth terminal Windscreen washer fluid reservoir = ANANAAWH
SERVICE TASKS The following pages provide easy-to-follow instructions to enable you to carry out the regular service tasks recommended by the manufacturer.
9 10 11. 12
Camshaft drivebelt plastic cover Distributor cap and HT leads Number 1 spark plug HT lead Alternator
13 Engine oil filler cap 14
Vehicle Identification Number (VIN) plate
15 Radiator cooling fan shroud 16 Thermostat housing
Identifying OHV and CVH engines To identify a CVH (Compound Valve angle, Hemispherical combustion chambers) engine, look at the right-hand end of the engine (when viewed from the driver's seat). CVH engines
have a moulded plastic cover on the end of the engine which covers the camshaft drivebelt. If there’s no plastic cover, then the engine is an OHV (OverHead Valve) type.
EORD:
FIESTA
Ci Every 250 miles (400 km)
or weekly Refer to ‘Regular checks’ on page 65 and carry out all the checks described.
Every 6000 miles
\
(10 000 km) or 6 months whichever comes first ENGINE COMPARTMENT Check all hoses and pipes, and the surfaces of all components for signs of fluid leakage, corrosion or deterioration If there's any sign of leaking fluid, try to find the source of the leak and seek advice if necessary. It can be difficult to identify leaking fluids, but if there’s obviously a major leak, or if you suspect even a slight brake fluid or petrol leak, don’t drive the car until the problem has been investigated by someone suitably qualified. Check all rubber or fabric hoses for signs of cracking, damage due to rubbing on other components, and general deterioration. It’s sensible to have any suspect hoses renewed as a precaution against possible failure. Check for obvious signs of corrosion on metal pipes, hose clips, and component joints, which may indicate a fluid leak. Any badly corroded components should be cleaned and, if necessary, renewed. Pay
@ New oil drain plug sealing washer (depending on the condition of the old one) @ Suitable container to catch the old oil as it drains (make sure that the capacity of the container is larger than the oil capacity of the engine — refer to ‘Service specifications’ on page 62) ®@ Oil filter wrench — for removal of old oil filter @ Small quantity of clean rag @ Suitable spanner or socket to fit oil drain plug The oil should be drained when the engine is warm, immediately after a run. Ideally, the front of the car should be jacked up to improve access. If the front of the car is to be raised, apply the handbrake, then jack up the front of the car and support it securely on axle stands (refer to ‘Jacking and vehicle support’ in ‘Safety first!’ on page 80 for details of where to position the jack and axle stands). Position a suitable container under the engine sump to catch all the oil which will be drained. Remove the oil filler cap from the top of the engine, then working under the car, unscrew the drain plug from the rear of the engine sump using a suitable spanner or a socket. Oil will be released before the drain plug is removed completely, so take precautions against scalding, as the oil will be hot. Position the container to allow for the fact that the initial jet of oil may fall at least eight inches away from the drain hole, and try not to drop the drain plug when removing it.
particular attention to metal fluid pipes (such
as brake pipes), and have them renewed if they're badly pitted or corroded.
ENGINE
Renew the engine oil and filter Note: The following items will be required for this task: @ A suitable quantity of engine oil of the correct type — refer to ‘Service specifications’ on page 61 @ New oil filter (of the correct type for your particular car)
A Engine oil drain plug (CVH engine)
FORD
FES
FA
| |
Se
| _ _ | _ _
ee
ee
Allow the oil to drain for at least 15 minutes, moving the container slightly if necessary from its original position. Check the condition of the oil drain plug sealing washer, and renew it if necessary. When the oil has finished draining, clean the drain plug, washer, and the mating face of the sump, then refit the drain plug. Tighten the drain plug securely, but without using excessive force — remember that it could be you who has to undo it next time! Position a suitable container under the oil filter at the rear of the engine, and unscrew the filter, using a suitable oil filter wrench if necessary to loosen it. Ensure that the oil filter rubber sealing ring comes away with the old filter. Fitting a new oil filter (OHV engine viewed from underneath the car)