Haynes BLMC 1100 and 1300 1962 to 1974 Owners Handbook/Servicing Manual 0856963798, 9780856963797
Haynes BLMC 1100 and 1300 1962 to 1974 Owners Handbook Servicing Manual - Peter Ward - 1978.
114 77
English Pages 118 Year 1978
Recommend Papers


File loading please wait...
Citation preview
BLMC
1100: 1300
Digitized by the Internet Archive in 2023 with funding from Kahle/Austin Foundation
httos://archive.org/details/blmc11001300allm0000ward
“C. OBL 1978 15, FER. 1979 a>i g-
Ag et Mark Vv)
I DE. 1979
© 7?
: 4960 Wi UM,
whe
AUTHOR
45 war 1982
CLASS
WIned
629. 22 Aus|iso
fote-
—
TITLE
BLMCiO® as
460305352.
+ 1ROO \Rcaous dlbadte
LANCASHIRE
COUNTY
COUNCIL
This book should be returned on or before the shown above to the library from which it was
LIBRARY
HEADQUARTERS,
143 CORPORATION
118
STREET,
latest date borrowed
PRESTON,
ty MM 8484
@5Sb
PR1
8RH
x
|
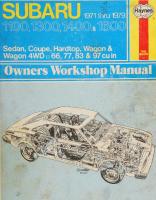
BLMC
T1100 21800 All models 1962 to 1974
Owners | Handbook/Servicing Guide by P Ward
460305 352
Acknowledgements Thanks are due to many the
author
this
and
and
people for assistance given to
publishers
numerous
during
the
publications.
preparation
Not
least
of
among
these are: Fred Warren, Graham
Thompson,
and
loaned
Ken
allowed
Blair, access
who
Mr and Mrs R Dunn,
original
to their cars; Castrol
handbooks
and
Ltd for advice on
lubrication; and Moff Motors of Castle Cary. Brian
Horsfall
maintenance
carried
out
operations
the
in our
various
service
workshops,
photographs were taken by Leon Martindale of the Master Photographers’
and
and the
(a member
Association). The layout
of the pages was planned by Lee Saunders.
A book in the Haynes Owner's Handbook/Servicing Guide Series Edited by Robin Wager
©
Haynes Publishing Group 1978
Published
Group,
ISBN
and
printed
Sparkford,
O 85696
379
by
Yeovil,
8
the
Haynes
Somerset
Publishing
BA22
7JJ
Contents What’s In It For You?
5
About this Handbook
The 1100 & 1300 Family Main Production
Road Test Data Performance
7
dates and changes
11
figures from Autocar
In the Driving Seat
12
Instruments, controls, layout
Filling Station Facts
19
Garage forecourt guide to tyre pressures etc.
QUiCK-CHECK
CHART
20
Fill-up data at-a-glance
In an Emergency Get-you-home
21
kit, wheel. changing, towing, light bulb renewal
Save It!
on
Cutting motoring costs - safely
Vital Statistics Technical
32
data on all models
Tools For The Job
46
Getting equipped - what to buy
Service Scene
49
What to do, when, and how
Body Beautiful
Ad
Cleaning and renovating the car
The Personal Touch
82
Adding accessories
Troubleshooting
94
Charts to help when things go wrong
Conversion Chart Factors
106
‘What's that in pounds per square inch ...?’
Index
108
SOW OOLL
uoojes
What's in it for You? Whether you've bought this book yourself or had it given to you,
the idea was probably the same in either
case - to help you get the best out of your BLMC or
1300
Vanden
Austin,
Morris,
Plas, saloon
MG,
Riley,
1100
Wolseley
or estate, GT or standard
or
model,
and
perhaps to make your motoring a bit less of a drain on your hard-earned cash at the same time.
Garage
labour
charges
hourly
rate
your
own
main
part of any
can
easily
of pay,
servicing
be several
and
usually
bill; we'll
times
form
help you
the
avoid
them by carrying out the routine services yourself. Even if you don’t want to do the regular servicing, and
prefer to leave it to your Leyland dealer, there are some things you should check regularly just to make sure that your car’s not a danger to you or to anyone
else on the road; we tell you what they are. If you're
(whether properly) described
can
about
to start doing your
to cut costs we
own
servicing
or to be sure that it’s done
think
you'll
find
give an easy-to-follow
the
procedures
to what of spending a few hours
be a very satisfying way
introduction
of your spare time. We've
some
included
money
when
some
tips
that
should
save
you
buying replacement parts and even
while you're driving; there’s a chapter on cleaning and renovating your car, and another on fitting accessories.
Apart needs
from
to know
the
things
every
a broken
headlamp,
shooter
Charts
to
cover
the
that
can
crop
up
problems
1100/1300
to deal with mishaps we've
owner
like a puncture or
put together some Trouble-
more with
likely even
of
the
the most
carefully maintained car sooner or later. There’s also a set of comprehensive alphabetical
conversion
index
to
tables and a help you find
your way round the book. ; If the bug gets you, and you’re keen to tackle some of
the
more
advanced
you'll
need
our
BLMC
1100/1300
repair jobs on
Owner’s
(No.
Workshop
260)
which
your
Manual
car, then
for
the
gives a step-by-
step guide to all the repair and overhaul tasks on these cars, with plenty of illustrations to make things even clearer.
5
S) & 8 S< : Se S
s
se)™ S
L)
The
Lo
1100 & 1300 Family
When they unveiled the Morris 1100 in August 1962, the British Motor Corporation (as they then were) offered the average motorist not only a reliable, comfortable everyday car but one with some advanced design features too. Besides being an enlarged version of the Mini, (which only a few years previously had astonished everyone by appearing with its engine mounted transversely under the stubby bonnet, instead of in line with the car as usual), the 1100 also sported the new Moulton Hydrolastic suspension, designed to maintain stability and comfort without
the use of normal springs. The Morris was gradually followed
by the MG, Austin, Vanden
shape of the range altered very little over under the bonnets.
Plas, Wolseley
its twelve years of production.
and Riley variants, and the basic
But there were changes inside the cars and
At the 1967 Motor Show the Mark I] models were introduced; these had a slight rounding-off of
the rear light clusters and a restyled interior, but more important changes were a modified all-synchromesh gearbox and the option of the 1300 engine. Towards the end of 1971 the Mark II! models appeared, differing mainly in further detailed styling changes. Full mechanica! details are given in Vita/ Statistics, but here in a nutshell is the life story of the range.
Morris
1100
August 1962 October
1964
October
1965
Model introduced. -
Coil spring clutch superseded by diaphragm spring
type. March
Automatic transmission available.
1966
October
Traveller introduced.
1967
Mk
Il model
introduced. Restyled rear lights, front
grille and interior.
October 1968
Modified all-synchromesh gearbox.
September
Model
Austin
1971
discontinued.
1100
September
1963 to October
1968
Model ran concurrently with Morris
1100, and had
similar modifications.
October
1971
Mk Ill model introduced. Restyled front grille and interior.
1974
MG
Model
discontinued.
1100 October
1962 to October
1968
Model ran concurrently with Morris 1100, and had similar modifications. All models had twin SU
carburettors.
A 1275 cc engine was available from
June 1967. September
1971
Model discontinued.
Wolseley
1300 Saloon
: NS PACER
NEN
Austin
1300 GT
g
THE 1100/1300 FAMILY
Riley Kestrel 1100 September
1965 to January
1968
Model ran concurrently with MG
1100, and had
similar modifications.
Wolseley 1100 September
1965 to January
1968
Model ran concurrently with MG
1100, and had
similar modifications.
Vanden
Plas 1100
October
1963 to October
1968
Model
ran concurrently with Morris 1100, but more
luxuriously appointed and with twin-carburettor.
1275 cc engine available from June 1967.
Morris
1300
October
1967
Model introduced; generally similar to 1100 models.
October
1969
GT model added to range, with twin SU carburettors,
servo assisted front brakes and lowered suspension; re-styled interior with tachometer; individual paint
September
1971
scheme and external finish. Mk Ill traveller introduced with re-styled front grille and interior. Other models discontinued. Model discontinued.
1974
Austin 1300 October
1967 to August 1971
September
1971
Model
ran concurrently with Morris
1300, and had
similar specifications. Mk III model introduced. Re-styled front grille and interior.
Model discontinued.
1974
MG 1300 June
Model
1967
October
1967
October
1968
introduced.
Mk Il model introduced. Re-styled rear lights. Automatic transmission available. Mk II introduced. More powerful engine with twin SU carburettors; new close-ratio gearbox.
September
1971
Model discontinued.
Riley Kestrel 1300 June
1967 to July 1969
Model
ran concurrently with MG
similar modifications.
1300, and had
THE
1100/1300
FAMILY
The engine/transmission unit is installed transversely
Wolseley 1300 June
1967 to September
1971
Model
ran concurrently
with MG
1300, and had
similar modifications.
1974
Model
discontinued.
June 1967
Model
introduced; generally similar to
October 1967
Modified all-synchromesh gearbox.
1974
Model discontinued.
Vanden
10
Plas 1300 1100 models.
e
ydw 9g -Q
ydui 09 - OF ajlu % 1123s BuIpUueIS ydwi Q/ - 0 ydw 9 - 0
:(SpuOdas) UO!}B419|3909\7
;
“UOISs!Wad 4184) YIIM aiay paonposdas aie Aakp] “Pa}iwi] ssaig Jsodsues| Od| WeI0INY 40 IYBI4Adoo ase sainbi} asay|
Lvl
891 G27 € St 672
| Qi
LSL SL 9°82 v'8l
L0¢ Sie SV lefel
yd Oy - 0 ydw OE - 0
08
v'6 6'S
isEN Gch
g'8 v's
(sajjtu) yUeI Jang |jN} UO ebuey
“(aunbiy
(udu) pasds WnNWIxel\
(Bdw) uolyduinsuod
(Bdw) ydw gg }Ue}lsuod Je UO!IdWINsUOd |jan4 jan} |je48AO
ydwi Q/ ydui Og
coon 0'0¢ 0 A6 SSL EeOl Cae vv
Be v'0S
LS
Ole O'er
ees
8VC
GAS
08
OLE
JajjaAery OOLL S144 0A]
;
1S} ||218A0 pajonb au} 0} Suajas dw) apinf e sapiaoid yyhi ayy uO eynWO} ayy ‘sainbiy uoldwinsuod 1a}1aq AjjUed!yiUBIs aAalyoe ||IM s4aUMO AUeW ‘bul}sa} adUeWOJIad Bulpnjoul ‘poluad jsa} 41941 104 d4nBiy UOIWdLUNSUOD |je418N0 ay} s! auNbiy Bdw ayy :uolydwinsuod jan4
| IA OOLL SIN
G38
CEC
gee
OOEL ulisnyy
L'67%
9L¢
%OC+
BulAlig
afAqs
puey
abeuane
3j}Uuab
9EC LSE C 8V 86S 9 6¢ 88 LS
v Sv 00S 0 27¢
OOEL ja43s9y
%OE+ %OL+
Aaldy
%O0C+ Bdw
O1IDAVS
WOYS GVOU 1S3i VLVG NANVL
%OL+
abejsane Asea suolzpuod BuIALIG
‘sjsa] peos aulzebew se20jNVy WOs} $}De4Xs ale aiay Paysijqnd seinbiy ay]
JENIN
6 —%0 Bdw %O0 1 1+
11
In the Driving Seat Having found
out a few details of production
history, let’s have a look at some
of the more
important
things
you'll need to know from the driving seat. Fortunately, the layout of the 1100 and 1300 models is pretty straightforward for the experienced motorist, but a little information on one or two things may be useful if you're not familiar with the car.
Instruments and Controls The
accompanying
instrument
panel
layouts
during the production explanatory,
the engine
illustrations used
run.
show
on the various
In general,
they
but the following points may
is idling, but
typical
speed
models
probably got a problem pretty urgent attention.
are self-
above
idling.
should go out at any
If this doesn’t
on
your
engine
happen,
you've
hands which
needs
be useful if
you've recently acquired a model or are borrowing one
Oil pressure warning light This light should
temporarily.
only be on when
the ignition is
switched on, and should go out as soon as the engine is
Ignition warning light This
driver though
serves
the
dual
that the ignition the engine
may
running. purpose
of
reminding
circuit is switched not
acting as a no-charge indicator.
be
running),
on
the
(even
as well
as
It should light up when
the ignition is switched on, and may also be on when
Austin Ignition warning light Oil pressure warning light Water temperature gauge Speedometer
Fuel gauge
If it doesn’t go out within a second
or so of
Start-up, it suggests a considerable degree of wear exists somewhere in the engine mechanism, or (less
likely)
that
faults
can
problems
some be
of the oilways
lived
with
for
a
are blocked. while,
in the not too distant future!
but
These expect
If the warning
1100 Mk | dash panel!
Main-beam warning light Windscreen washer control Light switch
Ignition/starter switch Choke control
Mileage indicator Lubrication warning light Windscreen wiper switch Panel light switch
Morris
1100 Mk | dash panel
15
Choke control
!gnition/starter switch Light switch
Panel light switch Windshield washer control! Windshield wiper switch Fuel gauge ONADAWN Direction indicator warning
9 10 11 12 13 14
light Lubrication warning light Speedometer Main-beam warning light
©® &
OmOnO
Mileage indicator Ignition warning light Direction indicator warning
light 15 Water temperature gauge
Princess 1100 dash panel
Main-beam warning light Lubrication warning light Direction indicator warning light Water temperature gauge Speedometer Fuel gauge Ammeter Oil pressure gauge Trip reset control
710 Total mileage indicator 171 Trip mileage indicator 12 Windshield wiper /washer
Gn g (radeas eevee 13. 14
switch
13 Choke control
14 Ignition/starter switch 15 Panel light switch 16 Ignition warning light 17 Heated rear window switch 18 Lighting switch 19 Fog light switch 20 Fog light switch 21 Clock
2
Morris 1300 Mk II! Traveller dash panel Speedometer Main beam warning light Temperature gauge Direction indicator warning light Light switch Wiper switch Facia vent Windscreen washer switch Heated rear window warning light 10 Heated rear window switch 11 Brake pressure warning
12 13 14 15 16
light Hazard warning light Hazard warning switch Fuel gauge Oil pressure warning light Ignition warning light
Ie S241
10-9
13
MG
1300 Mk I! dash layout
Speedometer
(17 early cars) Ignition warning light 13.
Heated rear window switch
Direction indicator warning lights Oj! pressure gauge Temperature gauge
Main beam warning light Light switch Mileage recorder
Choke control Ignition/starter switch Panel light switch
Tachometer
(rev counter)
(7 early cars) Heated back-light warning light
714 15 16
Fuel gauge
17
Wiper switch
18
Windscreen
washer contro/
Bonnet release catch and stay on late Morris 1300
1
Lock release
3
Stay
2
Safety catch
4
Clip
1
Safety catch
5
Bonnet release catch and stay on MG
2
Stay release
Support bracket
1300
The bonnet release lever B is shown inset.
IN THE DRIVING light comes engine more
SEAT
on while you're travelling, switch off the
immediately,
it could
be
a duff
switch,
but
likely you're out of oil and that’s serious. If you
can’t find the cause, get expert assistance - but don’t drive the car.
Oi! filter warning light Many
models
is linked
housing.
up
have an oil filter warning light which
to
a pressure
switch
on
the
oil
filter
Its job is to tell you that the oil flow through
the filter is restricted,
are renewed at the normally operate.
but provided
correct
the filter and oil
intervals
it should.
not
Switches Most
rocker
switches
type
lever
type
models the
are
toggle
switch
on
the
this did nothing
direction
steering
more
indicators,
in
indicators, main
(earlier
later but
cars. also
column.
technical
cars)
or
mysterious On
early
Typical lock mechanisms Left Right
-
than operate
but the marvels
engineering have produced - found
type
(later cars), but there is one
(Vanden Plas 1100 shown)
Childproof rear lock setting catch (arrowed) Locking action U Unlock Ee LOCK
of modern
the ‘multi-function’ switch
This
not
only
to
work
manages
and dipped beams, the headlight
operates the
the
headlight
flasher and the
horn.
Steering column lock The
steering
models
column
is incorporated
Three
lock
introduced
on
later
in the ignition/starter switch.
basic types were fitted, and they all do the same
job, the only difference being the method of locking. With the early type, just turn the key to ‘Garage’. Where there’s a push button, press it in then turn the key to ‘O’ and withdraw it; alternatively, press the key
inwards
then
turn
to
‘O’
and
withdraw
it. When
Rear seat fold-down catches on Traveller/Countryman
1
Backrest, 2 Cushion (pulled forward), 3 Cushion support (lowered), 4 Locating pins
Typical seat adjusters Left:
1 2
Seat release lever Seat adjustment on frame.
On some models this is on the floor
Right: Backrest adjuster on some models
15
IN THE DRIVING
SEAT
Typical heating contro! pane! 1
Air distribution lever,
2 Temperature control,
3 Blower switch
On some models ‘eyeball’ air outlets or swivelling vents are positioned at each end of the dash panel. releasing the lock, turn the steering wheel a little from - this relieves the strain on the key and lock plunger. One other point worth mentioning is
side-to-side that
‘Halt’
vehicle’s
and
to
be
‘I’ should
always
be
towed,
prevent
the steering
to
selected
if the from
locking. If you should ever have the misfortune to lose your steering you'll
lock find
For security barrels,
key,
or any
yourself
with
reasons
so
unless
never
be able
know
the numbers
replacements
door
key
a problem
for that on
your
there are no numbers
you
to buy
know
the
key
hands.
on the lock
number
a replacement.
matter,
Even
you'll
if you
do
they may not be ‘over the counter’
so, to reduce
problems
to a minimum,
the very least you can do is to record the key numbers Multi-purpose steering column switch 71
Left-hand indicator.
2
Right-hand indicators
3
Main beam
4 5
Headlight flash Horn
somewhere.
Automatic transmission An
was
Automotive
available
Products
from
favour with many
October
automatic
1965,
transmission
and
has
found
drivers. Its only slight drawback
is a
rather sluggish behaviour when cold, but otherwise it’s not known
to be a problem item.
The
transmission
converter
incorporates
a
fluid
torque
(an automatic clutch linking the drive from
engine to gearbox)
and a hydraulically-operated, four-
speed
gearbox.
and
reverse
The gears as with a normal a clutch), or will
can
either be gearbox (but change auto-
selected without
manually operating
matically
with engine speed and load, according to the
selector lever position.
The selector positions are:
R - reverse, N - neutral,
1 - 1st gear, 2 - 2nd gear, 3 - 3rd gear, 4 - 4th gear (not Early type steering lock
16
Garage Halt Start
-
Fahrt
:
Steering locked Ignition off, steering unlocked Engine starting position Ignition on
applicable to all models) and D - normal automatic driving. A reverse stop in the selector quadrant prevents reverse gear being selected when travelling
forward. An interlock switch is fitted which ensures that the engine can only be started with ‘N’ selected.
IN THE DRIVING SEAT
Driving controls - typical Clutch pedal Brake pedal Accelerator pedal Gearshift lever Handbrake lever Steering column switch AaAwWY™ Throttle pedal positions with automatic transmission
1 3
Low speed up-changes, 2 High speed up-changes, Kickdown position
Normal driving
is selected
For all normal day-to-day driving, ‘D’ can be used. When selecting, the engine should be idling with the handbrake on; apply the footbrake, select D, release the footbrake then press the accelerator pedal to travel forward. If the engine is cold, or running at a higherthan-idling speed, there may be a slight jerk when engaging ‘D’; also, if the engine is cold, there may be a slight delay in engagement. The road speeds at which the gears change depend to some extent on your right foot. When accelerating normally, light pedal pressure will give gear changes at relatively low road speeds, whereas heavy pedal pressure will give gear changes at much higher road
provided that you're not travelling at too high a speed, the transmission will automatically downshift to give improved acceleration.
speeds. As with normal transmissions, the heavy right foot is associated with poorer fuel economy although you get the improved performance. For
increased
performance,
overtaking, a ‘kickdown’
for
example
when
facility is incorporated. This
by
flooring
the
accelerator
pedal
and,
Manual gear selection Selection of gears when starting is made in the same way as when using the ‘D’ range, 2, 3 and 4 being used in succession as the car speed increases.
Precautions It's not possible to overspeed the automatic transmission when in the ‘D’ range, but, if a little care isn’t taken when selecting manually, overspeeding can occur which may cause damage to the engine or transmission, or may cause a dangerous deceleration. Broadly speaking, in the 1300 never change down
from 4 to 3 at speeds above 60 mph 1100’s) or from 3 to 2 above 45 mph 1100's).
(50 mph for (40 mph for
17
IN THE
DRIVING
SEAT
Contro/ techniques
Being
Creep:
This will occur
engine
is idling, once
be useful when
when
a gear is engaged and the
the brakes
responsive
will warm
up and be
if the car is driven in ‘Manual
few hundred yards before ‘D’ is se! ted. Steep gradients: When going downhill,
2’ for a
is fully operational,
is released and ‘N’ is selected.
Don’t allow
than 20 mph
or for any
greater distance than is absolutely necessary.
more
engine
Emergency model,
there
the
on this gear and there will be no
engine braking at all. For hill climbing, the transmission will change down automatically; there is no
need to select 1. Towing: Use only the ‘D’ range to prevent the torque converter from being overloaded.
18
handbrake
the car to be towed at more
braking can be obtained if 2 is selected. Don’t use 1, as
is a freewheel
\|f the transmission
the ignition is off (but the steering not locked!), the
manoeuvring in confined spaces.
Winter starting: The transmission more
are released, and can
towed:
check that the engine oil level is up to the ‘Full’ mark on the dipstick (see Weekly Servicing). Make sure that
starting:
so don’t
only
parallel your own
solution
using
You can't tow-start an automatic
bother
to try!
is to
jumper
connect
cables,
battery.
Maintenance: Refer to Weekly Servicing.
or
If your up
to
battery’s flat,
another
charge
one
in
or renew
Filling Station Facts Forgetting about the actual servicing and mechanical things which
are so simple they're
maintenance of your car for the time being, there are some
likely to get overlooked;
but they’re not only an important part of the mainten-
ance of your car - they’ré vital for its safety and reliability too. Three of these items - tyres, oil and water - you can check if necessary whenever you visit a petrol station. We've set out overleaf the absolute minimum of information you need to know right from the very first day you drive an 1100 or 1300. Remember that tyre pressures can only be checked accurately when the tyres are cold. Any tyre that’s travelled more
than a mile or so will show a pressure increase of several pounds per square inch (psi) - maybe more than 5 psi
after a longer run. So a certain amount of ‘guestimation’ comes into checking tyres if they’re warm. Since
the pressures
won't
increase
for any
reason
other
than heat, the least you can do is to ensure
that the
pressures in the two front tyres are equal, bearing in mind that they may be a bit above those shown in the table. (The same applies to the two back tyres, but remember that their pressure should be different from the front). If one tyre of a pair has a low pressure when hot, bring it up to the pressure of the other at the same end of the car; if they’re both below the recommended cold pressure although warm, the safest thing to do is to bring them up to about 3 psi above it, to allow for cooling.
Engine oi! dipstick readings
Adding engine oil
19
QUICK-CHECK CHART TYRE PRESSURES Tyre size
Recommended pressure (psi) when cold
Front
Rear
5.50 - 12 Crossply
28
24°
155 - 12 Radial (except Michelin ZX)
32
28
155 - 12 Radial (Michelin ZX only)
23
26.5
* 26 psi for Countryman/Traveller when fully laden.
** 29 psi for Countryman/Traveller when fully laden.
FUEL OCTANE
RATING
Austin and Morris 1100 models with manual transmission
3 Star
All other models
4 Star
FUEL TANK CAPACITY All models
ENGINE
8 gallons.
OL TYPE
All models
20W-50 Multigrade.
QUANTITY OF OIL REQUIRED TO BRING DIPSTICK All models
LEVEL FROM M/N TO MAX ON 1% pt approx.
bf
Min. 90 octane
+
|Min. 94 octane
| |
*
Elina Octane rating symbols.
Use the correct one for
your car
=
In an Emergency There’s been no car invented yet that can guarantee you a safe and reliable journey from A to B every day of your life. Be it due to a breakdown or a puncture, the day will come when your trusty transport requires a bit of roadside attention - usually at the most inconvenient time. in this Handbook you'll find a wealth of information which should certainly minimise the possibility of a breakdown but, although we hope it won't be very often, the odd thing is bound to go wrong from time to time. The Troubleshooter Section should help to trace the cause of an unexpected problem, but it’s not much good knowing what's wrong if you've nothing to put it right with, or needing to change a wheel in the dark when you haven't a clue how the jack works. A few timely minutes spent reading through this Chapter now could save your time and temper later on!
Spares and repair kit The
basic
‘tools’
supplied
Clean lint-free cloth with
the car won’t
get
you very far if you should have the misfortune of a roadside breakdown. An additional tool kit is available and contains about the minimum you're likely to need. This tool kit will also be useful for many of the servicing jobs, but can only be regarded as a minimum - for further information see Too/s for the Job. A few items which can be used or fitted without too much bother at the roadside should also be carried. These can prove invaluable in getting you out of trouble on the odd occasion when they might be needed. The sort of things you should carry are:
This Handbook
The list could of course be expanded indefinitely for example, you might like to have a set of spare cooling system hoses instead of just a hose bandage. It's up to you to decide what you're likely to use in a roadside situation. So
far
as
mentioning
the
fan
that
you
belt can
is concerned, buy
an
it’s wortti
emergency
type
which doesn’t require any bolts to be loosened to fit it and which will suit a wide variety of cars. With one of these in the car, you can get on your way quickly and fit a proper replacement belt at your leisure.
Spark plug, properly cleaned and gapped H.T. lead and plug cap - one that will reach
the
Jacking up and changing a wheel The
furthest plug from the distributor
jack
supplied
with
the
car
is suitable
for
Set of light bulbs
changing a wheel
Tyre valve core and pocket pressure gauge
If the car’s to be jacked up for servicing or other work, you'll need a stronger and more reliable means of
Fuses Distributor rotor, condenser and contact set Fan belt
by the roadside, and that’s about all.
supporting it; for further Tools for the Job. Early
Roll of insulating tape
models
pedestal this type,
Spare set of keys (but not in the car)
but
Extension light and lead with crocodile clips Windscreen de-icer aerosol! (during winter months) Breakdown triangle
pointing jacks
a central
always
inserted
were
jack with
Tin of radiator sealer and a hose repair bandage First aid box and manual
make
outwards
information equipped
a reversible jacking
sure
with
ratchet
point
that
after
the
the
on
where
there's
top
still the
a screw-type
handle.
With
the car is used,
lifting
in the jacking point. With
(even
on this, refer to ;
of
arm
the
jack’s
has
been
later, scissor-type
old-type
jacking
21
The later type jack in use
oe
pet eee ge right Always chock the wheels on the opposite side before jacking
22
Spread the load under the foot of the jack with a block of wood or something similar
oe
IN AN EMERGENCY 4
point), the jack can
be positioned anywhere along the
body sill flange. To begin the wheel
changing
operation, first apply
the handbrake firmly and engage first or reverse gear; then find something to chock the wheels on the other side. of the car. An old brick or block of wood the job, but have
unless
to improvise.
which
way
wrong;
in position
and
hitting it smartly with the ball of your
hand.
you
carry
If you
can
a thing
you
may
only find one, weigh up
following
the correct
enough
pressure,
make
a
checked
in future
and
drive
you'll find two, then one can be put
air-line.
likely
to move
if anything
service
procedures,
let it down to the correct reading by pressing in the pin in the centre of the valve to release air, and checking with your pressure gauge. If it hasn’t got
goes
the car's
hopefully
such
is just
If you're
the spare will have plenty of pressure in it; if necessary
mental
note
carefully
to
keep
to
the
at the front
and
it
nearest
each side of a wheel. Before
lifting,
position, makers
remove provide
but
with
the
hub
the
jack
cap
a bit of bent
or
iron
in the trim
correct
plate.
The
for this job but a
screwdriver blade can be used if you don't mind taking off a bit of paint or chrome.
Now
spanner
by
to
Hopefully,
haven't
loosen
each
they won't
been
nut
use the wheel about
be excessively
removed
for
a
half
nut
a turn.
tight but if they
long
time
a
bit
of
footpower on the spanner may be required.
The car can now be raised, but make sure it doesn’t move
and
check
that
the chocks
are still in position.
Towing and being towed Towing
most attached cars
eyes are
models, either
have
two
provided
just to
under
the
front
the
subframe
and
rear,
bumpers. or
floor
others
one
rear on
They're pan;
some
front
and
rear; also they may be on the left or right-hand side. If towing
has to be done
in an emergency,
points
for
a
attaching
rope.
For
use only these
automatic
trans-
mission models, refer to /n The Driving Seat.
Take off the wheel nuts and then the wheel. The
spare’'s
beneath
simply
lifts up. A wing nut, or knurled
secure
the
wheel
in its place.
- take
held
luggage
which
One
is either
the
floor,
by
two
compartment turnbuckles
or
it out and put the punctured
Fit the spare
wheel
Maintenance of Lights Remember
nut, and plate to
the car
and
only
bulbs
be
that a defective
dangerous
will enable
you
exterior
to replace
blown
ones as they
make sure they're good and tight (if you're interested, the correct tightening torque is 42 Ib f ft).
headlamp important replacement
change. of
but the
You as
car’s
or panel
not spare
be just a nuisance but most of them aren't particularly unit,
lamp
Carrying
car to the ground. Fully tighten the nuts now; you don't have to stand on the spanner to do this, but
to
interior
light can
illegel.
occur.
difficult
failed
is also
pinch up the nuts in a crosswise order, then lower the
Finally fit the hub cap or trim plate by holding it
A
but
may
these lights
not are
light bulb
carry
perhaps
let's
deal
may
a
spare
the
most
with
their
first.
Headlight adjustment screws (arrowed)
23
\ i |%
|
Tithe
Removing headlamp rim screw
24
Rear light lens on Mk II and Mk III Saloons
Removing a lamp unit retaining screw
IN AN EMERGENCY
Headlight unit renewal Loosen the retaining screw at the bottom of the headlight rim; ease the bottom of the rim forwards and lift the complete rim up and away. Take off the rubber
dust
excluder,
then
remove
the
inner
rim
screws (don’t touch the focussing screws) and draw the light unit forward so that the electrical connector can be removed. Fitting the new unit is straightforward, but make sure that it’s the right way up, and fitted squarely. With a new light unit you should have the alignment checked optically by a garage, although a temporary adjustment can be made by experimenting with the focussing screws if you find that the light pattern is badly adrift. Remember though, this is a temporary adjustment.
Side, front flasher or reverse light bulb renewal MG front sidelamp assembly
7 2
Lens Lens retaining lugs
MG
models:
Press the lens inwards
and
turn
it anti-
clockwise to remove it; the bayonet-fitting bulb can now be removed and a replacement fitted, followed by the fens.
Other models:
Remove
the lens retaining screws and
take the lens off, then refer to the information
for MG
models.
given
Note that a capless (push-in) bulb is
used for the Princess sidelamps.
Stop/tail or rear flasher bulb renewal 1100
Mk I and
all Countryman/Traveller
models:
From inside the luggage compartment (on MG and Wolseley models, remove the floor panel and side trim
first), puli the bulb holder from its socket at the rear of the light body. The bulbs are bayonet-fitting types,
with offset pins for the stop/tail bulb.
Refitting the
bulbs is straightforward, but ensure that the pins of the stop/tail bulb are the right way round. 71100 Mk II! and all later saloon models: Remove the two lens unit screws and take the lens off. The bulbs
are similar to those described earlier for Countryman/ Traveller models.
Rear light assembly for Mk | and Estate models
25
IN AN EMERGENCY
Princess foglamp bulb
Interior lamp ‘festoon type’ bulb
panel
Wing repeater light bulb renewal Remove lens and
the two lens retaining screws,
take
out
the festoon-type
bulb.
lift off the Refitting is
straightforward.
Number plate light bulb renewal Remove lens
the screws and take off the light covers or
units,
then
remove
the
bayonet-fitting
bulbs.
Refitting is straightforward.
Interior light bulb renewal Squeeze then
the
pull
retained
the
by two
plastic lens
lens
away
to
release
(on
the
Princess
tongues,
models
it’s
screws) and take out the festoon-type
bulb. Refitting is straightforward.
unit,
withdraw
the
unit
and
| models
and
can
through
For
remove
the bulb.
in the light
battery
earth
lead for
safety’s sake.
crosshead (three
Remove the instrument cowling
screws),
crosshead
and
screws).
the
up behind
the facia.
bulb
bulbs
which
you
can
must
be reached.
remove
the
(after
the clamp
removing
and
wing
nut),
and
the
or chrome screw. The panel
can now
for access to the remaining
be eased
forward
bulbs, Refitting’s the reverse of removal. Princess:
of the over
For
/n all cases, while you're working behind the
(four
bulbs are a push-in type,
ignition switch escutcheon
The
procedure
sheer
instrument
Ease
the
panel
instrument
head
to the Leyland
Super
Panel and warning light bulb renewal
facia
When
everything's
light (if there is one), ashtray holder
Haynes
on
II and Mk bulbs
Austin
screw. man,
Owner's
de luxe and
to the
Mk | models - Morris:
bulb.
that
ashtrays, ashtray
All Mk
positioned
shell before the clamp screw is tightened.
26
remaining
and that the lugs are correctly
the
The
by reaching
and pull out any
the
in the
detach
relevant
ensure
Wolseley, Riley, MG, GT (positive earth): Remove the access hole cover from inside the glovebox, then reach
followed.
panel,
- Austin:
be removed
Refitting is straightforward but make sure that the slot
instrument
the
to
correctly aligned before tightening the screws. Mk
in the bulb disc locates in the projection in the holder,
NOTE:
remove
care
these
models
involves
complication on models with a steering lock is removal
the clamp screw at the bottom of the light
then
and
take
removing the facia panel (a rather complicated job) and lowering the steering column. An_ additional
Fog light bulb renewal (Princess) Loosen
forward
refitting,
This
Workshop
III models: GT
Morris
de
be passed
the procedure
Manual
should
be
For the Austin/Morris
(negative earth)
is as described and
job should
or otherwise
for Mk luxe
models,
| Austin
models,
access
models.
remove
the
facia panel (four screws) and pull the speedometer forwards; twist the bulb to remove it from its holder. Refitting’s straightforward, but make sure that the facia panel screws.
is squarely
All other models: Mk | models.
fitted
before
tightening
Refer to the information
the
given for
Save It! Do-it-yourself
car servicing is ail about money
ing the highest standards costs - Or at least prevent
of safety. them
saving, whilst not forgetting the ever-important point of maintain-
In this Chapter we cover several points which should help reduce your motoring
from
increasing quite as fast as they otherwise might these days - without reducing
your car's safety.
Tyres Without give you
any
much
doubt
whatever,
better value
because, although
a radial ply tyre will
for money
than a crossply
it will ‘cost a bit more
to buy, it will
last a great deal longer. Remould tyres can give good service, but they have their limitations when used for family motoring; remould radials now have a more reliable reputation than they had when they first appeared
on
the
market,
but sometimes
broadest
have
terms
the
we
learnt
more
you
so far? Only pay
you
for your tyres, the
a good runabout tyre, and aren't thinking of
remember
they
‘shimmy’
if
cheapest
tyre
may
used
give
on
which
the still
buy radial remoulds but a
bit
of
front;
steering
if you
complies
with
wheel
want the
the
law
in
safety standards, buy remould crossplies.
Regraded
to that in the
want
high speeds or long journeys,
give a bit of
trouble when trying to balance them. So, what
good tyre life but aren’t quite so worried about roadholding under adverse conditions, buy crossplies; if
be
tyres
known which
tyres are sometimes
as remould may
the tread pattern
quality
available (they used
or RQ); these are
have the very slightest of defects or moulding,
but are otherwise
in
per-
better value for money you'll get. If you want the best
fect. If you get the chance to buy these, buy them - to
in roadholding and tyre life, buy radials; if you want
all intents and purposes
they're as good as a new tyre.
Tyre construction - a cross section of a cross-ply tyre (left) and radial ply tyre (right)
27
SAVE
IT!
Cross-ply and Radial ply tyres The difference in the construction of the two types of tyre gives them very different characteristics.
The cross-ply (1) has a uniformly strong tread and wall bracing. This gives it better cushioning properties but allows some deformation on bad ]
Cross ply
Radial ply
2
surfaces and cambers,
The radial ply tyre (2) has
a supple wall and a firmly braced tread, ensuring that the maximum area of tread is kept in contact with the road despite suspension angle changes and road camber effects. On no account should the two types of tyre be mixed on the same axle. (See
the Weekly checks listed in Service Scene).
It's not
generally
realised
that
most
major
tyre
manufacturers also produce tyres under a less well known name at a somewhat cheaper price. These are first class buys too - ask any tyre dealer. Talking of tyre dealers, it’s worth mentioning that they’re the people to go to if you're intent on saving money (and who isn't these days?). Unless there’s a ‘special offer’ going, the most expensive place to get your tyres will normally
Now
last.
let’s just briefly consider
First,
Station
be your local garage.
keep
them
inflated
how to make tyres
properly
(see Fi//ing
Facts for the correct pressures). Second, drive
sensibly
(i.e. no
race-track starts or cornering). Third,
make sure the wheels are balanced a garage or tyre specialist).
properly (a job for
Exhaust systems The systems
average car gets through several in the course of its life, the actual
depending used
exhaust number on the sort of journeys for which the car's
(lots of short
remaining
journeys
will
mean
inside the exhaust system
condensation
and helping it to
rust Out more quickly). The needs
best
place
to
a replacement
go
when
exhaust
your
1100
(or maybe
or
1300
just part
of
the system) is one of the specialist ‘exhaust centres’ which have sprung up in recent years. They keep huge stocks to fit most mass-produced cars, and offer free fitting
as well
selves.
You'll
as discount
almost
saving compared
fit the exhaust
with
prices
certainly
on
the
show
getting your
a
parts
them-
worthwhile
Leyland dealer to
(which will involve labour charges as
well).
Batteries
If you're
Next to tyres, batteries are the most commonly found parts sold by specialists. A top quality battery may
cost
up to three times the price of the cheapest again,
price
is related
to quality,
but
isn’t
necessarily directly proportional. A battery with a twelve month guarantee ought to last that long and a little
bit
more,
but
batteries
always
seem
keep
your
car
for
several
but on the other hand should last the remainder of the car’s life. If you're interested, talk it over with one of the exhaust specialists - they're usually stockists of the stainless steel kind too.
to fail at
embarrassing or inconvenient times so it’s worthwhile getting something a little bit better. Many of the acces-
Lubricants and the like
bit less than the dearest ones around. And, if you look
Good cheap engine oils are available, but because it's so difficult to find out which cheap ones are good, it's safest to stay clear of them. There are plenty of good multigrade engine oils on the market and quite a
after it, it'll look after you, too.
few
sory shops and tyre dealers sell good quality batteries with two
or three year guarantees.
Buy one of these -
it'll be worthwhile in the long run and still cost quite a
28
to
mild steel replacement,
One that'll fit your car. Once
planning
years it would certainly be worth thinking about an exhaust system made from stainless steel. It'll normally cost you considerably more than an ordinary
are
available
at sensible
prices
from
the
D-I-Y
SAVE-‘IT! motoring and accessory shops.
Unless buy
oil
circumstances in pint
expensive
or
way
of
filling station.
should
half-litre buying,
The
tain
just about
change;
an
changes
the
extra
for most
will probably
for
to, don’t
is the
most
if it’s from
(they used
SMITHS
a
to be one
FUEL
purposes, and con-
right amount can
you
This
particularly
big 5-litre
gallon) cans are adequate
force
cans.
for an
topping-up
engine
oil
between
oil
CONSUMPTION
be required, particularly if your
pride and joy happens to be a bit of an oil burner. Oil is also available in larger drums (which can be fitted with a tap) sometimes at an even bigger price saving.
A telephone
call or visit to nearby wholesalers
may well prove worthwhile.
Antifreeze motoring apply
is always
shops,
because
but
you
cheaper
bulk
never
if you
buying need
go
doesn’t
to buy
to
the
normally
it in any
real
quantity. As for greases,
brake fluid, etc, you'll save a little
at the motoring shops but again you'll never need large quantities
- just
make
sure
that
you
buy
Smiths Industries’ ‘Milemiser’, a type of engine performance or vacuum gauge, can significantly improve fuel economy by monitoring driving technique
something you
that’s good quality.
can look after all these things, the rest’s up to you
as the driver.
Fuel Your car’s designed
fuel
(star rating).
to run ona
Don’t
buy
particular grade of
Driving habits With the car in a decent
fuel that’s of a higher
state of tune, there’s a lot
On the other hand, if you buy a lower rating fuel your
that you, yourself, can do to improve the car's economy simply by your method of driving. It’s very
engine
tempting
rating
than
this, because
performance
will suffer.
carefully
you're wasting your
(and probably
your
money.
engine
too)
If you are forced to buy inferior fuel, drive
until you can
circumstances by a couple
get the correct
it’s also beneficial of degrees,
grade; in these
to retard the ignition
but you've got the bother
slip
speed,
and
careful
produce
the
same
misused; it simply means getting
economy,
and economy
try
(sometimes
one at
violently
keeping
the
down
just a little more
the standard
by the manufacturers, so these must
be your obvious guidelines. Different
needles
if you're
performance
(see
particular
are
after Vita/
available
a
little
Statistics
model).
You
for
more for
might
the
carbu-
economy
the try
needle one
or
of the
valve
clearances),
but
take
care
that things like over-adjusted brakes don’t mar this. If
off;
a moderate
of the clutch,
result
much
with
greater
just
accelerates
no
need
pedal
in the
- you
may
but
for
don’t
it. The
same
need
press
position
to ease
it too
little time
it
hard -
saved
in
accelerating will be outweighed by the additional time and cost involved the next time you fill up with petrol.
Changing through
for
‘sports’ type air filters; these are claimed to improve performance and economy, but there’s a_ slight increase in the noise level. Regular maintenance is the most important factor in keeping the engine in a good state of tune (e.g. spark plugs, distributor points, ignition timing, carbuadjustments,
there’s
car
throttle
have a job to improve on the specifications and
from
starting
engagement
and only alittle more slowly. Once moving,
the
rettor(s)
driving is to use the pedals
when
while
of the other)
settings laid down
rettor
clutch
engine.
the expense
your
art of economical
engine
will
the best performance
You'll
The
sensibly. There’s no need to race the engine and let the
Engine tuning is much
to do a ‘grand prix’ start from the
ator just to show yourself that you can do it (nobody else cares anyway!).
of
resetting it again later.
The term
at times
traffic lights, or to change down and floor the acceler-
the gears should
be done in just
the same way, using the accelerator pedal with care. When you have to change down, there’s no need to rev
your engine - this is another fuel waster. Similarly, ‘blipping’ the throttle pedal while impatiently waiting for the Even
lights to turn green in warm
is using unnecessary
fuel.
weather you'll need to use the choke
to start a cold engine. The secret, though, is to push in
the soon
knob
as soon
it can
be
as possible; experiment done
- you
may
to see how
surprise
yourself.
29
SAVE
IT!
not only affects fuel mixture getting into the oil, and excessive engine wear. Considerably more
applies to bank and Civil Service employees.
engine
What it all adds up to is: (1) Insure well; (2) See what you can get in*the way of discounts; and (3)
Excessive
use
economy,
but results in unburnt
start
of
the
choke
wear occurs in a few hundred miles of stop/ motoring from cold, than in many times this
mileage
of
driving
with
a
thoroughly
warmed-up
also get a better
bargain
by insuring
the Motoring Associations if you're
You may
through
one of
a member.
Find out exactly what you're covered for.
engine on long journeys. Automatic transmissions can be used carefully also. The relative position of the throttle pedal considerably affects the road speed at which
the gears shift, and all
this with the extra 50 Ib or so of additional transmission weight and the power losses which occur in the torque converter.
Buying spare parts Apart from the oils and greases which you're going to need, it won't be long before you have to buy a few bits and pieces to Please do remember
keep
things running smoothly. up any parts which are
to clean
traded-in on an exchange basis (e.g. brake shoes) and, wherever possible, check that any replacement parts look the same as-the old one, either by direct compari-
Roof racks The
ever-faithful
so many
roof
rack
has proved a boon
motorists, for the extra
holiday
to
luggage, but
son
how often do you see cars being driven around with an empty been
roof made
still attached?
Many
estimates
of the increase in fuel consumption
by a roof
erally rack,
rack
rack, due
accepted this
to wind
can
caused
be done, or by reference
to any of the
Spare parts and accessories are available from many
sources,
but the following should act as a good guide
when they’re required.
resistance, and the gen-
figure is around
figure
have
if this can
illustrations in the appropriate Section of this book.
10%;
with
be as high as 30%.
a loaded
The
Officially appointed Leyland garages
moral,
Although
Leyland
dealers should be able to supply
everything
for your car, it’s generally true
then, is obvious, don’t use a roof rack unless you have
just about
to, and always remove it when it’s not in use.
to say that the prices
may
be higher than
you need
pay.
The car itself It seems almost a foregone conclusion that the 1100 will be more economical than the 1300, until you
look at comparative
true
that an
1100
can
fuel consumption
give you
more
figures. It’s
mpg, but for a
car that’s well loaded you're going to need to use the gearbox more. This means higher engine revs and consequently
less
economy,
so
never
rule
out
a
1300
because you think it will use more fuel. Where you might save a little is on a few replacement parts (where these are related to engine size), and insurance.
Other garages In recent years the big British car manufacturers introduced a replacement parts scheme whereby
have
they market parts for each others’ cars under trade names such as Mopar, Unipart and Motorcraft. Though you'll pay the same sort of prices for any of these parts ranges, you may well find that your local Chrysler
or
Ford
dealer
teed parts for your thing.
can supply
BLMC
you
with guaran-
car, and that can’t be a bad
Accessory shops
Insurance
These
usually the best places to get items like
contact breaker points, oil filters, pads, spark plugs, light bulbs, fan
obtained.
need for the general servicing of the car. They also sell general accessories and charge lower prices but, what's
make
A cheap
policy’s
good
until
you
need
to
a claim, and then the sort of snags you're going
touch-up
equally
inspect
hours and can often
the
damage?’
or
‘How
will it affect
my
No
pay
the
first
companies if they
£20
or so
of any
claim.
Many
large
have a discount scheme for their employees
use
the
same
insurance
company;
this. also
brake belts,
shoes
and
lubricants,
paints etc. - the very things you're going to
to come across are ‘How do | get hold of an assessor to
Claims Bonus?’ There are one or two legitimate ways of reducing the policy premium, perhaps by insuring for ‘owner driver only’, ‘two named drivers’, or an agreement to
30
are
Like some of the other things that we've discussed, the service you're going to get from your insurance company will be related to the cost of the cover
important,
they
have
be found
convenient
opening
not too far from home.
Motor factors Good
factors
components braking
will
stock
of the engine,
systems,
and
often
all the gearbox, provide
more
important
suspension guaranteed
on an exchange basis. They're particularly the more advanced do-it-yourself motorist.
and parts
useful
to
SAVE
Vehicle identification numbers When
obtaining spare parts
ories), the very least you year of manufacture
is all you
time
when
commission
need
to know,
you're number
must
of your
asked
(and sometimes
know is the model and car.
For many
items this
but there will soon
for
(which
access-
the you'd
engine always
come
number meant
a
or to
the bonnet valance. Car
number:
the bonnet
locking
platform
Stamped
locking
Engine
number:
to the
right-hand
on
or
a metal
right-hand
wing
plate fixed
to
platform.
Stamped
on
a metal
side of the cylinder
plate fixed block.
make a noie of but just hadn't got round to!). Make a note of these now, in your diary or inside the back
Transmission
casing assembly: Stamped
on a facing
provided
the
the
starter
cover of this book.
motor. a plate fixed
to the
The numbers you’re likely to need
are:
Body
Commission
number:
Stamped
on a plate fixed on
on
IT!
casing
number: Stamped right-hand wing valance.
joint on
below
31
Vital Statistics You're going to need to know most of the information in this Chapter that’s applicable to your particular model, at some time or other (even if it’s only to win a bet in the pub!). Let’s go in head first then, starting with the engine.
ENGINE Type designation Morris and Austin
1100 Mk I, manual
10 AMW,
10 AH
transmission Morris and Austin
1100 Mk II and Mk III,
Aes manual transmission
10H
MG, Vanden Plas, Riley Kestrel and Wolseley 1100, manual transmission, up to 1967
10 GR, 10 V
Austin and Morris 1100 Mk |, Mk I! and Mk III,
(automatic transmission), MG, Riley Kestrel, Vanden
Plas and Wolseley
1100, automatic
10 AG, 10 AJ, 10 AR
transmission, 1967 only
Austin and Morris 1300 (except GT), 1967 on, MG, Riley Kestrel and Wolseley 1300, manual
transmission, 1967 to 68, Wolseley and Vanden Plas 1300, automatic transmission, 1967 on,
12H
MG and Riley Kestrel 1300, automatic
transmission, 1967 to 69 Wolseley and Vanden
Plas 1300, manual
transmission, 1968 on, MG and Riley Kestrel
12H
1300, manual transmission, 1968 only MG and Riley Kestrel 1300 Mk II, manual transmission, 1968 to 71, Austin and Morris
V2
1300 GT, 1969 on
1275 cc engine as optional fitment to 1100
32
Mk
|, 1967 only
12s
[10
YIINII/aye1g ajnespAY
JOINGIAISIG
10je1Ipey deo
juau/jsedwos
UOISSILUSUCIY/AUIBUFZ [JO
YSEMUAAIIS
4afjlfdeo
jeaidA aulbua
40 e49UID SI OAIISAI
49/3SA1p A41ajjeg
VITAL STATISTICS 4-cylinder, 4-stroke, water-cooled, overhead valve,
Type
in-line, transversely
mounted.
Cubic capacity 1100
1098 cc
1300
1275 ce
Bore 1100
2.543 in (64.58 mm)
1300
2.78 in (70.61
mm)
Stroke 1100
3.296 in (83.72 mm)
1300
3.2 in (81.28 mm)
Compression ratio 10 AMW,
10 AH, 10 H (manual transmission,
pre-1972) 10 GR, 10 GV, 10 AG, 10 AJ, 10 AR, 10 H
(1972 on) 12 Gand
12 Hexcept GT, MG
Mk II (manual
transmission) and Riley Mk II (manual
S351
transmission) 12 H (GT, MG Mk II manual transmission and Riley Mk II manual transmission)
9.7532 4
Firing order
1-3-4-2 (No. 1 cylinder is nearest radiator)
Engine idle speed
Refer to Fuel System data
Valve clearances (cold) All models, inlet and exhaust
Maximum
0.012 in (0.305 mm)
torque
1100, single carburettor
60 Ibf ft (8.3 kgf m) at 2500 rpm
1100, twin carburettors
61 Ibf ft (8.4 kgf m) at 2750 rpm
1300, single carburettor, 8.8 : 1 compression
69 Ibf ft (9.54 kgf m) at 2500 rpm
ratio
1300, twin carburettors, 8.8 : 1 compression
70.5 Ibf ft (9.75 kgf m) at 3000 rpm
ratio
1300, twin carburettors, 9.75 : 1 compression
74 Ibf ft (10.23 kgf m) at 3250 rpm
ratio
Compression pressure 1100, 8.5:
1 compression
ratio
145 psi
1100, 8.9 : 1 compression
ratio
160 psi
1300, 8.8 : 1 compression ratio
155 to 180 psi
VITAL STATISTICS 1300, 9.75 : 1 compression
ratio
185 to 210 psi
Lubrication System NOTE:
The engine oil also lubricates the transmission.
Oil pump
type
Internal gear or eccentric vane
Oil pressure Idling:
1100
16 psi
1300 Running: 1100 1300
15 psi
60 psi 70 psi
Oil filter Oil type Sump capacity (total, including filter) : Manual
8% pt. (4.8 litres) 13 pt. (7.4 litres) 9 pt. (5 litres)
transmission
Automatic
transmission
Refill capacity (approx.)
COOLING
Full-flow type 20W-50 Multigrade
SYSTEM
System type
Pressurized with belt driven pump and fan. (Variable pitch fan on some
late GT models)
Thermostat setting 82°C (180°F)
Normal Expansion
tank cap blow-off pressure
Fan belt tension
13 psi
0.5 in (13 mm) deflection under firm thumb pressure midway
Cooling system capacity (total, including
along longest belt run.
6% pints (2.8 litres)
heater) Antifreeze type
FUEL
Ethylene glycol, BS 3151
or 3152
SYSTEM
Air cleaner
Disposable paper element type.
Fuel pump: S.U., SP or AUF S.U., AUF 714
Electrical type Mechanical
type
200
Deiivery pressure Electrical
Mechanical
2.5 to 3 psi
type
3 psi minimum
type
Carburettors S.U. horizontal-draught, constant depression.
Type Type usage:
Morris 1100 Saloon and Traveller - manual Austin 1100 Saloon and Countryman - manual Austin and Morris 1100 Mk models
II - all manual
1962 - 67 1963 - 67 1967 -71
35
VITAL STATISTICS Austin and Morris 1100 Mk III - all manual
1971
models Type
or
Piston spring
Red
Needle:
AN H6 EB
Standard Rich Weak Idle speed
550 rpm
Fast idle speed
1050 rpm 1962 - 67
MG 1100 and 1100 Mk I! Vanden Plas 1100 and 1100 Mk II Riley Kestrel and Mk II Wolseley 1100 and 1100 Mk II Type Piston spring
1964 - 67
1965 - 67 1965 - 67
HS 2 (Twin) Blue
Needle:
Idle speed
D3 D6 GV 500 rpm
Fast idle speed
1050 rpm
Standard Rich Weak
Austin and Morris 1100 - automatic Austin and Morris 1100 Mk II - automatic Austin 1100 Mk III - automatic MG, Riley, Vanden Plas and Wolseley 1100 automatic Type
1966 - 67 1967 -71 1971 1967 on
HS 4
Piston spring
Red
Needle: Fixed type: Standard
DL
Rich
BO ED
Weak
Spring loaded type
AAY
650 rpm 1050 rpm
Idle speed
Fast idle speed 1275 cc engines as optional extra for
1100
1967 only
Mk | Type
HS 4
Piston spring
Red
Needle: Standard Rich
Weak Idle speed
650 rpm
Fast idle speed
1050 rpm
Austin and Morris 1100 Mk 111 Type 7
36
DZ BQ CF
1972 0n
HS 4
Piston spring
Red
Needle
AAY 750 rpm
Idle speed
VITAL STATISTICS Fast idle speed
Exhaust gas CO content Austin and Morris 1300 - all versions, except
1100 to 1200 rpm 3.5 to 4.5%
1967 - 1971
GT MG, Riley, Vanden
Plas and Wolseley 1300 -
1967 - 68
manual Wolseley 1300 and 1300 Mk II and Vanden
Plas 1300 - automatic MG and Riley Kestrel 1300 - automatic
1967 on 1967 - 69 HS 4
Type
Piston spring
Red
Jet size
0.090 in (2.29 mm)
Needle: Fixed type: Standard Rich
Weak Spring loaded type Idle speed
Fast idle speed Wolseley 1300 and 1300 Mk II and Vanden
Plas 1300 - manual MG and Riley Kestrel 1300 - manual
DZ BO CE AAR 650 rpm 1050 rpm 1968 on
1968 only
Type
HS 2 (Twin)
Piston spring
Blue
Needle: Fixed type: Standard Rich Weak
Spring loaded type
EB M GG AAP
Idle speed
500 rpm
Fast idle speed
1050 rpm
MG 1300 Mk II - manual Riley 1300 Mk II - manual Austin and Morris 1300 GT Type
Piston spring Needle:
1968 - 71 1968 - 69 1969 - 1971 HS 2 (Twin) Blue
Fixed type (standard only)
Gy
Spring loaded type Idle speed
AAP 750 rpm
Fast idle speed
1050 rpm
Austin, Morris, Vanden
Plas and Wolseley
1972 0n
1300 Mk III Type
HS 4
Piston spring Needle
Red
Idle speed
Fast idle speed
Exhaust gas CO content
ABB 750 rpm 1100 to 1200 rpm 3.0 to 4.5%
37
VITAL STATISTICS Austin and Morris 1300 GT
1972 on
Type
HS 2 (Twin)
Piston spring Needle Idling speed Fast idle speed
Blue AAP 800 rpm 1100 to 1200 rpm
Exhaust gas CO content (maximum)
3%
Fuel tank capacity All models
8 gallons
Fuel octane rating Austin and Morris manual
1100 cc models
with
3 Star
transmission
All other models
4 Star
IGNITION SYSTEM System
type
Coil and distributor, with centrifugal and vacuum advance and retard
Morris Austin Austin Austin
1100 Saloon and 1100 Saloon and and Morris 1100 and Morris 1100
Traveller — Manual Countryman — Manual Mk Il — Manual Mk II1 — Manual
1962 - 67 1963 - 71 1967 — 71 1971-74
Ignition timing
Static Stroboscopic at 600 rpm (vacuum pipe
3° btde 5° btde
disconnected)
General distributor data Make and type
Lucas 25D4
Rotation
Anticlockwise
Dwell angle
60 + 3°
Points gap
0.014 to 0.016 in (0.36 to 0.40 mm)
Condenser capacity
0.18 to 0.24 mfd
Spark plugs Make and type
Champion
Gap
0.025 in (0.64 mm)
N9Y
or NS
Ignition coll Make and type
Lucas LA12
Primary resistance at 20° C (68°F)
3.0 to 3.4 ohms (cold)
MG
1100 and 1100 Mk II
1962 - 67
Vanden Plas 1100 and 1100 Mk II Riley Kestrel and Mk II Wolseley 1100 and 1100 Mk 11 Ignition timing Static Stroboscopic at 600 rpm (vacuum pipe 38
disconnected)
5° btde 7° btde
1964 - 67 1965 - 67 1965 - 67
VITAL STATISTICS
Spark plugs Make and type
Champion
All other details as for Austin/Morris
1100 Mk
11 manual
N5
transmission
models.
Austin and Morris 1100 Automatic Austin and Morris 1100 Mk I! Automatic Austin 1100 Mk IIl Automatic MG, Riley, Vanden Plas and Wolseley 1100 Automatic
1966 - 67 1967-71 1971 1967 on
Ignition timing Static: Distributor number:
41181, 41261 41134 Stroboscopic at 600 rpm
5° btde 7° btde (vacuum
pipe
disconnected) Distributor number:
41181, 41261
8° btde
41134
10° btde
Ignition coll Make and type
Lucas HA
All other details as for Austin/Morris
12
1100 Mk I! automatic transmission
models.
1275 cc Engine as Optional Fitment to 1100 Mk |
Ignition timing Static
1967 only
8° btde
Stroboscopic at 600 rpm
(vacuum pipe
10° btde
disconnected)
Spark plugs Make and type
Champion N9QY (originally UN 12Y)
Ail other details as for 1100 Mk | models.
Austin and Morris 1100 Mk III
Ignition timing Static
7° btde
Stroboscopic at 1000 rpm (vacuum pipe
14° btde
disconnected)
Spark plugs Make and type
Champion
N9Y or N5
.
Ignition coil Lucas HA 12
Make and type All other details as for earlier Mk 111 models with manual
transmission.
Austin and Morris 1300 — All Models Except GT
1967 - 1971
MG, Riley, Vanden Plas, and Wolseley 1300 — Manual
1967 - 68
39
VITAL
STATISTICS
Wolseley 1300 and 1300 Mk II, and Vanden 1300 — Automatic MG and Riley Kestrel 1300 — Automatic
Plas
1967 on
1967 - 69
[gnition timing Static Stroboscopic at 600 rpm (vacuum pipe
8° btde 10° btde
disconnected)
Spark plugs Make and type
Champion
All other details as for Austin/Morris
1100 Mk
I! manual
N9Y
transmission
models.
Wolseley 1300 and 1300 Mk II, and Vanden 1300 — Manual MG and Riley Kestrel 1300 — Manual
Plas
1968 arly
/gnition timing Static
5° btde
Stroboscopic at 600 rpm (vacuum pipe
8° btde
disconnected)
Spark plugs Make and type
Champion
All other details as for Austin/Morris
1100
Mk Il manual
transmission
N9Y models.
MG 1300 Mk II — Manual Riley 1300 Mk II — Manual Austin and Morris 1300 GT
Ignition timing Static
2 pide
Stroboscopic at 1000 rpm (vacuum pipe
9° btde
disconnected)
Spark plugs Make and type
Champion
N9SY
Lucas HA
12
Ignition coil Make and type All other details as for Austin/Morris
1100 Mk
Austin, Morris, Vanden
|| manual
transmission
models.
Plas and Wolseley 1300
Mk Itt
Ignition timing Static Stroboscopic at 1000 rpm (vacuum pipe
8° btde 13° btde
disconnected)
Spark plugs Make and type
40
Champion
1968 on
NOY
All other details as for Austin/Morris 1100 Mk | manual transmission models.
VITAL STATISTICS
CLUTCH Type 1100, pre October 1974
Single dry plate, coil spring.
All other models
Single dry plate, diaphragm spring.
Driven plate diameter
7 1/8 in (181 mm)
Clutch fluid specification
SAE J1703C or DOT 3
MANUAL TRANSMISSION
(GEARBOX)
Type
4 forward speeds and reverse with synchromesh 2nd, 3rd and 4th (early cars) OR
on
with synchromesh
on all forward gears (later cars).
Ratios 1100, Transmission
4 speed synchromesh
3 speed synchromesh
Top
U0) 31
Ove
Third
(42k 1 Ql) Dice 1 Bogie 1 S627 1
DDO ial Stoel
Second First Reverse
14s54
3.54:
1
1100, Overall Top
413%
1
Third
5:33:
1
413201
Second
8.98 : 1
lA
ot
First
14.99 : 1
14257
ot
Reverse
14.99:
1
14.65:
1
biQORM
1100, Final Drive
ANSrall
1275 cc Option and 1300, Transmission Early 1275 cc
Later 1275 cc
engines
engines
Top
OE
Oa
Third
IEA26 3 1
(aA?
Second
PEA20RF
PLEX
First Reverse
S829
4]
SOL
i
1300 models
1300 models
SSoaicR
9.75:1CR
LORS =
3.627% SHVA7/
(kA
SN Sey
10°24 Sal
ests) 37
222Ee| Seo get
2 Oem SEOCnel
354051
SEES: 54
Si65En1 5225
4.93:
1275 cc Option and 1300, Overall Top
S44
SH{G}5)©
516% TESPAS
Third Second First
4:9 Siam Venere
USEPA
Reverse
tiSaGee
USA
1275 cc (Early Models), Final Drive 1275 cc (Later Models) and 1300, Final Drive
8.09: 1 12.85: 1 22a
5 ek) ok) =
1 3.65 : 1
S652)
1) 4 1
Tow) 2 a 12.04: 1 WeAO22S &
B44":
‘E
41
VITAL STATISTICS
Road speed in top gear at 1000 rpm (approx.) 1100
15 mph
1275 cc (3.44 : 1 final drive)
18 mph
1275 cc (3.65 : 1 final drive) and 1300
17 mph
Transmission lubricant
Refer to Engine data.
AUTOMATIC TRANSMISSION Type
Three-element fluid torque converter and
hydraulically
operated bevel reduction gearbox.
Ratios Transmission Top
eOhsat
Third
15460514
Second
1.845: 1
First
Zi69%% t 2691
Reverse
Early 1100 models
Overall
Later 1100 and 1300 models
Top
At
rose |oY a |
Third Second
5.84: 1 Wess; oe |
54904 6.94: 1
First
TO76
cn
10:12
Reverse
1O765
1
VOSAat
Final Drive Early 1100 models
S420
Later 1100 models and 1300 models
S27
Transmission lubricant
24
Refer to Engine data.
DRIVE SHAFTS Type
Solid, with Hardy Spicer (Hooke’s) or constant velocity inner joint; constant velocity outer joint.
BRAKING
SYSTEM
System type
Lockheed
hydraulic; front disc and rear drum.
operated handbrake to rear wheels only.
Front brake type Mk | models and early 1100 Mk II (manual
Fixed caliper
transmission) models Other models
Swinging caliper
Fixed caliper type Disc diameter
8.0 in (20.3 mm)
Minimum
1/16 in (1.59 mm)
pad thickness
Swinging caliper type
42
Disc diameter
8.4 in (213.4 mm)
Cable
SS
ae
ee
‘ Minimum
ee
eae
VITAL STATISTICS
pad thickness
1/16in (1.59 mm)
Rear brake type
Leading and trailing shoe.
Drum diameter Minimum lining thickness
8.000 to 8.005 in (20.320 to 20.333 cm) 1/16 in (1.59 mm)
Brake fluid specification
SAE J1703C or DOT 3
Servo (where fitted)
Lockheed type 6
ELECTRICAL
ee
SYSTEM
System type 1100 Mk ! and Mk II
1100 Mk III Austin and Morris 1300; Riley and MG and 1300 Mk
12 volt, positive earth 1300
12 volt, negative earth 12 volt, positive earth
li; Princess 1300 and Wolseley
1300 and 1300 Mk Ii (up to 1971) Austin and Morris 1300 Mk I!1; Princess 1300 and Wolseley 1300 Mk I! (1971 on)
12 volt, negative earth
Battery Type (as original equipment)
Lucas D9/DZ9 Lucas A9/AZ9 Lucas A11/AZ11
Capacity at 20 hr rate
D9 and AY Al
40 amp hr 50 amp hr
Starter motor Make and type
Lucas M35G
or M35J
Dynamo Make and type
Lucas C40
Dynamo control box Type
RB 340 or 106
Alternator (where applicable) Type - positive earth cars
Lucas 11AC
Type - negative earth cars
Lucas 16ACR
Control unit (11AC alternator) Field isolating relay (11AC alternator)
ATR 6RA
Warning light control (11AC alternator)
3AW
or 17ACR
Windscreen wiper Make and type
Lucas 3WA or 14W
y
Horns Make and type
Lucas 9H, 9H modified or 6N. Clear hooters
F725/N
Fuse unit Make and type
Lucas 4FJ
Fuse rating (2 live, 2 spare)
35 amps
43
VITAL STATISTICS An additional 35 amp in-line fuse for the side and tail lamps is fitted behind the right hand side of the facia, adjacent to the wiring connectors
on later models.
Bulbs Mk | models
Watts
Headlights
50/40
Sidelights: Austin Morris, Wolseley, Riley, MG Princess Direction indicator lights (front and rear) Tail and stop lights Number
plate illumination
6 5 ZA
6/21
light:
Morris, MG
6
Austin, Wolseley, Princess, Riley
6
Panel and warning lights (screw-in type) Panel and warning lights (bayonet type)
22, 2
Interior light Direction indicator stalk Radiator badge (Wolseley) Fog light (Princess)
6 es 6 48
Reverse light (Princess)
21
Mk II and Itl models As for Mk | with following exceptions: Direction indicator repeater lights: Capless bulb
5
Bayonet bulb
6
Direction indicator warning light Number
2
plate light:
Austin, Morris, Princess, Riley 1300,
6
Wolseley 1300 MG, Riley 1300
6
Reverse light (GT)
Mk II, Wolseley 1300 Mk II
21
a
Fuse block
Suspension trim height check
VITAL STATISTICS
4
SUSPENSION AND STEERING Front suspension
Independent by interconnected
Hydrolastic displacers
and unequal length arms.
Castor angle
5%° positive - static unladen condition,
Camber angle
¥° positive - static unladen condition. 10° - static unladen condition.
King pin inclination Toe-out
1/16 in (1.59 mm) - static unladen condition. 4 ft 3% in (1.297 mm) - static unladen condition.
Track
Rear suspension Type
Independent by interconnected radius arms, and anti-roll bar.
Camber angle Toe-out Track
1° positive - static unladen condition.
Hydrolastic displacers,
1/8 in (3.18 mm) 4 ft 2 7/8 in - static unladen condition.
Steering Type
Steering wheel turns - lock to lock
Rack and pinion. 3 1/8
Turning circle
34 ft 9 in (10.59 m)
Suspension trim height (hub centre to underside of front wing) Austin and Morris 1300 GT
13 + 3/8 in (330 + 9 mm)
Austin and Morris 1100 Mk II and 1300 with arch rear spring
14 + 3/8 in (355 + 9 mm)
All other models
13 5/8 + 3/8 in (346 + 9 mm)
JY RES AND-TYRE
PRESSURES
Refer to Filling Station Facts
DIMENSIONS AND WEIGHTS (approx.) Overall length Overall width Overall height
(2fe2a75in 5 ft 0.375 in 4 ft Sin
7 ft 9.5 in
Wheel base Track: Front
4 ft 2.875 in
Rear
4 ft 2.875 in
Turning circle Ground clearance: Saloon Countryman/Traveller
GT Boot capacity
34 ft 9 in 6 in (15.24 cm)
6.125 in (15.5 cm) 5.5 in (14 cm) 9.5 cu ft
Weights (approx.): 1100 Saloon, manual transmission
1800 Ib (820 kg)
1100 Saloon, automatic transmission
1850 Ib (840 kg)
1100 Countryman/Traveller
1820 Ib (825 kg)
1300 Saloon, 4 dr, manual transmission
1850 Ib (840 kg)
1300 Saloon, 4 dr, automatic transmission 1300 Countryman/Traveller
1880 Ib (855 kg)
1300 GT Maximum
towing weight
1890 Ib (860 kg)
1900 Ib (862 kg)
15 cwt (760 kg)
45
—— 7 t
‘ \
pee A
Wes
Tools for the Job For anyone
intending to tackle car servicing, a selection of good down-to-earth
initial outlay, even
though
it may
appear to be something approaching
tools is a basic requirement.
the national
defence
The
budget, could well be
less than the labour charges for one full service; on top of this, you should be paying less for the oil and replacement parts by getting them yourself so, provided you've two or three hours to spare, you must be on to a winner.
The
tools supplied with the car allow you to jack and nothing else. The absolute
up and change a wheel
minimum you're going to need is the additional tool kit available through Leyland dealers under Part No. AKF
1596, which comprises the following:
6 spanners (5/16 x 3/8 in AF, 7/16 in x %in AF, % in x 9/16 in AF, 9/16 in x 5/8 in AF, 11/16 in x 13/16 in AF, % in x 7/8 in AF) 1 Pair 6 in pliers 1 %in x 9/16 in AF tubular spanner 1 7 in x 3/8 in dia tommy bar 2 screwdrivers With
a bit of luck
and
ingenuity,
this should get
you through the routine servicing jobs, but it won't do much else. A small but important point when buying tools is
Combination ring/open spanner
the quality. You don’t have to buy the very best in the
shop but, on the other hand, the cheapest probably aren’t much good. Have a word with the manager or proprietor if you’re in doubt. He’ll tell you what’s good value for money.
It’s very goind
help
to
difficult to tell you exactly what you're
need,
but the list below
in building
up
a good
tool
spanners
should be a great kit. (Combination
(ring one end, open-ended recommended because, although more
double
open-ended
the other) are expensive than
ones, they give the advantages of
both types). Combination
spanners to cover the range % to 1 in
AF Adjustable spanner - 9 inch
Spark plug spanner (with rubber insert) Spark plug gap adjustment tool Set of feeler gauges
Brake adjuster spanner (% in AF, square)
Screwdriver - 4 in blade x % in dia (plain)
Adjustable wrench
TOOLS
FOR THE JOB
Screwdriver - 4 in blade x % in dia (crosshead) Pliers - 6 inch Junior hacksaw Tyre pump
Tyre pressure gauge Grease gun Oil can Fine emery. cloth or oilstone
Wire brush (small) Funnel (medium size) Hydraulic jack or strong scissor type
Pair of axle stands (concrete or wooden blocks wiil do if you're careful about choosing them) Hose brush
You may find that a pair of metal ramps is a very useful investment, providing an alternative to the jack or axle stands
when
you
want
to get at the underside
The basic too! kit as supplied with a late model MG 7300 Mk I!
of the car but don't need to remove the wheel(s). Most ramps
available give a lift of betwee"
and you
can, of course,
9 inches and 1 ft
drive either the front or back
end
of the car on to them - but you'll still need to engage a gear and chock the other two wheels for
safety’s sake. Hopefully, to show you
; your attempts
at car servicing are going
that it can all be worthwhile, and having
worked your way through the various jobs listed in the Service Schedules you'll be able to see that there are many others which can be done without becoming a mechanical
wizard.
For this purpose,
Haynes publish a
first class Owner's Workshop Manual for the 1100/1300 which details just about every operation that can conceivably
be done on these cars. It'll mean
Stee/ ramp
Set of feeler gauges
Axle stand
47
TOOLS
FOR THE JOB
buying
a few
out to save
more
tools, but to hell with it - you're
yourself some
some
of
the
Cylinder compression gauge This is very useful for tracing the cause of a fall-off
and get a good job
in engine performance.
done in the process. While we're talking tioning
money
about
tools,
tune-up
it’s worth
aids
market. A visit to a good motor an enlightening experience, just of things available. Later in this about ‘bolt-on goodies’, but in concern ourselves with are three
that
are
menon
the
accessory shop can be to show you the sort book, you'll find a bit this Chapter all we'll items.
and
non-return
It consists
valve,
and
spark plug hole while
starter.
the engine
Compression
of a pressure
is simply
figures
screwed
gauge into a
is turned over on the
are
given
in
Vita/
Statistics. Two other useful items are a hydrometer, which is used for checking the specific gravity of the battery electrolyte
(this
will
tell you
if you
have
a dud
cell
which won't hold a charge), and a 12-volt lamp on an extension
Stroboscopic timing light The most accurate way of checking ignition timing (that’s the time at which the spark occurs) is with the engine
light
running,
is used.
and
This
for this a stroboscopic
(strobe)
is connected
1 spark
to
No.
plug lead and the beam is shone on to the crankshaft pulley mark. Any proprietary light is supplied with full connecting and operating instructions.
lead
with
crocodile
clips
which
Having bought a reasonable set of tools and equipment, it’s the easiest thing in the world to abuse them. After use, always wipe off any dirt and grease using a clean, dry cloth before putting them away. lying around
after
they've
been
which
is used
carry
for measuring
the distributor
the period of time for
points remain
closed during the
and
Never leave
used.
rack on the garage wall, for things you This
be
Care of your tools
them
Dwell angle meter
can
connected to the battery terminals.
A simple
don’t need to
in the car, is a good idea. Keep all your spanners the like in a metal
around
them
box
to stop them
- you
can
wrap
some
rags
rattling if you're going to
ignition cycle of one cylinder, and provides a more accurate method of setting-up the ignition than can be done by simply setting the points gap. Dwell angle
carry them in the boot of the car. Any gauges and meters should be carefully put away so that they don’t
meters
normally
(rev
taining
your
counter
if yor!
for
example,
inevitably
incorporate prefer),
checking engine idle speed.
which
a can
tachometer be
useful
get damaged
or rusty. tools
Do take a little care over maintoo.
Screwdriver
blades,
for
lose their keen edges, and a little
timely attention with a file won't go amiss.
Service Scene We've
now
discussed some
of the more
important
features of your car, and also given some thought to equally
important things like tools, money
saving and so on. Now to the nitty-gritty of servicing — perhaps the very thing you've dreaded for so long? It’s not as difficult or mysterious as you think ... The
1100/1300
models
are
an
up-to-date
design
which,
if it means
nothing
more
to you,
does offer the
advantage attention.
of fairly widely spaced service intervals and a general reduction in the number of items requiring This has developed from the increased use of sealed-for-life bearings, nylon bushes, better metal and lubricant technology, and a reduction in the number of moving parts (which tends to make some people think the car will go on forever without any regular attention because half the bits don’t exist any more!). It’s
still
important
to
carry
out
servicing
and
inspections at regular intervals to keep the car safe, to prolong its active life, and to maintain a sensible resale value. was
The
old maxim
never
Whether
of prevention
truer than in connection
rather than cure with car servicing.
it be casting your eagle eye over the general
workings
of the car
or
getting
down
to the service
Safety Accidents do happen, but 99% of them can be prevented by taking a little care. We're going to list a few points which should reduce any accident risk, and we'd like you to read through them before starting work — it could prove to be very worthwhile. DON’T run the engine in the garage with the doors
tasks in a workmanlike (or workwomanlike) fashion, it’s all going to be worthwhile in the long run.
closed - exhaust fumes are highly poisonous.
Remember
running
that a worn
part won’t
put itself right and
isn’t a thing to be lived with. Fix it as soon as you find it, even if it’s not time for the next service.
DON’T
work
in an inspection
- the fumes
will
tend
pit with the engine
to concentrate
at the
lowest point. DO keep long hair, sleeves, ties and the like well
job. The items listed are basically those recommended
clear of any rotating parts when the engine’s running. DON'T grab hold of ignition HT leads when the engine’s running - there’s just the possibility of an electric shock, particularly if the leads are dirty or
by
wet.
In this Chapter, we've tried to present the servicing tasks in a logical way to minimize the amount of
jacking up, etc, which the
some
car
may
manufacturers,
additional
ones
the extra trouble. If you've recently
be a prelude to the actual but
which
are supplemented
we
bought
by
DO
think are well worth
the car, the safest thing
about things as you'd like to be. If you don’t use the car regularly enough to clock up the scheduled mileage until well after the time interval that’s quoted as an alternative
basis
for
Spring can
and
make
guide, always use the time intervals as your
servicing. Autumn sure
season ahead.
your
see
that
check-ups,
You'll
too,
car’s
as
fit as
we’ve
included
just so that you possible
for the
the
rear
of the car, and
apply
the handbrake
is to go right through all the Service Schedules (not on the same day, of course!) unless you can really satisfy yourself that the previous owner was as meticulous
chock
front
DON’T underneath.
rely on Axle
wheels
when
jacking
vice versa. Where
and engage
first or reverse gear.
the car jack when stands,
or
up the
possible, also
you're working
wooden
or
concrete
blocks should be used, placed under the rear oy front subframes - but do take care, the 1100/1300 models can
be affected
by rusting of the subframes,
partic-
ularly the rear one. DO wipe up oil or grease from the floor if you spill any (and you will do, sooner or later). DO thing's
get someone to check regularly that everyOK if you're likely to be spending some time
underneath the car.
49
oweudsg
uolssiwsues3/aulbuz Ajsea) 4sajeyy4 dwind SHOALASAS ayesg pue YOINII(sjapow Bulsaalg szulof
~=NANMHM TOON
1Y6I7
/epad
Bulzealsqny jo ues osjeaq
“SJOAIA
pasnJOJ
40}},01NGIED Yul] ‘sabe yI0/ ‘“s
sBulleaq
a/ged ayeiqpueyy
/aayM
pua
seay
Jojjaingsep lodysep
JOINGIISIG
,
juauodwoy
papuawwozay sjueIlIgn|
ysngqg
‘sabuly ‘219
asay} *sla})
OS-MOz
apesbi1j/NW
OS-M0Z
apesBnjnw
OG-M0z
9pesbijiNW »
jesauasy asodindaseai6 jesauay asodindaseatB
jesauay asodindaseasb jesauay asodindaseas6
OG-MO0Z apes61jnw unajonad/, Ajjaf I1/NeIPAH PIN IVS DE0LIL 49 100 € OG-MOZ apes6i3/NW
SERVICE SCENE DON'T use a file or similar tool without a handle. The tang can give you a nasty gash if something goes wrong. BO make sure when you're using a spanner that it’s the right size for the nut and that it’s properly
fitted
before tightening or loosening. DO
brush
away
any
drilling swarf
with
an
old
paintbrush - never your fingers.
DON’T allow battery acid or battery terminal corrosion to contact the skin or clothes. If it should happen,
wash
off
immediately
with
plenty
GF =5
S
of cold
running water. DON’T
rush
any
job
- that’s
how
mistakes
are
made. If you don't think you'll finish the job in time, do it tomorrow, but try not to make this an excuse for forgetting about it.
DO spills
take care when on
the
pouring out brake fluid. If it
paintwork
iately, it'll take
and
isn’t
removed
the paint off. And
immed-
wash your
hands
Always support the car firmly before working underneath. Here axle stands are in use under the front subframe
well afterwards as it’s poisonous.
~ SERVICE SCHEDULES WEEKLY, BEFORE A LONG NEY:OR- EVER Y¥-250-:MILES The
following
tools,
lubricants,
etc., are
JOURlikely to be
needed: Tyre
pressure
gauge,
wheel
nut
spanner,
lint-free
cloth. Multigrade engine oil, distilled water, clean tap water, windscreen washer detergent sachet (antifreeze type in winter), cooling system anti-freeze.
1. Check engine oil level (car on level ground) Manual transmission models The engine oil dipstick’s on the spark
the
engine
between
the
dynamo
plug side of
and
Removing a battery terminal
distributor
(beneath the fibreboard cover if your engine has one). If the engine has just been running, wait a few minutes for the oil to drain
back to the sump, then pull the dipstick up and out. Wipe it clean on a lint-free cloth then put back into its full depth; now pull it out again and check the level. Add oil if necessary, to bring it up
to the because
‘MAX’
mark
it’s not
on
the dipstick - don’t overfill
only wasteful
but can
also mean
oil
finding its way into the clutch or leaking out of one of the engine or transmission oil seals.
Take
care
pouring
in the oil
(the filler’s on the
recker cover towards the radiator end, covered by a metal or plastic cap), and allow it to drain into the sump and transmission casing before re-checking the level. When you're satisfied that the job is completed, ensure that the dipstick and filler cap are properly fitted, then wipe any spilt oil from the engine. Where
applicable, secure the fibreboard cover with the clips.
Fibreboard cover (1) used on later models, showing
securing clip positions (2)
51
SERVICE
SCENE
Engine coolant reservoir cap Dipstick on automatic transmission models
Automatic transmission models The engine oil dipstick’s on the spark plug side of
3.
the engine to the left and below No 4 (the rear) spark
reservoir, together
plug. To check the oil level, run the engine for at /east minute, then switch off and wait for a further
an
minute.
because this can damage the car paintwork).
One
that
The
remaining
described
for
the
procedure’s manual
now
the same
transmission
as
Top up windscreen washer reservoir Add
water
ary detergent
4.
Check battery electrolyte /evel
below
any dirt or moisture from the top
member) it's time
caps
the
regular
electrolyte
level
the battery cells, and check
(with
the
Lucas
Pacemaker
battery
you can see the fluid level through the battery case). Add distilled water to bring the level just above the tops of the
battery
plates; with the Pacemaker
type,
distilled water is added to the trough until all the rectangular filling slots are full and the bottom of the trough’s just covered. If for some reason you've got no distilled water you can use the frost which collects on the walls of the freezer or fridge, and allow this to melt; if you're
cooling
In winter, use
system
antifreeze,
level
dynamo
in the
reservoir
or alternator
on
(it’s down
the front cross-
to
add
task,
spells danger.
some
you're
more.
If this
obviously
is becoming
losing
Causes of loss may
some,
a
which
be loose or perished
hoses, a faulty seal on the reservoir or radiator cap, a leaking gasket.
radiator or heater, or a blown cylinder head If you can’t find the fault, get it looked into
Straight away
by the local
Leyland
man
before your
troubles really start. Never
engine
remove
the reservoir
is hot; if you
everywhere
and
system’s warm,
you
do, could
or radiator
boiling
cap
if the
may
shoot
burnt.
If the
water
get severely
take off the reservoir cap s/ow/ly, first
really desperate, and as a last resort only, boil up some
turning
tap water in the kettle then allow it to cool, but don’t
then
make a habit of using this or the battery will suffer in
there’s coolant in the reservoir, you shouldn’t have to top up the radiator unless air has got into the system (this can happen with a blown cylinder head gasket): if
the long run. Refit the cell
caps
or cover,
carefully
wiping
up
it anticlockwise
removing
to
it fully
let the
and
pressure
topping
up.
escape, Provided
any drops of water that were spilt, then check that the
the radiator does have to be topped up, fill it right up
terminals
to the filler neck.
are tight.
A very
light smear
of petroleum
jelly (Vaseline) can be applied to these to help prevent any corrosion.
52
for windscreens.
(not
is less than 2% in (57 mm) from the bottom,
the
from
type
coolant
the
of the battery so that none can get inside. Remove
or cover
washer
Check engine coolant level If the
First wipe away
products
antifreeze
to the windscreen
with a little of one of the propriet-
models
(above).
2.
as necessary
If the weather’s extremely
cold, run the
engine for a few minutes; this will charge the battery and mix the electrolyte which will prevent the added water from freezing.
If only a very small quantity of coolant is required, you
can
get
away
with
adding
water
only,
but
remember you're diluting the antifreeze strength so beware, especially in winter. Preferably top up with an antifreeze/water mixture as generally used in the
SERVICE SCENE system
-
for
further
information
on
this,
see
the
looking for the tell-tale reflection on the garage wall or
24000-mile Service Schedule, later in this Chapter. When you've topped up the system, ensure that the
adjacent
cap seals are clean, then refit the caps.
in the High Street). If any bulb needs renewing, you'll
car.
(Shop
find the secret
5.
Check tyre pressures and tread condition With
the
tyres
cold,
check
their
pressures
Emergency. (see
Filling Station Facts). \f possible, use your own gauge - those
at
garages
tend
(except
you
and
us) and
their
accuracy.
Don't
to
be
abused
they’re
forget
by
spare
wheel;
pressure here should be up to the maximum
for the
ever likely
to be needed - you can always let some air out if necessary when the wheel is used. With the tyres properly inflated, run your hands and eyes over the tyre walls and tread. This is best done with the wheel off the ground so that it can be rotated but, if you’re really not feeling up to it, move the car
backwards
or forwards
less than 1 mm over at least three-quarters of the width, and around the full circumference. You can buy gauges for checking this, but a 2p piece inserted in
groove
is a good
deeper than the distance
guide.
If the tread’s
not
from the row of dots to the
edge of the coin, you're breaking the law, so get some replacements pretty quickly. There must also be no cuts, bulges or other deformities; if these are present,
you’re also breaking the law. If you’ve got to buy new tyres, read the bit in Save /t! but remember that it’s illegal to fit a radial and a crossply tyre on the same axle (i.e. at the same end of
the car) and that radials mustn't be fitted on the front
down
a useful
of how
And
to get at it revealed in /n An
while you’re checking
the lights, it
sense to see that the lenses are clean, front and
rear.
EVER Yes000: MIKES: O R23: MONTHS, WHICHEVER COMES FIRST (in addition to the ‘Weekly’ Schedule). The
following
tools,
lubricants,
etc., are
likely to be
needed: Sump
drain
plug
miscellaneous Multigrade
spanner,
spanners,
engine
grease
gun,
oil
can,
hydrometer
(if available).
brake
clutch
oil,
and
fluid,
petroleum jelly. You may also need:
Windscreen wiper blades, set of brake pads.
1. Change engine oil (if necessary) The 6000
engine miles
or
oil’s normally 6 months,
but
changed
at intervals
in certain
cases
of
more
frequent changing is required. The sort of conditions we're talking about are: repeated stop/start driving where you're often using the choke; driving in extremely cold conditions; or driving in extremely hot
conditions much given
2.
(the latter isn’t likely to worry
you too
in Britain!). The procedure for oil changing is in the 6000 mile Schedule, together with
Check fan belt tension The
6. Check tightness of wheel nuts you’re
provide
renewal of the filter.
if you've got crossplies on the back.
While
makes
a foot or two, so that
you can check all round. The tread depth must not be
the tread
can
everyone
not renowned
the
windows
check on brake lights - try it next time you're parking
at floor level, it’s a good time
drive
belt from
the engine
crankshaft
pulley
not only drives the fan (as its name suggests) but also
to check the tightness of the wheel nuts. Take off the hub caps or trim plates using that bit of bent iron which is supplied with the car (if you've got to use a screwdriver, take care with the chrome and paintwork)
and just check that the nuts are tight using the spanner supplied
for the job. This is % in in case you
got
original
the
and
have
to
buy
haven't
one - it’s pretty
difficult to use any other type successfully. There’s no need wheel
to stand will
tightened
on
the spanner,
have to come
firmly.
Don’t
because
someday
off, but the nuts should
forget
to put back
the be
the hub
caps or trim plates afterwards.
7. Check that all the lights work
:
Switch on the car lights and check that they’re all working correctly. Don’t forget to include the direction indicators and brake lights, either by getting someone
to
watch
while
you
operate
them
or
by
Radiator cap
53
SERVICE
SCENE
the water pump, which is behind the fan pulley, and the generator (dynamo or alternator). Failure of this
rather insignificant item
(the belt, that is) has ruined
many a journey, and it must be inspected regularly. You're not only looking for slackness, but also for any signs of fraying or splitting of the belt fabric. A slack Or damaged fan belt not only affects cooling and charging, but can produce some pretty awful shrieking and rumbling noises on occasions - and is likely to pack up completely at any time.
3. Check clutch and brake fluid level The brake and clutch fluid reservoirs are the two tin cans attached to the rear bulkhead of the engine compartment. (The clutch reservoir’s the one on the right as you stand facing them). Wipe carefully around
the
reservoir
remove bottom added level
caps
each one. of the
with
filler
as necessary. each time
The correct belt tension is given in Vita/ Statistics under the cooling system Section. It’s going to need adjustment some time, so here’s how: Loosen the two pivot bolts which attach the generator to the engine; if your car’s one of those with the coil above the dynamo, this makes things a bit
the bodywork.
more tricky because the front one’s difficult to get at
tion.
somewhere urgently.
which
Much
a clean
lint-free cloth,
The fluid level should neck,
and
new
fluid should
must
be
of this is an
traced
iately; it acts as a very efficient paint stripper if left on Refit
both
reservoir
caps
when the tension’s correct. the generator
mounting and adjustment bolts as already described, and slip the belt off the pulleys. Now comes the bit guaranteed
man
who
to
make
designed
you
say
nasty
got to do is to pass the belt over
turn,
things about
the cooling system.
using the indentation
each
What fan
the
you’ve blade
in
so kindly provided in the
cowling, until the whole belt’s on the radiator side of
the
fan;
Fitting
then
pull
a new
belt
it out
is the
between
reverse
two
fan
blades.
of this awkward
procedure; its tension should be checked after about 250 miles, and readjusted if necessary to take up any
initial stretching.
Fan belt adjustment (alternator shown but dynamo is
similar) 7 Securing bolts, 2 Adjusting link nut,
3 Drive end bracket
rectified
it’s dealt with in item 14 of this Schedule. Don't forget to wipe up any fluid spillage immed-
alternator this must be at the drive end bracket only or you'll damage it. Tighten all the nuts and bolts loosen
and
‘under the car’ job, and
the engine. A bit of leverage can be used, but with an
belt’s to be renewed,
be
If there’s a marked drop in the you check it, there’s leakage
(remove the coil if you like, it only means undoing the metal strap). Now loosen the adjusting link nuts and bolts (at each end), and pull the generator away from
If the
then
be up to the
Fan belt removal gap (arrowed)
on
comple-
SERVICE terminals. making
Ensure good
these are sufficiently
contact
by
checking
SCENE
tight and are
that
the
starter
operates.
5.
Check condition of windscreen wiper blades With
time,
affected screen,
wiper
blades
by oil and fumes
and the wiping action
the only
answer
when
deteriorate.
which
They're
collect on the wind-
deteriorates.
Renewal
is
this occurs, and it’s a straight-
forward operation. Pull the wiper arm
draw
the
blade
away
out
of
from
the
the windscreen
socket
with
a
and
gentle
outward
curving pull. The end of the arm is inserted into the blade holder and the blade swivelled to lock
the two together. If the arm itself Splined drive
fitting from action will
If you've got a hydrometer (it’s not essential) now’s the time to use it to check your battery specific
be satisfactory.
help
6.
gravity (SG for short). Assuming that it’s well charged, been
and
necessary.
Check and clean battery
the SG reading should
but
reposition
you
remove
prepare
to meet
thy battery
the
maker
end
is in sight
before
-
it lets you
battery
time
to time
terminals
leads. Where
corrosion
may
appear
on
the
front
detach the leads (the
and lift out the battery. A solution of warm water and bicarbonate of soda will remove all the corrosion; brush it on to the terminals, making sure that none gets inside. You can dip the lead ends straight into the solution,
but too much
corrosion
will neutralize
chocked,
Remove
it so
pads
eyes, as there’s
a certain amount
more
easily next
are much
support
it firmly,
get into
of fizzing and
applied
and
compartment
a good
degree
smeared
with
used
in the battery
if there’s been corrosion, as this provides
of protection.
petroleum
Other
parts should
jelly (Vaseline)
with
than
the
wheel,
of friction material
bolted up. Make sure everything’s covered, but only very lightly. Refit the battery and leads, smearing a little more petroleum jelly on the lead ends and
left. If this
a pair of pliers; note the anti-squeal
shims
other,
but
they
never
can
do this
be
interchanged
if one’s
worn
on
down
that
to
the
limit even if the other’s OK. Carefully clean dirt
which
the recess could
properly.
reservoir and Carefully
in the caliper to remove
prevent
Now
the
remove
new
the
place a large absorbent
press
in the caliper
for the new,
thicker
pads
cap
from
from
the
cloth
beneath it.
this
is to make
piston;
pads, but watch
the fluid spill over -
that’s what the absorbent rag’s for. The
be
before being
the
that given in Vita/ Statistics, pull out the
level in the reservoir as it will rise and may
be
and rear
on the pad retaining spring
underseal
can
time.
remove
room
of paint
if
the same. Jack up the
bubbling while it does its work. When everything's clean again wipe every part dry with aclean cloth. An type
splines
the splines
(thin metal plates) used with early calipers - take out these also. If one pad of a pair is wearing more quickly
seating
doesn’t
the sweep
the
the spring then, looking at the ends of the
is less than
all this,
the mixture
on
of grease on
the arm
pads, check the amount
any
that
arm
of the car with the handbrake
may need a second lot. Also clean round the battery compartment if corrosion’s there too. During care
Refitting’s
and pull out the split pins with pliers.
you
take
shaft. to check
road wheels. (For jacking up and changing a wheel see In An Emergency). Fold in the ends of the two large
or on the ends of the main battery
this has occurred,
terminals are retained by a single self-tapping screw or pinch bolt, depending on the type), release the clamp
your
the
split pins, then press down
down. From
the
different types of caliper are used, the procedures for
wheels
case,
release
Check brake pad condition
electrolyte
loss of (unlikely unless the casing’s cracked) or an either
forget
A very light smear
checking and renewal
In
renewed,
All models have disc front brakes and although two
If the battery's
on charge recently, leave it for an hour or two if
fault.
be
(grooved)
don’t
you can, as it warms up when being charged. If one cell has a low reading it indicates internal
to
the splined
straightforward,
Wiper arm attachment
4.
has
spring clip using a small screwdriver, then pull the end
new
pads can
that they move the
early calipers
and
ensure
uppermost
that
now
be fitted, but make
sure
into position freely and don’t jam. On don’t the
forget
cutaway
the anti-squeal part
of
the
shims,
pistons
is
before the pads go in. On the later calipers,
a15,
Vo Removing a split pin from the brake caliper
le ROA
Rear brake adjuster
Components of tixed type caliper
1 2 3 4
Brake pads Pad retaining spring Split pins Rubber dust seal Piston fluid seal Piston Bleed nipple
5) 6 7 8 Main caliper & Rim caliper 1 O Holes for caliper mounting bolts 11 Anti-squeal shims
Components of swinging caliper 7
2 Sj
4
5 6 7 8
56
Friction pads Retaining pins Pad retaining spring Piston dust seal Piston Piston fluid seal Piston cylinder Piston assembly retaining clip
SERVICE make
sure the pad operated
SCENE
by the piston is free to
move in the caliper. Fit the pad retaining springs and split pins; if any parts are damaged or corroded, renew them as soon as you possibly can. On the later type calipers, slacken the nut next to the pivot pin boss, press pads
the on
brake
pedal
several
the disc, then
times
to centralize
the
retighten the nut. The wheels
can now be fitted and the car lowered Don’t forget to check the reservoir completion, and to refit the cap.
to the ground. fluid level on
7. Check rear brake adjustment, travel and handbrake operation
brake pedal
The
brake
pedal
travel and handbrake
lever travel
are automatically adjusted with the rear brakes. It’s only after a very high mileage that you're ever likely
to find that handbrake cables have stretched and need adjustment,
but
if it
does
happen
the
procedure’s
Upper swivel hub balljoint. Arrow shows grease nipple
quite straightforward. To adjust
the rear brakes, chock
securely and engage
the front wheels
first or reverse gear, then raise the
rear of the car. With
the handbrake
car supported
remove
you've
got
adjuster
firmly,
better
on
each
access
the rear wheels so that
to
backplate
released and the
the
adjusters.
clockwise
Turn
(as seen
the from
the centre line of the car) until the brakes lock against the drum and prevent it from turning. Now slacken each
adjuster
until
the
wheels
will
raise
the
handbrake
lever
joint.
This
movement balljoints man
will
be seen
if it’s there which
and,
is either
Haynes
1100/1300
Owner’s
the
brake
by the
by means
of the
adjustment nuts on the handbrake lever trunnion.
When you're satisfied with the adjustment, refit the rear wheels and lower the car to the ground, and everything should be OK for another 3000 miles.
bushes
your
needs another
person
so grab yourself a passer-by or borrow
mother-in-law
for
a
few
minutes.
The
weight
needs to be on the front wheels, and if you haven't got an inspection
pit, you'd
of these faults must
that’s
Leyland
to
steering road age,
outer
get underneath
ball
detect any lost movement between the and the tie-rods by checking whether movement
of the steering wheel before the start to turn. This is a little difficult to
is present,
for wear
joints
(the
and
look
tie-rods
at the
are those
Check for leakage from steering rack With
the rack,
of oil leakage.
front
of the
particularly
car
still raised, check the
at the gaiters for any signs
If there is any, again it means the steer-
ing rack coming out, not only to fit new gaiters but to
top up the oil. Very laborious indeed dealer or workshop
Ask
If
exchange steering rack is almost certainly required.
gaiters
them).
to occur.
we're sorry to have to tell you that an
things coming out of the steering rack with big rubber on
delay, either
to the Owner's
better lift the car and lower
Now, with the able-bodied assistant
seat, end
or by reference
but is the least likely point
wear
steering
driver's
be put right without
man
check, particularly if there’s any other play in the link-
the car may
in the
arms,
wheel
wheels
9
tierod
it’s coming from - it could be
ends of the suspension
Workshop Manual. One further check is on the steering rack itself, and
the front wheels on to concrete blocks or ramps. Don’t forget the handbrake and rear wheel chocks, or move.
where
the steering ball joints (ball pins) or the bearings. Any
there’s any
8. Check steering and front suspension for wear of this check
for the
the suspension. Hold each front wheel in turn at the top and bottom, and try to rock it. If there’s any
it’s on
check
first part
Manual
until
at the inner
The
Workshop
and proceed with the suspension balljoint check.
the
for assistance,
new
Leyland
models. You can let your assistant go now,
movement,
this is done
need
a job for the local
or, if you think you're up to doing it yourself, it’s
all in the
third notch of the ratchet. If the handbrake’s adjusted it should just be possible to turn the rear wheels, an equal amount of force being required for each wheel. If you find that adjustment of the handis needed,
as up-and-down
Raise the front of the car off the ramps so that the front wheels are hanging under their own weight on
properly
lever
mostly
if it is, you'll
just rotate freely,
and the job’s done. Now
the
passer-by
or
mother-in-law
to
move the steering wheel backwards and forwards until resistance is felt each way, then check for slackness in
manual
(and a Leyland
job) but if it’s not attend-
ed to you'll end up buying an exchange which will be a lot more expensive.
steering rack
57
SERVICE SCENE
10 Lubricate steering joints
11 Check drive shaft joints
With the front of the car still raised, get out the grease
gun
and
position
yourself,
one
side
or the
other, in front of the grease nipples. These are just behind the brake calipers, one on the top joint and one on the bottom, with the same on the other side of the car. Wipe the dirt from the nipples with a clean cloth then give about four strokes of general purpose grease to each nipple. Don’t push too much in, it only seeps out; if you
nipple’s blocked,
can’t get any grease in, it means
blocked
or the joint’s full.
it can be unscrewed
that the
If the nipple is
and soaked
in petrol, or
you can try holding it in a vice and forcing grease through it. If all this fails, a new nipple should be fitted.
With the front of the car still raised and a gear engaged, rotate each front wheel back and forth and see if you
can detect any lost movement
in either of
the joints on each drive shaft. This can be a bit tricky to
check,
because
the
transmission
gears
will
have
some free play too, but once you've got down to the job you'll understand the problem. Try holding the shaft one side of the joint when turning the wheel; this way you'll see and feel any play. Also try moving the shaft up-and-down or side-to-side either side of the joint - this will also show up any play. When you’ve been driving the car, you may have noticed the occasional ‘clonk’ from the front end somewhere. This happens when changing or engaging a gear, or when cornering sharply, and it’s typical of a worn drive shaft joint. Where play is found, a new drive shaft or joints will be required. The procedure’s given in the Owner's Workshop Manual; otherwise it’s a job for the local Leyland man. One last check is to make sure that the rubber boots on the joints are OK. If there’s any sign of grease seeping out, get it seen to straight away before the joint dries out.
12 Check condition of exhaust system Keeping the front of the car raised, get underneath and examine the exhaust system and the attachment
brackets.
Look for signs of serious corrosion and loose
joints; where they are present you'll get leakage sooner or later, which not only means excessive noise but also that poisonous fumes can get into the car. If you can’t get to the tail end of the exhaust system, either jack up the rear of the car later on, or combine this Driveshaft joint rubber boot
with items 13/14 which may also mean jacking up the rear. Small exhaust holes or gashes can often be repaired
Door (1) and body (2) drain holes
SjapOW OOF 1/OOL 1 UO Sjuawabuese ysneyxa jedidA]
59
Brake hydraulic pipe-runs
60
SERVICE SCENE using one of the proprietary sealing products, but it’s sometimes difficult to make a lasting repair. Follow the makers’ instructions when using this type of thing.
the
At the same time, check the seat belts - not only webbing and buckles, but the anchorage points,
Particularly
appearing,
13 Check clear
that door and body drain holes are
mean
you
those
on
the
floor.
If there’s
have a word with the Leyland
any
rust
man; it may
that reinforcement plates will have to be fitted if
With the car still raised at the front (you may have
want them to pull out of the floor. Check the tightness of any securing bolts, and where inertia
to raise it a bit higher at the sides or towards the rear -
reel belts are fitted, check that they operate correctly.
it depends how agile you are), get a piece of stiff wire ~ and make
sure that all the door and body
drain holes
are
clear of mud, leaves, underseal, etc. If this isn’t done, anything that’s there will retain moisture and before you know where you are you'll have a rust problem on your hands.
don’t
If belts are badly
frayed,
or are
known
to have pro-
vided restraint during a serious acicdent, they may not do their job properly when
needed to. Think about it, -
wouldn’t it be worthwhile like this?
fitting new ones in a case
17 Check rear view mirror(s)
14 Check all fuel and hydraulic lines for leakage, corrosion and damage. With
the front of the car still raised, crawl under-
neath
and
pipes,
working
examine
the run of the fuel and hydraulic
from
the back
of the car
forward.
If
you
can’t see everything at the back, do the job in two stages and raise the back end for better access. The rigid pipes last a long time but can become damaged through corrosion or by stones being thrown up. The flexible
few
pipes are the ones
years’
braking
service
and
(like
clutch
which
all the
systems,
deteriorate rubber
including
after a
parts
in the
the hydraulic
cylinder seals). Look for signs of dampness or bulging; they’!Il stand quite a Jot of pulling about so don’t think you'll cause any damage during checking - if you do, you’ve
done
yourself
a
favour
because
they
were
about to fail anyway. The car can at last be lowered to the ground and you can continue checking the pipes in the engine compartment. Don’t forget the flexible clutch slave cylinder pipe. You've now got to the end of the really dirty jobs, so it might be an idea to clean yourself up a bit at this point!
15 Check bolt This
doesn’t
tightness
job
takes
matter.
of steering column
no
The
time
clamp
at all, but
don’t
bolt is located
clamp think
under
it
the
facia and if ever allowed to come
loose will give exces-
sive
Just
movement
of
the
column.
check
that
it’s
tight; don't try to shear it off.
Check sure
the operation they’re
of all the seat adjusters, and
securely
attached
to the floor and
seat frame. Clean off any dirt that may have collected round the moving parts, and apply a spot of lubricating oil to all the pivoting and sliding surfaces. Don't use too much, it just collects more dirt and dust, and encourages things to stick.
period
of time
so, if new
ones
are
needed,
why
not
treat yourself?
18 Lubricate locks and catches Apply contact
a drop
or two of oil to all the moving and
hinges and locks, bonnet hinges, lock and safety catch, and boot or tailgate hinges and lock. Wipe off any surplus as it collects dirt
and
points
marks
of the door
the paintwork
if it’s left to run.
Lubricate
the lock barrels by applying a little oil to the key and inserting it two
or three times.
Wipe the key and lock
barrel afterwards to remove any surplus. Smear a little general purpose grease to the lock contact points of the
striker
plates on the door
pillars. Again, wipe off
the surplus now with a rag - not on your best suit later -on!
19 Lubricate carburettor controls Apply
and
a drop or two
pivot
points
of
of oil to the control
the
carburettor(s).
linkage
There
are
several different set-ups, so you'll need to check exactly what you've got on your car but generally speaking if it moves,
lubricate
it. Also
apply
a drop
to the
accelerator pedal pivot.
20 Check headlight beam alignment Without
optical
measuring
equipment
it’s impos-
sible to set the headlight beams accurately, so this is a job
16 Check condition of seats and seat belts make
Another quickie, but make sure that they’re clean, securely fitted and give a good reflection. Outside mirrors particularly lose their ‘silvering’ after a long
for any suitably equipped garage. Unless there’s been some accident damage, or a light unit has been renewed, the alignment is unlikely to have altered. A temporary adjustment can be made if you find that the illumination’s poor or if other drivers flash their headlights at you at night, but get them checked
properly as soon as possible. The headlight adjustment
screws
are
headlamp Emergency.
shown unit
in the
renewal
illustration instructions
accompanying - see /n An
61
—.
Engine oil filter - manual transmission 7
2 3
4
5 6 7
Sump drain plug (arrowed)
Filter element Seating plate Seating washer Steel washer Spring Warning light switch Filter retaining bolt
Engine oil filter - automatic transmission Filter element Circlip Stee/ washer Sealing ring Centre bolt
1st type (short element (1) and long spring (6))
6
Spring Sealing washer
Sealing plate Filter head retaining bolts Oil pressure check plug
2nd type (longer element (1) and shorter spring (6))
SERVICE SCENE
EVERY
6000
MILES
OR
6 MONTHS
WHICHEVER COMES FIRST (in addition to the Weekly and 3000 miles Schedules) The following tools, lubricants, etc., are likely to be needed:
Sump drain plug spanner, oil can, feeler gauges, tachometer. and stroboscopic timing light (if available), spark piug spanner, miscellaneous spanners and screwdrivers. Multigrade
engine
oil,
oil
can,
petroleum
jelly,
general purpose grease. Oil filter element, air cleaner element.
7 Change engine oil and filter Oil changes should only be made when the engine is warm, as this ailows the oil to drain out more quickly and take most of the impurities with it. So, if it’s not warm, drive around for a mile or two - this is better than leaving a cold engine idling because less wear takes place. Now get a suitable container which will fit beneath the sump. It’s got to be fairly shallow, and at the same time hold about a gallon of oil - a plastic washing-up bowl’s the sort of thing that will do the job otherwise you’ll end up raising the front of the car to clear the container which may mean that not all the oil will drain out. Now prepare yourself for the dirty part. Lie on the ground and remove the drain plug. You’re going to get oil on your fingers, and possibly all over your hand (try not to let it run all up your arm as well!) so do it as quickly as possible. If you should drop the drain
plug in the container,
don’t forget it’s there - you're going to need it later on. The draining operation will take about 15 minutes so you can now think about the filter. Automatic and manual transmission models have different arrangements, but the procedure’s much the same. You'll need another small container to catch the oil in the filter bowl; this holds something
like a pint. Remove
the filter bowl retaining bolt, grasp the bowl with both hands and pull it away, allowing the oil to pour into the container. On automatic transmission models, where the coil’s mounted above the generator, it will be necessary to remove the clamp bolt from the generator so that the filter bowl can be pulled off. Remove the old filter element and the associated parts, taking care
the element and drain plug, with and paraffin can and dirt if there’s
not to lose anything.
Throw away
clean all the other bits including the a lint-free cloth. An old paint brush be used to remove any congealed oil any around.
When all the parts are clean, reassemble the filter bowl using a new element. By now all the oil should have drained, so check that the old seal ring has come away from the filter head on the engine.
one (it comes
If not, remove it and put the new
with the new filter element) in position,
smearing it with grease to hold it in place. Fit the new filter assembly and tighten the bolt, then wipe around with
a cloth to remove
the drain plug hole washer’s undamaged, any oil with the rag. Now add the new _ mark on the dipstick, for about
a minute.
any old oil, etc. Wipe around
as well, check that the sealing and refit the plug. Wipe away
oil to bring it up to the ‘MAX’ and run the engine at a fast idle Recheck
the
oil
level and add
Air cleaners on single carburettor models (typical) A B
Winter position Summer position
1 2
Cover retaining nuts Clamp
3
Intake pipe
SERVICE SCENE
Twin carburettor air cleaner (typical) A
more
as necessary
to bring
it back
Winter position
B
Summer position
up to the ‘MAX’
mark again. There’s always a problem with disposing of old oil, but if you buy it in a 5-litre can you can put the old oil in there and let the dustmen take it away. An alternative is to get some similar type of container and dispose of it in the same old oil off your own
way.
Some
garages will take
hands - they've got to get rid of their
and it’s often collected
for recycling or used ina
special type of workshop heater.
2
Renewair cleaner element (if necessary) The
air cleaner
element
is normally
renewed
at
intervals of 12,000 miles or 12 months, but under very dusty
conditions
quently.
it’s advisable
to renew
it more
fre-
If you're in doubt, check whether there’s any
dirt build-up inside the air cleaner housing.
it’s a good idea to renew
If there is,
Topping up carburettor dashpot
the element; the procedure’s
given in the 12,000 mile Schedule.
3
Check oil level in carburettor dashpot(s) The
oil
in the
dashpot
piston and ensures
smooth
ing.
small
Unscrew
the
acts
as a damper
for the
and progressive fuel meter-
knurled
plastic
cap
on
the
carburettor and add a little engine oil, if necessary, to
bring the level % in (13 mm) hollow
piston
rod.
Refit
the
above the top of the cap:
where
applicable
repeat this for the other carburettor.
4
Examine cooling system hoses Although
coolant, condition
64
there
it’s a good
may
be
no
idea to very
of the hoses.
Press them
leakage carefully
of
engine
check
the
and squeeze them,
and check for signs of cracking or perishing. Renew any that show even the slightest sign that they might give trouble in the future. More information’s given in
Distributor contact breaker points. Arrows show fixed contact securing screw, and adjusting notch
SERVICE SCENE
The one-piece contact set used on later models
7. 2 3 4
Points Pivot spindle Cam Contact breaker plate oil hole
the 24,000-mile Service Schedule and refilling of the cooling system.
5
5 6 7 8
covering
draining
The
spark in the
behind
the
plugs are some
of the more
accessible
fibreboard
cover
on
they’re
later models,
which
from a lot of road dirt, etc. Pull
off the plug caps; if you think you won’t know where each
one
belongs
Paint.on
each
when
you
put them
back, a little
the cable or plug cap can be used to identify
-
remember
breaker points and lubricate
Occurs
1100/1300, engine compartment;
helps to protect them
6 Clean contact distributor
After a period of time, due to the sparking which across them, the contact breaker points will
Clean spark plugs
items
Screw head on cam Contact plate securing screw Adjustment notch for screwdriver Terminal nut
that
No.
1 cylinder’s
nearest
the
radiator. Check that there’s no dirt around the plugs, which might fall into the engine, then remove each plug using the proper spark plug spanner. For cleaning use a thin wire brush and a penknife
blade, but take care not to
need cleaning. A build-up occurs on one contact and a small crater appears in the other one; the electrical resistance of the contacts increases too. These things
lead to starting problems and a general fall-off in the efficiency of the ignition system. To clean the contacts, snap off the spring clips and
take off the distributor cap (beneath the fibreboard cover
on
later models, but earlier ones have a rubber
cover over the distributor cap); next pull off the rotor
arm. Unscrew the terminal nut, (taking care that it doesn’t drop inside the distributor!) and the steel nut under it if there is one. Remove the top flanged bush, and the condenser and low tension (LT) lead; you can
set of plugs makes life easier - you can fit these straight away and clean the ones you've just taken out
now lift off the moving contact. Remove the fibre washer or lower flanged bush, then the screw and washer (don’t drop them), and lift out the other contact.
at your leisure. Wipe the plug insulators
carborundum
damage central
the surface finish of the insulator around the electrode; this will
lead to misfiring.
A spare
To
with
a petrol-moistened
reface
cloth, and see that the screw thread is clean. Check the
that
electrode
gap
thickness
(see Vita/ Statistics)
contacts flat and
using
a feeler
gauge
of the
specified
and if necessary
bend
metal
the
stone
isn’t
contacts,
rub
or fine emery
removed
from
them
cloth.
one
on a
fine
Take
care
edge
of
the
because when they’re fitted they need to be parallel, or very slightly domed so that they
the outer electrode to correct it. Never try to bend the central electrode - all you'll achieve is a broken insu-
touch at their mid points. Make sure that the contact faces are very smooth when they've been rubbed down
lator.
or they'll rapidly wear and burn. Refitting’s now in the reverse
When the plugs are clean and reset, check that the seating on the block is clean and that the washer’s on
the
plug.
Apply
a drop
threads then tighten them
or two down
of oil to the plug firmly - but no white
knuckles or bulging cheeks, you’ve got to get them out again one day! Don’t bother to fit the plug leads yet, because you'll need them off for the next job.
The
illustration
shows
the
order of removal.
later type contact set, the
only real difference with the earlier type being a flat insulating washer beneath the moving contact arm rather than a flanged nylon bush and a washer beneath the nut. Lightly tighten the securing screw then engage top gear and push the car a little so that the heel of
65
SERVICE SCENE Using a knife or a fine file, clean off any deposits
the moving contact is on one of the peaks of the cam (on
automatics,
pulley
hole
you'll
have
to
turn
the
crankshaft
with a spanner or insert a screwdriver in the in the converter housing to engage one of the
notches - see the illustration). Now,
out with the feeler gauges
again and select
from the rotor and metal electrodes in the distributor cap.
Wipe
the cap
clean,
and check
that
the spring
behind the central carbon electrode is still effective. Wipe the plug leads and caps clean, and check that they’re all in good condition; if there’s any doubt, renew them without a second thought before they give
the size given in Vita/ Statistics for the points gap. Place the feeler between the contact faces and use a
you
screwdriver
and reconnect the plug leads in the correct order. Now
in the notch
to set the gap, rotating the
screwdriver a little one way
or the other as necessary.
trouble.
start the engine (just to make sure that it does!).
The feeler should be a firm sliding fit when the points are set; tighten the screw and recheck the gap. Now apply a trace of petroleum jelly to the cam profile,
7
one
pivot spindle,
contact
two
drops on the screw head on top of the cam, and drops through the hole in the contact breaker plate to lubricate the advance weights.
ignition
three or four
occurs.
drop
of oil to the moving contact
Fit the rotor and cap to the distributor,
Check ignition timing As the contact has been
timing
heel wears, or after
- the
moment
If you
at
which
the
use a stroboscopic
spark
(that’s with the
is easily done, and this method want
a new
be a slight shift of
Checking the timing statically
engine stopped) cribed.
breaker
fitted, there may
is des-
a more accurate setting, you must
light (this is dynamic
light will be supplied with operating
timing); the
instructions
and
you'll find it quite easy to use but, if you haven't got one, dynamic timing’s a job for the Leyland man again.
Ignition timing marks will be found by looking through the small window on the torque converter or flywheel housing (there may be a small inspection plate which
(remember
has to be removed). Rotate the crankshaft
how
we did it when
checking
the points
gap?) until the 1/4 or O mark aligns with the mark on the cover. If you can’t see it properly, use a mirror. You're now at top-dead-centre (TDC) for number 1 or 4 piston on its firing stroke, (It doesn’t matter which, but
if you
electrode
Distributor clamp bolt and
adjuster (arrowed)
Vernier timing
want in the
to find out distributor
you cap
must
check
the rotor’s
which
pointing
to). The engine Now
static will
ignition
be found
setting
in the
rotate the crankshaft
for
your
Vita/ Statistics
particular Chapter.
or flywheel in the opposite
Ignition timing marks - manual transmission
The timing marks 1/4 (TDC), 5° , 10° and
15° BTDC are on the flywheel. They may be seen, together with the indicator, with the aid of
a mirror after removing the plate (arrowed)
66
SERVICE SCENE
Ignition timing marks - automatic transmission a)
a
‘A
On early models the TDC position is
Seana
eRe Meg:
indicated by the 1/4 mark (Inset A)
with 5° and 10° marks also provided.
1c] Bl
b) On later models each degree from 20° BTDC to 10° ATDC is marked.
K\ % \\
c) The hole in converter housing (Inset B)
Pees
“5
10\5
Sar 7
PNA HTTHI
BEFORE AFTER Y /
is used for inserting screwdriver to turn the converter.
direction
to normal
rotation
by about
5° more
than
sory market, and if you’re going to use one follow the
this static ignition timing setting (say 10° to 15° alto-
maker’s instructions carefully.
If you
gether - the exact amount’s
the job is best left to someone
who
not critical). Remove
distributor cap; the points will
now
the
be closed but if
the
local
Leyland
man
haven't got one, has - for example
or carburettor
specialist.
you slowly turn the engine in the normal direction of rotation they'll open. Stop rotating at the precise
single carburettors, the procedure’s now explained.
instant
operating
the
points
commence
to open
and check
the
marking on the scale - this is the static timing and if everything’s OK it should correspond to that quoted in
Vital
Statistics
for
your
model.
If the
setting
Obtained is too near to TDC you'll have to advance the ignition, either by means of the knurled wheel adjuster on the distributor (in the ‘A’ direction) or by loosening the distributor clamp bolt and turning it clockwise
For
a start
you
must
temperature
have
the engine
so a run of two
For
at normal
or three miles
will be needed before you can start. While you’re getting your tools etc ready, leave the engine idling for a few more minutes. On automatic models the handbrake must be firmly on and ‘N’ selected. If you’ve got
a tachometer,
briefly
switch
the engine
off and
connect it up according to the maker’s instructions, then start the engine again. Turn the throttle adjusting
very slightly. If the setting’s too far from TDC, the opposite action is required. You'll probably find it difficult to judge exactly
screw
when the points are opening,
check the mixture strength by raising the piston lifting pin about 1/32 in after it contacts the piston; if the
round fitted
this. with
but there’s an easy way
All you need is a 12V bulb in a holder leads and crocodile clips. Connect one
to get the specified
got a tachometer
but
point,
ately
other
to the
moving
contact
spring,
then turn on the ignition. At the instant of the points
the test the job
if it’s too
decrease;
weak
if it’s too
the speed will immedi-
rich the speed
will increase
and continue to do so,
opening, the bulb will light up and remain alight until the points close again. Don’t forget to switch off ignition when you've finished and remove the lamp if you’re using one. When you're happy with timing, refit the distributor cap and that’s another
Now
mi xture’s correct the engine speed should increase only
momentarily;
the
(if you haven’t
this setting’s fairly critical on automatics).
crocodile clip to the distributor body or a good earth
and
idle speed
an intelligent guess will have to do,
the
If mixture adjustment’s necessary, carefully turn jet adjusting nut at the base of the carburettor
downwards
mixture. time,
to
Never
and
rev
richen,
turn
or
upwards
the nut
the engine
more
to
weaken,
the
than one flat at a
a little before
rechecking,
finished.
using the piston lifting pin.
8
Check idle speed and mixture settings
The fast idle speed needs to be checked now, but first ensure that with the choke knob pressed fully in, there’s about 1/16 in free movement before the cable
Two adjustments are provided on SU carburettors,
begins to pull on the lever. Pull out the knob about %
one for the mixture (air/petrol ratio) and the other for the idle speed (minimum throttle opening). With twin
in (13 mm)
and wedge
it in this position,
then adjust
the fast idle screw to give the specified fast idle speed. Now push in the choke knob and check that there’s a
carburettors, adjustment’s a little difficult and will need to be done using some form of flow balancing
small
device. There are many of these available on the acces-
the cam.
clearance
between
the fast idle cam
screw and
67
SERVICE SCENE
9
Check clutch lever return stop setting This check’s necessary to make sure that the clutch
doesn’t
start
checked
and reset, so don’t neglect to do it; the clutch
lever arm
to
slip as
is connected
Pull the operating
wear
takes
place.
It’s easily
to the slave cylinder pushrod. lever outwards
and use a feeler
gauge to check for a gap of 0.020 in between the lever
and the head of the adjustment bolt. Loosen the locknut and reposition the bolt, if necessary; recheck the gap after tightening the locknut.
70 Lubricate dynamo rear bearing Apply two or three drops of engine oil to the rear bearing of the dynamo (where applicable). There’s not much
Typical SU carburettor
Idle speed (throttle) adjusting screw Suction chamber
17 Lubricate
Jet adjusting nut (mixture) Piston lifting pin Wh QA Fast idle adjusting screw
room to get at it, but an oil can with a cranked
spout will do the job.
Raise
the handbrake
cables and linkage
the car at one side and support
that you can get underneath
it firmly so
to the handbrake cables.
Using your fingers, smear some general purpose grease on to all the pivoting, sliding and linkage points of the handbrake cables to prevent wear and corrosion
setting in. You can leave the car raised after doing this because it'll give you a better view of the tyres for the next check.
12 Check tyre wear pattern With wards
the car
on
If you
still raised
on
one
the other side) check
side
(then after-
the tyre wear pattern.
find the front ones wearing more than the rear,
you can reverse them if you wish, but you
may end up
with all four wearing out at the same time and that’s hard on the wallet. If the front ones are wearing unevenly
1 2
Handbrake cable lubrication points Cable guide channel 3 Clevis pin Swivel sector pivot
it’s a good idea to have the front suspension
alignment
checked;
the
cost
compared with prematurely
the
isn’t
worn
excessive
when
out tyres.
When you've finished checking, lower the car to ground and congratulate yourself on another
service schedule expertly completed!
EVERY 12,000 MILES OR 12 MONTHS WHICHEVER COMES FIRST (in addition to the 6000-mile Schedules)
Weekly,
The following tools, lubricants,
3000-mile
and
etc., are likely to be
needed:
Feeler
gauges,
grease
and screwdrivers, hub nuts.
gun,
socket
miscellaneous or box
spanner
spanners for rear
Air cleaner element, set of spark plugs, distributor
68
Clutch return stop bolt and locknut. Arrow shows where gap should be set
contact breaker points, general purpose grease.
Rocker
cover
gasket, oil filler cap
(later models),
SERVICE SCENE holding the central screw with a screwdriver to stop it turning. Now turn the screw with the screwdriver to obtain the correct gap, tighten the locknut while holding the screw firmly, and check again. Repeat this if necessary. Having done No. 1 valve the remainder can be adjusted in the same way, preferably in the order given below, as it saves too much rotating of the crankshaft.
Valve fully open
Check & Adjust Valve No. 1 Niet Hy 3 aN 5 verve 2
Valve No. 8
me al eee non a
fuel filter nuts.
(some
models),
split pins for rear hub
1 Check valve clearances Valve clearances
be correct for the engine to
properly - that is to take in the correct of fuel/air mixture at precisely the right
moment,
and
Procedure though
must
then
get rid of the exhaust
for checking
gases. The
on all models is the same, al-
there are slight differences
in the approach
to
the job because of different piping arrangements. First, make
a note of the piping attached to your
particular rocker cover engine), then carefully
Now
on
and
sticking
rocker a good
cover blow
remove take
with
the two large nuts
the
cover
the ball of the
off; if it’s hand
will
move it but don’t be too brutal. Now you’ re going to need to turn the engine, and in this instance the easiest way is to jack up one front wheel off the ground (apply the handbrake firmly first) and engage top gear.
Turning
the wheel
in the normal
direction
of travel
the crankshaft
eee
2
oe
To help memorise the numbers
in this way
and
watch
the
rockers moving up and down, at the same time comp-
ressing and decompressing the valve springs. Starting No. 1 valve (nearest the radiator) position the
with
the hose(s) to the cover and run the engine, checking for oil leaks around the gasket seal.
2 Service crankcase breather system An air filter is incorporated in the oil filler cap on later cars; also some cars have a wire gauze filter in a combined breather and flywheel housing. Where
Some models also have a crankcase breather control valve. If your car’s one of these, spring the clip to One them
side,
take
end)
will be fully
compressed. Using the correct size feeler gauge (0.012 in) slide it between the end of the No. 1 valve stem and the rocker arm. If the clearance is correct, the feeler will be a firm sliding fit; if it’s too tight or too
slacken
the
hexagon
the component
locknut
while
parts
and
clean
and
parts can first be boiled in water for a few the parts are all clean, refit them in the
spring on
the retaining clip. Now run the engine at idle speed then remove the oil filler cap; the speed should increase. a little, but if it doesn’t the breather valve’s either incorrectly assembled or faulty (possibly a ruptured diaphragm).
loose, adjustment will be needed.
adjust,
valve
out
in petrol. If the deposits are difficult to remove,
the metal
opposite
oil separator fitted to the the latter is fitted, pull off
the detachable cap and wash the gauze in petrol. Shake it dry and refit it. Where there’s a filter in the oil filler cap, the
minutes. When
To
this table, note that in each case
With the valve clearances all correct, it’s a good idea to renew the gasket beneath the rocker cover. Take off the old one and make sure that the seating surface on the cylinder head and rocker cover are clean, then put the new one in place. Don’t use gasket sealant - if necessary a little grease can be used to hold it in place. Refit the cover and pinch up the nuts; don’t overtighten them or the cover may distort. Refit
8 valve
(at the
y
of the valves open and closed always add
engine so that the spring’s fully open; at this point No.
spring
a
complete cap must be renewed.
will now rotate the engine surprisingly easily.
Rotate
LT ere ee 6 “om 4
(the tin box on top of the unclip the pipes and move
them out of the way. the
ol 3 5
up to 9.
You may also need: Set of brake shoes
breathe amount
eae ee nom
renewed individually.
Parts for this can be
69
SERVICE
SCENE
Oil filler cap and breather control valve
Spring clip Cover Diaphragm Metering needle
Spring Cruciform guides DaARWBNH™
3
Clean brake servo filter
If your car’s got a brake servo, carefully prise the dome from the valve cover using a screwdriver. Take
out the filter and clean it with compressed air froma foot pump (actually, a garage type compressed air line
is preferable, and it won’t take more than a minute or two on the forecourt if you feel like doing it that way). When refitting, make sure that the spring’s securely located in the valve, then refit the filter and snap on the cover.
4
Renewair cleaner element Several different types of air cleaner are in use but
they’re all basically the same; they have a paper-type element in a metal housing with an air intake pipe.
Unscrew the wing nut(s) or bolt(s) on the cover, take the cover off and take out the element. Clean the container with a lint-free cloth, making sure that no
dirt gets into the carburettor
intake(s).
1
Brake servo filter Snap-on cover (remove with screwdriver blade)
2
Filter
element and refit the cover.
7
5 Fit new spark plugs All the information
6000-mile
new
plugs are
and
are
Champion
Service the
correctly plugs
for this job will be found in Schedule. Make sure that the
right type
gapped. always
obtained are recommended
6
70
for your
If
make
particular car,
you're sure
Spring
Clean fuel pump or filter If your
the
3
Fit the new
not
that
buying the
type
equivalents.
Fitnewcontact breaker points
All the information for this job will be found in the 6000-mile Service Schedule.
car has a mechanical
fuel pump,
mounted
on the carburettor side of the engine at the front, remove the three cover retaining screws then take the cover and joint washer off. Clean any sediment from the
pump inlet chamber then refit the joint washer and cover. Run the engine and check for leaks although not very likely, it may be necessary to renew the joint washer.
If your car has an electric pump, the filter’s inside and not really accessible without removing the pump. This job’s covered for these models.
in the Owner's
Workshop
Manual
SERVICE SCENE Some models have a separate in-line filter which be renewed. Simply loosen the fuel pipe clips, pull off the pipes and fit a new filter. Don’t forget to must
check for fuel leaks afterwards. NOTE: Don’t have lighted cigarettes or naked flames around while working on any part of the fuel system.
8
Lubricate speedometer cable The
speedometer cable is a two-part affair, joined in the middle and running from behind the speedometer, through the engine compartment bulkhead, along the side of the engine to the transmission. The joining union’s at the radiator end of the engine against the bulkhead. Separate wipe them
the
two
parts,
pull
out
the
cables
and
clean with a petrol-moistened cloth. Smear
a little general purpose
grease over the cables, except for the last 8 inches or so at the speedometer end to
1
Screws
Mechanical fuel pump
4
Fuel inlet pipe
avoid getting grease inside the instrument. Refit the cables, turning them if necessary to get the end fittings
2 3
Cover Joint washer
5
Fuel outlet pipe
to engage, then reconnect the outer cable halves.
9
Lubricate water pump bearing (early models) On
behind
early type water the pulley.
pumps
there’s a grease plug
unscrew it and apply the end of the grease gun to the threaded hole. Give it two or three strokes of the gun but don’t try to use too much
If your
car’s got one,
pressure
or you
may
damage the
internal seals. Refit the plug afterwards.
10 Check rear brake linings Unfortunately, although this seems a basic and fundamental part of routine servicing, it’s not really a job that can be done properly without
a 15/16 in AF tubular or socket spanner which will fit the hub nut. Also, there may be difficulty in removing the brake
drum.
If you
think you can get over these problems,
The in-line fuel filter used on some models. Arrows show direction of flow
% Rear brake backplate showing handbrake cable
72 ~~‘linkage
Speedometer cable jointing sleeve (arrowed)
SERVICE SCENE
Taking out the split pin prior to removing hub nut
As then
a see
precaution,
slacken
if the brake
drum
won't but may come
off the
brake
adjuster
will pull off. It probably
free by tapping around the edge
with a good sized piece of wood; levering isn’t recommended
because
you
may
damage
the backplate.
No
luck yet? Then try refitting the wheel and use a fairly vigorous rocking action which
should
loasen the hub;
try a few blows from the piece of wood, if necessary,
on the inside of the wheel near the brake drum. If this won’t do the job it looks as though you're back to the
Leyland
man
might work
again, although
there is something that
for early models.
The spare wheel used to
be retained in the boot by a cup-shaped piece of metal
“ and a screw. If you can fit this between the wheel and the brake drum so that it contacts the end of the hub
shaft, then tighten the wheel
Lifting off the brake drum
on to the brake drum,
you should be able to pull the drum off. By now you'll either have given up or got the drum off, so let’s assume
the latter. Dust out the drum with
an old clean paint brush or a clean lint-free cloth (try there
shouldn’t
trouble, Raise do)
until
be anything
else
to
cause
you
any
the
rear
one
of the car
wheel
is clear
(one side at a time will
of the
ground.
Don’t
forget to chock the front wheels and engage first gear, and make
sure that the handbrake is released. Remove
the
wheel,
road
then
use
a screwdriver
to carefully
prise off the grease cap from the centre of the brake drum. Using pliers, unfold the ends of the split pin in the
you
hub
not to inhale the dust). If the linings aren’t worn down to the limit (see Vita/ Statistics), check that there are
nut
and
haven’t
got
draw
a
the pin out.
spanner
that
If you
will
now
find
fit the
nut
no signs of hydraulic
fluid leakage and put everything
back; this is described later in the Section. If there should be signs of fluid leakage, the wheel cylinders must be overhauled or renewed; this is a job described in the Owner’s Workshop Manual or otherwise should be left to the Leyland man. If the shoes need renewing, don’t despair, it’s not too difficult. Using pliers, press in the steady spring washers,
turn
them
and
remove
them
from
the pins;
properly, don’t go any further but put everything back
remove
and leave the job to the local Leyland man. Assuming
fitted behind the brake shoe webs. Now use a large screwdriver and lever the front shoe out of the slots in the adjuster and wheel cylinder piston, then repeat for the rear shoes. Detach the handbrake operating lever.
that things are OK remove the nut (left-hand thread on left-hand wheel) and washer, and prepare for problem No. 2 - that is, removing the brake drum.
the springs. Note that the pull off springs are
73
SERVICE SCENE Don’t touch
the brake pedal and take great care that
the pistons of the wheel cylinder don’t move
out, or
you'll need to bleed the brakes afterwards; they can be held in place by thick rubber bands or a piece of bent wire. Separate the
new
the shoes
ones;
affect braking.
don’t
from handle
the springs, them
then
or the
attach
grease
will
Now dust out the backplate then apply
a trace of grease to the high spots on the plate where the shoes touch, to the grooves in the adjuster and pistons,
and
to the
handbrake
lever contact
points.
Everything can now be refitted following the reverse of the removal procedure, but make sure the shoes go on the right way. Don’t forget the rubber band or wire on the wheel cylinder has to be removed, and don’t forget to fit the steady springs and washers.
With the brake
shoes
in position,
refit the drum,
washer and nut. Tighten the nut firmly you've
got a torque
These screws inside distributor cap secure the leads
(60 Ibf ft if
wrench), and fit a new split pin.
The rest of the procedure’s straightforward, but don’t
forget that the brake must be adjusted before you tackle the other side. If the grease cap or the area around the castellated nut doesn’t have much grease around
it, smear
the nut with general
purpose
grease;
there’s no need to fill the grease cap.
EVERY 24,000 MILES OR 2 YEARS, WHICHEVER COMES FIRST (in addition to the items previously listed) The following tools, lubricants, needed:
etc, are
likely to be
Miscellaneous spanners and screwdrivers Cooling system antifreeze You
may also need:
Distributor cap, rotor, conden-
Radiator drain plug
ser, set of ignition HT leads.
71 Renew
distributor rotor, condenser and cap
(if necessary) We've attended
to most
of the things in the igni-
tion system at regular intervals, but the rotor, cap and condenser
haven't
really
been
included
apart
from
keeping them clean. To keep the system in perfect tune, these items will now probably need renewing as well. The plug leads we've been keeping an eye on, but if your car has the carbon fibre type leads (i.e. they're
not wire renewed.
inside that insulation)
Fitting little screws
all these
items
74
is straightforward
inside the distributor
leads, and the condenser the flying lead attached LT lead.
2
these too should
cap retain
be
- those the HT
has one securing screw, with to the same terminal on the
Renew antifreeze in cooling system The antifreeze should be renewed every two years
Cylinder block drain plug (arrowed)
HT
SERVICE SCENE ‘ and the system
flushed through
just to make sure it
can do its job properly. To handy
drain
the
system,
place
a suitable
at the base of the radiator
container
(something like the
plastic washing up bowl used for draining the engine oil will do), then remove the drain plug (where there is one) or detach the radiator bottom hose. The coolant will start to flow out and now, if the radiator cap’s removed
and the heater control
position, will run out much
moved
to the ‘HOT’
faster. When
the flow has
stopped, open the cylinder block drain tap or remove the plug, to drain the block. When all the coolant has drained, get a can of water or a hosepipe, and run water through the system
to
remove
any
Proprietary
sediment
that
flushing compound
might
be
present.
A
can be used if you've
any suspicions of the system being blocked, but follow the
makers’
instructions.
When
you're
satisfied
that
the system’s clear, refit the drain plug(s) and hose, or
close the tap, but leave the heater control at ‘HOT’. Unless it’s winter it’s not absolutely essential to use antifreeze when refilling the system, but it’s preferable because of the corrosion inhibitors which all good antifreeze has. This can stay in the system for two years, and once it’sin there’s no need to take it out during warmer weather. Here’s a table which can be used as a guide to how much antifreeze is required for any 1100 or 1300 model: Commences _ Solution freezing at % CG F
—9 —13 =
16 9
20 25 30
that the brake fluid deterioriates after a long period in
service, as do the rubber parts (eg hoses, seals, etc). Don’t
neglect
a job like this, it’s for your safety and
everyone else’s too.
OTHER
REGULAR
SERVICING
“If you carry out the procedures we've detailed so far, at more or less the prescribed intervals of mileage or time,
then
you'll
have
gone
a long way
towards
getting the best out of your 1100 or 1300 in terms of both performance and long life. That’s the good news. The other kind is that there are always other areas, not
dealt with in regular servicing schedules, where neglect can spell trouble. We reckon a bit of extra time spent on your car at the beginning and end of the winter will be well repaid in terms of peace of mind and prevention
of trouble.
The suggested attentions which follow have therefore been
divided
into Spring
there’s nothing
and
to prevent
Autumn
sections
you doing them
- but
more
fre-
quently if you like!
SPRING We've put this one first as it’s less depressing than Autumn
-
though
there’s
probably
more
work
involved!
Underside of Car Quantity of antifreeze required
In Spring, we venture to suggest, the owner’s fancy
lightly turns to thoughts of cleaning off all the accumulated
1.75 pints (1.0 litre) 2 pints (1.1 litres) 2.25 pints (1.2 litres)
Having decided how much you need, the antifreeze
muck
Without
of
winter
a shadow
underneath
is the
from
of doubt,
worst
underneath
the
the best time
time
from
the
car.
to clean
discomfort
point of view - that is, when the car’s been driven in the wet and all the dirt’s nicely softened up. So let’s talk first about the easiest way out - steam cleaning or
idle to let the mixture circulate; as this happens the level may fall as airlocks are displaced, then will drop
pressure washing. These aren’t D-I-Y jobs, and can only be done at larger garages, usually those which undertake body repair jobs. You may feel this method is unnecessarily expensive, but it’s generally preferable to grovelling about underneath and getting filthy and
quite sharply
uncomfortable
can
be poured straight into the radiator followed by enough water to fill it; leave just a little antifreeze for adding to the expansion tank. Run the engine at a fast
when
the thermostat
opens.
Finally top
the radiator right up to the brim and fit the cap. Pour
owner
the remaining drop of antifreeze into the expansion tank and add a little water to bring the depth up to
water
about 2% in (65 mm). Just to check that there are no airlocks, run the car on the road for a short distance, then stop and allow the engine to cool, and recheck
who
You'll
doing
it yourself.
However,
for
the
really wants to do it by hand, here goes .... need
paraffin
(and preferably
or
a water-soluble
solvent,
a hose), a wire brush, a scraper
and a stiff-bristle brush. If you think the car floor may leak, remove the carpets or they'll get wet; this will also help you
pinpoint the places where
water's getting in.
the coolant level.
To start with, jack the car up as high as possible, preferably at one side or one end. For your own
3 Renew brake fluid and all rubber parts in brake hydraulic system
safety,
This is a job for the Leyland man, or for the more enthusiastic owner by following the procedures in the Owner’s Workshop Manual. The reason for doing it is
support
it on
ramps
or concrete
or wooden
blocks and chock the wheels which are on the ground. Unless
both
handbrake;
rear
wheels
are
raised,
also
apply
the
similarly, unless both front wheels are off
the ground, engage first or reverse gear.
SERVICE SCENE Several different adjusting arrangements
have been
Now get underneath (you‘ve put it off as long as you can!) and cover the brake discs and calipers with polythene bags to stop mud and water getting into
used, but it’s either a case of slackening the wing nut
them.
loosening
Next
loosen
any
encrusted
dirt and,
working
on
top
of the
air cleaner
a clamp
screw
one end or one side, scrape or brush it away. The
turning
or sliding
paraffin or solvent can be used where there’s oil contamination. After all the brushing and scraping, a final wash down with the hose will remove the last of the
Typical
set-ups are shown
from
and
turning
around
the pipe
the cover,
the intake
to the
or
pipe and
correct
position.
in the illustrations. Remem-
ber to tighten the nut or screw afterwards.
dirt and mud. You
can
now
check
for leaks in the floor; if you
find any, dry the area carefully then use a mastic type sealer to plug the offending gap. Hollow sections of doors
and
bodywork
can
be sprayed
or brush-painted
with a rust-inhibitor to provide some extra protection.
If there are signs of the underseal breaking away, this opportunity to patch it up. Undersealing
is a good
AUTUMN With system
winter
on
the
way,
is going to take much
your
detailed procedure’s described there.
though, and that’s to make sure the area is clean and
Battery up correctly Ensure this is topped Section) Check and clean as necessary (3000 miles)
dry, otherwise you're wasting your time. you’re
underneath,
have a good
electrical
has during the last few months. Now - and not on a dark night miles from anywhere in a snowstorm - is the time to check the vital components. Where other Sections or Chapters are referred to in brackets, the
Paint is available in spray cans or tins from accessory shops; one small point about putting the stuff on
While
car's
more of a beating than it
look round
for signs of rusting. Likely places are the body sills, panels and subframes, and if you do find any
(Weekly
floor
rust have a word
with the local
Leyland
man
or body
Fan belt 3000 miles
repair shop before things get too bad.
Lights
Bodywork This too will have suffered from all the muck and salt that’s around during the winter, and there’s no
Check operation (Weekly Section).
better time to wash
check for faults as necessary
chips and rust spots. You're bound to find some, despite the regular washing you've given the car - or meant
Renew
it thoroughly and check for stone
to - throughout
any
failed
bulbs
(/n
an
Emergency)
Wipers/Washers
the winter. Treat as for rusty
These
are
going
to get a lot of use, so check the
scratches (see Body Beautifu/).
wiper arms
After the touch-up paint has thoroughly hardened, it's worth giving the car a good polish to prepare it for the long, hot summer ahead (well, there’s no harm in hoping). If you're feeling really energetic you could do
reservoir (Week/y Section) and check operation.
the interior
as well
but the most
the
position
(3000 miles).
Top up washer
Check all hoses (6000 miles).
important cleaning
Drain,
flush and
refill system
with new
antifreeze
mixture if necessary (24000 miles).
Engine air cleaner intake in anticipation
and blades
Cooling system
jobs are now done.
Again
or
(Troub/eshooter 6).
Carburettor Air Intake
of warmer
of the carburettor
weather
air intake
to come,
should
Reset to winter position (Spring Section).
be
changed from the winter to summer setting. The intake spout can be set so that it either draws in warm
Tyres
air from the area of the exhaust manifold, or cooler air
Remember conditions.
from
the engine compartment generally. Positioning the intake to draw in warmer air during winter obviously makes sense because it helps to warm the ingoing mixture and enables the choke to be used less.
But now the outside temperature should be warm enough and the summer position is the correct one.
Check
tread
and
that you
condition may
well
(Week/y
be driving
Section). in slippery
Bodywork and
Finally, if you've got any energy left, wash the car polish it thoroughly to help protect the paint
against the winter elements.
Body Beautiful If you've bought this book
to keep the bodywork anyway ... It’s always this way
a good
you
won't
polished exterior
intending to do all the routine servicing of your car yourself, then you'll surely want
and inside of the car looking good too. And for anyone who doesn’t, here’s how to do it
idea to ciean the interior first; get the dust all over your nicely
- or the car's!
Begin
by removing all
You
have
windows,
to
household
products
the contents, not forgetting the odds and ends in the pockets and glovebox. Then take out all the mats and
Water containing
carpets, which should be shaken and brushed, or better still vacuum-cleaned. If they need further
removed
cleaning this can let them
be done
dry thoroughly
best,
you
put them
back.
careful
any
the
cleaning
car
with
some
as these can leave a smeary
a few drops
stubborn
with
about
windscreen, of ammonia
marks
methylated
and
spirit;
film.
is probably
smears
finish
can
off
be
with
a
chamois leather squeezed as dry as possible. Just in case you
with a carpet shampoo, but before
but
be
especially
should think that’s it, there’s stil!
the boot to be dealt with. Take
bad state of decay that they don’t merit cleaning, why
not get yourself a decent set of replacements? You can get kits tailored for your particular model from
earned
underfelt
should
be taken
out
and shaken, too,
but don't try washing this or it may end up in rather more pieces than you started with. If the carpets
should
just happen
to be in such a
specialist firms, and they’re quite reasonably priced. The
inside
of the car can
now
be cleaned
with a
brush and dustpan, or again preferably a vacuumcleaner. If the flex on the Hoover won't stretch to the car
(and
door!)
the
car
it might
won'‘t
be worth
squeeze
through
thinking about
the
front
investing in
junk
that seems
Now
you
repairs
such
probably
trim
materials
can
be
wiped
containing a little washing-up
over
with
liquid, but
the
for the job. An old
area.
This
Decosol, which are specially
nail don’t
brush
made
will help to remove
splash
too
much
water
ingrained about
such
marks,
but
and do wipe the
this
open
to speed up drying. The carpets can be
doesn't
put back when
they’re quite dry, making sure they're
windows
properly fitted around the controls etc.
of
the
most
useful
comes
is
in various
in a plastic
seat
or
piece
of trim,
from the graining material
over
pattern
type
the
repair and
is then
of
rubbing
embossed
repair’s
into
equally
supplied,
with the
a hot
repaired
successful,
incid-
For larger splits or tears it may be necessary to cut
a piece
dry afterwards
One
entally, on vinyl roofs if your car happens to have one.
with a clean cloth, leaving the
surfaces
hole
matching pattern iron;
cleaners
these.
blended into the surrounding area by selecting the best
as
upholstery
a welllook at
like body filler, and allowed to set. It’s then
one
proprietary
as
a split or
placing
the
a moment
some sheets of texturing material. The liquid is applied
for best results (particularly if they're very dirty) use of
- make
- and take acritical
colours and consists of a quantity of ‘liquid vinyl’ and
smoothed
and
for
the vinyl repair kit, which
probably show you one.
water
pause
the interior. Are there any nicks or tears in the seats or other trim? Is the headlining drooping or peeling? Some excellent products can now be obtained for
to
Seat
can
grown
cup of tea perhaps
one of the small 12-volt hand vacuums which can be attached to your car battery - your accessory shop can
warm
to have
out that collection of
every time you open the lid, and get busy with brush or vacuum cleaner again. While you're at it, if you must carry all that stuff around, now’s the time to try and stow it so it doesn’t rattle any more!
Any
work
of matching show,
apply
it under
together
as
the
neatly
material some edges
as
from
somewhere
that
suitable adhesive to it and of
the
possible
tear,
once
pressing
the
glue
these
has
BODY BEAUTIFUL become
tacky enough.
Any
loose headlining
For
or trim
who's
as
lazy
as
alternative to painting over a scratch
adhesive that’s suitable for PVC or vinyl.
transfer’,
Once
you've
cleanliness
and
got the seats in a reasonable state of repair,
why
not
consider seat covers?
available
colours.
in
packs
Prepare the affected
for touch-up
to
we
are,
the
match
popular
area in the same
paint, then simply
easy
is to use a ‘paint car
way as
pick a transfer
of a
Like the carpets, they're available from specialist firms
suitable size to cover the scratch completely. Hold the
to suit your car and are a worthwhile
transfer against the area and burnish its backing paper,
buy in view of
the protection they give. If you use your car regularly
and if you're doing it right you should find it sticks to
and you've got the time and inclination, it should really be washed every week, either by hand (preferably using a hosepipe) or by taking advantage of the local car-wash if there is one. Whichever method you choose (assuming you
through
to
wash your car at all!) we don’t think we need tell you
different
technique.
how to do it - but remember just wipe
over
a very
it’s never a good idea to
dirty car, whether
wet or dry;
the car paintwork same
time
frees
(rather than your itself from
hand) and at the
the backing.
The patched
area can now be polished to blend it in.
When
any
you've got a scratch that’s penetrated
loose
paint
the rust
on a
metal,
causing
Use your
from
the
rusting,
Scout
bottom
rust-inhibiting
you
right
need
a
knife to remove
of the scratch, then
paint
to
prevent
it from
you might as well sandpaper it!
spreading.
Two or three times a year (even once is better than not at all) a good silicone or wax polish can be used on the paintwork. We don’t know which of the many
cellulose body stopper paste - use a rubber or nylon applicator or a knife, but don’t borrow one from the
makes
you'll
use, so we can only recommend
follow the makers’ see a reward cleaned
you to
instructions closely so that you do
for your
efforts.
with a special chrome
Chrome
considering
the
use
finger,
to help, it will be with
a mild
accessory shop man will advise on a suitable type. The remainder of this Chapter describes how to keep your car’s bodywork and paintwork in good damage
by dealing with too,
as they
occur.
scratches
and
A number
more
major
of repair aids
and materials are referred to, most of them essential if you're to achieve good results. They should all be available, together with free advice, from good motor
accessory shops.
Keeping paintwork up to scratch superficial
scratches
(the
only
other
people seem to get) where they don’t penetrate down to the metal, you'll be glad to hear that repair can be very simple. Lightly rub the area with a paintwork renovator
or a fine cutting paste to remove
any
loose
paint from the scratch and to clean off any polish. Rinse the area with plenty of clean water and allow to dry. Apply touch-up paint to the scratch using a fine brush, and continue to build up the paint by several applications, allowing each to dry, until it’s level with the surrounding area. Allow the new paint at least two weeks to harden (knitting or a crossword puzzle will help to pass the time) then use the paint renovator or cutting paste again to blend it into the original. Nowa
good polish can be used.
be thinned
of smooth dip
down
cotton
it in thinners
to
apply
if necessary
using
rag round and
the end of
quickly
up to the correct level as described earlier.
Dealing with Dents When you car's bodywork gets a deep depression, you'll probably have one too. But there’s no reason why even fully by
fairly large dents
the
can’t be tackled successowner, especially using the
D-Il-Y
excellent body repair materials now available. So cheer up, and let’s see what can be done. The first step is to try to pull the dented metal out
to bring it more Don’t expect to won't; the metal makes
or less back to the original level. make a perfect job of this - you
has stretched
area;
and
‘work-hardened’
it a virtually impossible job. Try to bring
the level up to about sort
need
sweep it across the filled scratch. This ensures that the area is very slightly hollowed and allows the paint to be built
which With
paste can
a piece
‘cutting’ action to remove what is, in effect, a surface layer of dead paint. Your friendly neighbourhood
condition
The wrap
of a polish
now
cellulose thinners. Before it hardens, it’s a good idea to your
If the paint’s beginning to lose its gloss or colour,
probably
kitchen as you'll have a job cleaning it!
parts are best
and ordinary polishing doesn’t seem worth
You'll
cleaner; ordinary metal
polish will attack the finish.
‘78
anyone
can also be stuck in place - but make sure you get an
obviously,
with
1/8 inch below the surrounding shallow
dents
you
can
bypass
this bit. If the underside of the dent can be got at, try hammering it out gently from behind, using a hammer with a wooden or plastic head. You'll need to hold a fairly heavy hardwood block on the outside of the dent;
this absorbs
and helps to stop opposite direction!
the impact the
metal
of the hammer being
dented
blows in
the
If you've got a dent in a completely enclosed body section, or there’s something else preventing you from getting behind it, a different approach is needed. Try to Screw up enough courage to drill several small holes through the metal in the dent, particularly in the deeper parts. Now screw
so that they get a good
in several
sel f-tapping screws bite, and either pull on the
BODY
BEAUTIFUL
4
reads with pliers or wrap some
heavy gauge steel wire ‘ound them and pull this. Brace yourself in case something gives suddenly or you may dent your own
90 dy work!
If things don’t seem
that bad and you're prepared
to have a go at doing the job yourself, remove all the fittings from the surrounding area except those which
may
help to give a good
guide
to what
the shape
area.
should be (e.g. headlamp shells). Now, get a hacksaw
This is best done using a power drill and abrasive disc, put if you've got the time and energy you can use 2Ibow-grease and abrasive paper. Don’t forget to
blade or a pair of snips and cut out all the loose and badly affected metal. Hammer the edges inwards so
Now
to remove
the paint from
the damaged
that you've got a recessed area to build up on.
or the tang of a file to provide a good key for the filier
Wire brush the edges to remove any powdery rust, then paint over with a rust inhibitor; if you can get to the back, do the same to that. You're now going to fill the hole with something, but unfortunately just
which
anything
remove
the paint from
ing good paintwork,
nicely.
Now
an inch or so of the surround-
too, so that everything
blends in
score the metal surface with a screwdriver
you're
didn’t know.
going
to
have
to
apply,
in case
y-ou
Now, to finish off the repair, refer to the
filling and spraying section at the end of this Chapter.
won’t
aluminium
do.
The
best
bets
tape or polyurethane
probably
the
favourite
are
foam.
zinc
The
for a large hole.
gauze,
gauze
is
Cut a piece
slightly larger than the hole to be filled, then position it in the hole so that its edges are below the level of
Rust holes and gashes If
there’s
remove
any
the
paint
left
on
the
affected
area,
it as described previousiy so that you can get a
good
idea
more
rust or fresh air than good metal, now’s the time
to
consider
more
of just how whether
bad the probiem a replacement
is. If there’s
panel
would
be
appropriate; this is a body shop job, beyond the
scope of this book.
;
The subframes are places 71
Front subframe
surrounding
place
with
narrow
sold
by
bodywork.
a few
blobs
If necessary,
of filler paste.
holes you can use the aluminium
the
roll.
approximate
size
backing paper,
Pull and
off a piece shape
hold
or
tape which is
and
required.
trim
to the
If
there’s
peel it off (it sticks better that way)
and
place the tape
over the hole; if necessary,
can
be
at
overlapped
where rust often occurs 2
it in
For small
Rear subframe
the
edges.
Burnish
pieces
down
the
BODY
BEAUTIFUL
LLL
WILLLLLLL 777%
Body areas particularly liable to rusting
edges of the tape with a file handle or similar to make
plane
sure it’s firmly adhering to the metal.
the final shape.
Polyurethane foam sections, but if you’re
grades
is best used in hollow body using this follow the makers’
instructions carefully. When this foam hardens it can be cut back to just below the level of the surrounding bodywork with a hacksaw blade. With the hole now blocked off, the affected area can be filled and sprayed as follows.
or coarse of
coarse,
Many
types
generally
of
speaking
body
filler
those
are
proprietary
available, kits
but which
contain filler paste (or a filler powder and resin liquid) hardener are best. You'll also need a flexible plastic or nylon applicator (usually supplied) for putting the mixture on with. Mix up alittle of the filler on a piece of board or plastic (those plastic
the contents and don’t you
first!).
make
Read
the instructions
up too much
have to work
carefully
at one go. You'll find
fairly fast or the mixture will begin
to set, especially if you’ve been a bit generous with the hardener.
this
plenty
grades
to
fine
their
witt (some
wet-or-dry
keep it wet by rinsing in clean water
point,
of clean
If you're then
you're
the
water
happy ready
over the whole
doctored
area
bare metal, paintwork.
should
be
encircled by « Rinse it wit
to get rid of all the paint anc
with to
the surface you’ve obtainec
apply
some
paint.
First spray
area with a light coat of grey primer
This will show up ‘any surface imperfections whict may need further treatment, and will also help you ge
the knack of spraying with an aerosol can before yo start on the colour coats. Rub down the surface again and if necessary use alittle body stopper, as describe for minor scratches, to fill any small imperfections Repeat
this
until
level’s just proud
When
‘grit’
starting
then
filler dust, and allow it to dry completely.
first a word
of the surrounding
medium,
surrounded by a ring of feathered edge of good
Layers
the final
progressively fine’
paper
or the filler and paint will clog up the abrasive surface
the applicator.
be built up at intervals
the excess and obtair with
abrasive by
give
flat surface, and
satisfied
bodywork.
80
followed
Apply the paste to the prepared hole or dent more or less to the correct level and contour, but don’t try to shape it once it’s become tacky or it’ll pick up on should
follow
wet-or-dry
manufacturers
and a separate
margarine tubs are ideal but do wash out all traces of
Then
paper - 40 is the coarsest, 400 the finest). Always wrar the paper round a flat block if you're trying to get «
At
Filling and Spraying
file to remove
with
spray-and-level
procedure
the finish; then
wash
until
down
you'r
again an
allow to dry.
The
next stage is to apply the finishing coats, bu or two
Paint spraying should
about
the techniques
be done in a warm,
involvec dry, winc
less, dust-free atmosphere - conditions not very readil: the filler has fully hardened,
use a Surform
available to most of us! You
may be able to approac
BODY
BEAUTIFUL
4
them artificially if you’ve got a large indoor workshop, but if you
have
to work
outside
you'll need to pick
the day carefully. If you’re working in your garage you'll probably need to ‘lay’ the dust on the floor by damping it with water. If the
body
repair’s
confined
to a small
patch,
mask off the surrounding area to protect it from paint spray.
and
Bodywork
the
like)
removed.
fitting (chrome
will
If you're
need
to
masking,
and plenty of newspaper to
spray,
shake
experiment
-
the
not
the
neighbours’
the
paint
be
either
aerosol
can
car!)
masked
or
Before starting
thoroughly;
until
you
At the
feel
of the
new
good wax
primer ones.
- not
then
you
can
previous stage this
Use
rub
plenty
with
a thick
coat
of
as one coat, but built up of several thin
When
paper,
area
this down
is dry,
using
the surface
of water
to
the
until
finest
wet-or-dry
it’s really smooth.
keep the surface
it's dry, spray on another
clean; when
primer coat and repeat the
the
for the top coat. Again the idea’s to build up
paint
spray
mence
first
thickness as
this
by several is a
spraying in the centre
a circular
motion,
work
thin coats.
different
aerosol,
Have a test then
com-
of the repair area. Using
gradually
outwards
this time, using a paint
into the original.
Finally,
apply
a
or silicone polish, and hopefully you'll have
There are various kinds of self-adhesive body decor
available for customising your car, while the GT, later Estates and some other versions of the 1100/1300 have their own side-stripes built in. Perhaps the neatest and
most
stripes,
towards
suitable
and way
of
we've
appeal
the
included
‘add-on’ these
variety
are
Pin-
in this Chapter
as
to the owner who wants a cheap and
to improve
the appearance
of his or her
car. They're adhesive tapes which come in different widths and colours and as single or multi-stripes. Most have a backing paper which is peeled off as the stripe is applied. When applying any of these self-adhesive tapes, first make sure the paintwork’s clean by washing with water
Next
clean
paste
or
and up
a car shampoo
the
paintwork
surface
or liquid
with
renovator,
a very
and
detergent.
fine cutting
wash
down
again.
You can now apply the tape, but follow the directions carefully.
Smooth
necessary,
prick out any small air bubbles with a pin.
of the repair and about two inches of the surrounding original paint is covered. Remove all the masking material 10 to 15 minutes
Try
after you've finished spraying.
the edges.
the edges until the whole
paint
After
Adding ‘Pinstripes’
warm
procedure.
Now
all the bits and
a repair you're proud to own up to!
simple repair
away
completely.
best possible finish. the
putting
or a very fine cutting paste, blend the edges
they may
cover
start
renovator
wasn’t too important, but now you’re trying to get the First
can
handles
(an old tin or similar will do
smoothly.
you
to harden
use genuine masking tape
as necessary.
on something
apply
strips, door
Now
pieces because it'll need about two weeks for the paint
not
because
to
stretch
it down the
they'll shrink
with
stripes
slightly
a clean as
you
anyway;
rag and, if
put them
on
and wrap the
ends rcund the panels so that they don’t pull away at
81
The Personal Touch On market
the subject
of accessories
it’s been
in extras and accessories
has now
said that, if somebody grown
to enormous
makes
it, the
proportions,
motorist
and it can
will buy it. The
‘after-
be difficult to sort out the
useful and practical items from what, at the other end of the scale, is some undoubted rubbish. We'd need several volumes to discuss all the various kinds of things you might conceivably buy for your car, and those we have managed around
a good motor
to mention
accessory
can't be gone into in great detail in a book like this. Some time spent browsing
shop will reveal more
than we can
here, but nevertheless
we
hope the suggestions
given may prove useful. All
good
products
fitting
instructions
minor
modifications
will
which
be may
to suit
you're buying secondhand,
supplied or
your
may
1100
with
general
ments
not
require
are
or 1300.
If
of course, you may get no
such
as tachometers
attached
answer
may
allow you
to
the
top
be a central to mount
installation
can
be pod
of the dash console,
instruments
compartment
types,
panel.
which
will not only
but may
and/or
a
which
Another
have a radio
storage
pocket.
instructions at all. The guidelines given here are in no way intended to replace the manufacturers’ instruc-
Some
tions, and if you're in doubt about fitting a particular
Chapter.
item, they’re the people to refer to.
Sooner or later you re going to have to start drilling some holes somewhere, but this needn't cause any
NOTE: commencing
always
disconnect
any work
the
battery
before
involving the electrical system.
Fireworks are very pretty, but there's a time and place
real
information
headaches
already
these
is given
if it's approached
mentioned,
the panel
for everything.
on
make
before even
later
in this
in the right way.
sure there's
As
nothing behind
considering drilling a hole, and
that there's enough room to fit the instrument, switch, or whatever,
Auxiliary instruments It would
be possible to write a complete
book
on
auxiliary instruments and how to fit them but, as with other things, you'll normally get pretty good instructions
when
you
buy them. Because there are so
many instruments available, consider ammeters, battery clocks, oil pressure gauges,
we're only going to condition indicators, tachometers, vacuum
running through
it must have
a plastic or rubber grommet to prevent the metal chafing through; these grommets can be obtained from
DIY accessory or car electrical shops. When it comes to drilling larger holes ments, start off by centre-punching
for instru-
the middle
of the
First of all, even before you've decided what instruments you're going to fit, you've got to think where to fit them. The dash panel of the 1100/1300 models doesn’t lend itself readily to fitting brackets
area, then use compasses or dividers to mark the hole, allowing a little for clearance (standard instruments are 2 in/52 mm diameter). It’s best to mark another hole inside the first hole, and drill around this line so that the centre part can readily be pushed out; if you're using a 1/8 in drill the inner circle will need to be 1/16 in inside the first circle marked. Finish the job
and
small
off by carefully filing and deburring the hole.
end
up
gauges and water temperature gauges.
82
in the space chosen. Any hole which will
have a cable or capillary
extra panels, because the instruments will being rather low down. On some versions
there’s room in the dash itself, but if you do decide to put anything there, make sure there's nothing immediately behind the mounting point because you'll
‘Ammeter
have to drill and file out a suitable hole. Some instru-
from, the battery
The ammeter must be connected in such a way that it registers all the current supplied to, or drawn
except
for the starting circuit. On
THE PERSONAL TOUCH
YAZAKI
VEGLIA BORLETTI
SMITHS
=
COIL
COIL
COIL
Connections for three popular tachometers Yazaki: Smiths:
Negative earth shown - reverse arrowed wires to change polarity. Positive earth shown - the dotted connection must be removed when the tachometer is fitted. Reverse arrowed wires to change polarity. Negative earth shown - reverse arrowed wires to change polarity.
Veglia Borletti:
the 1100/1300 models, the best way of doing this is to
disconnect solenoid
the (that’s
compartment
two
brown
the
device
sidewall
leads
from
mounted
behind
on
the battery)
the
starter
the
engine
and solder
them carefully together. this soldered connection
Now connect the ammeter to and the solenoid connection,
carefully
bare
the
taping-up
ammeter
designated
any
should
44/.012).
nected, it’s found
be
wires.
The
at least 44/0.30
If, after
the
wire size for (previously
ammeter’s
con-
to be indicating in the reverse sense,
Clock Clocks
come
in
many
contain semi-conductors.
forms,
but
most
types
If this means nothing to you,
remember that while it ensures a negligible load on the battery it does mean that the polarity (positive/
negative connections) is critical if you don’t want to permanent damage, so watch the makers’ instructions here. Connections are much the same as for the battery condition indicator except that you don’t want the clock to stop when the ignition’s cause
simply change over the connections on the back of the
switched
instrument.
should be the fuse with the purple wire(s) attached.
Battery condition indicator
Tachometer
The battery condition indicator is simply a voltmeter, and as such must be connected to a good earth point on the chassis and to any suitable connection
that’s available in larger sizes than the others
which
obtained).
is live when
the ignition
switch
is ON.
For
convenience, this could be the fuse with the green wires attached. You wont need heavy cables for the battery condition indicator, 14/0.30 (14/.012) should be OK, but make sure that the earth polarity’s correct.
off.
Therefore
The tachometer
instead must
of 52 mm,
point
(rev counter) is the one instrument
although
them
this smaller
up correctly.
pick up a secondhand that with
connecting
(80 mm size can be
Most are positive or negative earth, but you
connect
common
a suitable
types
are
the Smiths
In case you
one, connections
shown
type,
in the
should
for the most
illustrations.
the distributor-to-coil
Note
LT
83
”
2Qu ww ”
=)
d
c ~ wn
=i
A or
) es a1
'
Owner's Handbook/Servicing Guide All BLMC
1100 and 1300 models, Mk 1, 2 & 3, 1098 cc and 1275 cc, Austin, Morris, Riley,
Vanden Plas and Wolseley, 1962 to 1974. This new Handbook for the very popular and successful BLMC 1100 and 1300 series is written for the owner who wants to get the best out of his or her car in terms of both motoring pleasure and economical running. It’s a time and cost saver, and a problem solver. We tell you how to reduce garage bills, and keep your car safe and roadworthy, by doing your own routine maintenance and servicing. Body repairs and interior and exterior renovation are covered in some detail. There are tips on saving money in other ways, too — on replacement parts, for example; and some ideas on fitting worthwhile accessories. Emergencies like punctures are covered, of course, while in the event of a mechanical breakdown the Troubleshooter Charts should help to get you out of trouble. Carry this book in your 1100 or 1300 at all times, and it should save you its modest cost many times over. O
85696
379
8
3
-
>
a