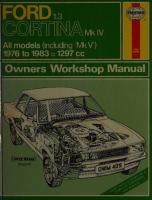
Haynes Ford Cortina Mk IV 1.3 Owners Workshop Manual 1850101698, 9781850101697
Haynes Ford Cortina Mk IV 1.3 Owners Workshop Manual - John H. Haynes, Peter G. Strasman - Haynes Publishing - 1985.
134 69 28MB
English Pages 224 Year 1985
Recommend Papers

- Author / Uploaded
- John H. Haynes
- Peter G. Strasman
- Similar Topics
- Technique
- Transportation: Cars, motorcycles
File loading please wait...
Citation preview
ORD. CORT
NAN Mk IV
All models (including ‘Mk V’) 1976 to 1983 5 1297 cc
(ferry Davey)
, GE
roaora AG
Ail
HEE |
uf
i
Fat
i.7hf
Mi TY :
ak
19D
Mads
GAS
CAEN
Ess
ROTHERHAM PUB
FOR
at he FAR GES
REFERENCE . USE
KOS
This
book
Library.
otter
ONLY S52
must
not
4169
be
removed
from
the
; LM 63
HAR
ord Cortina KIV 1.3 wners orkshop anual by
J
H
H aynes
Member of the Guild of Motoring Writers
and Peter G Strasman Models covered Ford Cortina Mk IV (including
Cortina
80 often known
as Mk V) 1.3 and 1.3L
Saloon, 1297 cc Covers Carousel and Crusader limited edition models Does not cover
7.6, 2.0 or 2.3 models
ISBN 1 85010 169 8 ROTHERHAM PUBLIC LIBRARIES
© Haynes Publishing Group 1978, 1981, 1985, 1989 All rights reserved. No part of this book may be reproduced or transmitted in any form or by any means, electronic or mechanical, including photocopying, recording or by any information storage or retrieval system, without permission in writing from the copyright holder.
Haynes Publishing Group Sparkford Nr Yeovil Somerset BA22 7JJ England
British Library Cataloguing in Publication Data Strasman, Peter G. Ford Cortina Mk IV (& ‘Mk V’) 1.3 owners -3rd ed.-
Haynes Publications, Inc 861 Lawrence Drive
(Owners Workshop
Newbury
629.28'722 TL215.C568 ISBN 1-85010-169-8
Park
California 91320
USA
Manual)
1. Cortina automobile |. Title
ll. Series
workshop
manual.
Acknowledgements Special thanks are due to the Ford Motor Company for the supply of technical information and certain illustrations. Castrol Limited provided lubrication data, and the Champion Sparking Plug Company supplied the illustrations showing the various spark plug conditions. The section of Chapter 10 dealing with the suppression of radio
interference, was originated by Mr. |. P. Davey, and was first published in Motor magazine. Lastly, thanks are due to all those people at Sparkford who helped in the production of this manual.
About this manual Its aim The aim of this manual is to help you get the best value from your vehicle. It can do so in several ways. It can help you decide what work must be done (even should you choose to get it done by a garage), provide information on routine maintenance and servicing, and give a logical course of action and diagnosis when random faults occur. However, it is hoped that you will use the manual by tackling the work yourself. On simpler jobs it may even be quicker than booking the car into a garage and going there twice, to leave and collect it. Perhaps most important, a lot of money can be saved by avoiding the costs a garage must charge to cover its labour and overheads. The manual has drawings and descriptions to show the function of the various components so that their layout can be understood. Then the tasks are described and photographed in a step-by-step sequence so that even a novice can do the work.
/ts arrangement The manual is divided into thirteen Chapters, each covering a logical sub-division of the vehicle. The Chapters are each divided into Sections, numbered with single figures, eg 5; and the Sections into paragraphs (or sub-sections), with decimal numbers following on from the Section they
are in, eg 5.1, 5.2, 5.3 etc. It is freely illustrated, especially in those parts where there is a detailed sequence of operations to be carried out. There are two forms of illustration: figures and photographs. The figures are numbered in sequence with decimal numbers, according to their position in the Chapter — eg Fig. 6.4 is the fourth drawing/illustration in Chapter 6. Photographs carry the same number (either individually or in related groups) as the Section or sub-section to which they relate. There is an alphabetical index at the back of the manual as well as a contents list at the front. Each Chapter is also preceded by its own individual contents list. References to the ‘left’ or ‘right’ of the vehicle are in the sense of a person in the driver's seat facing forwards. Unless otherwise stated, nuts and bolts are removed by turning anti-clockwise, and tightened by turning clockwise. Vehicle manufacturers continually make changes to specifications and recommendations, and these, when notified, are incorporated into our manuals at the earliest opportunity. Whilst every care is taken to ensure that the information in this manual is correct, no liability can be accepted by the authors or publishers for loss, damage or injury caused by any errors in, or omissions from, the information given.
Introduction to the Cortina Mk IV This model is available in 2- or 4-door saloon form transmission only. Although it is equipped with
with manual all essential
accessories, it must be regarded as the basic model in the range. The car will appeal to budget-conscious motorists who cannot afford a more luxurious vehicle and to cost-appreciative fleet users. For the twin advantages of fuel economy with Cortina size and road
holding, some limitation of performance must be expected on this model with such a small power unit which is now a somewhat dated design. The car is just as ruggedly constructed and easy to service as the other models in the Cortina range.
Contents Page
Acknowledgements
2
About this manual
N
Introduction to the Cortina Mk IV
2
Buying spare parts and vehicle identification numbers
5
Quick reference capacities
(o>)
Tools and working facilities
eo
Recommended
©
lubricants
and fluids
Safety first! Routine
9
maintenance
10
Jacking and towing Chapter
12
1 Engine
|
13
Chapter 2 Cooling system
40
Chapter 3 Fuel and exhaust systems
45
Chapter 4° Ignition system
53
Chapter 5 Clutch
61
Chapter
66
6 Gearbox
Chapter 7 Propeller shaft
79
Chapter 8 Rear axle
81
Chapter 9 Braking system
87
Chapter
10
Chapter 11 Chapter
12
Chapter 13 General
Electrical system
100
Suspension and steering
130
Bodywork and fittings
148
Supplement:
Revisions and information on later models
repair procedures
164 206
Fault diagnosis
207
Conversion
211
factors
ee
Index
212
CUIOD AI Al
OOEL
JOOP-OM} UOO]eS
Buying spare parts and vehicle identification numbers Buying spare parts Spare parts are available from many sources, for example: Ford garages, other garages and accessory shops, and motor factors. Our advice regarding spare part sources is as follows: Officially appointed Ford garages — This is the best source for parts which are peculiar to your car and are otherwise not generally available (eg complete cylinder heads, internal gearbox components, badges, interior trim etc). It is also the only place at which you should buy parts if your car is still under warranty — non-Ford components may invalidate the warranty. To be sure of obtaining the correct parts it will always be necessary to give the storeman your car's vehicle identification number, and if possible, to take the ‘old’ part along for positive identification. Remember that many parts are available on a factory exchange scheme — any parts returned should always be clean! It obviously makes good sense to go straight to the specialists on your car for this type of part for they are best equipped to supply you. Other garages and accessory shops — These are often very good places to buy materials and components needed for the maintenance of your car (eg oil filters, spark plugs, bulbs, fan belts, oils and greases, touch-up paint, filler paste, etc). They also sell general accessories, usually have convenient opening hours, charge lower prices and can often be found not far from home. Motor factors — Good factors will stock all the more important
Typ Type
mae
q
@
WWferastleln
7A0| Wan © levstalanice (enh Gross Vehicle Wet
Lenk Drive
Motor Engine
Getr.. Trans
components which wear out relatively quickly (eg clutch components, pistons, valves, exhaust system, brake cylinders/pipes/hoses/ seals/shoes and pads etc). Motor factors will often provide new or reconditioned components on a part exchange basis — this can save a considerable
amount
of money.
Vehicle identification numbers Although many individual parts, and in some cases subassemblies, fit a number of different models it is Cangerous to.assume that just because they look the same, they are the same. Differences are not always easy to detect except by serial numbers. Make sure therefore, that the appropriate identity number for the model or subassembly is known and quoted when a spare part is ordered. The vehicle identification plate is mounted on the right-hand side of the front body panel and may be seen once the bonnet is open. Record the numbers from your car on the blank spaces of the accompanying illustration. You can then take the manual with you when buying parts; also the exploded drawings throughout the manual can be used to point out and identify the components required. NOTE: /n most instances, parts designed for earlier Ford Cortina cars will not fit Mark IV models although in many cases the components appear similar.
laralalge(exs\()|
aol al(lem (eo)
VAU\E Achslast Vorn Perm. Axle Ld. Front
Achse Farbe Axle | Colour
Le a Vehicle identification plate and location
YAU) Way Nolatsiretsian allah(eval Perm. Axle Ld. Rear
Polst lida
ae
Bremsen Bifeles)
TS co os
Quick reference capacities Engine oil Without filter change With filter change
5-7 pints (3-25 litres)
Gearbox
1-8 pints (1-0 litre)
Steering Gear,
«= 2 scsi
7.3 pints (4.1 litres)
chic hee
ee
ca
a os
0-2 pint (0-14 litre)
Rear axle
1-8 pints (1-0 litre)
Cooling system
8-7 pints (4-96 litres)
Fuel tank
12 gallons (54-0 litres)
Tools and working facilities Introduction A selection of good tools is a fundamental requirement for anyone contemplating the maintenance and repair of a motor vehicle. For the owner who does not possess any, their purchase will prove a considerable expense, offsetting some of the savings made by doing-ityourself. However, provided that the tools purchased are of good quality, they will last for many years and prove an extremely worthwhile investment. To help the average owner to decide which tools are needed to carry out the various tasks detailed in this manual, we have compiled three lists of tools under the following headings: Maintenance and minor repair, Repair and overhaul, and Special. The newcomer to practical mechanics should start off with the Maintenance and minor repair tool kit and confine himself to the simpler jobs around the vehicle. Then, as his confidence and experience grows, he can undertake more difficult tasks, buying extra tools as, and when, they are needed. In this way, a Maintenance and minor repair tool kit can be built-up into a Repair and overhaul tool kit over a considerable period of time without any major cash outlays. The experienced do-ityourselfer will have a tool kit good enough for most repair and overhaul procedures and will add tools from the Specia/ category when he feels the expense is justified by the amount of use these tools will be put to.
It is obviously not possible to cover the subject of tools fully here. For those who wish to learn more about tools and their use there is a book entitled How to Choose and Use Car Tools available from the publishers of this manual.
Repair and overhaul tool kit
:
These tools are virtually essential for anyone undertaking any major repairs to a motor vehicle, and are additional to those given in the Maintenance and minor repair list. Included in this list is a comprehensive set of sockets. Although these are expensive they will be found invaluable as they are so versatile - particularly if various drives are included in the set. We recommend the + in:square-drive type, as this can be used with most proprietary torque wrenches. If you cannot afford a socket set, even bought piecemeal, then inexpensive tubular box spanners are a useful alternative. The tools in this list will occasionally need to be supplemented by tools from the Spec/a/ list.
Sockets (or box.spanners) to cover range in previous list Reversible ratchet drive (for use with sockets) Extension piece, 10 inch (for use with sockets). Universal joint (for use with sockets) Torque wrench (for use with sockets) Mole’ wrench - 8 inch Ball pein hammer Soft-faced hammer, plastic or rubber
Screwdriver Screwdriver Screwdriver Screwdriver
-
6 in long x 2 in dia (flat blade) 2 in long x 2 in square (flat blade) 14 in long x t in dia (cross blade) 3 in long x % in dia (electricians)
Pliers - electricians side cutters * Pliers - needle nosed ‘ Pliers - circlip (internal and external)
Cold chisel - 4 inch
Maintenance and minor repair tool kit The tools given in this list should be considered as a minimum requirement if routine maintenance, servicing and minor repair operations are to be undertaken. We recommend the purchase of combination spanners (ring one end, open-ended the other); although more expensive than open-ended ones, they do give the advantages of both types of spanner. Combination spanners to cover the range 10 to17 mm Adjustable spanner - 9 inch Engine sump/gearbox/rear axle drain plug key (where applicable)
Scriber (this can be made by grinding the end of a broken hacksaw
blade) Scrapeér (this can be made by flattening and sharpening one end of a piece of copper pipe) ; Centre punch Pin punch Hacksaw Valve grinding tool
Stee/ rule/straight edge Allen keys \ Selection of files
Spark plug spanner (with rubber insert)
Wire brush (large)
Spark plug gap adjustment too/ Set of feeler gauges Brake bleed nipple spanner
Axle-stands Jack (strong scissor or hydraulic type)
Screwdriver - 4 in long x t in dia (flat blade) Screwdriver - 4 in long x % in dia (cross blade) Combination pliers - 6 inch Hacksaw, junior Tyre pump Tyre pressure gauge Grease gun Oil can Fine emery cloth (1 sheet)
Wire brush (small) Funnel (medium size)
Special tools The tools in this list are expensive to buy, or which manufacturers’ instructions. are undertaken frequently,
these tools. Where
those which are not used regularly, are need to be used in accordance with their Unless relatively difficult mechanical jobs it will not be economic to buy many of
this is the case, you
could
consider
clubbing
together with friends (or a motorists’ club) to make a joint purchase, or borrowing the tools against a deposit from a local garage or tool hire
specialist.
,
The following list contains only those tools and instruments freely available to the public, and not those special tools produced by the
Tools and working facilities ee
vehicle manufacturer specifically for its dealer network. You will find occasional references to these manufacturers’ special tools in the text of this manual. Generally, an alternative method of doing the job without the vehicle manufacturers special tool is given. However, sometimes, there is no alternative to using them. Where this is the case and the relevant tool cannot be bought or borrowed you will have to entrust the work to a franchised garage Valve spring compressor Piston ring compressor Balljoint separator
Universal hub/bearing puller Impact screwdriver Micrometer and/or vernier gauge Carburettor flow balancing device (where applicable) Dial gauge Stroboscopic timing light
Dwell angle meter/tachometer Universal electrical multi-meter Cylinder compression gauge Lifting tackle Trolley jack Light with extension lead
Buying tools For practically all tools, a tool factor is the best source since he will have a very comprehensive range compared with the average garage or accessory shop. Having said that, accessory shops often offer excellent quality tools at discount prices, so it pays to shop around. Remember, you don’t have to buy the most expensive items on the shelf, but it is always advisable to steer clear of the very cheap tools. There are plenty of good tools around at reasonable prices, so ask the proprietor or manager of the shop for advice before making a purchase.
Care and maintenance of tools Having purchased a reasonable tool kit, it is necessary to keep the tools in a clean serviceable condition. After use, always wipe off any dirt, grease and metal particles using a clean, dry cloth, before putting the tools away. Never leave them lying around after they have been used. A simple tool rack on the garage or workshop wall, for items such as screwdrivers and pliers is a good idea. Store all normal spanners and sockets in a metal box. Any measuring instruments, gauges, meters, etc, must be carefully stored where they cannot be damaged or become rusty. Take a little care when tools are used. Hammer heads inevitably become marked and screwdrivers lose the keen edge on their blades from time-to-time. A little timely attention with emery cloth or a file will soon restore items like this to a good serviceable finish.
Working facilities Not to be forgotten when discussing tools, is the workshop itself. If anything more than routine maintenance is to be carried out, some form of suitable working area becomes essential. It is appreciated that many an owner mechanic is forced by circumstances to remove an engine or similar item, without the benefit of a garage or workshop. Having done this, any repairs should always be done under the cover of a roof. Wherever possible, any dismantling should be done on a clean flat workbench or table at a suitable working height. Any workbench needs a vice: one with a jaw opening of 4 in (100 mm) is suitable for most jobs. As mentioned previously, some clean dry storage space is also required for tools, as well as the lubricants, cleaning fluids, touch-up paints and so on which become necessary. Another item which may be required, and which has a much more general usage, is an electric drill with a chuck capacity of at least 3 in (8 mm). This, together with a good range of twist drills, is virtually essential for fitting accessories such as wing mirrors and reversing lights. Last, but not least, always keep a supply of old newspapers and clean, lint-free rags available, and try to keep any working area as clean as possible.
Spanner jaw gap comparison table Jaw gap (in) 0-250 0-276 0-313 0-315 0-344 0-354 0-375 0-394 0-432 0-438 0-445 0-472 0-500 0-512 0-525 0-551 0-563 0-591 0-600 0-625 0-630 0-669 0-686 0-709 0-710 0-748 0-750 0-813 0-820 0-866 0.875 0-920 0-938 0-945 -000 -010 -024 -063 -100 “425 -181 -200 -250 -260 -300 “Sil3 -390 -417 -438 -480 -500 -575 -614 -625 -670 -688 ‘811 813 -860 -875 -969 -000 -050 -165 -362 NO ONO [Oy] ES ea) ey EA en ey SR BS Bae en eS ey Bs 2Aee
Spanner size
z in AF 7mm
8 in AF
8mm ¥ in AF;2 in Whitworth 9mm 2 in AF 10 mm
11mm i in AF % in Whitworth; in BSF 12 mm
Lin AF
13 mm + in Whitworth; % in BSF 14mm
2 in AF 15 mm
% in Whitworth; 2 in BSF
3 in AF 16mm 17mm in AF 18 mm
3 in Whitworth; 3 in BSF 19mm
3 in AF 2 in AF
% in Whitworth; + in BSF 22 mm
7 in AF
+ in Whitworth; 3 in BSF 3 in AF 24mm 1 in AF
% in Whitworth; ea)2 in BSF 26mm
1% in AF;27 mm 2 in Whitworth; # in BSF
11 in AF
30 mm
iz in Whitworth; |e2 in BSF 1} in AF 32 mm
2 in Whitworth; IN2 in BSF 12 in AF ig in Whitworth; #3 in BSF 36 mm
12 in AF
% in Whitworth; 1 in BSF
14 in AF
40 mm; 2 in Whitworth 41mm
12 in AF 1 in Whitworth; 124 in BSF
12 in AF 46 mm
12 in AF 1% in Whitworth; 13 in BSF
12 in AF 50 mm 2 in AF
1} in Whitworth; 12 in BSF 55 mm 60 mm
—
Recommended
lubricants and fluids
Component
Lubricant type or specification
1
Engine
Multigrade engine oil SAE 20W/50
2
Gearbox
3
Rear axle (differential)
SAE 90 EP hypoid gear oil
4
Front wheel
Multipurpose grease
5
Steering
SAE 90 EP hypoid gear oil
6
Brakes
Hydraulic fluid to FMVSS
(manual)
bearings
SAE 80 EP hypoid gear oil
116 DOT 3 or SAE J1703 C
Safety first! Professional motor mechanics are trained in safe working procedures. However enthusiastic you may be about getting on with the job in hand, do take the time to ensure that your safety is not put at risk. A moment's lack of attention can result in an accident, as can failure to observe certain elementary precautions. There will always be new ways of having accidents, and the following points do not pretend to be a comprehensive list of all dangers; they are intended rather to make you aware of the risks and to encourage a safety-conscious approach to all work you carry out on your vehicle.
Essential DOs and DON'Ts DON'T rely on a single jack when working underneath the vehicle. Always use reliable additional means of support, such as axle stands, securely placed under a part of the vehicle that you know will not give
way. DON'T attempt to loosen or tighten high-torque nuts (e.g. wheel hub nuts) while the vehicle is on a jack; it may be pulled off. DON'T start the engine without first ascertaining that the transmission is in neutral (or ‘Park’ where applicable) and the parking brake applied. DON’T suddenly remove the filler cap from a hot cooling system — cover it with a cloth and release the pressure gradually first, or you may get scalded by escaping coolant. DON'T attempt to drain oil until you are sure it has cooled sufficiently to avoid scalding you. DON'T grasp any part of the engine, exhaust or catalytic converter without first ascertaining that it is sufficiently cool to avoid burning
you. DON’T DON'T mouth, DON’T below). DON'T straight DON'T
allow brake syphon toxic or allow them inhale dust
fluid or antifreeze to contact vehicle paintwork. liquids such as fuel, brake fluid or antifreeze by to remain on your skin. — it may be injurious to health (see Asbestos
allow any spilt oil or grease to remain on the floor — wipe it up away, before someone slips on it. use ill-fitting spanners or other tools which may slip and cause
injury. DON'T attempt to lift a heavy component which may be beyond your capability — get assistance. DON'T rush to finish a job, or take unverified short cuts. DON'T allow children or animals in or around an unattended vehicle. DO wear eye protection when using power tools such as drill, sander, bench grinder etc, and when working under the vehicle. DO use a barrier cream on your hands prior to undertaking dirty jobs — it will protect your skin from infection as well as making the dirt easier to remove afterwards; but make sure your hands aren't left slippery. DO keep loose clothing (cuffs, tie etc) and long hair well out of the way of moving mechanical parts. DO remove rings, wristwatch etc, before working on the vehicle — especially the electrical system. DO ensure that any lifting tackle used has a safe working load rating adequate for the job. DO keep your work area tidy — it is only too easy to fall over articles left lying around. DO get someone to check periodically that all is well, when working
alone on the vehicle. DO carry out work in a logical sequence and check that everything is correctly assembled and tightened afterwards. DO remember that your vehicle’s safety affects that of yourself and others. If in doubt on any point, get specialist advice. IF, in spite of following these precautions, you are unfortunate enough to injure yourself, seek medical attention as soon as possible.
Asbestos
Certain friction, insulating, sealing, and other products — such as brake linings, brake bands, clutch linings, torque converters, gaskets, etc — contain asbestos. Extreme care must be taken to avoid inhalation of dust from such products since it is hazardous to health. If in doubt, assume that they do contain asbestos.
Fire Remember at all times that petrol (gasoline) is highly flammable. Never smoke, or have any kind of naked flame around, when working on the vehicle. But the risk does not end there — a spark caused by an electrical short-circuit, by two metal surfaces contacting each other, by careless use of tools, or even by static electricity built up in your body
under certain conditions, can ignite petrol vapour, which in a confined space is highly explosive. Always disconnect the battery earth (ground) terminal before working on any part of the fuel or electrical system, and never risk spilling fuel on to a hot engine or exhaust. It is recommended that a fire extinguisher of a type suitable for fuel and electrical fires is kept handy in the garage or workplace at all times. Never try to extinguish a fuel or electrical fire with water.
Fumes Certain fumes are highly toxic and can quickly cause unconsciousness and even death if inhaled to any extent. Petrol (gasoline) vapour comes into this category, as do the vapours from certain solvents such as trichloroethylene. Any draining or pouring of such volatile fluids should be done in a well ventilated area.
When
using cleaning fluids and solvents, read the instructions
carefully. Never use materials from unmarked containers — they may give off poisonous vapours. Never run the engine of a motor vehicle in an enclosed space such as a garage. Exhaust fumes contain carbon monoxide which is extremely poisonous; if you need to run the engine, always do so in the open air or at least have the rear of the vehicle outside the workplace. If you are fortunate enough to have the use of an inspection pit, never drain or pour petrol, and never run the engine, while the vehicle is standing over it; the fumes, being heavier than air, will concentrate in the pit with possibly lethal results.
The battery Never cause a spark, or allow a naked light, near the vehicle's battery. It will normally be giving off a certain amount of hydrogen gas, which is highly explosive. Always disconnect the battery earth (ground) terminal before working on the fuel or electrical systems. If possible, loosen the filler plugs or cover when charging the battery from an external source. Do not charge at an excessive rate or the battery may burst. Take care when topping up and when carrying the battery. The acid electrolyte, even when diluted, is very corrosive and should not be allowed to contact the eyes or skin. If you ever need to prepare electrolyte yourself, always add the acid slowly to the water, and never the other way round. Protect against splashes by wearing rubber gloves and goggles. When jump starting a car using a booster battery, for negative earth (ground) vehicles, connect the jump leads in the following sequence: First connect one jump lead between the positive (+) terminals of the two batteries. Then connect the other jump lead first to the negative (-) terminal of the booster battery, and then to a good earthing (ground) point on the vehicle to be started, at least 18 in (45 cm) from the battery if possible. Ensure that hands and jump leads are clear of any moving parts, and that the two vehicles do not touch. Disconnect the leads in the reverse order.
Mains electricity When using an electric power tool, inspection light etc, which works from the mains, always ensure that the appliance is correctly connected to its plug and that, where necessary, it is properly earthed (grounded). Do not use such appliances in damp conditions and, again, beware of creating a spark or applying excessive heat in the vicinity of fuel or fuel vapour.
Ignition HT voltage A severe electric shock can result from touching certain parts of the
ignition system, such as the HT leads, when the engine is running or being cranked, particularly if components are damp or the insulation is defective. Where an electronic ignition system is fitted, the HT voltage is much higher and could prove fatal.
Routine maintenance Maintenance is essential for ensuring safety and desirable for the purpose of getting the best in terms of performance and economy from your car. Over the years the need for periodic lubrication — oiling, greasing, and so on — has been drastically reduced if not totally eliminated. This has unfortunately tended to lead some owners to think that because no such action is required, components either no longer exist, or will last for ever. This is a serious delusion. It follows therefore that the largest initial element of maintenance is visual examination. This may lead to repairs or renewals.
Check battery electrolyte level and top up if necessary. Refer to Chapter 10. Check windscreen washer fluid level and top up if necessary. On Estate models, check also rear screen washer reservoir level. Use a proprietary windscreen washer fluid with antifreeze characteristics. Do not use cooling system antifreeze. Check coolant level and top up if necessary. For models up to 1979, refer to Chapter 2; for later models fitted with an expansion tank, refer to Chapter 13. Check operation of all lights and windscreen wipers.
Every 250 miles (400 km) or weekly Every 6000 Check tyre pressures and adjust if necessary. Refer to Chapter 11 for specified pressures. Check oil level and top up if necessary. Car must be standing on level ground with engine switched off. Withdraw dipstick and wipe it clean. Reinsert it then withdraw it again and note oil level reading. Top-up, if necessary, through filler neck in top of rocker cover. Do not overfill.
Checking windscreen washer fluid level
miles (10 000 km) or 6 months
Change engine oil and renew oil filter. Warm up engine, park car on level ground, remove sump drain plug and drain oil into suitable container. Refer to Chapter 1 for renewal of oil filter. Refit drain plug with new washer and top up engine oil level with specified quantity and grade of oil.
Clean fuel pump filter. Refer to Chapter 3.
Checking coolant level (pre-1980 models)
|
Routine maintenance
11
-— SS
Check carburettor adjustment. Refer to Chapters 3 and 13. Check drivebelt tension and if frayed, renew. Refer to Chapter 2. Clean and adjust spark plugs. Refer to Chapter 4. Check all steering joints and flexible dust covers for wear. Refer to Chapter 11. Check brake fluid lines for leaks, damage or deterioration. Refer to Chapter 9. Inspect front disc pads and rear brake shoe linings for wear. Refer to Chapter 9. Check brake fluid reservoir and top up if necessary to ‘Max’ line. Lubricate door hinges and controls. Check gearbox oil level and top up if necessary. Check rear axle oil level and top up if necessary through the level/filler plug (see illustration). Use only specified grade of oil. Check clutch free movement (pre-1980 models) and adjust if necessary. Refer to Chapter 5. Check valve clearances and adjust if necessary. Refer to Chapter 1. Clean crankcase ventilation valve. Refer to Chapter 1. Check tyres for wear and condition. Check dwell angle and adjust if necessary (Chapter 4). Check ignition timing and adjust if necessary (Chapter 4). Clean oil filler cap (Chapter 1).
Lubricate distributor. Clean distributor cap HT Check components for condition (Chapter 4).
Check ignition timing and adjust if necessary. Check front hub bearings adjustment and Chapter 11. Check front wheel alignment and adjust if Chapter 11. Renew spark plugs (Chapter 4). Check all hoses and pipes for fluid leaks and 2 and 9). Renew contact breaker points (Chapter 4). Lubricate handbrake linkage (Chapter 9).
coil.
Refer to Chapter 4. lubricate. Refer to necessary.
condition
Every 18 000 miles (29 000 km) or 18 months Renew
air cleaner
element.
“
°
s
ae
a
eyay
gS
no20
w
SL'O
SL‘
| SLO 28/mS 1y-¥S
STs ek SS eS
aT
u0IUB! pue Buiyeys ‘BuiBsey : wesbeip Buuian 2G°OL “614
S 4922-16
eer.
sz 141 92-0€ S'%3392-0€
atic
ae
——_
wIis—
Ov
aL
TT
—
ee
Oo)
.41S
O'p
L
& r
SN
121 a0
COS
aca
Violet White
eras
>» ce
= ro
SES
li) pS fi | { Wn
qr)
; bh
i)
ee ae ESs2s3 SaaL56 ® 1g —=t O22
ty/ "CL dg BRAN
Ow
C€
DODD
i]9
O07
Nx
YARIS [9
light warning charging 3current —
Instrument 11 switch inhibitor transmission automatic Relay 12 — transmission automatic switch inhibitor Selector 13 — switch Steering 10 panel black) bulkhead (engine 9Multi-plug rear — lock/ignition equipment Optional extra grey) bulkhead (engine 8rear -Multi-plug
ire
circuits ignition and starting Charging, diagram: Wiring 10.57 Fig.
oO
°
a
as
wis oOGee
2s
==]
ix
> ta
a 8 =
Se ie switch solenoid and Starter motor
Item No 1 22 3 4 5 6 7
122
:
3 < ty
*
2g
2
,
odoy‘a
ase
OS SLO vbsasy o1
wae
OF
tra
$1461 paezey pue 10}e0!Ipul ‘UO
141-08 19/882-¥S —O'}
r
orw mal
BS 1E—O
Tay!
O'9!
3)
AUER
$% 26/341 S1-O€
2
>
e me 2
2 8 a
Tey
St 14/4
2-06
——
Eat
age
= 2/2 hl So
=a nee
Ss 2io Y e|e wle
01
19/882-9S
O-
O71 eaters
ee
se o1zz-1€ ARS.
35$3 38 =
SLO svoses'c-es
s8ye-05 + ‘sf 4°
4
«
=
3
a o xd ra
zemewe
ea O11 19/882 ws
6.5
a asOnhswe “a4
¢
oe
———
iat
°
|
ae° 2 88S i'¢-85 Sc’ z= Ps o 2 4 wa
O') Stor
sLo ira
D148?
op
ii]
SLO
Bayes id
: WesBeip Bupa 8G‘OL “514
dict
ems
a
39
kewv
26/1197 ms
eve
a
JUOIY4
4e9J
wesbeip : ‘WOH
s0}edI1pul pue
paezey $1461;
Q/ prezeH JOYysely YOUMS 77 Bunybr]youms Jouseljdwe| BZ UONOUN-BIN! YOUMS Buissanay due} youms Aiayeg G7 Bulaayg UO!HUBI/90] YOUMS BSN4 Yul] O4IM Og JuauuNdjsu] Jaysnjo UJOH 1 — sayseyyeoIpul 10, sduwie| esn4 xoq jeuoNdg e1jxa juaudinba 1g 101DB}aS JOUGIYU!YOUMS Bnid-nynyw eulBue) — peayying — (Ae16 DI}eWOINe UOISSIWSUeI} dos youms zg jeng yinoI9 ayeiq Bulusem Jause|4 qlun Wa}sAs — 1S9} YO1IMS pauiquwog j12} due Ajquiasse¢g seayBoj dwe) youms 7— seas Jayselj sdwe| yg ueayBoj due; g — Buissanai sdwe| gg jenqg ynosl9 ayesq Bujusem —9 dois/jie| sdwie| WwaysAs YoUIMs jaued JOWUWIp YOIMS
we}
Buia,
yoerg YOIOIA SUUM
anid uMO1g MO}|9A Aas uaa 4Uld peY
8G‘OL
pAA BULL 4ANOJOD
“614
4q a6 46 ub SJ u MS IA SM
19
123
Se
124
13 fa Ne
a
96/16 €'9-05-C ary 98s—
he
44/48 9-es—G 26/46 72°6-985
|
lamps Interior diagram Wiring 10.59 Fig.
26/46¢-8s
=
Aral
t,
$1 9414-08 Ov 144-06 o1#s/46 es 31.7 —_+-—— 0.75 bF
Ts = 1brO.75 ae
gr/ge 58-97 ———+
0.75 31 7br U-7ibro7s 4
cen
att
,
&°
/m8 a6
ms
Aims
06/268
1q/as
u/s06/
6/26 Se eee
msj6 4/8
ays.
ANOJOD Bul
jms
pele
1/38
umMoig anid
sei Bnyid-ninweauibua) (49219
9/01 UsaI1DH Dey
AMO}||9 Aas 4Uld el Suu
[aUeq dweq] —
Buny6br]youms 1019}U] 2461)
9G 1G ggG
GG
uoljeuiuuny)|!
— peayying
9AD|HXOg dwe| Yo}IMS10U) (aseg jeuondo e1jxa juawdinba abeb6n7 Juawyedwos Gwe] yoUMs abeb6n7 Juawyedwos dwe] dwe] — oNewWoINe uoissiuusues} JOJDa|aS UO!HJEUILUN||!
JOWWIP YOIMS 4e610 482461 JuawNAsU] Ja}snjo uo!eUILUN||! —ZL JOU) (aseg ~G aAD|IH xog dwe]
LG 7G EG
6 OG
OF Aseneg /P Asaynog yb sayoims UOIJEUILUN]|! gry JaJeoYy—dweql |O4JUOD
Sr
wa}, ON Ey xoq esn4 PL BSNA AU] a4IM
sduie] s0198}u] Wesbeip Bunun, 6G'OL “614
ig 125
126
|pty @Q
vsepes 01 9 495
.
$20242 16 of
16-05
A 1)
3 *
B
a
|
brO7s
aa
g
:
°
on
(_
:
33
a
e
U
°
3
Ss] j+j
2
=]
:
mn
a
+
:
a
|
5
w 33
€5 SLO |
Ie
wel
Oba
PI-1€ O19
=
O11 4-26 /m8 |-9s S*VA/S81E-wS
-1€ 012927
49 eI-1€
i
hd a
aby*y
He
eS
eae
Lorges
4 v4 °o oS ae 9g= Li
:
[L P|
$0 408-08 1
o'r wis
O1esz-es
peg a8 f
————_——veyta Sel
9861-20
14/a8 AEN-LO ST 21-9
abd
S1-1E 148-08 $2
—«
Sey6/701Oe
15-06 4 of
rn
:
,
eae
~o
—— Rees
Ang
Cg
ee ae
ee
mt
a
:
i
miinter bg Levent i rtf- ontobag barney e
:
ver oy 88! ~ stabom OSG 5 ity
enialiggt
a
»
oe oe:
(rt
A
a aS
Sg
ei ~ 2% Tin itu var Tareying atin
ee
CF ae
—~—o
;
7 sunt ~ 28 Yvang qoar whwels and rmruavel - F? ah Cerra
¥
=
U 7
,
rs
stn
‘
c
ome
at}
=.£%
Lepr
>
Viverks
'
a
|
awde
i
; 7
bn
7
i=
Z ;
¥
a
= ia: :
i
ae
;
=> me
v
nS
wey
re=
pie
76
wal jo'nes :
or
Cire
¥
ideves oat leae«
ER
2
."
4
v ies
ei:
aver :
:
85 r
v
4
Ve
%
ati
par
ap
f
hind
i
Prati
: Piasd shat
pemovel
rec)
xeric je - ts ‘Saree ani qe BAS Necaet werlvOl Dalligltta Sp ed airs fein! eT
wR
=
5
&
arent
:
oral
peut
ej
Me
: 138
;
wing
oti
a
, petting n
ae
nvbation
'
%s
oats \
I (
26
\ Oe
ares
Ss
(eee
~~
arc
SP
7
vita
‘re
one
:
Oval
= be |
ania ior
i
enewe! -
ree
0. por win
F
4
i
eengvak a: deat tirey
>
>
bee
;
,
ne
t
7
4
s
ES
’
e t
_ =.
~
i?
iris
'
14
¥
7
a.
fi
sy wa eet and, pti #3 rs} denyel va. ff
‘/
i
wee ¥ SV ‘gi se
ditt MLA SASH es
=
c
a
t f
=
a t A
oi
Eos
__
ee ae
Ra)
tyt
"
Printed by J H Haynes Sparkford
Somerset
BA22
& Co Ltd Nr Yeovil
7JJ
England
‘
Models covered by this manual Ford Cortina Mk IV (including Cortina 80 often known as Mk V) 1.3 and 1.3L Saloon, 1297 cc Covers Carousel and Crusader limited edition models Does not cover 7.6, 2.0 or 2.3 models
The clear, step-by-step illustrated instructions cover the dismantling, inspection, repair and refitting of the engine, cooling system, fuel and emission control systems, exhaust, ignition system, clutch, manual gearbox, propeller shaft or drive shafts, braking system, electrical system, suspension, steering, bodywork and fittings. Routine maintenance, complete specifications and detailed fault diagnosis procedures are also included. For rear axle differential units and automatic transmissions (where applicable) the removal, refitting and fault diagnosis procedures only are covered. ONLY HAYNES COMPLETELY STRIP AND REBUILD THE CAR FOR EACH MANUAL
‘These are really worthwhile manuals which can save you a lot of money.” ’ Autocar ‘Haynes manuals are outstanding for giving the learner mechanic an easy to foltow guide to doing most any type of repair or maintenance work on his or her car.’ Road & Track ‘These authentic manuals are actually written from practical experience ...’ Car Mechanics
Whether you just want to change your oil or replace your plugs, or change your clutch or rebuild your gearbox, the Haynes manual will show you how, and can help you save pounds on servicing and repair bills.
A Haynes manual can help you stretch your motoring budget that little bit further in other ways too. Regular maintenance and servicing will mean your Car is safer to drive whilst giving you more of those precious mpg. What's more, a Car that is well looked after will hold its price better and last a lot longer!
H 922534
ISBN
1 85010
a8 8
HAYNES MANUALS EXPLAIN BEST elo :) Miia :jiele)|
‘Excellent value for money, beginners and experts should find it equally useful, overall a mine of information’ Motor ‘It is thus opportune that a simply splendid Owners Workshop Manual has just come out. Every imaginable job is illustrated ...’ Autosport
‘For.the home mechanic Haynes DIY workshop manuals’show clearly step-by-step service operations in pictures.’ Sunday Mirror
