Haynes Chrysler Full-Size Models 1988 thru 1993 Automotive Repair Manual 1563920581, 9781563920585
“"Models covered: all full-size front-wheel drive Chrysler LeBaron Landau and Sedan, New Yorker (V6 engine) Fifth A
129 84 32MB
English Pages 356 Year 1993
Recommend Papers

![Haynes Volvo 240 Series 1976 thru 1993 Automotive Repair Manual [8 ed.]
1563921367, 9781563921360](https://ebin.pub/img/200x200/haynes-volvo-240-series-1976-thru-1993-automotive-repair-manual-8nbsped-1563921367-9781563921360.jpg)
![Haynes Hyundai Excel 1986 thru 1993 Automotive Repair Manual [1552]
1563920638, 9781563920639](https://ebin.pub/img/200x200/haynes-hyundai-excel-1986-thru-1993-automotive-repair-manual-1552-1563920638-9781563920639.jpg)


![Haynes Mazda Pick-Ups 1972 thru 1993 Automotive Repair Manual [287, 6 ed.]
1563920840, 9781563920844](https://ebin.pub/img/200x200/haynes-mazda-pick-ups-1972-thru-1993-automotive-repair-manual-287-6nbsped-1563920840-9781563920844.jpg)

- Author / Uploaded
- Larry Warren
- John H. Haynes
- Similar Topics
- Technique
- Transportation: Cars, motorcycles
File loading please wait...
Citation preview
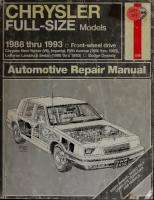
CHRYSLER FULL-SIZE 1&88 thru 1993
otfl
Models
n Front-Wbeel
drive
New Yorker (V6), Imperial, Fifth Avenue (1^90 thru 1993), LeBaron Landau & Sedan (1990 thru 1993) D D6^ge Dynasty
Chrysler
Automotive Repajlr Manual
Chrysler Full-size Front wheel drive
Automotive Repair
Manual by Larry Warren
and John H Haynes Member
of the Guild of Motoring Writers
Models covered: All full-size
front-wheel drive
Chrysler LeBaron Landau and Sedan, New Yorker (V6 engine) Fifth Avenue (1990 through 1993) and Imperial
Dodge Dynasty: and 3.8
liter
2.5
liter
4-cylinder engine and 3.0, 3.3
V6 engines
1988 through 1993 (3X2
-
2058)
A /un-CMcnvii I^VI?T5
s»
/»fiSClAL VACUUM OPERATED ACCESSORIES
FILTER
M PRESSURE RELIEF/ ROLLOVER VALVE
-^ -{^ -f^
FUEL TANK
AAANIFOLD
VACUUM
PORTED VACUUM
P
ORIFICE
CHECK VALVE CHECK VALVE WITH ORIFICE
4 PORT
VAPOR 'CANISTER
TO HEATER-A/C
POWER^C-Jk BRAKE I VJ
^-CONTROL WITHABS
I
^
AAAP
% BOOSTER CI
SENSOR
V
1
\l-
TO HEATERA/C CONTROL
wrmouTABS
MV
MV
MV
EGR SOLENOID (!)
VALVE COVER
P
.
I
M
!
TRANSDUCER
|
THROTTLE FUEL PRESSURE
REGULATOR
BODY
6
INTAKE MANIFOLD
BACKPRESSURE EGR VALVE
VAC IF
PURGE SOLENOID
f
IS"
VAC
FILTER
e-
TO
RES
AIR CL£A^^1ER
VALVE COVER
SPEED
CONTROL PRESSURE REUEF/ROLLOVER VALVE
[•]
NO BRAKE BOOSTER WITH ABS
A/C = AIR CONDITIONING ABS = AUTOMATIC BRAKE SYSTEM FUEL
TANK
-
OPTIONAL VACUUM OPERATED ACCESSORIES P PORTED VACUM AAANIFOLD VACUUM
M CANISTER
1.3f
Vacuum hose
-l^a-
ORIFICE
-{^^
CHECK VALVE
V/ITH ORIFICE
routing on a 3.3L and 3.8L models (Federal and California)
EQUIPPED
Chapter 6
Emissions and engine control systems DOWN
•AUTO SHUT
A/C CLUTCH CUTOUT RELAY
(ASD)
RELAY
1.6 Typical Vehicle
6-5
Emissions Control Information (VECI) label
2.6a Relay location on an early 2.5L engine
Brake switch (VG engines) Camshaft reference sensor (3.3L and 3.8L engines) Charge temperature sensor (some V6 engines) Coolant temperature sensor (all engines) Crankshaft reference sensor (3.3L and 3.8L engines) Knock sensor (3.3L and 3.8L engines) Manifold Absolute Pressure (MAP) sensor (all engines) Neutral safety switch
(all
engines)
Oxygen sensor (all engines) Speed control switch (all engines) Throttle body temperature sensor (2.5L engines) Throttle Position Sensor (TPS) (all engines) Transmission neutral-safety switch (3.0L engine) Vehicle distance sensor (2.5L engine)
2.6b Relay locations for the later models are printed under the Be sure to follow the top row of the relay panel with
Vehicle
speed sensor (V6 engines)
relay cover.
Air conditioning cut-out relay (2.5L
the top row designations on the relay cover
Refer to
tunes such variables as ignition timing, spark advance, ignition coil dwell, fuel injector pulse width and idle speed to minimize exhaust emissions and enhance dhveability. It also controls the operation of the radiator cooling fan, the alternator charging rate and such emissionsrelated components as the EGR solenoids and the purge solenoid for the EVAP canister. The SMEC/SBEC even updates and revises its own programming in response to chang"tng operating conditions. 4 The SMEC/SBEC also constantly monitors many of its own input and output circuits. If a fault is found in the EFI system, the information in the SMEC/SBEC memory. You really can't check or test components of the EFI system without an expensive factory tool, the Diagnostic Readout Box DRB (number C-4805) or its equivalent, but you can often determine where a problem is coming from, or at is
stored
the
The
6 in
illustrations air
2.6a
conditioning cut-out relay (see illustrations)
series electrically with the air conditioner
the
air
and 3.0L engines)
and 2.6b
damped
is
connected
pressure switch,
conditioner switch and (on 2.5L engines) the radiator/condenser
fan relay.
The cut-out
the engine
is
relay
operating.
is
energized
When
the
(in its
closed position) when a low idle
SMEC/SBEC senses
speed, or the throttle position sensor indicates a wide open throttle condition, the cut-out relay is de-energized, its contacts open and the air conditioner clutch is prevented from engaging. The cut-out relay is located on the left inner fender panel, next to the battery and right
above the SMEC/SBEC.
Auto shutdown relay
(all
engines)
II
which
process always begins with reading any stored fault codes to identify the general location of a problem, followed by a thorough visual inspection of the system components to ensure that everything is properly connected and/or plugged in. The most common cause of a problem in any EFI system is a loose or corroded electrical connector or a loose vacuum line. To learn how to output this information and display it on the "Check Engine" light on the least
circuit it's in. This
dash, refer to Section
4.
there's no ignition (disthbutor) signal (2.5L
If
cam
or crank reference sensor signal (3.3173.81 engines), present
when
5
Various
SMEC/SBEC;
components
provide
basic
information
they include:
Air conditioning cut-out relay (2.5L
Auto shutdown relay
(all
engines)
and 3.0L engines)
to
the
RUN
position, the auto shutdown pump, the fuel injectors, the ignition coil and the heated oxygen sensor. The cut-out relay is located on the left inner fender panel, next to the battery and right above the SMEC/SBEC (see illustrations 2.6a and 2.6b).
the ignition key
relay interrupts
is
power
turned to the
to the electric fuel
Camshaft reference sensor Refer to
Information sensors
and 3.0L engines), or
7
illustration
(3.3L
and 3.8L engines)
2.8
8 The camshaft reference sensor (see illustration) is mounted on top of the engine timing chain cover. The sensor reads camshaft position by sensing slots on the cam sprocket. The sensor then sends a
coded
signal to the
whether the
SBEC, which uses
fuel injectors
and
determine synchronized
this information to
ignition coils are correctly
6
1
Chapter 6
6-6
Emissions and engine control systems WIRING TERMINALS
2.8
The camshaft reference sensor (arrow) is located in the top of the timing chain cover on 3.3L/3.8L engines
CHARGE SENSOR 2.9 Typical
COOLANT SENSOR
charge temperature sensor and coolant temperature sensor
PAPER SPACER'
3-WAY ELECTRICAL
ELECTRICAL
CONNECTOR 2.11
CONNEaiON
The crankshaft reference sensor used on 3.3L/3.8L engines
Charge temperature sensor (1988 3.0L and 1991 and earlier 3.3L/3.8L engines) Refer to
illustration 2.9
The charge temperature sensor (see illustration), which is mounted in the underside of the intake manifold, measures the temperature of the incoming air and sends this information to the SMEC/SBEC. This data is used by the SMEC/SBEC to modify the
9
THREADS
air/fuel mixture.
Coolant temperature sensor
(all
engines)
2.12
10 The coolant temperature sensor (see illustration 2.9), which is threaded into the thermostat housing, monitors coolant temperature and sends this information to the SMEC/SBEC. This data, along with the information from the charge temperature sensor, is used by the SMEC/SBEC to determine the correct air/fuel mixture and idle speed while the engine is warming up. The sensor is also used to turn on the
Crankshaft reference sensor (3.3L and 3.8L engines) 1
illustration
3.8L engines
and later 2.5L and 3.0L engines) 12 On 1991 and later 2.5L and 3.0L engines, engine speed input supplied to the SMEC/SBEC by the distributor Hall effect pick-up (2.5L Distributor pick-up (1991
is
radiator fan.
Refer to
The detonation (knock) sensor used on 3.3L and
2.11
The crankshaft reference sensor (see
illustration)
is
mounted on
the transaxle bellhousing. This sensor sends information to the
SBEC
regarding engine crankshaft position. The sensor "reads" slots (sets of four per cylinder) on the torque converter driveplate.
engines) or the optical system pick-up (3.0L engines). The distributoi uses an internal shutter and Hall effect sensor (2.5L engines) or an in-
and optical sensor (3.0L engines) to create a pulsing sent to the SMEC/SBEC. These electronic pulses are converted to engine rpm information.
ternal metal disc
signal that
is
Detonation (knock) sensor (3.3L/3.8 engines)
Manifold Absolute Pressure (MAP) sensor (all engines)
Refer to
Refer to
illustration 2.
12
The detonation (knock) sensor (see illustration) generates a signal when spark knock occurs in the combustion chambers. It is mounted on the intake manifold where detonation in each cylinder can be detected. The sensor provides information used by the SMEC/SBEC to modify spark advance and eliminate detonation. 12
1
4
illustrations 2. 14a, 2. 14b, 2.
The
14c and
MAP sensor (see illustrations)
is
2.
14d
located on the firewall or on
It monitors intake manifold vacthe throttle body. The MAP sensor transmits this data, along with data on barometric pressure, in the forrr of a variable voltage output to the SMEC/SBEC. When combined with
the side of the engine compartment.
uum through
a
vacuum
line to
Chapter 6
Emissions and engine control systems
6-7
MANIFOLD ABSOLUTE PRESSURE (MAP) SENSOR^
2.14b Manifold Absolute Pressure (MAP) sensor used on a later 3.0L engine
2.14a Manifold Absolute Pressure (MAP) sensor used on fourcylinder engines
MANIFOLD ABSOLUTE PRESSURE (MAP) SENSOR
MAP SENSOR
HEATED OXYGEN SENSOR 4-WAY ELEORICAL
CONNEQOR
"eGR DIAGNOSTIC
CANISTER PURGE
SOLENOID
SOLENOID
(CALIFORNIA ONLY); 2.14d Manifold Absolute Pressure (MAP) sensor used on 3.3Ly3.8L engines
MAP sensor on an early 3.0L engine
2.14c
Oxygen sensor SENSOR OUTPUT
Refer to
(BLACK WIRE)
(all
illustration 2.
engines)
16
16 The oxygen sensor (see illustration), which is mounted in the exhaust manifold (the rear manifold on V6 engines), produces a voltage signal when exposed to the oxygen present in the exhaust gases. The sensor is electrically heated internally for faster switching when the enis running. When there's a lot of oxygen present (lean mixture), the sensor produces a low voltage signal; when there's little oxygen present (rich mixture), it produces a signal of higher voltage. By monitoring the oxygen content and converting it to electrical voltage, the sensor acts as a lean-rich switch. The voltage signal to the SMEC/SBEC alters the pulse width of the injector(s).
gine
POWER AND
GROUND
4-WAY ELECTRICAL
CONNEaOR
2.16 Typical heated oxygen sensor used on
all
engines
Throttle
data from other sensors, this information helps the mine the correct air-fuel mixture ratio.
Miscellaneous switches 15 the light
(all
SMEC/SBEC
deter-
SMEC/SBEC, which adjusts enaccordance with what switch states are present at
switch) provide information to the in
these inputs. The state of these switch inputs (high/low) determine without the DRB diagnostic meter. II
body temperature sensor
throttle
(2.5L engine)
body temperature sensor, which
throttle
engines)
Various switches (such as the transmission neutral safety switch, air conditioning switch, the speed control switch and the brake
gine operation
The
is mounted in the body, monitors the temperature of the throttle body (fuel temperature). When transmitted to the SMEC/SBEC, this data helps determine the correct air/fuel mixture during a hot restart condition.
17
is difficult
to
Throttle Position Sensor (TPS) Refer to
illustration 2.
(all
engines)
18
18 The TPS (see illustration), which is located on the throttle body, monitors the angle of the throttle plate. The voltage produced increases or decreases in accordance with the opening angle of the throttle plate. This data,
when
relayed to the
SMEC/SBEC,
along with
Emissions and engine control systems
Chapter 6
6-8
FUEL SUPPLY QUICK CONNECT FITTING
To display the codes on the dashboard (POWER LOSS or CHECK light), turn the ignition key ON, OFF, ON, OFF and finally ON. The codes will begin to flash. The light will blink the number of the first digit then pause and blink the number of the second digit. For example: Code 23, throttle body temperature sensor circuit, would be indicated by two flashes, then a pause followed by three flashes. Certain criteria must be met for a fault code to be entered into the 4 engine controller memory. The criteria may be a specific range of en3
ENGINE
gine rpm, engine temperature or input voltage to the engine controller. It is possible that a fault code for a particular monitored circuit may not
FASTENERS 2.18 Throttle Position Sensor (TPS) on the throttle body of a fourcylinder engine
data from several other sensors, enables the computer to adjust the air/fuel ratio in accordance with the operating conditions, such as acceleration, deceleration, idle and wide open throttle.
Vehicle distance (speed) sensor 19
The vehicle distance (speed) sensor, which
transaxle extension housing, senses vehicle motion.
is It
located in the generates eight
be entered into the memory despite a malfunction. This may happen because one of the fault code criteria has not been met. For example; The engine must be operating between 750 and 2000 rpm in order to monitor the Map sensor circuit correctly. If the engine speed is raised above 2400 rpm, the MAP sensor output circuit shorts to ground and will not allow a fault code to be entered into the memory. Then again, the exact opposite could occur: A code is entered into the memory that suggests a malfunction within another component that is not monitored by the computer. For example; A fuel pressure problem cannot register a fault directly but instead, it will cause a rich/lean fuel mixture problem. Consequently, this will cause an oxygen sensor malfunction resulting in a stored code in the computer for the oxygen sensor. Be aware of the interrelationship of the sensors and circuits and the overall relationship of the emissions control and fuel injection systems. The accompanying table is a list of the typical trouble codes 5 which may be encountered while diagnosing the system. Also included are simplified troubleshooting procedures. If the problem persists after these checks have been made, more detailed service procedures will have to be performed by a dealer service department or other qualified repair shop.
pulses for every revolution of the driveaxle and transmits them as voltto the SMEC/SBEC. These signals are compared by the
age signals
SMEC/SBEC with a closed throttle signal from the throttle position sensor so it can distinguish between a closed throttle deceleration and a normal idle (vehicle stopped) condition. Under deceleration conditions, the SMEC/SBEC controls the AIS motor to maintain the desired MAP value; under idle conditions, the SMEC/SBEC adjusts the AIS motor to maintain the desired engine speed.
3
Self diagnosis
system
-
description and code access
4
Information sensors
-
check and replacement
Camshaft reference sensor (3.3L and 3.8L engines)
-
replacement
Note: This sensor requires a special factory tool (DRB-II) to diagnose voltage and resistance values under specific working conditions. If further diagnostic tests are required, have the sensor and the circuit diagnosed by a dealer service department or a qualified automotive repair shop.
Before outputting the trouble codes, thoroughly inspect ALL electrical connectors and hoses. Make sure all electrical connections are tight, clean and free of corrosion; make sure all hoses are properly connected, fit tightly and are in good condition (no cracks or tears). Note 2: On the models covered by this manual, the CHECK ENGINE light, located in the instrument panel, flashes on for three seconds as a bulb test when the engine Is started. The light comes on and stays on when there's a problem in the EFI 1 The self diagnosis information contained in the SBEC or SMEC (computer) can be accessed either by the ignition key or by using a
Note
1
:
special tool called the Diagnostic Readout Box (DRB II). This tool is attached to the diagnostic connector in the engine compartment and reads the codes and parameters on the digital display screen. The tool is expensive and most home mechanics prefer to use the alternate method. The drawback with the ignition key method is that it does not access all the available codes for display. Most problems can be solved or diagnosed quite easily and if the information cannot be obtained readily, have the vehicle's self diagnosis system analyzed by a dealer service department or other properly-equipped repair shop. 2 To obtain the codes using the ignition key method, first set the parking brake and put the shift lever in Park. Raise the engine speed to approximately 2500 rpm and slowly let the speed down to idle. Also cycle the air conditioning system (on briefly, then off). Next, with your foot on the brake, select each position on the transmission (Reverse, Drive, Low etc.) and bring the shifter back to Park. This will allow the computer to obtain any fault codes that might be linked to any of the sensors controlled by the transmission, engine speed or air conditioning system.
1
Unplug the cam reference sensor lead
(see illustration 2
Loosen the cam reference sensor
3
Remove
difficult to pull
at the electrical
connector
2.8).
retaining bolt.
the sensor from the cylinder head. The sensor might be out of the cover, but
it
will
come
if
you
persist.
Caution:
Don't pull on the sensor wire or you will damage it. 4 If you're reinstalling the same sensor, remove the old spacer, clean off the sensor face and install a new spacer on the face. Inspect the 0-ring too. Replace it if it's damaged. 5 If you are installing a new sensor, make sure a new paper spacer is already installed on the face and the 0-ring is properly positioned in its
groove.
Apply a couple of drops of oil to the 0-ring prior to installation. install the sensor, push it down until it contacts the cam timing gear. Hold it in this position while you tighten the retaining bolt to
6
When you
the torque listed
in this
Chapter's Specifications.
you plug in the sensor lead, make sure the lead away from the accessory drivebelt. 7
After
is
routed
Charge temperature sensor (1988 3.0L and1991
and earlier 3.3U3.8L engines) - replacement Refer to
illustrations 4.8a
and 4.8b
Note: This sensor requires a special factory tool (DRB-II) to diagnose voltage and resistance values under specific working conditions. If further diagnostic tests are required, have the sensor and the circuit diagnosed by a dealer service department or a qualified automotive repair shop.
Chapter 6
Emissions and engine control systems
6-9
2 1
6-10
Chapter 6
Emissions and engine control systems VACUUM CONNEaORS
4.8a Charge temperature and coolant temperature sensors (3.0L engine)
4.8b Charge temperature sensor location on the 3.3Ly3.8L engines
\
FUEL PRESSURE
REGULATOR VACUUM HOSEi
THERMOSTAT HOUSING 4.13a Coolant temperature sensor location on the 2.5L engine
FUEL SUPPLY
AND
RETURN HOSES
'
ENGINE TEMPERATURE SENDING UNIT
4.13b Coolant temF>erature sensor location for the 3.0L engine 4.13c Coolant temperature sensor (arrow) location for the 3.3Ly3.8L engines
Coolant temperature sensor General description
8 (see 9 10
Locate the charge temperature sensor on the
air
intake
plenum
illustrations). 1
Unplug the
electrical
connector from the sensor.
1
Reattach the electrical connector.
3
rein-
is
a thermisto
which varies the value of its voltage output in accordanci with temperature changes). The change in the resistance values will di rectly affect the voltage signal from the coolant temperature sensor. A the sensor temperature DECREASES, the resistance values will IN CREASE. As the sensor temperature INCREASES, the resistance val (a resistor
Unscrew the sensor.
Coat the threads of the new sensor (or the old one, if you're stalling it) with teflon tape, screw it in and tighten it securely. 1
illustrations 4. 13a, 4. 13b, 4. 13c and 4. 14 The coolant temperature sensor (see illustrations)
Refer to
8
5
Chapter 6
Emissions and engine control systems
KNOCK SENSOR*^
nn CRANK POSITION
^
6-11
SENSOR
DISTANCE SENSOR
3-WAY ELECTRICAL
CONNECTION y^(
.
Chapter 6
Emissions and engine control systems THROTTLE BODY
GROUND
4.45 Location of the oxygen sensor on the
U
/^
6-13
HEATED OXYGEN SENSOR 3-WAY CONNECTOR
V6 engine 4.51a Electrical connector for the oxygen sensor (2.5L engine)
-AIR
HEATED OXYGEN SENSOR^ 3-WAY CONNECTOR
,
/yr
//^
,
,,,>> v^e
/
//,#^ENGINE GROUND
^~^J^
CLEANER ASSEMBLY
\\\v3 STRAP
V
4.51b Electrical connector for oxygen sensor on the 3.0L engine
HEATED OXYGEN
SENSOR CONNEaOR
GROUND STRAP
produce a voltage output which varies from 0.1 -volt (high oxygen, lean mixture) to 0.9-volts (low oxygen, rich mixture). The ECU constantly monitors this variable voltage output to determine the ratio of oxygen to fuel in the mixture. The ECU alters the air/fuel mixture ratio by controlling
the pulse width (open time) of the fuel injectors.
A
4.51c Electrical connector for the oxygen sensor on a 3.3L engine
6 c)
mixture ratio
of 14.7 parts air to
1 part fuel is the ideal mixture ratio for minimizing exhaust emissions, thus allowing the catalytic converter to operate at maximum efficiency. It is this ratio of 14.7 to 1 which the ECU and the oxygen sensor attempt to maintain at all times. 46 The oxygen sensor produces no voltage when it is below its normal operating temperature of about 600-degrees F. During this initial
period before warm-up, the ECU operates in open loop mode. 47 If the engine reaches normal operating temperature and/or has been running for two or more minutes, and if the oxygen sensor is producing a steady signal voltage below 0.45-volts at 1,500 rpm's or
ECU
set a Code 21 a problem with the oxygen sensor or its circuit, the ECU operates in the open loop mode - that is, it controls fuel delivery in accordance with a programmed default value instead of feedback information from the oxygen sensor. 49 The proper operation of the oxygen sensor depends on four congreater, the
48
When
there
d)
Proper operating temperature - The ECU will not react to the sensor signal until the sensor reaches approximately 600-degrees F. This factor must be taken into consideration when evaluating the performance of the sensor. Unleaded fuel - The use of unleaded fuel is essential for proper operation of the sensor. Make sure the fuel you are using is of this type.
50 In addition to observing the above conditions, special care must be taken whenever the sensor is serviced. a) The oxygen sensor has a permanently attached pigtail and electrical connector which should not be removed from the sensor. Damage or removal of the pigtail or electrical connector can ad-
will
versely affect operation of the sensor.
is
b)
Grease,
dirt
d)
Do Do
e)
The
c)
not use cleaning solvents of any kind on the oxygen sensor. not drop or roughly handle the sensor. silicone boot
ditions: a)
installed in the correct position to pre-
-
ever a malfunction of the sensor b)
must be
vent the boot from being melted and to allow the sensor to oper-
The low voltages generated by the sensor depend upon good, clean connections which should be checked whenElectrical
and other contaminants should be kept away from
the electrical connector and the louvered end of the sensor.
suspected or indicated. Outside air supply - The sensor is designed to allow air circulation to the internal portion of the sensor. Whenever the sensor is removed and installed or replaced, make sure the air passages are not restricted.
is
ate properly.
Check Refer to
illustrations 4.51a, 4.51b, 4.51c, 4.51 d arid
Warm up
the engine and
4.54
Locate the oxygen sensor electrical connector (see illustrations) and connect the positive 51
let
it
run at
idle.
6-14
Chapter 6
Emissions and engine control systems
4.51 d The oxygen sensor electrical connector is located on the back of the engine near the firewall on later model 3.0L engines. Back probe the connector and locate the signal wire by checking for a low millivolt discharge. To verify the correct wire, raise the engine rpm and observe a slight increase in voltage.
THROHLE POSITION
4.54 Back-probe the oxygen sensor electrical connector and locate the heater wire. This wire supplies battery voltage to
the sensor
57 58
Carefully disconnect the electhcal connector from the sensor. Carefully
unscrew the sensor from the exhaust manifold. Caution:
may damage the threads. compound must be used on the threads of future removal. The threads of new sensors will
Excessive force
SENSOR 3-WAY
59
CONNECTOR
Anti-seize
to facilitate
coated with
this
compound, but
if
an old sensor
is
the sensor already be
removed and
rein-
stalled, recoat the threads.
the sensor and tighten
60
Install
61
Reconnect the
electrical
it
securely.
connector of the
pigtail
lead to the main
engine wiring harness.
Lower the vehicle and reconnect the cable
62
to the negative termi-
nal of the battery.
Throttle FUEL INJECTOR
through 1990 2.5L engines)
2-WAY CONNECTOR
yAUTOMATIC
Refer to
SPEED
IDLE
SENSOR 2-WAY CONNECTOR
Remove the
63 64 probe of a voltmeter to the backside of the connector onto the signal wire (see illustration) and the negative probe to ground. The signal usually a black/blue stripe wire.
If
the color codes differ and
it
is
determine the correct wire, carefully probe the oxygen sensor connector terminals with the engine running and look for a wire that has only a very slight millivolt discharge. This will be the signal wire. difficult to
52
Increase and then decrease the engine speed and monitor the
voltage.
53
the speed
to 1.0 volts.
When
crease to about properly, replace
increased, the voltage should increase to 0.5
is
the speed with a
new
decreased, the voltage should deIf the oxygen sensor does not react
is
to 0.4 volts. it
replacement
air
cleaner (see Chapter
Disconnect the
throttle
Remove the screws from move the bracket.
65 66
Pulling
down, unplug the
the accelerator cable bracket and reelectrical
connector from the sensor
(see illustration).
Remove
67 68
the sensor.
Apply heat transfer compound (included with sensor) to the sentip.
69 70
Install
the sensor and tighten
The remainder
of installation
Throttle Position
part.
4).
cables from the throttle lever (see Chap-
ter 4).
sor
When
-
4.66
voltage
4.66 Location of the throttle body temperature sensor (1988 through 1990 2.5L engine)
is
illustration
Note: This sensor requires a special factory tool (DRB-II) to diagnose and resistance values under specific working conditions. If further diagnostic tests are required, have the sensor and the circuit diagnosed by a dealer sen/ice department or a qualified automotive repair shop.
THROTTLE BODY TEMPERATURE
MOTOR 4-WAY CONNECTOR
(AJS)
wire
body temperature sensor (1988
it
is
securely.
the reverse of removal.
Sensor (TPS)
54
Also inspect the oxygen sensor heater circuit for the correct voltage. With the engine running, probe the oxygen sensor electrical connector (see illustration) with a digital voltmeter on the heater wire (large green wire). Check for battery voltage. If there is no battery volt-
age present, trace the wire
for
an open or short
circuit condition.
contracts
when
when
it
is
installed in the exhaust manifold or pipe,
cool, the
oxygen sensor may be very
difficult to
which loosen
Rather than risk damage to the sensor (assumit in another manifold or pipe), start and run the engine for a minute or two, then shut it off. Be careful not to burn yourself during the following procedure. 55 Disconnect the cable from the negative terminal of the battery. 56 Raise the vehicle and place it securely on jackstands. ing
the engine
is
cold.
you are planning
to
reuse
illustration 4.
The
74
is located on the end of the body. By monitoring the output voltage from the TPS, the ECU can determine fuel delivery based on throttle valve angle (driver demand). A broken or loose TPS can cause intermittent bursts of fuel from the injector and an unstable idle because the ECU thinks the throttle is moving. 72 Disconnect the electrical connector from the TPS. 73 Using a digital ohmmeter, connect the positive probe to the center terminal and the negative probe to each of the outside terminals (in
71
Throttle Position
throttle shaft
Replacement Note: Because
Check Refer to
on the
Sensor (TPS)
throttle
turn).
74
Slowly
move
the throttle lever
until
it
is
wide open and observe
the resistance readings (see illustration). With the accelerator
fully
Chapter 6
6-15
Emissions and engine control systems
THROTTLE POSITION
CANISTER
SENSOR
PURGE NIPPLE
SENSOR NIPPLE
4.74 Position the probes on the TPS electrical terminals and slowly open the throttle valve until it is wide open. Observe a distinct decrease in the sensor resistance as the sensor travels from closed to full throttle
4.78a Removing the Throttle Position Sensor (TPS) from the throttle body of a 2.5L engine
THROTTLE POSITION
SENSOR
AUTOAAATIC
IDLE
SPEED
(AIS)
(TPS)
MOTOR
4.78b Removing the Throttle Position Sensor (TPS) from the throttle body of a 3.0L engine
4.78c Location of the Throttle Position Sensor (TPS) on 3.3L/3.8L engines
eas on the
TPS potentiometer
will
show up as
erratic resistance read-
ings.
75
If
new
the resistance readings are incorrect, replace the
TPS
with a
part.
Replacement Refer to
TO
illustrations 4. 78a, 4.
On
76
78b and
2.5L engines, remove the
4.
air
78c cleaner assembly (see Chap-
ter 4).
CANISTE
77
PURGE
Unplug the
electrical
connector from the
TPS
(three-wire
connec-
tor).
CRANKCASE \ VENT VALVE
78 then
HOSE TO VALVE COVER
79
Remove the two screws retaining the TPS to the throttle body, the TPS off the throttle shaft to remove (see illustrations). Installation is the reverse of removal. Make sure the flat tip of the
pull
it
throttle shaft seats properly into the slot in the
ing
TPS. Tighten the
retain-
screws securely.
CRANKCASE VENT VALVE HOSE ASSEMBLY TO INTAKE
5
Positive
MANIFOLD 5.1a Positive Crankcase Ventilation (PCV) system on the 2.5L engine
and 5. Id Crankcase Ventilation (PCV) system (see illustrations) reduces hydrocarbon emissions by scavnging vapors from the crankcase. It does this by circulating fresh air from the air cleaner through the crankcase, where it mixes with blow-by gases and is then Refer to 1
it should read approximately 5.2K ohms. With the throttle lever open, it should read approximately 1 .4K ohms. Note: Also look for a smooth transition between high and low resistance. Any damaged ar-
closed,
fully
Crankcase Ventilation (PCV) system
illustrations 5. 1a, 5. lb, 5. 1c
The
Positive
rerouted through a
PCV
valve to the intake manifold.
g
.
6-16
Chapter 6
Emissions and engine control systems
CRANK CASE VENT VALVE
AIR INTAKE
AIR CLEANER
HOSE ASSEMBLY
PLENUM
ASSEMBLY
CRANK CASE
POSITIVE
CRANKCASE
|
VENTILATION (PCV) VALVE.
INLET
AIR FILTER
CRANK CASE VENT TO AIR CLEANER HOSE 5.1c
PCV valve and hose on
the 3.0L V6 engines
5.1b Schematic of the Positive Crankcase Ventilation (PCV) system on the V6 engine
5.1 d
Positive
Crankcase Ventilation (PCV) valve (arrow) (3.3Ly3.8L engines)
The main components of the PCV system are the PCV valve, a 2 fresh air filtered inlet and the vacuum hoses connecting these two components with the engine. To maintain idle quality, the PCV valve restricts the flow when the intake manifold vacuum is high. If abnormal operating conditions (such
3
5.5 To check the PCV valve, detach it with the engine running you should hear a hissing sound coming from the valve and you should feel a strong vacuum when you place your finger over the end of the valve
as piston ring problems)
arise, the system is designed to allow excesblow-by gases to flow back through the crankcase vent tube into the air cleaner to be consumed by normal combustion. Checking and replacement of the PCV valve and filter is also cov4 ered in Chapter 1
sive
amounts
of
Check and component replacement Refer to
illustration
5.5
With the engine running at idle, pull the PCV valve out of the mount and place your finger over the valve inlet (see illustration). A strong vacuum will be felt and a hissing noise will be heard if the valve is operating properly. Replace the valve with a new one, as described in Chapter 1, if it is not functioning as described. Do not attempt to 5
clean the old valve.
form of hydrocarbon (HC) emissions. The system is very simple and consists of a charcoal-filled canis2 ter, canister purge solenoid, a combination rollover/pressure relief valve and connecting lines and hoses. When the engine is off and pressure begins to build up in the fuel 3 tank (caused by fuel evaporation), the charcoal in the canister absorbs the fuel vapor. When the engine is started (cold), the charcoal continues to absorb and store fuel vapor. As the engine warms up, the stored fuel vapors are routed to the intake manifold or air cleaner and combustion chambers where they are burned during normal engine operation.
4
The canister
solenoid, which
Evaporative emissions control system
Refer to
illustrations 6. 7a, 6. 7b, 6. 7c, 6.
76 and 6.8
General description 1
This system
from the
fuel
is designed to trap and store fuel that evaporates system that would normally enter the atmosphere in the
is
purged using engine vacuum through the purge
controlled by the
systems use a
SMEC
or
SBEC.
Single-point fuel
purge system. This system uses a dual source of vacuum to remove the vapors from the canister. Multi-point fuel injection systems use a tri-level canister purge system. The vapors are drawn in through the throttle body and air cleaner. Also, the vapors are drawn in at closed, part or wide open throttle. When the engine coolant temperature is below 70-degrees F the computer energizes the solenoid by grounding it so vacuum won't flow through it to the vacuum canister. Once the coolant temperature rises above 70-degrees F the solenoid is de-energized and vacuum then acts on the caninjection
6
is
ister.
bi-level canister
.
Emissions and engine control systems
Chapter 6 2
WAY
ELECTRICAL
6-17
PURGE SOLENOID
CONNECTOR
EGR SOLENOID
CANISTER PURGE
SOLENOID
6.7b
6.7a Typical canister purge solenoid
On some models,
the canister purge solenoid next to the EGR solenoid
is
mounted
^AAP SENSOf
CANISTER PURGE
EGR DIAGNOSTIC SOLENOID
SOLENOID
(CALIFORNIA ONLY);
MAP SENSOR CONNECTION 6.7d
6.7c Canister purge solenoid on an early California
model
lines
It is a good idea to check for any crimped or leaking vacuum by applying vacuum directly at the throttle body (single-point system shown)
Check Check the canister, hoses and lines for cracks and other damage. To check the filler cap, look for a damaged or deformed gasket as de6
scribed
7
in
Chapter
1
To check the purge solenoid, disconnect one
hoses from
of the
vacuum
and attach a short length of hose to the port (see illustrations). You should be able to blow air through it. Unplug the electrical connector from the solenoid and apply battery voltage to the terminals using two jumper wires. Now when you blow into the hose, the valve should not pass air. Caution: Don't leave the jumper wires connected to the solenoid any longer than necessary to perform this it
check.
Component replacement Canister The canister is located in the right front corner of the engine partment, behind the headlight (see illustration).
8 9 6.8 Charcoal canister
5
A B
Canister signal hose
The
relief valve,
C
Tanl< vent
hose
tain level.
mounted in the fuel tank filler cap, is caltank vacuum or pressure reaches a cerThis vents the fuel tank and relieves the high vacuum or which
is
fuel
canister, disconnect the
vacuum hoses, unscrew it
from the engine
compartment. 1
open when the
To replace the
the mounting nuts and lower the canister, removing
Purge hose
ibrated to
pressure.
hose designation
com-
Installation is the reverse of removal.
Canister purge solenoid 11 The canister purge solenoid is located on the engine compartment firewall or the fenderwell area (see illustrations 6.7a through 6.7c). On models equipped with an EGR solenoid, this solenoid is
3
6-18
Chapter 6
Emissions and engine control systems APPLY VACUUM TO VACUUM DIAPHRAGM
AIR CLEANER
ASSEMBLY
CRANKCASE VENT
HEATED
TO AIR CLEANER HOSE
AIR INLET
CONNECTOR
THROTTLE
BODY
AIR
HEATER
lONNECTOR AIR DUCT rO
POWER MODULE
LOWER SHELL ASSEMBLY To check the vacuum diaphragm, unplug the vacuum source hose from the sensor and attach a hand-held vacuum pump when vacuum is applied, the diaphragm should open the door and hold it open without leaking down - if the diaphragm fails to open the door or leaks, replace it with a new unit 7.8
Typical heated inlet air system
7.1
uum diaphragm, which operates a heat duct valve in the air cleaner, is actuated by intake vacuum. When the underhood temperature is cold, warm air radiating ofl 3 the exhaust manifold is routed by a shroud which fits over the manifolc up through a hot air inlet tube and into the air cleaner. This provides warm
air for the throttle body, resulting in better driveability and fastei warm-up. As the temperature inside the air cleaner rises, the heat dud valve is gradually closed by the vacuum diaphragm (which, in turn is controlled by a bi-metal temperature sensor inside the air cleaner) anc the air cleaner draws air through a cold air duct instead. The result is a
consistent intake
air
temperature.
Check Note: Refer to Chapter
1
for the initial
doesn't operate as described
in
Chapter
system check. If the systerr, 1, proceed as described be-
low.
7.10
The heated
inlet sensor is attached to the cleaner housing
air
mounted together
with the canister purge solenoid. Disconnect the vacuum hose(s), unplug the electrical connector(s), remove the mounting bolt and detach the solenoid(s) and bracket assembly from the fender panel.
12
1
Installation
7
Heated
is
the reverse of removal.
Always check the vacuum source and the integrity of all vacuum 4 hoses between the source and the vacuum diaphragm before beginning the following test. Don't proceed until you're sure they're okay. Apply the parking brake and block the wheels. 5 Detach, but do not remove, the air cleaner housing and element 6 (see Chapter 4). Turn the air cleaner housing upside down so the vacuum di7 aphragm door is visible. The door should be open. If it isn't, it might be binding or sticking. Make sure it's not rusted in an open or closed position by attempting to move it by hand. If it's rusted, it can usually be freed by cleaning and oiling the hinge. If it fails to work properly after servicing, replace
inlet air
system (single-point EFI systems
only)
8
If
the
it.
vacuum diaphragm door
to operate correctly,
Refer to
illustrations 7.1, 7.8
The heated
and 7.10
mixing
temperature within a 70 to 105-degrees F operating range by
warm and
cool
for the throttle body,
air.
This allows leaner fuel/air mixture settings
which reduces emissions and improves driveabil-
ity.
2
Two
fresh air inlets
ance between the two
is
okay, but the diaphragm
still fails
carefully for
(temperature control) system (see illustra-
inlet air
tion) provides heated intake air during v^/arm-up, then maintains the inlet air
is
a leak in the hose leading to it. Check the vacuum source to and from the diaphragm, and the operation of the diaphragm itself (see illustration) with a hand vacuum pump. If no leak is found, replace the vacuum diaphragm. If the diaphragm is okay, check the heated air temperature sensor.
General description 1
check
-
one warm and one cold
-
The balvacuum. A vac-
are used.
controlled by intake manifold
Component replacement On some models, the vacuum diaphragm is secured with a rivet, which must be removed with a drill. Use a self-tapping screw to install the new diaphragm. 10 To replace the heated inlet air temperature sensor, disconnect the hoses from each end of the valve, then install the new sensor facing the same direction as the old one (see illustration). 9
Chapter 6
Emissions and engine control systems .EGR VACUUM iSIGNAL HOSE
GASKET
BOLTS
BOLTS'
8.2a Typical
GASKET
EGR system on four-cylinder engines
EGR TUBE ASSEMBLY
INTAKE
MANIFOLD
VAPOR
VACUUM HARNESS
EGR VALVE
EXHAUST ASSEMBLY
MANIFOLD
EGR
6-19
7
Chapter 6
6-20
BACKPRESSURE TRANSDUCER
Emissions and engine control systems
VACUUM MOTOR .SPRING
DIAPHRAGM
MOVEMENT INDICATOR
BACKPRESSURE SIGNAL
INLET 8.2f
8.2e
8.4
EGR
The
valve and Backpressure Transducer (Non-California V6 engines)
Electric
EGR Transducer
(EET)
is
mounted near the EGR
A B
8.5
EGR
Vacuum
valve mounting details (3.3L/3.8L engines)
Check
all
C
line
Electrical
Mounting bolt
connector
the hose connections directly on the throttle body
valve (late model 3.0L California engine shown)
EGR
EET electrical connector Vacuum connections
valve
Electric
EGR
Transducer (EET)
The solenoid may be engine compartment or on the Electric EGR Transducer (EET) (see illustration). Symptoms of problems associated with the EGR system are rough idling or stalling when at idle, rough engine performance during light throttle application and stalling with engine temperature
mounted on the
and
driving conditions.
right side of the
during deceleration.
Check Refer to
5
illustrations 8.5
Check
all
and
hoses (see
8.
illustration) for cracks, kinks,
broken sec-
and proper connection. Inspect all system connections for damage, cracks and leaks. 6 To check the EGR valve operation, bring the engine up to operat-
tions
blocked to prevent movement). 7 Disconnect the hose from the transducer (see illustration 8.2a through 8.2e) and connect a vacuum pump (see illustration). Start the engine, raise the engine speed to approximately 2000 rpm, hold it there and apply ten inches of vacuum with the pump. The EGR valve stem should move and stay open for at least 30 seconds if the control system is working properly. ing temperature with the transaxle in Neutral (tires
8.7
Connect a vacuum pump
vacuum
and apply The EGR valve stem should
directly to the transducer
(10 inches-Hg) at 2,000 rpm.
move
(open)
1
1
Emissions and engine control systems
Chapter 6 ASPIRATOR
AIR CLEANER TO SILENCER HOSE
6-21
DIAPHRAGM
SILENCER
CATALYST
DOWNSTREAM ASPIRATOR SILENCER TO
TUBE ASSEMBLY
ASPIRATOR HOSE VIEW
IN
9.1
8
If
the stem
TO EXHAUST MANIFOLD
DIRECTION
OF ARROW
FROM
Z
AIR
CLEANER
Typical air aspirator system
moves
but won't stay open, the
sure transducer assembly
is
faulty
EGR
valve/backpres-
and must be replaced with a new
one. If the EGR valve stem doesn't move except when vacuum from the pump is applied, remove the throttle body (see Chapter 4) and clean the EGR ports in the throttle bore and body with solvent.
9
idle is
the engine exhibits rough idle, dies when returned to idle or the both rough and slow, the EGR valve is leaking in the closed po-
sition.
Inspect the
10
If
EGR
tube for leaks at the connection to the mani-
Loosen the tube connection, then tighten it securely. Remove the EGR valve and transducer assembly and inspect the poppet to make sure it's seated. If it isn't, replace the EGR valve transducer assembly
fold.
with a
new
one; don't attempt to clean the
EGR
VIEW A 9.6 When the negative exhaust pulses are strong, air is drawn through the valve and into the exhaust manifold (view A) - when exhaust backpressure increases, the valve closes (view B)
valve.
Component replacement To remove the EGR valve and backpressure transducer, disconvacuum hose from the backpressure transducer assembly, then pull the assembly out of the mounting clip. Remove the bolts or unscrew the tube nut and disconnect the 12 1
nect the
crossover tube from the EGR valve. 13 Remove the mounting bolts' and detach the EGR valve and backpressure transducer assembly from the engine. Clean off all old gasket material from the mating surfaces of the valve and manifold, and be sure to use a new gasket when installing the valve.
14 The EGR solenoid (see illustration 6.7b).
is
located on the engine compartment firewall
to the air cleaner.
5
If
Air aspirator
system
illustration 9.
cleaner assembly and the exhaust system.
3 idle,
The aspirator valve works most efficiently at idle and slightly off where the negative exhaust pulses are strongest. The valve re-
mains closed
at higher
If
To determine
With the engine
in
cleaner hose connections for leaks.
new hose clamps
the hose has hardened, replace
inlet.
if
it
(if
with a
If
the hose con-
the hose hasn't hard-
new one as
well.
the valve has failed, disconnect the hose from the idling (transmission in Neutral),
front of the inlet
-
hold a strip of pa-
the paper should be sucked against the open-
if it's working properly. If a steady stream of exhaust escaping from the inlet (which will blow the paper away from the valve), the valve is defective and should be replaced with a new one (see illustration). Warning: Don't use your tiand to feel for the exhaust pulses - the exhaust gas can be very hot!
is
Component replacement The valve can be replaced by removing the hose clamp, detachhose and unscrewing it from the tube. The aspirator tube can be replaced by removing the valve, un8 screwing the fitting at the manifold and removing the bracket bolt. ing the
10
Module Engine Controller (SMEC) or Single Board Engine Controller (SBEC) - removal and installation
Single
Refer to
illustration
install
6 per
air
leaking, retighten the tube fitting.
engine speeds.
Check Refer to
is
nections are leaking, ened).
excessive, check the aspirator tube-to-exhaust
7
The air aspirator system (see illustration) uses exhaust pulsations to draw fresh air from the air cleaner into the exhaust system. This reduces carbon monoxide (CO) and, to a lesser degree, hydrocarbon (HC) emissions. The system is composed of a valve, hoses and tubes between the 2 1
air
is
and the valve and
ing of the valve
General description Refer to
joint
the manifold joint
gas
9
exhaust noise
If
manifold
9.6
4 Aspirator valve failure results in excessive exhaust system noise from under the hood and hardening of the rubber hose from the valve
illustrations 10.4a,
10.4b and 10.4c
Removal 1
Disconnect the battery cables (negative cable
the positive cable).
first,
followed by
6
6-22
Chapter 6
Emissions and engine control systems DIAGNOSTIC
CONNEaOR
14-WAY WIRE
SCREWS
CONNEaOP:
(2)
SINGLE MODULE ENGINE CONTROLLER (SMEC) 10.4a Detach the electrical connector from the SMEC/SBEC perfectly parallel to the unit to avoid bending any of the pins
SMEC can be removed after unplugging the electrical connectors and removing the bolts from the housing
10.4b The
2 3 4
Disconnect the
air
cleaner duct from the module.
Remove the battery (see Chapter 5). Remove the mounting bolts, unplug the connectors
tions)
and remove the
SMEC
or
SBEC
(see illustrafrom the engine compartment
SCREWS
DIAGNOSTIC
(see illustration).
(2)
CONNECTOR
Installation 5
Hold the module
in
position, install the bolts
and plug
in
the con-
nectors.
6 Connect the air cleaner duct. Install the battery and connect the battery cables (positive 7 then negative).
11
first,
Catalytic converter
Note: Because of a Federally mandated extended warranty which covcomponents such as the catalytic converter, check with a dealer service department before replacing the converter at your own expense. ers emissions-related
General description The
10.4c
an emission control device added to the exhaust system to reduce pollutants in the exhaust gas stream. There are two types of converters. The conventional oxidation catalyst reduces the levels of hydrocarbon (HC) and carbon monoxide (CO). The three-way catalyst lowers the levels of oxides of nitrogen (NOx) as well as hydrocarbons (HC) and carbon monoxide (CO). 1
catalytic converter
plugged. The easiest way to check for a restricted converter is to use a vacuum gauge to diagnose the effect of a blocked exhaust on in-
take vacuum. a)
The
b) c)
equipment for a catalytic converter is expensive and If you suspect the converter is malfunctioning, take the vehicle to a dealer service department or authorized emissions inspection facility for diagnosis and repair. Whenever the vehicle is raised for servicing of underbody compo3 nents, check the converter for leaks, corrosion, dents and other damage. Check the welds/flange bolts that attach the front and rear ends test
highly sophisticated.
of the converter to the exhaust system.
If
damage
is
discovered, the
converter should be replaced.
4
details
come
Check 2
SBEC mounting
is
Although catalytic converters don't break too often, they can be-
d)
Open
the throttle until the engine speed is about 2000 rpm. Release the throttle quickly. If there's no restriction, the gauge will quickly drop to not more than 2 inches-Hg or more above its normal reading. If the gauge doesn't show 5 inches-Hg or more above its normal reading, or seems to momentarily hover around its highest reading for a moment before it returns, the exhaust system, or the converter, is plugged (or an exhaust pipe is bent or dented, or the core inside the muffler has shifted).
Component replacement 5
Refer to the exhaust system servicing procedures
in
Chapter
4.
Chapter 7 Automatic transaxle Contents
Automatic transaxle Band adjustment Diagnosis - general Fluid
and
Fluid level
-
removal and
and back-up and replacement
10
installation
See Chapter
Neutral start
1
2
change check
See Chapter See Chapter
filter
General information Ignition switch/shifter interlock
-
check and adjustment
Oil seal
switch
light
-
check
replacement
1
Speedometer drive pinion - removal and Shift cable - check and adjustment
1
Throttle pressure cable or rod
5
Transaxle mount
1
-
-
installation.
adjustment
check and replacement
Specifications Fluid type
See Chapter
and capacity
Torque specifications Neutral start Shift
and back-up
light
1
Ft-lbs (unless otherwise noted)
switch
cable adjustment bolt
25 105in-lbs
Throttle pressure cable/rod adjustment bracket lock bolt/screw
Transaxle case-to-engine bolts
Torque converter-to-driveplate bolts Transaxle mount through-bolts Transaxle mount attaching bolts
108 70 55 40 40
in-lbs
diagnosis, seal replacement, adjustments
General information
and removal and
installation
procedures.
manual come equipped with a three-
If the transaxle requires major repair work, it should be left to a dealer service department or an automotive or transmission repair
speed or four-speed automatic transaxle. Due to the complexity of the automatic transaxle and the need for special equipment and expertise to perform most service operations, this Chapter contains only general
shop. You can, however, remove and install the transaxle yourself and save the expense, even if the repair work is done by a transmission shop.
All
vehicles covered
in this
1
7
:
Chapter 7 Automatic transaxle
7-2 Diagnosis
(none missing) and tight, the gasket is in good condition and the pan is (dents in the pan may indicate damage to the valve body inside). 15 If the pan gasket is leaking, the fluid level or the fluid pressure
general
-
flat
Note: Automatic transaxle malfunctions may be caused by four general Poor engine performance, improper adjustments, hydraulic malfunctions or mechanical malfunctions. Diagnosis of these problems should always begin with a check of the easily repaired items: Fluid level and condition (see Chapter 1), shift linkage adjustment and throttle linkage adjustment. Next, perform a road test to determine if the problem has been corrected or if more diagnosis is necessary. If the conditions:
problem persists
after the preliminary tests
pleted, additional diagnosis should
and corrections are com-
be done by a dealer service depart-
ment or transmission repair shop. Refer to the Troubleshooting section manual for transaxle problem diagnosis.
at the front of this
Preliminary checks warm
Drive the vehicle to
1
the transaxle to normal operating tem-
perature.
Check the
2 a)
as described in Chapter 1 unusually low, add enough fluid to bring the level within the designated area on the dipstick, then check for If
fluid level
the fluid level
is
external leaks. b)
c)
abnormally high, drain off the excess, then check the drained fluid for contamination by coolant. The presence of engine coolant in the automatic transmission fluid indicates that a failure has occurred in the internal radiator walls that separate the coolant from the transmission fluid (see Chapter 3). If the fluid is foaming, drain it and refill the transaxle, then check If
the fluid level
is
for coolant in the fluid or
a high
fluid level.
Check the engine idle speed. Note: If the engine is malfunctioning, don't proceed with the preliminary checks until it has been repaired and runs normally. 4 Check the throttle pressure cable or rod for freedom of move3
necessary (see Section 4). Note: The throttle pressure when the engine is shut off and cold, but it may malfunction once the engine is hot. Check it cold and at normal engine operating temperature. 5 Inspect the shift cable (see Section 3). Make sure it's properly adjusted and operates smoothly. ment. Adjust
may
cable
may be
may be plugged, the pan bolts may be too may be warped, the sealing surface of the transaxle housing may be damaged, the gasket may be damaged or the transaxle casting may be cracked or porous. sealant is used in place of a gasket, may be the wrong sealant. tight,
If
it
Seal leaks is leaking, the fluid level or pressure may be too may be plugged (these models are vented through the hollow dipstick), the seal bore may be damaged, the seal itself may be damaged or improperly installed, the surface of the shaft protruding through the seal may be damaged or a loose bearing may be causing
16
If
excessive shaft movement. 1 Make sure the dipstick tube seal is in good condition and the tube is properly seated. Periodically check the area around the speedometer gear or sensor for leakage. If transmission fluid is evident, check the 0-ring for damage. Also inspect the side gear shaft oil seals for leakage.
Case leaks If the case itself appears to be leaking, the casting is porous and have to be repaired or replaced. 19 Make sure the oil cooler hose fittings are tight and in good condi-
18
will
tion.
Fluid
comes out the filler opening
20
this condition occurs, the transaxle
in
If
the
fluid
procedure
7
a seal or gasket.
may
If
a leak
is difficult
to find, the follow-
help.
Identify the fluid.
9
fluid
sure
it's
transmission
fluid
and not engine
is
dripping onto the cardboard.
Make
a careful visual inspection of the suspected component and it. Pay particular attention to gasket mat-
the area immediately around ing surfaces.
A
mirror
is
often helpful for finding leaks
in
suspected component again. 12 Once the leak has been located, the cause must be determined before it can be properly repaired. If a gasket is replaced but the sealing flange is bent, the new gasket won't stop the leak. The bent flange must be straightened. 13 Before attempting to repair a leak, check to make sure the following conditions are corrected or they may cause another leak. Note:
be fixed without highly specialand expertise. Such problems must be referred to a transmission shop or a dealer service department. of the following conditions can't
ized tools
Gasket leaks 14
overfilled, there is coolant is
plugged or the drain
3
Shift cable
-
check and adjustment
Check 1
Check the operation to start the engine
in
of the transaxle in
each position
-
each
shift lever position
the starter should operate
in
Check the pan
Adjustment
periodically.
Make
3 bolt
Place the
shift lever in Park.
Working in the engine compartment, loosen the on the transaxle bracket.
shift
cable clamp
4 Pull the shift lever all the way to the front detent (Park position) by hand. 5 Keep pressure on the shift lever and tighten the cable clamp bolt. Check the shift lever in the Neutral and Drive positions to make 6 sure it's within the confines of the lever stops. The engine should start only when the lever is in the Park or Neutral position.
areas that are
hard to see. 10 If the leak still can't be found, clean the suspected area thoroughly with a degreaser or solvent, then dry it. 1 Drive the vehicle for several miles at normal operating temperature and varying speeds. After driving the vehicle, visually inspect the
Some
is
incorrect, the vent
back holes are plugged.
2
Make
or brake fluid (automatic transmission fluid
the
is
the Park and Neutral positions only).
a deep red color). 8 Try to pinpoint the source of the leak. Drive the vehicle several miles, then park it over a large sheet of cardboard. After a minute or two, you should be able to locate the leak by determining the source of oil
the dipstick
leaks are easy to locate visually. Repair usually con-
sists of replacing
ing
fluid,
it if
function properly
Fluid leak diagnosis Most
a transaxle seal
high, the vent
(try
6
too high, the vent
the pan sealing flange
sure the bolts are
all in
place
4
Throttle pressure cable or rod
Refer to 1
-
adjustment
illustration 4.3
The
throttle
pressure cable (four-cylinder models) or rod (V6 mod-
in the transaxle which governs shift quality and speed. If shifting is harsh or erratic, the throttle pressure cable or rod should be adjusted. 2 The adjustment must be made with the engine at normal operat-
els)
controls a valve
ing temperature.
Cable adjustment 3
Loosen the cable mounting bracket lock screw and position
the
contact with the transaxle casting (see illustration). Tighten the lock screw to the torque listed in this bracket so the alignment tabs are
in
Chapter's Specifications. Release the cross-lock on the cable assembly by pulling up on 4
it.
1
7-3
Chapter 7 Automatic transaxle Move
8
against
its
the transaxle throttle lever toward the engine, hold stop,
and tighten the lock screw
it
firmly
to the torque listed in this
Chapter's Specifications.
LOCK SCREW
9 ter
It's
a good idea to lubricate the linkage at this point (see Chap-
1).
THROTTLE
CONTROL CABLE
5
Ignition switch/shifter interlock
-
description,
check
and adjustment
Description
THROHLE
Refer to
PRESSURE
THROTTLE CONTROL LEVER
CABLE SELECTOR LEVER
/.
4.3 Throttle pressure cable details (three-speed transaxle only)
illustration 5.
The automatic transaxle shifter/ignition interlock (see illustration) is a cable-operated system that interconnects the floor-mounted shifter to the ignition switch on the steering column. The interlock system locks the shifter into the Park position when the ignition switch is in the Lock or Accessory position. When the key is in the Off or Run position, the shifter is unlocked and can move to any position. The in1
system also prevents the key from being turned to the Off or Accessory position unless the shifter is fully locked into the Park positerlock
tion.
To ensure proper adjustment, the cable must be
way toward
free to slide
the engine, against the stop, after the cross-lock
all
the
is re-
leased.
5
Move
the transaxle throttle control lever clockwise as far as pos-
sible (against the internal stop)
and press the cross-lock down
into the
locked position.
Check the cable way forward, release 6
action.
it
Move the transaxle throttle cable all make sure returns completely.
slowly and
Check Place the shift lever in the Park position and make sure the shift knob pushbutton is in its full up position. The ignition key should rotate freely from its Off/Run position to the Lock position. Move the shift lever to the Drive (or Overdrive) position. The igni3 tion key should not rotate from its Off/Run position to the Lock posi2
the
lever
tion.
it
You should be able
4
with the ignition key
Rod adjustment Loosen the adjustment swivel lock screw and make sure the swivel slides freely along the flat end of the throttle rod. If it doesn't, disassemble the linkage and clean or repair it as necessary. 7
STEERING COLUMN ASSEMBLY
to
move
Lock 5
the
in
to
move
shift lever
out of the Park position
shift lever
out of this position with the ignition key
in
the
position. If
the automatic transaxle shifter/ignition interlock system does
not operate as described above, try adjusting
SCREW
SHIFTER
HANDLE
INTERLOCK CABLE
AND LEVER
INTERLOCK CABLE
5.1
the
the Off/Run position; but you should not be able
Ignition switch/shifter interlock
ADJUSTMENT NUT
system
details
it,
then recheck
it.
1
7-4
Chapter 7 Automatic transaxle ADJUSTING
NUT
GREEN PLUNGER
CABLE
SLUG 5.13 Loosen the adjustment nut on the interlock lever
enough
to
allow the spring to correctly position the interlock lever on the shift lever
assembly
CABLE
SLUG 5.10
The green plunger should be slug should be fully seated
all
in
CONTAa
the way up and the cable the interlock lever
WIRING CONNECTOR SWitCH 6.6 Neutral start
and back-up
switch details
light
tion (see illustration 5.1). 1 3 Loosen the adjustment nut (see illustration) on the interlock lever adjustment nut enough to allow the spring to correctly position the interlock lever on the shift lever assembly. 14 Tighten the interlock lever adjustment nut to the torque listed in this Chapter's Specifications. 15 Installation is the reverse of removal. 16 After adjusting the interlock system, check it again as described
6.1 There are two switches at the lower front of the transaxle on four-speed models (three speeds have only the one on the right) the switch on the right (1) is the Neutral start and back-up light switch; the switch on the left (2) is for the selector (PRNDL) indicator; the connector above the switches (3) is for the output speed sensor
6
If
5.10 and 5.13
illustrations
binding or
is
the Off position, even though the
system needs
Turn the ignition
7
difficult
or impossible to turn to
shift lever is fully
locked into the Park
be adjusted. switch to the Accessory position to
system cannot be adjusted correctly if the
the
the
shift lever.
9 plate
shift
knob
Leave the
To remove the
(the interlock
ignition switch is in the
Lock
retaining
shift
screw and remove the knob from
release button
in
the
shift lever
shift lever trim plate, carefully
handle.
pry between the
and the console with a screwdriver. Don't scratch or gouge the
plate or console assembly.
10
Put the
illustration) 1
light
4.
switch
-
check
illustrations 6. 1 and 6.6 The Neutral start and back-up light switch is located at the lower front edge of the transaxle (see illustration). The switch controls the back-up lights and the center terminal of the switch grounds the starter
solenoid circuit 2
shift lever in
on the
Park and
Verify that the slug
make
mechanism
sure the green plunger (see
the full up position. on the end of the interlock cable is completely
shift lever
seated into the interlock lever. 12 Verify that the ignition switch
is in
is still in
the accessory (ACC) posi-
when the
ity
transaxle
is in
Park or Neutral, allowing the
start.
Prior to
checking the switch, make sure the
adjusted (see Section
3
Remove
Neutral start and back-up and replacement
engine to
position).
8
Steps 2 through
1
the ignition switch
position, the
6
in
Refer to
Adjustment Refer to
above as described
shift
cable
is
properly
3).
Unplug the connector and use an ohmmeter to check for continubetween the center terminal and the case. Continuity should exist
only when the transaxle is in Park or Neutral. 4 Check for continuity between the two outer terminals. Continuity should exist only when the transaxle is in Reverse. No continuity should exist between either outer terminal and the case. If the switch fails any of the tests, replace it with a new one. 5 Position a drain pan under the switch to catch the fluid released 6 when the switch is removed. Unscrew the switch from the transaxle, using a box-end wrench to avoid damage to the switch housing (see illustration).
7-5
Chapter 7 Automatic transaxle
SPEEDOMETER CABLE "O" RING
TRANSAXLE
PINION
EXTENSION HOUSING
7.2 Speedometer drive pinion installation details - models equipped with a mechanical speedometer use a cable (shown); those equipped with electronic speedometers use a wiring harness instead of a cable
Move
7
the
shift lever
from Park to Neutral and check to see in the opening.
10.7
be reassembled
the
if
Wrap
8
the threads of the
Plug
tions.
in
new
switch with Teflon tape,
to the torque listed
in this
fluid level
and add
fluid
install
it
in
Chapter's Specifica-
the connector and repeat the checks on the
Check the
9
it
new
switch.
as required (see Chapter
5
If
the
special
switch operating fingers are centered the case and tighten
Mark across the torque converter and
1).
drive pinion
-
removal and
Using a large section of pipe or a large deep socket as a drift, innew oil seal. Drive it into the bore squarely and make sure it's completely seated. Apply multi-purpose grease to the seal lip before stall
the
the driveaxle.
tial
is
located
The manufacturer recommends that the
in
the transaxle differen-
oil
seal
drive
careful not to
the retaining bolt and carefully work the speedometer
assembly up and out
of the transaxle extension housing (see
9
if
the O-ring
Remove
Section
is
is
located on the
7).
9
Transaxle mount
1
Insert a large screwdriver or prybar
-
check and replacement
4
does, replace the mount.
leakage, pry off the retainer, detach the adapter from
Connect the adapter
to the pinion,
2
3
the pinion gear and replace the 0-ring.
5
new
leaking.
transaxle bracket and pry back and forth.
is
of the
the speedometer drive pinion and replace the O-ring (see
Inspect the pinion for signs that lubricant has leaked past the adapter or into the cable. 3
there
lip
il-
lustration).
If
damage the
be replaced be-
fore reinstalling the pinion.
Remove
Be
The speedometer cable and extension housing
termine drive pinion
extension housing. The drive pinion must be removed for certain
2
the driveaxle(s).
transaxle housing. Look for lubricant around the cable housing to de-
operations, such as to allow right side driveaxle removal and installation.
Install
seal.
installation
illustration 7.2
The speedometer
1
be removed with a screwdriver or prybar, a will be re-
6
8
Refer to
driveplate so they can
same way
quired.
7
Speedometer
seal can't
the
seal removal tool (available at auto parts stores)
oil
installing
7
oil
in
making sure the
retainer
is
se-
between the mount and the
The transaxle bracket should not move away from the mount.
To replace the mount, support the transaxle
with a jack,
If it
remove
the nut and through bolt and the bracket-to-transaxle bolts, then de-
cure.
tach the mount.
Make sure the mating surfaces of the adapter and extension 6 housing are clean because any debris could cause misalignment of the
slightly to
It
may be necessary
to raise or lower the transaxle
provide enough clearance to remove the mount.
4
Installation
10
Automatic transaxle
is
the reverse of removal.
gear.
7 it
Insert the
assembly
into the transaxle, install the bolt
and tighten
securely.
Refer to
8
Oil seal
1
Oil
-
removal and installation
illustrations 10.7, 10.19, 10.20. 10.21,
10.22a and 10.22b
replacement
Removal leaks frequently occur
due
to
wear
of the driveaxle
oil
seals
and/or the speedometer pinion drive gear O-ring. Replacement of the seals is relatively easy, since the repairs can usually be performed without removing the transaxle from the vehicle.
The driveaxle oil seals are located at the sides of the transaxle, where the driveaxles are attached. If leakage at the seal is suspected, raise the vehicle and support it securely on jackstands. If the seal is leaking, lubricant will be found on the sides of the transaxle. Refer to Chapter 8 and remove the driveaxle(s). 3 2
4
Using a screwdriver or prybar, carefully pry the
transaxle bore.
oil
seal out of the
Disconnect the negative cable from the battery. Raise the vehicle and support it securely on jackstands. the front wheels. 1
2
3
Drain the transaxle fluid (see Chapter
On V6
Remove
1 ).
models, drain the cooling system and remove the coolant return extension (See Chapter 3). Remove the torque converter cover and the left splash shield. 5 6 Remove the driveaxles from the transaxle (see Chapter 8). Mark the torque converter and driveplate so they can be rein7 stalled in the same position (see illustration). 8 Remove the torque converter-to-driveplate bolts. Turn the 4
3 4 7 8
7-6
Chapter 7 Automatic transaxle FRONT ENGINE
MOUNT INSULATOR
^^ FRONT ENGINE.
MOUNT BRACKET TO CROSSMEMBER
LOWER RADIATOR HOSE
/ 10.19
Remove the mounting bracket
/
\-
10.20
Remove the front mounting
\
insulator through-bolt and unbolt the insulator from the transaxle
FRONT MOUNT INSULATOR
TRANSAXLE REAR END COVER 10.21
On four-speed models, remove this front engine mount
10.22a
Remove the
left
engine mount attaching bolts
crankshaft to bring each bolt into view. The crankshaft bolt can be reached through an access cover in the passenger side splash shield.
Remove the starter motor (see Chapter 5). Disconnect the speedometer cable (mechanical speedometer) or electrical connector (electronic speedometer) (see Section 7). Unplug the electrical connector from the Neutral start/back-up 11 light switch. On four-speed transaxles, disconnect the PRNDL switch connector, output speed sensor connector, and input speed sensor connector as well (see illustration 6.1). On models equipped with a lockup torque converter, disconnect the converter electrical connector near the dipstick. 12 On models so equipped, disconnect the vacuum hose(s). 1 Remove any exhaust components that will interfere with transaxle removal (see Chapter 4). 1 On three-speed transaxles, disconnect the throttle pressure cable 9
10
or rod.
15 16
Disconnect the shift cable. Support the engine with a hoist from above or a jack from below (position a block of wood between the jack and oil pan to spread the load). 1
Support the transaxle with a jack - preferably a special jack made purpose. Safety chains will help steady the transaxle on the
for this
10.22b
jack. 1
Remove any
chassis or suspension components that
with transaxle removal.
will
interfere
.
.
.
and
this long through-bolt
Chapter 7 Automatic transaxle Three-speed models 19
Remove
the engine
28
mount bracket from the
front
crossmember
(see illustration). 20 Remove the front mounting insulator through-bolt and unbolt the insulator from the torque converter housing (see illustration).
21
Remove
up.
29
models
22
the front engine
mount
insulator
and
its
bracket (see
il-
Remove Remove
the
left
engine mount attaching bolts and through-bolt
the bolts securing the transaxle to the engine.
Lower the transaxle
slightly
and disconnect and plug the
transaxle cooler lines.
the transaxle back to disengage
it from the engine block and make sure the torque converter is detached from the driveplate. Attach a small C-clamp to the transaxle case to prevent the torque converter from falling out during removal. Lower the transaxle
dow/el pins
from the vehicle.
Installation 26
Prior to installation,
make
sure the torque converter hub
is
se-
engaged in the pump. With the transaxle secured to the jack, raise it into position. Be sure to keep it level so the torque converter doesn't slide out. Connect curely
27
the
fluid
until
the dowel pins and
the transaxle housing-to-engine bolts. Tighten them se-
Install
31
Install
the torque converter-to-driveplate bolts. Tighten the bolts in this
Chapter's Specifications.
Install the engine mounts and any suspension and chassis com32 ponents that were removed. Tighten the bolts and nuts to the torque
(see illustrations).
Move
the transaxle forward carefully
to the torque listed
All
25
Move
transaxle housing are engaged. curely.
lustration).
23 24
Turn the torque converter to line up the bolts with the holes in the The marks on the torque converter and driveplate must line
driveplate.
30
Four-speed models
7-7
cooler
lines.
listed in this
Chapter's Specifications.
33 Remove the jacks supporting the transaxle and engine. 34 Install the starter motor (see Chapter 5). 35 Connect the vacuum hose(s) (if equipped). 36 Connect the shift linkage (and throttle pressure linkage on threespeed models). 37 Attach the electrical connectors to the Neutral start/back-up light switch.
38 39 40
Install the torque converter cover and left splash shield. Connect the driveaxles (see Chapter 8). Connect the speedometer cable (mechanical speedometer).
41
Adjust the
shift
cable (see Section
3).
42 Install any exhaust system components that were removed or disconnected. 43 Lower the vehicle. 44 Fill the transaxle and the cooling system (see Chapter 1), run the vehicle and check for fluid leaks.
7-8
Chapter 7 Automatic transaxle
Notes
Chapters Driveaxles Contents
Constant velocity (CV) joint boots - replacement Constant velocity (CV) joints - disassembly, inspection and reassembly Driveaxle boot check Driveaxle oil seal replacement Driveaxles
-
6
Driveaxles
Flywheel
- removal and installation removal and installation
General information Intermediate shaft (1991 and 1992 3.3L and 3.8L models only) - removal and installation
5
See Chapter 1 See Chapter 7
general information and inspection
-
2
Specifications
Driveaxle dimensions
inches
1988 and 1989 18-29/32 to 19-13/64 8-1/2 to 8-13/16
Right Left
1990
SSG Right Left
18 to 18-1/2 7-45/64 to 7-29/32
GKN Right
18-29/32 to 19-13/64
Left
8-1/2 to 8-13/16
1991 and later 2.5L and 3.0L engines Right Left
17-51/64 to 18-7/64 7-13/32 to 7-45/64
3.3L and 3.8L engines Right
1991 and 1992
1993 Left
7-13/32 to 7-45/64 17-51/64 to 18-7/64 7-13/32 to 7-45/64
Torque specifications
Ft-ibs
Pressure plate-to-flywheel bolts Bearing bracket bolts for intermediate shaft Dhveaxle nut
21 21
180
3
See Chapter 2 1
4
8-2
Chapter 8
Driveaxles
EXPOSED BOOT RETENTION COLLAR
A.C.I.
INNER BOOT
G.K.N.
OPEN
TULIP 69/92
THREE PIECE
CONSTRUCTION
1
2
(OPEN TULIP)
G.K.N.
CLOSED TULIP 82/98
INNER BOOT
ONE PIECE ROUND EXTRUSION
S.S.G.
12345
(CLOSED TULIP)
2.4a
Use
123456
this chart to identify the driveaxles
end
1
General information
The information in this Chapter deals with the driveaxles. WarnSince nearly all the procedures included in this Chapter involve working under the vehicle, make sure it's securely supported on sturdy jackstands or on a hoist where it can be easily raised and lowered. ing:
2
Driveaxles
-
general information and inspection
General information illustrations 2.4a and 2.4b Power from the engine passes through the clutch and transaxle to the front wheels via two driveaxles. Most models have unequal length driveaxles; 1991 and 1992 models with a 3.3L or a 3.8L engine use equal-length driveaxles. On these models, the inner end of the right
Refer to
driveaxle is connected to an intermediate shaft; the point at which the two are connected is supported by a bearing and bracket. The inner
used on early models
.
is connected to the differential side gear Cardan-type joint. Each driveaxle assembly consists of three parts: A 'tripod" type inner CV joint, a "Rzeppa" type outer CV joint and an axleshaft which connects the two. Outer CV joint housings on both equal and unequal length driveaxles have a splined stub axle which engages with the front hub and is retained by a large nut. Inner CV joint housings have a short, splined stub axle which engages with the differential side gear (the CV joint housing for the right driveaxle on equal length systems engages with the intermediate shaft). The inner splined end of the CV joint housing is held in place by a spring inside the CV joint housing which pushes the housing toward the transaxle, keeping the stub axle fully seated in the differential side gears. As the driveaxles move through their range of travel, ball bearings inside the CV joint housings allow them to operate at various lengths and angles. These bearings must be lubricated with special grease and protected by rubber boots. You should periodically inspect these boots for tears and/or grease leaking out. Torn boots allow dirt and
of the intermediate shaft
via a
moisture to enter the
CV
joints;
if
not fixed, a simple tear accelerates
bearing wear and eventually causes premature
failure.
Chapters Driveaxles
8-3
TONE WHEEL (WHEN EQUIPPED WITH
OUTER BOOT
A.B.S.)
GKN
/WEIGHT
/
INNER BOOT
HALFSHAFTS LEF AND RIGHT EQUAL LENGTH -INNER
DAMPER WEIGHT
BOOT
y^
OUTER BOOT
TONE WHEEL
8
SAGINAW MANUAL 2.4b
and
If,
AUTOMATIC
this chart to identify the driveaxles
The vehicles covered by this manual can be equipped with Jnveaxles manufactured by ACI, GKN, SSG or Saginaw (see illustralons).
SAGINAW 2200
SAGINAW AUTOMATIC later
driveaxle for another or Inspection
after referring to the illustration, you're
still unable to deternine the manufacturer, take the driveaxle assembly with you when )uying boots or CV joint parts. Don't try to substitute one brand of
used on
models
swap
Periodically, inspect the tion (see
the
CV
Chapter
joints
may
parts from
one brand
to another
boots for leaks, damage and deterioraReplace damaged CV joint boots immediately or be damaged. You must remove the driveaxle (see
1).
4 5
8-4
Chapter 8
If there's no assistant handy to apply the brakes while you unscrew the hub nut, use a large screwdriver or pry bar to immobilize the hub
3.2
Section 3) to replace the boots.
Some
can be
when
pull
out the driveaxle
installed with-
out removing the driveaxle from the vehicle. This design repairs
Swing the steering knuckle away from the transaxle and
3.7
auto parts stores carry a conve-
nient alternative: "Split-type" replacement boots
emergency
Driveaxles
you're traveling, but
it's
is
handy
for
not a substitute for
one-piece boots. When a boot is torn, you must remove the dhveaxle and disassemble, clean and inspect the CV joint to make sure no moisture and dirt - which greatly accelerate bearing wear - have already
caused damage. The most common symptoms
of
worn or damaged
sides lubricant leaks, are: a clicking noise
in
CV joints,
turns, a clunk
when
be-
accel-
highway speeds. To wear in the CV joints and driveaxle shafts, grasp each axle (one at a time) and rotate it in both directions while holding the CV joint housings. Watch for movement, indicating worn splines or sloppy CV joints. Also, check the driveaxle shafts for cracks and distortion. erating from a coasting condition or vibration at
check
3
for
Driveaxles
-
removal and installation 3.8 Pry the inner
Removal and 3.8 hub cover). Remove the front hub nut cotter pin, nut lock and wave washer, if equipped. With the weight of the vehicle on the wheels, loosen the hub nut. Refer to 1
end
of the
CV joint
out of the differential side
gears with a large screwdriver or pry bar
illustrations 3.2, 3. 7
Remove
the wheel cover (or
Loosen the wheel lug nuts, raise the front of the vehicle and supsecurely on jackstands (apply the parking brake and block the rear wheels). Remove the lug nuts, the front wheel, the hub nut and the big washer (see illustration). If you're removing the right driveaxle from a vehicle with unequal 3 length driveaxles, remove the speedometer drive gear (see Chapter 7) prior to removing the right axle. 4 Remove the steering knuckle-to-balljoint clamp bolt (see Chap-
while the driveaxles are out,
install
bolts through the
hubs and thread
nuts onto them to keep the bearings from loosening.
2
port
it
ter 10).
Disconnect the
stabilizer bar
ter 10).
7
Grasp the outer
10
Prior to installation, clean the
CV joint and
the seal
in
wear sleeve on the
driveeixle outer
the hub. Lubricate the entire circumference of
lip and fill the seal cavity with grease. Apply a 1/4-inch bead of grease to the wear sleeve seal contact area as well. 11 Apply a small amount of multi-purpose grease to the splines at each end of the driveaxle. Place the driveaxle in position and carefully
the seal
end of the shaft into the transaxle. Push the steering knuckle out and insert the outer splined shaft of
insert the inner
from the suspension arm to allow enough movement to separate the balljoint (see Chapter 10). Pry the lower balljoint stud out of the steering knuckle (see Chap6 5
Installation
12 the bolt
CV
joint
and the steering knuckle and pull the hub (see illus-
steering knuckle out to separate the driveaxle from the
tration). Be careful not to damage the CV joint boot. Caution: Don't pry on or damage the wear sleeve on the CV joint when separating it from the hub. Pry the inner end of the CV joint out of the differential (or interme8 diate shaft) with a large screwdriver or pry bar (see illustration). The driveaxles, when in place, secure the hub bearing assem9 blies. If the vehicle must be supported or moved on the front wheels
CV joint
13
into the hub.
Insert the balljoint stud into the steering knuckle, install the
and tighten
it
to the torque listed
in
clamp
the Chapter 10 Specifications.
a self-locking bolt. If it's worn, replace it with an equivDon't use an ordinary bolt. 1 Reattach the stabilizer bar (see Chapter 1 0). 1 Install the speedometer drive gear (see Chapter 7). Install the wheels and hand tighten the wheel lug nuts. Install the 16 spacer washer and hub nut and tighten the nut securely (don't try to
Caution: This alent
tighten
17
is
new bolt.
it
to the specified torque yet).
Lower the vehicle and tighten the wheel
listed in
the Chapter
1
Specifications.
lug nuts to the torque
8
Chapters Driveaxles
8-5
turer (see illustrations 6.2a
OUTBOARD BOOT
22
INBOARD BOOT
If
and 6.2b
ened and the engine repositioned lengths.
the engine can't be
If
slotted engine mounts,
ets
and side
23
Measure the distance between the arrows
3.21
driveaxle
is
the correct length
when
If
to identify the driveaxle type).
mount
the dimensions aren't as specified, the
check
bolts
can be loos-
to obtain the specified driveaxle
moved enough within the range of the damaged or distorted support brack-
for
rails.
the engine
moved, see Chapter 7 and adjust the
is
shift linkage.
Intermediate shaft (1991 and 1992 3.3L and 3.8L models
to verify that the
models
installed
Tighten the driveaxle hub nut to the torque listed in this Chapter's Specifications, then install the wave washer, nut lock and a new cotter
only)
-
removal and installation
Removal
1
1
pin.
Driveaxle position check Refer to
illustration
19
models have engine mounts with
All
3.21
side-to-side positioning of the engine. or
Refer to
left
If
slotted holes that allow for
the vertical bolts on the right
upper engine mounts have been loosened
the vehicle has been
damaged
any reason, or
must be checked/corrected. A driveaxle
quired
will result in
that's shorter than re-
objectionable noise, while a driveaxle that's longer
may
result in
4.3
the right driveaxle (see Section
3).
the speedometer drive gear from the transaxie extension 2 housing (see Chapter 7). Remove the bearing bracket mounting bolts (see illustration). 3 4 Place a drain pan underneath the right side of the transaxie to catch any lubricant that leaks out during removal of the intermediate shaft. Grasp the intermediate shaft securely with both hands and pull it
if
structurally at the front end, driveaxle
length
than necessary
for
illustration
Remove Remove
out of the transaxie.
Installation 5
damage.
20 The vehicle must be completely assembled, the front wheels must be properly aligned and pointing straight ahead and the weight of the vehicle must be on all four wheels. 21 Using a tape measure, check the distance from the inner edge on the outside of the boot to the inner edge of inside the boot on both driveaxles. Take the measurement at the lower edge of the driveaxles (six o'clock position) (see illustration). Compare the measurennent with the length listed in this Chapter's Specifications. Note that the required dimension varies with transaxie type and driveaxle manufac-
Place the intermediate shaft and bearing assembly
in
position
6 bolts
Place the bearing bracket in position, install the bracket mounting and tighten them to the torque listed in this Chapter's Specifica-
tions.
7
Lubricate the splines inside the pilot bore of the intermediate
shaft with a liberal
amount
of multi-purpose grease.
the right driveaxle (see Section
8
Install
9
Check and,
lubricant to bring
if it
necessary, add the
up
3).
recommended type
to the proper level (see
Chapter
of transaxie
1).
BUSHING AND ROLLERS
SCREW
SEAL
BUSHING
OUTER
RETAINER
SLINGER
BEARING ASSEMBLY SEAL RETAINER
BUSHING RETAINER
BUSHING
BUSHI RETAINER
AND 4.3
ROLLERS
An exploded view
and
carefully insert the splined stub axle into the transaxie.
of the intermediate shaft
assembly
8-6
Chapter 8 CAGE CROSS
Driveaxles
CUMP-
(DRIVER)
HOUSING
HOUSING
(RIGHT SIDE
(OUTER)
SHOWN)
SPRING
COLLAR
RETAINER
TRIPOD
NTERCONNECTING SHAFT WEIGHT (LERSOEONLY,
DAAi^PER
IFAPPUCAiLE) 5.4
5
Constant velocity (CV) joints and reassembly
-
Remove
CV joints
of a typical driveaxle
assembly
disassembly, inspection
Loosen the hub nut and the wheel 1 and support it securely on jackstands. 2
An exploded view
lug nuts, then raise the vehicle
the driveaxles (see Section 3) and identify which types of
are installed (see Section
2).
a vise, using wood blocks to protect it from the vise jaws. If the CV joint has been operating properly with no noise or vibration, replace the boot as described in Section 6. If the CV joint is badly worn or has run for some time with no lubricant due to a damaged boot, it should be disassembled and inspected. 3
Place one of the driveaxles
Inner
CV joint
Refer to illustrations 5.4 through 5.19, 5.24 and 5.27
4
in
Remove
TRIPOD RETAINING TABS 5.8, 5. 10, 5.11a, 5.11b, 5. 12, 5. 18,
//:p^
7
G.K.N.
the clamps and slide the boot back to gain access to the
Depending on the type of CV joint involved, separate the tripod from the housing as follows. On early GKN driveaxles, the retaining tabs are an integral part of 5 the housing cover. Hold the housing and lightly compress the retention spring while bending the tabs back with a pair of pliers (see illustra-
tripod (see illustration).
Support the housing as the retention spring pushes it off the triwill prevent the housing from reaching an unacceptable angle and keep the tripod rollers from being pulled from the tripod studs. On later GKN driveaxles, secure the CV joint housing in a vise 6 (see illustration). Hold the shaft at an angle and pull on it gently to free one of the tripod rollers. Detach the other tripod rollers in the same manner and take the housing off. 7 On SSG driveaxles, the tripod is retained in the housing with a wire ring which expands into a groove around the top of the housing. tion).
pod. This
5.5
To separate the tripod from the housing of an early-type GKN CV joint, bend up the retaining tabs with a pair of pliers
inner
Using a screwdriver, pry this ring out of the groove (see illustration) slide the tripod from the housing. On ACI driveaxles, the tripod retaining tabs are part of the boot 8 retaining collar, which is staked in place. Compress the retaining spring lightly while bending the tabs back with a pair of pliers (see illustration). Be sure to support the housing as the spring pushes it off
and
the tripod.
When removing the housing from the tripod, hold the rollers in 9 place on the studs to prevent the rollers and needle bearings from
1
.
Chapters Driveaxles
8-7
WIRE RING TRIPOD RETAINER
INTERCONNECTING BAR
TRIPOD
TRIPOD
HOUSING
BEARING
5.7
tripod from the housing of an SSG inner pry out the expander ring with a screwdriver
To separate the joint,
CV
tripod from the housing of a later-type GKN hold the shaft at an angle to the housing and pull gently to disengage each of the rollers in turn
To separate the
5.6
inner
CV joint, on
it
BOOT RETAINING COLLAR 5.10
The
tripod
on
all
except
axleshaft by a snap-ring
-
later
remove
GKN
it
driveaxles is held on the with a pair of snap-ring pliers
SNAP RING
TRIPOD RETAINING TABS
PLIERS
TRIPOD
8 To separate the tripod from the housing of an ACI inner CV Joint, compress the spring and bend back each tab with pliers
5.8
falling.
After the tripod
is
out of the housing, secure the rollers
in
place
with tape.
10
All
except
later
GKN
axles:
Remove
the snap-ring (see illustra-
tion). 1
Later
GKN
axles:
Expand the stop
ring
and
slide
it
away from the
tripod (see illustration). Pry off the circlip (see illustration).
12
Use a brass punch
to drive the bearing
and tripod assembly
off
the splined shaft (see illustration).
Loosen the boot clamp and remove the boot from the axle. Clean the grease from the tripod assembly. Check for score marks, wear, corrosion and excessive play. Replace any damaged or worn components. 15 Inspect the inner splined area of the bearing tripod for wear and damage. Replace parts as necessary. 16 Remove all old grease from the housing. Inspect the housing 13 14
INTERCONNECTNG SHAFT 5.11a
On
later
GKN
driveaxles,
expand the snap-ring that secures move it back along
the inner end of the tripod and the axleshaft
.
.
7
8-8
Chapter 8
Driveaxles
INTERCONNEaiNG SHAFT
SCREW DRIVER
CIRCLIP
5.12 Secure the bearings with tape and drive the tripod off the shaft with a brass punch and hammer
TRIPOD 5.11b ... then pry off the circlip with a screwdriver
CHAMFERED
SIDE
CHAMFERED END
NON-CHAMFERED END TRIPOD RETAINING RING GROOVE
A.C.I.
5.18
& G.K.N
On ACI and GKN CV joints, the non-chamfered end of the must face out when installed on the driveaxle splines
TRIPOD ASSEMBLY
tripod
5.19 splines, ball races, spring, spring shaft for wear,
cup and the spherical end
new boot on
1
Install
18
On ACI and
early
GKN
with the non-chamfered
the axle. driveaxles, slide the tripod onto the shaft
end facing out
(next to the snap-ring groove) (see illustration). 19 On later GKN driveaxles, slide the stop ring into its groove on the driveaxle. Install the tripod with its internally chamfered side toward the
stop ring (see illustration), then off the shaft
20
SSG
by hand;
if it
comes
install off,
the
circlip.
the circlip
Try to pull the tripod
isn't
properly seated.
driveaxles are equipped with tripods that can be installed
with either end out (both sides are the same). ring tripod retainer
Be sure
on the driveaxle shaft before
to install the wire
sliding the tripod
onto
the shaft.
necessary, use a section of pipe or a socket and hammer to it just clears the snap-ring groove.
21
If
carefully tap the tripod onto the shaft until
22
Install
a
in
damage, nicks and corrosion. Replace parts as neces-
sary.
the
The chamfer must face
of the
new
snap-ring or circlip and
make
sure
it's
seated
in
the
groove.
23 On ACI driveaxles, distribute one of the two supplied packets of grease in the boot and the remaining packet in the housing. On early GKN driveaxles, distribute two of the three or four packets of grease
supplied with the kit in the boot and the remaining packet(s) in the housing. On later GKN and all SSG driveaxles, distribute half the supplied grease in the boot and the other half in the housing. Make sure the grease is applied to the bearing grooves in the housing.
24 Position the spring in the housing spring pocket with the cup attached to the exposed end of the spring (see illustration). Apply a small amount of grease to the concave surface of the spring cup. 25 On early GKN driveaxles, slip the tripod into the housing and
bend the
On
down
retaining ring tabs
the tabs retain the tripod
GKN
in
to their original positions.
Make
sure
the housing.
in a vise and position Hold the housing at an angle and push it down over each of the tripod rollers in turn so the rollers lock into the housing. Make sure the rollers are locked into the housing. 27 On ACI driveaxles, slip the tripod into the housing but don't bend the retaining tabs (see illustration) back to their original positions. Reattach the boot instead, which will hold the housing on the shaft. When the driveaxle is reinstalled on the vehicle, make sure the tripod is
26
later
driveaxles, secure the shaft
the housing over the
rollers.
re-engaged in the housing. 28 On SSG driveaxles, install the tripod
in
the housing and secure
it
.
Chapters Driveaxles
SPRING CUP
8-9
BOOT RETAINING COLLAR TRIPOD RETAINING TABS
When assembling the inner CV joint, make sure the spring seated securely in the spring pocket and the spring cup is installed on the outer end
5.24
is
5.32a On ACI and GKN driveaxles, give the outer CV joint housing a sharp tap with a soft-face hammer to disengage it from the internal circlip installed in a groove on the outer end of the axleshaft .
.
5.27 On ACI driveaxles, press the housing onto the tripod - but don't try to bend the retaining tabs back to their original positions
5.32b
.
.
.and
remove the outer CV joint from the housing
with the wire retainer. Try to pull the housing
hold
it
off;
the retainer should
on.
Make sure the retention spring is centered in the housing spring pocket when the tripod is installed and seated in the spring cup. 30 Install the boot and retaining clamp (see Section 6). 29
CIRCLIP
Outer
RETAINER
CV joint
8
Refer to illustrations 5.32a, 5.32b, 5.32c, 5.36, 5.37, 5.38, 5.39, 5.42, 5.46a, 5.46b and 5.50
Remove the boot clamps and push the boot back. Wipe the grease out of the joint. Use a soft-face hammer
31
32
the housing off the axle (see illustrations). Support the is
done and rap the housing sharply on the outer edge
from the
internal circlip installed
on the
shaft.
On SSG
equipped with a damper weight), a single groove on the cross locks it to the axleshaft (see shaft
to drive
CV joint
as
this
to dislodge
it
driveaxles (axle-
circlip
located
illustration).
in
To
a
re-
move this type, mark the position of the damper weight, loosen the damper weight bolts, slide the weight and the boot toward the inner joint, remove the circlip with snap-ring pliers and slide the inner joint off
the axle.
33 5.32c
On SSG
driveaxles, a single circlip located the cross locks it to the axleshaft
in
a groove
in
Slide the boot off the driveaxle.
erly
and the grease doesn't appear
new
one.
If
the
CV joint was
operating prop-
be contaminated, just replace the boot (see Section 6). Skip the following disassembly procedure. If the CV joint was noisy or the grease was contaminated, proceed with the disassembly procedure to determine if it should be replaced with a to
Chapter 8
8-10
Driveaxles
5.36 After removing the grease, mark the bearing cage, cross and housing to ensure that they're reinstalled in the same relationship to
5.37 With the
cage and cross tilted like this, remove the bearings one at a time
ball
one another
BALL RACE
CAGE
WINDOW
5.38 in
Tilt the cross and cage 90 degrees, then align the windows the cage with the lands and rotate the cross up and out of the housing
5.39 Turn the cross 90 degrees, align the race lands with the cage windows and rotate the race out of the cage
the driveaxle
is
being replaced with a
new
one.
35 Clean the axle spline area and check the splines for wear, damage and corrosion. 36 Clean the outer CV joint bearing assembly with a clean cloth to remove excess grease. Mark the relative position of the bearing cage, cross and housing (see illustration). 37 Grip the housing shaft securely in the wood blocks in the vise. Push down one side of the cage and remove the ball beahng from the opposite side. Repeat the procedure in a criss-cross pattern until all of the balls are removed (see illustration). If the joint is tight, tap on the cross (not the cage) with a hammer and brass punch. 38 Remove the bearing cage assembly from the housing by tilting it vertically and aligning two opposing elongated cage windows in the area between the ball grooves (see illustration). 39 Turn the cross 90-degrees to the cage and align one of the spherical lands with an elongated cage window. Raise the land into the window and swivel the cross out of the cage (see illustration). 40 Clean all of the parts with solvent and dry them with compressed air
the wear sleeve (on models so equipped) requires replacement, pry it off the housing with a screwdriver
5.42
34
If
Remove
rebuild
the circlip from the driveaxle groove and discard it (the include a new circlip). GKN and ACI driveaxles are
races. If any of the components are not serviceable, the entire CV joint assembly must be replaced with a new one. 42 Check the outer housing wear sleeve for damage and distortion. If it's
ring,
which must not be removed unless
available).
Inspect the housing, splines, balls and races for damage, corrosion, wear and cracks. Check the cross for wear and scoring in the
kit w/ill
equipped with a large spacer
(if
41
damaged
or worn, pry the sleeve off the housing (see illustration)
Chapters Driveaxles BOOT RETAINING GROOVE-A.C.I.
8-11
CAGE WINDOWS
JOINT HOUSING CIRCLIP
RETAINER
CROSS-LARGE COUNTERBORE
OUT
WEAR
SLEEVE
On SSG
5.46b
^9^^
On GKN and ACI CV joints, make sure the large counterbore faces out when the joint is reassembled
6.8
5.50 Strike the end of the housing with a soft-face engage it with the small circlip
and replace
new
it
with a
new
one.
A
special tool
is
hammer to
available for installing
sleeve, but a large section of pipe slightly smaller
than the outer edge of the sleeve nick or
gouge the
will
work
if
care
is
in
diameter
exercised (don't
lands
elongated window. 45 Rotate the cross into position in the cage and install the assembly in the CV joint housing, again using the elongated window for clearance. 46 Rotate the cage into position in the housing. On GKN and ACI driveaxles, the large counterbore of the cross must face out (see illustration). On SSG driveaxles, the internal circlip in the cross will be facing out from the housing (see illustration). On all driveaxles, make sure the marks made during disassembly face out and are aligned. 47 Pack the lubricant from the kit into the ball races and grooves. 48 Install the balls into the elongated holes, one at a time, until into the
they're
all in
position.
49
Place the driveaxle
cept
SSG
in
the vise and slide the boot over
driveaxles, install a
not to twist
it.
SSG
new
circlip in
it.
On
all
ex-
driveaxles have a reusable retainer integral with the
CV
housing in position on the axle, align the splines and rap it sharply with a soft-face hammer -(see illustrations). Make sure it's seated on the circlip by attempting to pull it off the shaft. 51 Install the boot (see Section 6). Place the
joint
the
the driveaxle (see Section
6
Constant velocity (CV)
joint
(GKN and ACI)
3).
boots
-
replacement
Note: If the instructions supplied with the replacement boot kit differ from the instructions here, follow the ones with the new boots. A special tool, available at most auto parts stores, is required to install the factory-supplied boot clamps. Do-it-yourself kits which offer greatly simplified installation may be available for your vehicle. Consult an auto parts store or dealer parts department for more information on these kits.
joint
If the boot is cut, torn or leaking, it must be replaced and the CV inspected as soon as possible. Even a small amount of dirt in the
joint
can cause premature wear and
kit
failure.
Obtain a replacement boot
before beginning this procedure. There are several different types of
boot, each with its own replacement procedure. Compare the boots on your vehicle to the following illustrations to determine which procedure to follow.
Remove the driveaxle (see Section 3). Disassemble the CV joint and remove the boot as described in 3 Section 5. Inspect the CV joint to determine if it's been damaged by contam4 ination or running with too little lubricant. If you have any doubts about the condition of the joint components, perform the inspection procedures described in Section 5. Clean the old grease out of the CV joint and repack it with the 5 grease supplied with the kit. 6 Pack the interior of the new boot with the remaining grease. Install the boot and clamps as follows. 7 2
the axle groove, taking care
driver assembly.
50
installation details
Install
1
Apply a thin coat of oil to all CV joint components before beginning reassembly. 44 Align the marks and install the cross in the cage so one of the
CV joint boot
in
LOCATING MARK
CLAMP
52
seal mating surface).
43
fits
is
BOOT RETAINING SHOULDER-G.K.N.
5.46a
the
make sure the internal circlip facing out from the housing
driveaxles,
cross
CROSS-SMALL COUNTERBORE INWARD'
Soft rubber boots (except
SSG right inner joint)
Refer to 6.15b
illustrations 6.8, 6. 10, 6.
13a, 6. 13b, 6. 14, 6. 15a
8
end of the boot over the mark or groove (see illustration).
Slide the small
locating
1 1, 6.
shaft
and
align
and it
with the
8
2 1
8-12
Chapter 8
TOOL
6.10
Wrap the clamp around the boot twice,
.
Driveaxles
C-4653
leaving about 2-1/2
6.11
inches of extra material, then cut off the excess
6.13a
Install
the strap on the boot and bend can't
it
back so
Pass the strap around the buckle and fold it back about 1/8 inch on the inside of the buckle
6.13b Attach the tool about 1/2-inch from the buckle
it
1-
.
unwind
CV joint housing. 10
Wrap
the clamping strap around the boot twice, plus 2-1/; and cut it off (see illustration). 1 Pass the end of the strap through the buckle opening and fold back about 1-1/8 inch on the inside of the buckle (see illustration). 1 Position the clamping strap around the boot, on the clamping sur face, with the eye of the buckle facing you. Wrap the strap around th( boot once and pass it through the buckle, then wrap it around a sec ond time and pass it through the buckle again. 13 Fold the strap back slightly to prevent it from unwinding itself (se< illustration), then open the special tool (C-4653) and place the strap inches,
i
ir
the narrow
6.14 ... then push the tool forward and up to hook in the buckle eye
9
Place the large diameter of the boot
in
engage the
tool
the groove. Note: Clamp-
ing procedures are Identical for attaching the boot to the shaft
and
the
about 1/2-inch from the buckle (see illustration). 14 Hold the strap with one hand and push the tool forward and uf slightly, then fit the tool hook into the buckle eye (see illustration). 15 Tighten the strap by closing the tool handles (see illustration) then rotate the tool down slowly while releasing the pressure on th( handles (see illustration). Allow the handles to open progressively then open the tool all the way and slide it sideways off the strap. Cau tion: Never fold the strap back or rotate the tool down while squeezinc the handles together (if this is done, the strap will break). 16 If the strap isn't tight enough, repeat the procedure. Always engage the tool about 1/2-inch from the buckle. Make sure the strap moves smoothly as tightening force is applied and don't allow the buckle to fold over as the strap passes through it. 17 When the strap is tight, cut it off 1/8-inch above the buckle anc fold it back neatly. It must not overlap the edge of the buckle. slot,
8
Chapters Driveaxles
6.15a Close the tool handles slowly to tighten the clamp strap
POSITION
ON
6.15b
.
.
INNER FLAT
.
8-13
then rotate the tool down while releasing the pressure on the handles (allow the handles to open)
C.V.
JOINT
HOUSING
BETWEEN LOCATING SHOULDERS
LOW PROFILE ClAMP
CLAMPS
6.20 Position the
edge
of the boot
on the
locating shoulders, then secure
it
flat
between the
with the clamp
INNER C.V. JOINT BOOT
TOOL
SPECIAL
YA-3050 6.23a Install the large clamp as
1
Repeat the procedure
shown
remaining boot clamps.
for the
Soft rubber boots (SSG right inner Refer to
19
illustrations 6.20,
Slip the
clamp
8
CV joint only)
6.23a and 6.23b
end of the boot onto the driveaxle
for the small
shaft.
20
Slip the
boot onto the shaft and position
it
on the
flat
between the
locating shoulders (see illustration).
21
Slip the small
clamp over the boot and crimp
it
with Tool
041 24 or
equivalent.
22 23
Install
the
CV joint
(see Section
5).
the large end of the boot and position its clamp. Tighten the clamp with Tool 04124 (automatic transaxle) or YA3050 (manual Install
transaxle) (see illustrations).
Hard plastic boots (SSG outer 6.23b then place the prongs of the special tool in the holes the clamp and compress the tool until the two ends meet .
.
.
in
left
inner and both
CV joints)
Refer to illustrations 6.25 and 6.27
24
Slip the
shaft.
clamp
for the small
end
of the boot onto the driveaxle
8-14
Chapter 8 Driveaxles 300T
CLAMP
LIP IN
6.25 Position the
25
Slip the
lip
THIRD
SPECIAL
TOOL C-4579
GROOVE
of the boot in the third groove on the axleshaft
boot onto the shaft and position
its lip in
the third locating
groove, nearest the center of the driveaxle shaft (see illustration).
Center the clamp over the end of the boot (see illustration 6.25). Install a clamp crimping tool (C4975) on the clamp bridge (see illustration). Tighten the tool until its jaws touch each other. 28 Release the crimping tool.
26 27
29 Install the CV joint (see Section 5). 30 Place the large end of the boot over the CV and secure the clamp (see Steps 26 through 28).
joint
housing.
Install
BRIDGE
OF CLAMP 6.27 Because the clamps used with hard plastic boots must generate approximately 100 times the clamping force of those used with rubber boots, this special tool is necessary to crimp the clamps securely
Chapter 9
Brakes
Contents
System (ABS) - general information Brake check Brake fluid level check Brake hoses and lines - inspection and replacement Brake hydraulic system - bleeding Brake light switch - check and replacement Front brake disc - inspection, removal and installation Front disc brake caliper - removal, overhaul and
Anti-lock Brake
1 1
11
13 18 4
Parking brake
adjustment - removal and installation Parking brake shoes (rear disc brake models) - removal
14 15
and installation Power brake booster
16 17
pads
replacement
-
General information -
2 1
removal and
installation
10
-
Parking brake cables
check, removal and installation removal, inspection and installation -
Rear brake disc Rear brake shoes - replacement Rear disc brake caliper - removal, overhaul and
3
installation
Front disc brake
Master cylinder
12
See Chapter See Chapter
7
8 6
installation
Rear disc brake pads - replacement Rear wheel bearing check, repack and adjustment
Wheel cylinder
-
removal, overhaul and installation
5
See Chapter
1
9
Specifications
Brake
fluid
See Chapter
type
1
Disc brakes Brake pad wear
Minimum
See Chapter 1 See specs cast
limit
disc thickness
Disc runout (maximum) Disc thickness variation
limit (parallelism)
into disc
0.004 inch 0.0005 inch
Drum brakes Brake shoe wear
limit
See Chapter
1
Drum
9
Standard diameter Maximum diameter Runout (maximum) Out-of-round (maximum) In 30-degrees In 360-degrees Parking brake adjustment diameter (models with rear disc brakes
8.66 inches
Torque specifications
Ft-lbs (unless otherwise indicated)
Master cylinder-to-booster nuts Power brake booster-to-firewall nuts Caliper guide pin(s) (front)
17 to 25 17 to 25
1990 and 1991 On
later
Double-pin family caliper Double-pin non-family caliper
See specs cast
into
drum
0.006 inch
0.0025 inch 0.0035 inch 6-3/4 inches
25 to 35 30 25 to 35 18 to25
.
9-2
Chapter 9
Torque specifications (continued)
Brakes
Ft-lbs (unless otherwise indicated)
Caliper attaching bolts (rear)
1991 and earlier 1992 on Caliper mounting bracket-to-steering knuckle bolts Brake hose-to-caliper inlet fitting bolt
20 16
160
Front
1991 and
19 24 24 75
earlier
1992 on Rear Wheel cylinder-to-brake backing plate bolts Brake backing plate-to-rear axle bolts 1988 through 1991 1992 on
in-lbs
45 to 60 80 See Chapter
Wheel nuts
1
General information
All
models are equipped with hydraulically operated disc front drum brakes are standard on all models. Rear disc brakes
brakes. Rear
are optional on later models.
The
brakes use a single-piston, floating-caliper design. all manufactured by Kelsey-Hayes, are used: single-pin/double-pin family, and double-pin non-family. Warning: The calipers differ in design, so parts are not interchangeable. Using parts from the wrong design could lead to complete brake failure. The single-pin caliper, used on early models, floats on a single steel pin that threads into an adapter. The adapter is attached to the steering knuckle. The double-pin family caliper is secured by two steel pins that thread into an adapter, which in turn is attached to the steerfront
Three types of
ing knuckle.
caliper,
The double-pin non-family
caliper
is
attached directly to
the steering knuckle by two steel pins.
The rear drum brakes are a leading/trailing design with automatic adjustment. The brakes may be manufactured by Kelsey-Hayes or Varga. Service procedures for both designs are nearly identical; differences are pointed out as they occur. The optional rear disc brakes use single-pin floating calipers. Warning: There are two sizes of rear disc brakes. Parts are not interchangeable between the two sizes or between front and rear disc brakes. Use of the wrong parts could cause complete brake failure. Front-wheel drive vehicles tend to wear the front brake pads at a faster rate than rear-drive vehicles. Consequently, it's very important to inspect the brake pads frequently to make sure they haven't worn to the point where the disc itself is scored or damaged. Note that the pad thickness limit on these models includes the metal portion of the brake pad, not just the lining material (see Chapter 1). The hydraulic system consists of two separate circuits. The master cylinder has a separate section in the reservoir for each circuit in the event of a leak or failure in one hydraulic circuit, the other circuit will remain operative. Some models have an Anti-lock Braking system (ABS) that aids vehicle stability during heavy braking or on wet or uneven road surfaces. All non-ABS models have a load sensing dual proportioning valve which modulates the rear brake pressure, depending on vehicle load. All models are equipped with a cable-actuated parking brake, which operates the rear brakes. On vehicles with rear drum brakes, the parking brake expands the brake shoes. On rear disc brake models, the parking brake uses a separate set of drum brakes, mounted inside
drums
2
integral with the rear
brake discs.
Front disc brake pads
-
replacement
Warning: Disc brake pads must be replaced on both front wheels at the same time - never replace the pads on only one wheel. Also, the
To get
2.2a
remove the guide pins (arrows) (doubleshown; some calipers have only a single
at the pads,
pin family caliper
lower pin)
.
.
dust created by the brake system may contain asbestos, which is harmful to your health. Never blow it out with compressed air and don't inhale any of it. An approved filtering mask should be worn when working on the brakes. Do not, under any circumstances, use petroleumbased solvents to clean brake parts. Use brake system cleaner or clean brake fluid only! Note: When servicing the disc brakes, use high-quality, nationally-recognized,
name-brand parts.
Raise the front of the vehicle and support it securely on jackstands. Block the rear wheels and apply the parking brake, then remove the front wheels. Note: The pad replacement procedure varies, depending on which design you have. Count the caliper mounting pins. If it has one pin, it's a single-pin caliper; if it has two, note whether it's attached directly to the steering knuckle or to an adapter If the caliper is attached directly to the knuckle, it's a non-family caliper; if attached to an adapter, it's a family caliper 1
Single-pin Refer to 2
and double-pin
family caliper
illustrations 2.2a, 2.2b, 2.3, 2.4a,
Remove
2.4b and 2.6
the caliper guide pin(s) (see illustration), swing up the
lower end of the caliper and
pull
it
off the caliper
mounting bracket
(see illustration). Support the caliper out of the way with a wire hanger (see illus3 tration). Warning: Don't allow the caliper to hang by the brake hose! 4 Detach the outer brake pad from the caliper mounting bracket (see illustrations). If you're replacing the pads on a single-pin or early double-pin caliper, remove the anti-rattle spring from the bottom of the
pad and
install
it
on the new outer pad.
Chapter 9
9-3
Brakes
BRAKING DISC
ANTI-RAHLE CLIP
CALIPER
and pivot the caliper off the mounting bracket (pry it 2.2b loose from the bracket if necessary) - note the anti-rattle clip at the top of the caliper .
.
.
2.3
Hang the
caliper out of the let
it
way
with a piece of wire
-
do
NOT
hang by the brake hose!
OUTBOARD SHOE ASSEMBLY
BRAKING DISC
To remove the outer pad from a later double-pin family disengage the upper end of the brake backing plate from anti-rattle spring and remove the pad - after you remove the inner 2.4b
2.4a
To remove the outer pad from a
single-pin or early double-
it straight off - then remove the antithe bottom of the pad and transfer it to the new outer pad
pin family caliper, simply pull rattle clip at
caliper,
pad, the anti-rattle spring (arrow)
mounting bracket, so note how
it's
will fall
installed
out of the caliper
BEFORE you remove
the inner pad 5
Remove
the brake disc (see Section
4).
Detach the inner brake pad (see illustration). If you're replacing the pads on a single-pin caliper or early double-pin caliper, remove the anti-rattle spring from the top of the inner pad and install it on the new inner pad. If you're replacing the pads on a later double-pin caliper, note how the anti-rattle spring clip is installed on the caliper mounting bracket, in case it falls off before you install the new pads. 7 Inspect the caliper and caliper mounting bracket for wear, damage, rust and evidence of fluid leaks. If the caliper-to-bracket mating surfaces are rusty, clean them thoroughly with a wire brush (the caliper must be able to move freely when the brakes are applied). Also inspect the brake disc (see Section 4). Siphon some brake fluid from the master cylinder reservoir, or 8 place rags or newspapers underneath the reservoir to catch the overflow that will occur when the piston is pushed back to make room for the new pads. Then use a piece of wood to carefully push the piston into the caliper bore far enough to provide clearance for the new pads. Apply a thin film of Mopar Multipurpose Lubricant or high-temper9 ature brake grease to the adapter-to-brake pad and caliper mating surfaces. Caution: Don't get any grease on the pad lining material, gasket 6
surface or brake disc.
ANTI-RATTLE CLIP
and
pad
the mounting br^oket - on single-pin remove the anti-rattle clip from the top of the pad and transfer it to the new pad
2.6 Slide the inner
off
early double-pin family calipers,
5 7 1
9
9-4
Chapter 9
Brakes AAACHINED ABUTMENT
GUIDE PIN BOLT
BLEEDER SCREW
BRAKING DISC
CALIPER ASSEMBLY
Work the hold-down spring out from under the machined abutment and remove the caliper together with the pads
2.19 2.18 Kelsey-Hayes non-family caliper mounting details
OUTBOARD SHOE ASSEMBLY 2.20 Pry the outer
10 Remove the protective paper from the noise suppression gasket on both pads. Install the inner brake pad, making sure the anti-rattle spring
is
secure.
the brake disc (see Section 4). Place the outer pad in position in the caliper mounting bracket. Make sure the anti-rattle spring is secure. 13 Slide the caliper into position over the pad and disc assembly. On single-pin or early double-pin types, be sure the anti-rattle clip is en1
Install
12
gaged 14 this
correctly.
the guide pin(s) and tighten it/them to the torque listed in Chapter's Specifications. Don't cross-thread the guide pin(s) durInstall
ing installation. 1
Repeat Steps 2 through
16
Install
listed in
1
4 for the other caliper.
the wheel, tighten the wheel lug nuts to half the torque the Chapter 1 Specifications and lower the vehicle. Tighten the
Chapter 1 Specifications. brake pedal several times to bring the pads into contact with the disc. Check the brake fluid level (see Chapter 1). Drive the vehicle in an isolated area and make several stops to wear off any foreign lug nuts to the torque listed irrthe 1
Pump the
material
on the pads and seat them on the
disc.
Double-pin non-family caliper Refer to
18
illustrations 2. 18, 2. 19, 2.20, 2.21,
Remove
2.21
pad loose from the caliper with a screwdriver
2.26a and 2.26b
the caliper guide pin bolts (see illustration).
To disengage the
retainer spring (on the back of the inner pad) from the piston, pull the inner pad straight out
Pivot the bottom of the caliper away from the brake disc and lift (see illustration), together with the brake pads. Warning: Once the caliper is off, don 't let it hang by the brake hose! Support it by hanc 1
il
off
while removing the pads, then
hang it from
the vehicle with wire (see
il-
lustration 2.3).
20
Pry the outer pad
Remove
away from the
caliper (see illustration).
it straight away from the piston (see illustration). 22 Inspect the caliper and caliper mounting bracket for wear, damage, rust and evidence of fluid leaks. If the caliper-to-bracket mating surfaces are rusty, clean them thoroughly with a wire brush (the caliper must be able to move freely when the brakes are applied). Also insped
21
the inner pad by pulling
the brake disc (see Section
4).
Siphon some brake fluid from the master cylinder reservoir, oi place rags or newspapers underneath the reservoir to catch the overflow that will occur when the piston is pushed back to make room for the new pads. Then use a piece of wood to carefully push the piston into the caliper bore far enough to provide clearance for the new pads. 24 Apply a thin film of Mopar Multipurpose Lubhcant or high-temperature brake grease to the adapter-to-brake pad and caliper mating surfaces. Caution: Don't get any grease on the pad lining material, gasket 23
surface or brake disc.
25 cess.
Install
the inner pad by pressing the retainer into the piston re-
9-5
Brakes
Chapter 9
INBOARD SHOE ASSEMBLY (RIGHT
AND
LEFT
COMMON)
CALIPER 2.26b
the caliper and engage the pad retainer the caliper body
Work the pad onto spring
vi/ith
OUTBOARD SHOE ASSEMBLY (RIGHT SIDE SHOWN) 2.26a Inner pads on non-family calipers are interchangeable; outer pads must be installed on the proper side of the vehicle the pads are marked to indicate the correct side
3.6 Place a piece of wood between the caliper and piston, then force the piston out of the caliper bore with compressed air - be sure to keep your hands and fingers out of the way during this
calipers are available
easy.
3.2 Place
some shop
inlet fitting bore,
rags or newspapers under the brake hose then plug it to prevent contamination right after you disconnect it
If it's
decided
on an exchange
basis,
to rebuild the calipers,
available before proceeding.
rebuild just
procedure which makes
make
this job quite sure a rebuild kit is
Always rebuild the calipers
in pairs -
never
one of them.
Removal Select the correct outer pad for the side of the vehicle you're working on by referring to the identification marks (see illustration). Remove the protective paper from the noise suppression gasket and install the pad on the caliper (see illustration). 27 Install the caliper on the steering knuckle and position the holddown spring under the steering knuckle abutment (see illustration 2.19). Caution: Don't damage the steering knuckle bushing seals when
26
you install the caliper. 28 Repeat Steps 1 8 through 27 for the other caliper. 29 Perform Steps 1 6 and 1 7 to complete the installation.
Refer to
illustration
3.2
Loosen the wheel lug nuts, raise the front of the vehicle and support it securely on jackstands. Remove the front wheels. 2 Note: Don't remove the brake hose from the caliper if you're only removing the caliper to gain access to other components. If you're removing the caliper for overhaul, remove the brake hose inlet fitting bolt and detach the hose (see illustration). Have a rag handy to catch spilled fluid and wrap a plastic bag tightly around the end of the hose to prevent fluid loss and contamination. 3 Remove the caliper guide pin(s) and detach the caliper from the 1
vehicle (see Section
3
Front disc brake caliper
-
removal, overhaul and installation
Overhaul Refer to
Warning: Dusf created by the brake system may contain asbestos, which is harmful to your health. Never blow it out with compressed air and don't inhale any of it. An approved filtehng mask should be worn when working on the brakes. Do not, under any circumstances, use petroleum-based solvents to clean brake parts. Use brake cleaner or clean brake fluid only!
an overhaul
Note:
If
plore
all
is
indicated (usually because of fluid leakage), ex-
options before beginning the job.
New and
factory rebuilt
2).
illustrations 3.6, 3.
7,
3.8, 3.9a, 3.9b, 3.9c, 3.9d, 3.
14
and 3. 15
4 Remove the brake pads (see Section 2). Clean the exterior of the caliper with brake system cleaner. Never 5 use gasoline, kerosene or petroleum-based cleaning solvents. Place the caliper on a clean workbench. 6 Position a wooden block or several shop rags in the caliper as a cushion, then use compressed air to remove the piston from the caliper (see illustration). Use only enough air pressure to ease the piston out of the bore. If the piston is blown out, even with the cushion in
9
1 5
,
Brakes
Chapter 9
9-6
3.7
Use a screwdriver to pry the dust boot out
of the
3.8
Remove the
cylinder bore
utensil
place,
it
piston seal with a
wood
pencil or a plastic eating
so you don't damage the bore and seal groove
may be damaged. Warning: Never place your in an attempt to catch or protect it when
of the piston
pressed air 7
-
fingers in front
applying com-
serious injury could result!
Carefully pry the dust boot out of the caliper bore (see illustra-
tion).
Using a wood or plastic tool, remove the piston seal from the groove in the caliper bore (see illustration). Metal tools may damage 8
the bore.
Remove the caliper bleeder screw. On double-pin calipers, move the bushing sleeves. Remove and discard the caliper (guide)
9
bushing(s) from the caliper ears. Discard
all
rubber parts (see
re-
pin
illustra-
tions).
Clean the remaining parts with brake system cleaner or new fluid then blow them dry with compressed air. 1 Carefully examine the piston for nicks, burrs and excessive wear If surface defects are present, the parts must be replaced. 12 Check the caliper bore in a similar way. Light polishing with crocus cloth is permissible to remove light corrosion and stains, but rus1 10
brake
require caliper replacement. reassembling the caliper, lubricate the bore and seal with clean brake fluid. Position the seal in the caliper bore groove - make or pitting
3.9a Grab the ends of the mounting pin bushings with needlenose pliers and push them through the caliper ears with a twisting motion
will
13
When
sure
it
isn't
twisted.
14 Lubricate the piston with clean brake fluid, install it squarely in the bore and apply pressure to bottom it in the caliper (see illustration). Stretch the dust boot over the groove in the piston, then carefully 1
INBOARD SHOE ASSEMBLY
OUTBOARD SHOE ASSEMBLY
ADAPTER 3.9b
An exploded view
of a typical single-pin
Kelsey-Hayes caliper assembly
.CALIPER PIN
OP
BUSHING
DUST
BOOT
«C=3
SEAL
PISTON
CALIPER
CALIPER GUIDE PIN BOLT
ADAPTER
9-7
Brakes
Chapter 9
PISTON SEAL
CAUPER
BUSHING
DUST SEAL
BLEEDER
SCREW
CAP
CALIPER GUIDE PIN BOLT
SLEEVE
__
BUSHING
3.9c An exploded view of a typical Kelsey-Hayes double-pin family caliper assembly (late design shown; earlier models use
ANTI RATTLE
three separate anti-rattle clips)
CLIP
/
SCREW SHOE ASSEMBLY (OUTBOARD)
BOLT
CAP
BLEEDER
SLEEVE
/
BUSHING
/
PISTON
SHOE ASSEMBLY (INBOARD)
BUSHING
BOOT
SEAL CALIPER
3.9d
An exploded view of a
typical double-pin
SLEEVE -WW-.-
BOLT
Kelsey-Hayes non-family caliper assembly
9
3.14
When you
install
the piston,
cocked as you push
it
make
into its
sure it doesn't become bore in the caliper
3.15
If
the correct seal driver tool isn't available, use a drift punch to tap around the edge until the dust boot is seated
7
9-8
Chapter 9
Brakes
Make
sure the lugs nuts are in place and evenly tightened, then measure the disc runout with a dial indicator
4.4a
4.4b Using a swirling motion, remove the glaze from the disc surface with sandpaper or emery cloth
MINIMUM THICKNESS MARKING
4.5a
The disc can be resurfaced by an automotive machine shop, provided the machining operation doesn't result in a disc thickness less than the minimum stamped on it
the caliper bore (see illustration).
seat
it
16
Install
the bleeder screw.
1
Install
new caliper pin bushings and make sure they're centered in On double-pin calipers, install the bushing sleeves and
in
their bores.
make
sure the bushings engage the sealing grooves
in
the sleeves.
4.5b Measure the disc thickness with a micrometer at several points around its circumference
4
Front brake disc
1
Loosen the wheel
curely on jackstands.
hold the disc
Installation 18
Inspect the caliper guide pin(s) for excessive corrosion. Replace if necessary.
19 Clean the caliper and caliper mounting bracket contact surfaces with a wire brush, then apply a thin film of high-temperature brake grease to them. 20 Install the brake pads and caliper (see Section 2). 21 Install the brake hose and inlet fitting bolt, using new copper washers, then tighten the bolt to the torque listed in this Chapter's Specifications.
22
If
the line
Section
23
was disconnected, be sure
to bleed the brakes (see
9).
Install
inspection, removal
and
lug nuts, raise the vehicle
Remove
installation
and support
it
se-
the wheel and reinstall the lug nuts to
place.
Remove
the brake caliper (see Section 2). It's not necessary to disconnect the brake hose. After removing the caliper guide pin(s), 2
them
in
-
the wheels and lower the vehicle. Tighten the lug nuts to in the Chapter 1 Specifications.
the torque listed
24 After the job has been completed, firmly depress the brake pedal a few times to bring the pads into contact with the disc. 25 Check brake operation before driving the vehicle in traffic.
suspend the caliper out of the way with a piece of wire. Don't let the caliper hang by the hose and don't stretch or twist the hose. On all except double-pin non-family calipers, remove the outer brake pad.
Inspection Refer to
illustrations 4.4a, 4.4b,
4.5a and 4.5b
and other damage. and shallow grooves are normal after use and may not affect brake operation, but deep score marks over 0.015-inch require disc removal and refinishing by an automotive machine shop. Be sure to check both sides of the disc. If pulsating has been noticed during 3
Visually inspect the disc surface for scoring
Light scratches
application of the brakes, suspect disc runout. 4 To check disc runout, mount a dial indicator with the stem resting about 1/2-inch from the outer edge of the disc (see illustration). Set the indicator to zero and turn the disc. The indicator reading should not exceed the maximum allowable runout listed in this Chapter's Specifications. If it does, the disc should be refinished by an automotive ma-
Chapter 9
4.6a pull
the discs on your vehicle use retaining washers like this, off with a pair of needle-nose pliers and discard them
If
9-9
Brakes
When you remove the
disc, make sure you don't threads on the wheel studs
4.6b
them
AH ACHING
Remove the
5.2
symptoms
M
j
recommend resurfacing (to
of brai»7
GANG
DENOTES WIRE CONTINUES ELSEWHERE DENOTES WIRE GOES TO ONE OF TWO
FUSES WITH BUSS BAR
SPLICE
CAPACITOR
>
J=
(0
TJ
C (0
c o u 0)
E^^l E
2 o> n o>
c
12 zz
12-22
Chapter 12 Chassis
electrical
system c
o w
JC
to a>
c
"5)
c 0)
_l CO CO "D
C (0
_l CO CO
2
CO-
OK'S
°
.2 'o CO o)'»r
c w
P 4^
4)
>l **
M O C .2 "ip
c ,o>
TJ
C m c o
c o _J 00 CO XJ
c n
_i CO CO
£ CO c»*. Q O c «
p C
CO
4=
0)
>» 4-
W O c o c ,a>
ac (0
c o o
'•J!
0)
*c
o 3
I ns I. a>
" u 3 o
c c .2 'iff
c o u
5
12
12-24
Chapter 12 Chassis
electrical
system c
£o (0 (0
« c w c e
^ -I 00 CO •a
c
(0
eo £2, (0
E ® -c « iS >> ^ « E
£
a o
a E a>
C (0
2 3 (0 (0
o
(0
u '5.
1^
E (0 w o> (D
o>
c
1
r-r.
3 re
« 3
o
*^
ac re
a I
I
E 3
a 3
O
a
Chapter 12 Chassis
electrical
system
12-25
•a
s « o u c o u
xli!2
E S a
12-26
Chapter 12 Chassis
electrical
system
Dn 0)
"a
® n U CM c «. o o
«CM
re
O o o
Chapter 12 Chassis
electrical
system
12-27
O) (0
a»
c
CM
"S
s O) a 'o o>
c
o (D
i3 "O
C a
12 a
12-28
Chapter 12 Chassis
electrical
system
o E re
o> re
c
Chapter 12 Chassis
TO STEREO RADIO (SEE SH 105)
TO POWER ANTENNA
electrical
system
12-29
Index About
this manual, 0-5 Accelerator cable - replacement, 4-6 Air cleaner housing - removal and installation, 4-6 Air conditioning system check and maintenance, 3-12 compressor removal and installation, 3-13 condenser removal and installation, 3-14 evaporator removal and installation, 3-15 filter-drier, removal and installation, 3-13 Air suspension systems - general information, 10-12 Airbag system
check, 1-31
Airbag system - general information, 12-16 Alternator - removal and installation, 5-10 Alternator brushes - replacement, 5-10 Antenna - removal and installation, 12-13 Anti-lock Brake System (ABS) - general information, 9-17 Antifreeze general information, 3-2
Automatic Idle Speed (AIS) motor (multi-point EFI) - check, removal and installation, 4-18 Automatic Idle Speed (AIS) motor (single-point EFI) - check, removal and installation, 4-15 Automatic transaxle, 7-1 through 7-7 band adjustment (three-speed models only, 1-31 diagnosis, general, 7-2 fluid
and
filter
fluid level
change, 1-31
check, 1-10
general information, 7-1 - description, check and adjustment, 7-3 neutral start and back-up light switch - check and adjustment, 7-4 removal and installation, 7-5 shift cable, check and adjustment, 7-2
Ignition switch/shifter interlock
throttle
pressure cable or rod adjustment, 7-2
Automotive chemicals and lubricants, 0-16
B Balljoints
-
check and replacement, 10-8
Battery - check and replacement, 5-2 check, maintenance and charging, 1-13 removal and installation, 5-2
cables
Body, 11-1 through 11-18 bumpers removal and installation, 11-7 center console removal and installation, 11-12 cowl cover removal and installation, 11-17
dashboard panel removal and installation, 11-14 door latch, lock cylinder and outside handle removal and installation, 11-9 removal, installation and adjustment, 1 1 -9 window glass removal, installation and adjustment, 11-10 window regulator removal and installation, 11-11 trim panel removal and installation, 11-8 engine drivebelt and wheelhouse splash shield removal, 11-17 front fender removal and installation, 11-6 general information, 11-1
hood latch and cable removal and installation, 11-6 hood removal, installation and adjustment, 11-3 instrument cluster bezel removal and installation, 11-14 maintenance, 11-1 mirrors removal and installation, 11-17 radiator grille removal and installation, 1 repair, major damage, 11-3 repair,
minor damage,
1 1
1
-6
-2
seat removal and installation, 11-18 steering
trunk
lid
column cover removal and installation, 11-16 removal, installation and adjustment, 11-13
maintenance, 1 1 -2 windshield and fixed glass replacement, 11-3 vinyl trim
Booster battery (jump) starting, 0-15 Brake hydraulic system - bleeding, 9-17 Brake system check, 1-28 fluid level
check, 1-6
Brakes, 9-1 through 9-22 Anti-lock Brake System (ABS) - general information, 9-17 front brake disc inspection, removal and installation, 9-8 front disc brake caliper removal, overhaul and installation, 9-5 general information, 9-2
hoses and lines - inspection and replacement, 9-16 hydraulic system bleeding, 9-17 light switch check and replacement, 9-21 master cylinder - removal and installation, 9-15 pads - replacement, front, 9-2 pads - replacement, rear, 9-9 parking brake adjustment, 9-18 parking brake cables - removal and installation, 9-19 parking brake shoes (rear disc brake models) - removal, 9-19 power brake booster check, removal and installation, 9-19 shoes (rear) - replacement, 9-10 wheel cylinder - removal, overhaul and installation, 9-14 Bulb replacement, 12-11 Bumpers - removal and installation, 11-7 Buying parts, 0-8
1
1
1
1
IND-2
Charging system alternator brushes, replacement, 5-10
removal and check, 5-10 alternator,
installation,
and
2A-14
Control arm - removal, inspection and installation, 10-6 Cooling system check, 1-24 coolant reservoir removal and installation, 3-3 fan, check and replacement, 3-4 general information, 3-2 radiator, removal and installation, 3-6 servicing (draining, flushing and refilling), 1-29 thermostat, check and replacement, 3-2 water pump, check, 3-7 water pump, replacement, 3-7 Cooling, heating and air conditioning, 3-1 through 3-15 Cowl cover - removal and installation, 11-17 Cruise control system - description and check, 12-17
Driveaxle boot check, 1-33 Driveaxles, 8-1 through 8-14 constant velocity (CV) joint boots, replacement, 8-1 constant velocity (CV) joints, disassembly, inspection and reassembly, 8-6 general information and inspection, 8-2
intermediate shaft (1991 and 1992 3.3L and 3.8L models, removal and installation, 8-5 installation,
Electrical troubleshooting
8-4
-
and replacement, 1-19
general information, 12-2
Emissions control systems aspirator system, 6-21
catalytic converter,
2A-6
number one
for
piston locating, 2A-3
valve cover removal and installation, 2A-3
Chassis electrical system, 12-1 through 12-18 Chassis lubrication, 1-15 Chemicals, 0-16 Circuit breakers - general information, 12-3 Constant velocity (CV) joint boots - replacement, 8-1 Constant velocity (CV) joints - disassembly, inspection, 8-6
Drivebelt check, adjustment
installation,
Top Dead Center (TDC)
voltage regulator, general information, 5-13
6-22
evaporative emissions control system, 6-16
Exhaust Gas Recirculation (EGR) system, 6-19 general information, 6-2 inlet air
installation,
pump
repair operations possible with the engine in the vehicle, 2A-2 timing belt and sprockets, removal, inspection
5-10
general information and precautions, 5-9
removal and
pan removal and
removal, inspection and installation, 2A-16 rear main oil seal replacement, 2A-18
oil
heated
1
Index oil
air
1
1
system (single-point EFI systems
only),
6-18
information sensors, check and replacement, 6-8
Crankcase Ventilation (PCV) system, 6-15 diagnosis system, description and code access, 6-8 Single Module Engine Controller (SMEC)/Single Board Positive
valve springs, retainers and seals, replacement, 2A-20 Engine (3.0L V6) camshaft and bearing surfaces, inspection, 2B-19 camshaft oil seal, replacement, 28-16 camshaft(s), removal and installation, 2B-19 crankshaft front oil seal, replacement, 2B-16 crankshaft pulley/vibration damper, removal and installation, 28-10 cylinder head(s), removal and installation, 28-18 exhaust manifolds, removal and installation, 28-8 hydraulic lash adjusters, check, removal and installation, 28-6 intake manifold, removal and installation, 28-7 mount check and replacement, 28-24 oil pan, removal and installation, 28-20 oil pump, removal, inspection and installation, 28-21 repair operations possible with the engine in the vehicle, 28-2 rocker arm components, removal and installation, 28-5 timing belt, removal, installation and adjustment, 28-1 Top Dead Center (TDC) for number one piston, locating, 28-3 valve covers, removal and installation, 28-4 valve springs, retainers and seals, replacement, 28-18 Engine (3.3Ly3.8L V6) camshaft installation, 2D-28 camshaft and bearings, removal and inspection, 2D-14 crankshaft pulley/vibration damper, removal and installation, 2C-9 cylinder head(s), removal and installation, 2C-7 exhaust manifold(s), removal and installation, 2C-6 flywheel/driveplate removal and installation, 2C-13 hydraulic roller lifters, removal, inspection and installation, 2C-8 intake manifold, removal and installation, 2C-4 mount check and replacement, 2C-14 oil pan removal and installation, 2C-1 oil pump removal, check and installation, 2C-12 rear main oil seal replacement, 2C-14 repair operations possible with the engine in the vehicle, 2C-2 rocker arms and pushrods, removal, inspection, 2C-3 timing chain and sprockets, inspection, removal and installation, 2C-11 timing chain cover, removal and installation, 2C-10 Top Dead Center (TDC) for number 1 piston, locating, 2C-2 valve covers, removal and installation, 2C-3 valve springs, retainers and seals, replacement, 2C-4 Engine overhaul procedures block, cleaning, 2D-18 block, inspection, 2D-19 crankshaft, inspection, 2D-22 crankshaft, installation and main bearing oil clearance check, 2D-26 crankshaft, removal, 2D-17 cylinder compression check, 2D-6 cylinder head, cleaning, 2D-1
self
Engine Controller
Engine (2.5L four-cylinder) camshaft and hydraulic lash adjusters/rocker arms, inspection and installation, 2A-1 camshaft oil seal replacement, 2A-9 counterbalance shaft removal and installation, 2D-16 crankshaft front oil seal replacement, 2A-10 cylinder head removal and installation, 2A-13 flywheel/driveplate removal and installation, 2A-18 intake/exhaust manifold removal and installation, 2A-5 intermediate shaft oil seal replacement, 2A-10
cylinder head, disassembly,
2D-10
cylinder head, inspection, 2D-1 cylinder head, reassembly, cylinder honing,
2D-13
2D-20
disassembly sequence, 2D-9 general information, 2D-5 start-up and break-in after overhaul, 2D-30 main and connecting rod bearings, inspection, 2D-23 overhaul reassembly sequence, 2D-24 overhaul, general information, 2D-5 piston, ring installation, 2D-24 pistons and connecting rods installation and rod bearing, 2D-28 pistons and connecting rods, inspection, 2D-21 initial
1
IND-3
Index pistons and connecting rods, removal, 2D-15 rear main oil seal installation, 2D-28 removal and installation, 2D-7
General engine overhaul procedures, 2D-1 through 2D-30
removal, methods and precautions, 2D-7
2D-13 Engine electrical systems, 12-1 through 12-16 Engine Identification Number (EIN), 0-6 valves, servicing,
Engine(general) oil level check, 1-6 oil and filter change,
H Headlight adjustment, 12-10
1
replacement, 12-10 switch removal and
-1
rebuilding alternatives,
2D-8
Evaporative emissions control system check, 1-33 Exhaust Gas Recirculation (EGR) system, 6-19 Exhaust Gas Recirculation (EGR) system check, 1-22 check, 1-24
4-25
,
Front brake disc - inspection, removal and installation, 9-8 Front disc brake caliper - removal, overhaul and installation, 9-5 Front disc brake pads - replacement, 9-2 Front end alignment - general information, 10-20 Fuel and exhaust systems, 4-1 through 4-26 general information, 4-2 Fuel injector(s) (multi-point EFI)
and
installation,
assembly (multi-point Fuel system
check
inlet air
I
system
check, 5-3 coil
-
check and replacement, 5-4 removal and installation, 5-6
distributor,
general information, 5-3 -
check, removal
check and replacement, 12-7 pick-up assembly replacement, 5-8 ignition switch
4-22
rail
-
inlet air
Ignition
Fuel pressure relief procedure, 4-2 Fuel
12-12
system (single-point EFI systems only), 6-18 system check, 1-23 Heater and air conditioner blower motor - removal, 3-10 Heater core - removal and installation, 3-12 Heater or heater/air conditioner control assembly - removal, 3-9 Heater/air conditioner assembly - removal and installation, 3-11 Hinges and locks - maintenance, 11-3 Heated Heated
Exhaust system servicing, general information,
installation,
Headlight dimmer switch (models without airbags) and replacement, 12-4
EFI)
timing check and adjustment (four-cylinder and 3.0L -
removal and
installation,
4-19
accelerator cable, replacement, 4-6 air
cleaner housing, removal and installation, 4-6
air
intake
plenum {V6 engines), removal and installation, 4-18 Idle Speed (AIS) motor (multi-point EFI) - check, removal
engines only), 1-29 Instrument cluster - removal and installation, 12-14 Instrument cluster bezel - removal and installation, 11-14 Instrument panel - removal and installation, 12-15 Introduction, 0-5
Automatic
and
installation,
Automatic
and
Idle
4-18
Speed
installation,
(AIS)
motor (single-point
EFI),
check, removal
4-15
J
check, 1-24
Jacking, 0-15
replacement, 1-16
filter
fuel injection fuel injection
system check, 4-12 system general information, 4-8
fuel injector (single-point EFI),
check, removal and
fuel injector(s) (multi-point EFI),
and
installation,
installation,
4-14
check, removal
Lubricants, 0-16
4-22
pressure regulator (single-point and installation, 4-13
fuel
EFI),
check, removal
assembly (multi-point EFI), removal and installation, 4-19 and fittings, replacement, 4-7 pressure damper (3.3L and 3.8L V6 engines), removal and installation, 4-24 pressure regulator (multi-point EFI), removal and installation, 4-23
fuel
rail
lines
M Maintenance schedule, 1-5 Maintenance techniques, 0-8
tank cleaning and repair, general information, 4-6 tank, removal and installation, 4-4 throttle body injection mounting bolt check, 1-23 throttle throttle throttle
body (multi-point EFI), removal and installation, 4-16 body (single-point EFI), removal and installation, 4-13 body temperature sensor (single-point EFI), check, removal
4-16 Sensor (TPS) (multi-point EFI), check, removal and installation, 4-17 Throttle Position Sensor (TPS) (single-point EFI) - check, removal and installation, 4-15 Fuses - general information, 12-2 Fusible links - general information, 12-3
and
models
Multi-function switch (airbag equipped
pressure relief procedure, 4-2 pump, removal and installation, 4-5 pump/pressure check, 4-2
only)
-
check
and replacement, 12-8
N Neutral start and back-up light switch and replacement, 7-4
-
check
installation,
Throttle Position
Parking brake
-
adjustment, 9-18
Crankcase Ventilation (PCV) valve check and, 1-21 Power door lock system - description and check, 12-16 Positive
Power
steering fluid level check, 1-10
IND-4
Index
Power steering pump - removal and installation, 10-17 Power steering system - bleeding, 10-19 Power window system - description and check, 12-16
body temperature sensor (single-point EFI) - check, removal and installation, 4-16 Throttle Position Sensor (TPS) (multi-point EFI) - check, removal Throttle
Pump
and
removal and installation, 4-5 water, removal and installation, 3-7
4-17
- check, removal 4-15 Throttle pressure cable or rod (automatic transaxle) - adjustment, 7-2 Tie-rod ends - removal and installation, 10-14 Tire and tire pressure checks, 1 -9 Tire rotation, 1-15 Towing, 0-15 Track bar assembly - removal and installation, 10-11 Transaxle, automatic, 7-1 through 7-7 band adjustment (three-speed models only, 1-31
and
Radio and speakers - removal and installation, 12-12 Rear air spring removal and installation, 10-9 Rear axle assembly - removal and installation, 10-12 Rear brake disc - removal, inspection and installation, 9-10 Rear disc brake caliper - removal, overhaul and installation, 9-10 Rear disc brake pads - replacement, 9-9 Rear spindle - inspection, removal and installation, 10-11 Rear wheel bearing check, repack and adjustment, 1-26 Rear window defogger - check and repair, 12-17 Relays - general information, 12-3
Safe automotive repair practices, 0-17 Seat belt check, 1-34 Seats - removal and installation, 11-18 Self diagnosis system - description and code access, 6-8 Shift cable (automatic transaxle) check and adjustment, 7-2
Spark plug check and replacement, 1-16 Spark plug wire, distributor cap and rotor check and replacement, 1-17 Speedometer cable - removal and installation, 12-15 Speedometer drive pinion - removal and installation, 7-5 Stabilizer bar - removal and installation, 10-5 Starting system general information and precautions, 5-14 starter motor assembly removal and installation, 5-14 starter
installation,
Throttle Position Sensor (TPS) (single-point EFI)
fuel,
installation,
diagnosis, general, 7-2 fluid
and
fluid level
change, 1-31 check, 1-10
filter
general information, 7-1 - description, check and adjustment, 7-3 neutral start and back-up light switch - check and adjustment, 7-4 removal and installation, 7-5 shift cable, check and adjustment, 7-2
Ignition switch/shifter interlock
throttle
pressure cable or rod adjustment, 7-2
Troubleshooting, 0-19 Trunk lid - removal, installation and adjustment, 11-13 Tune-up and routine maintenance, 1 through 34 Tune-up general information, 1-6
Turn signal and hazard flashers - check and replacement, 12-4 Turn signal/hazard warning switch (models without airbags) check and replacement, 12-5
u Underhood hose check and replacement, 1 -22 Upholstery and carpets - maintenance, 11-2
motor in-vehicle check, 5-14
assembly replacement, 5-14 replacement, 10-15
starter motor/solenoid/gear reduction
Steering gear boots Steering system check, 1 -26
power power
steering
-
pump
Vehicle Identification removal and
installation,
and installation, 10-15 and hub removal, inspection, 10-7 steering wheel removal and installation, 10-14 tie-rod end removal and installation, 10-14 Strut - replacement, 10-4 Suspension system air suspension systems general information, 10-12 balljoint check and replacement, 10-8 steering gear removal
check, 1-26
arm removal, inspection and installation, 10-6 and installation, 10-9 rear axle assembly removal and installation, 10-12 rear shock absorbers and coil springs removal, inspection, 10-8 rear spindle inspection, removal and installation, 10-11 stabilizer bar removal and installation, 10-5 strut assembly removal and installation, 10-3
control
rear air spring removal
replacement, 10-4
track bar assembly removal and installation, 10-11
Throttle Throttle
body body
(multi-point EFI)
-
(single-point EFI)
removal and installation, 4-16 removal and installation, 4-13
-
(ViN),
0-6
10-17
steering system bleeding, 10-19
steering knuckle
strut
Number
w Water pump - removal and installation, 3-7 Wheels and tires - general information, 10-20 Windshield wiper motor check and replacement, 12-14 wiper/washer switch (models without airbags) check and replacement, 12-6 Wiper blade inspection and replacement, 1-11 Wiring diagrams - general information, 12-17
,
HAYNES AUTOMOTIVE MANUALS NOTE: New manuals are added to
on a periodic basis. If you do not see a listing Haynes dealer for the latest product information.
this list
consult your local
ACURA '1776
'1628
Integra
a Legend all models
Corsica/Beretta all models '87 thru '92 Corvette all V8 models '68 thru '82 Corvette all models '84 thru '91 Chevrolet Engine Overhaul Manual
274 '86 thru '90
*1336
1762 704
AMC
all
626 241 *1642
AUDI
models, '85 thru '92 Pick-ups '67 thru '87 - Chevrolet & GMC, all V8 & in-line 6 cyl, 2WD & 4WD '67 thru '87; Suburbans, Blazers & Jimmys '67 thru '91 Pick-ups '88 thru '93 - Chevrolet & GMC, all full-size (C and K) models, '88 thm '93
420
4000 5000 5000
615 428 1117
all all all
models models models
'80 thru '87 '77 thru '83 '84 thru '88
'1664 *831
AUSTIN
*1
Healey Sprite Roadster (265)
-
MG Midget
see
727
*345
S-10 & GMC S-15 Pick-ups all models '82 thm '92 Sprint & Geo Metro '85 thm '91 Vans - Chevrolet & GMC, V8 & in-line 6 cylinder models '68 thm '92
BMW
788 '880
268 1763 789 '2046 '2021
560 334 754
773
CHRYSLER 3/5 Series not Including diesel or all-wheel drive models '82 thru '92 3201 all 4 cyl models '75 thru '83 528i & 530i all models '75 thm '80 1500 thru 2002 all models except
276 632 240
'2058
2500, 2800, 3.0
thm
'93
Laser - see DODGE Daytona (1 140) Chrysler & Plymouth Mid-size wheel drive '82 thm '93
*1337
&
Bavaria
'69 thru '76
DATSUN BUICK Century
(front
wheel
GENERAL MOTORS
drive) (829)
-
see
Buick, Oldsmobite & Pontiac Full-size (Front wheel drive) all models '85 thru '93 Buicl( Electra, LeSabre and Park Avenue; Oldsmobile Delta 88 Royale, Ninety Eight and Regency; Pontiac Bonneville Buick Oldsmobile & Pontiac Full-size (Rear wlieel drive) Buick Estate '70 thru '90, Electra'70 thru '84, LeSabre '70 thru '85, Limited '74 thru '79 Oldsmobile Custom Cruiser '70 thm '90, Delta 88 '70 thru •85,Ninety-ei9ht '70 thru '84 Pontiac Bonneville '70 thru '81 Catalina '70 thru '81 Grandville '70 thru '75, Parisienne '83 thru '86
*1627
1551
& Century all rear-drive models with V6, V8 and Turbo '74 thru '87 Regal - see GENERAL MOTORS (1671) Skytiawk - see GENERAL MOTORS (766) Skylark all X-car models '80 thru '85 Skylark '86 on - see GENERAL
679 123 430 372 277
all models '78 thm '82 510 & PL521 Pick-up '68 thm '73 510 all models '78 thm '81 61 all models '72 thm '76 620 Series Pick-up all models '73 thm '79 720 Series Pick-up - see NISSAN (771) 810/Maxima all gasoline models, '77 thm '84 F1 all models '76 thm '79 Pulsar - see NISSAN (876) Sentra - see NISSAN (982) Stanza - see NISSAN (981)
Mid-size Regal
552
MOTORS (1420) Somerset - see GENERAL
MOTORS (1420)
Cadillac Rear Wheel Drive all gasoline models '70 thnj '92 Cimarron - see GENERAL MOTORS (766)
•723 •1231
236 610
M668
CAPRI
234
2000 MK Coupe all models '71 thru '75 Mercury Capri - see FORD Mustang (654) I
CHEVROLET •1477
Astro
& CMC
Safari Mini-vans '85 thru '93
625
Camaro V8 all models '70 thru '81 Camaro all models '82 thru '92 Cavalier - see GENERAL MOTORS (766) Celebrity - see GENERAL MOTORS (829) Chevelle, Malibu & El Camino all V6 &
449 550
V8 models '69 thru '87 Chevette & Pontiac T1000 '76 thru Citation all models '80 thru '85
554 866
'
Listings shiown with
an asterisk
(')
Haynes North America,
•1026 •1421 '1418
'78
31
•1140 •545 •912 •556 •1726 •1779 •349
1338 '1725 •344
•829
•766
1420 •1671
Caravan & Plymouth Voyager Mini-Vans all models '84 thm '93 Challenger & Plymouth Saporro all models '78 thm '83
•2035
Challenger •67-'76 - see DODGE Dart (234) Colt all models '71 thm '77 Colt & Plymouth Champ (front wheel drive) all models '78 thm '87 Dakota Pick-ups all models '87 thm '93 Dart, Challenger/Plymouth Barracuda & Valiant 6 cyl models '67 thm '76 Daytona & Chrysler Laser '84 thm '89 Omni & Plymouth Horizon '78 thm '90 Pick-ups all full-size models '74 thm '91 Ram 50/D50 Pick-ups & Raider and Plymouth Arrow Pick-ups '79 thm '93 Shadow & Plymouth Sundance '87 thm '93 Spirit & Plymouth Acclaim '89 thm '92
'2039
Newbury
Mustang II 4 cyl, V6 & V8 models '74 thm Pinto & Mercury Bobcat '75 thm '80 Probe all models '89 thm '92
Buick Century, Chevrolet Celebrity, Oldsmobile Cutlass Ciera & Pontiac 6000 models 82 thm '93 Buick Skyhawk, Cadillac Cimarron, Chevrolet Cavalier, Oldsmobile Firenza ft Pontiac J-2000 ft Sunbird all models '82 thm '92 Buick Skylark ft Somerset, Oldsmobile Calais & Pontiac Grand Am all models '85 thm '91 Buick Regal, Chevrolet Lumina, Oldsmobile Cutlass Supreme & Pontiac Grand Prix all front wheel drive models '88 thm '90 Chevrolet Lumina APV, Oldsmobile Silhouette ft Pontiac Trans Sport eill models '90 thru '92
Metro - see CHEVROLET Sprint (1727) Prizm - see CHEVROLET Nova (1642) all models '90 thm '93 Tracker - see SUZUKI Samurai (1626)
Storm
Safari
-
ft
see CHEVROLET ASTRO (1477) Pick-ups - see CHEVROLET
(420, 831, 345, 1664)
(Continued on other side)
Park,
'78
Ranger/Bronco II gasoline models '83 thm '93 Taurus & Mercury Sable '86 thm '92 Tempo & Mercury Topaz all gasoline models '84 thm '93 Thunderbird/Mercury Cougar '83 thm '88 Thunderbird/Mercury Cougar '89 and '90 Vans all V8 Econoline models '69 thm '91
Vans
see Mitsubishi Eclipse (2097)
861 Lawrence Drive,
models
GMC
model coverage as of this printing. These titles will be periodically updated Haynes dealer for more information.
Inc.,
all
including Turbo. Mustang, '79 thm '92; Capri, '79 thm '86 Mustang V8 all models '64-1 /2 thm '73
GEO
Vans - Dodge & Plymouth V8 & 6 cyl models '71 thm '91
-
Versailles ('75 thru '86)
Mustang & Mercury Capri
all
400 & 600 - see CHRYSLER Mid-size (1337) Aries & PlymoutK Reliant '81 thm '89
Talon
Ford LTD Crown Victoria & Mercury Gran Marquis ('83 thm '87) Granada & Mercury Monarch a\\ in-line, 6 cyl & V8 models '75 thm '80 Ford & Mercury Mid-size, Ford Thunderbird & Mercury Cougar ('75 thm '82); Ford LTD & Mercury Marquis ('83 thm '86);
GENERAL MOTORS
EAGLE
'87
indicate
649 1670
DODGE
CADILLAC *751
231
200SX all models '77 thm '79 200SX all models '80 thm '83 B - 21 all models '73 thm '78 210 all models '78 thm '82 240Z, 260Z & 280Z Coupe '70 thru 280ZX Coupe & 24-2 '79 thm '83 300ZX - see NISSAN (1 137)
,
627
357
402 647 228 525 206 563
376 368
'78
Aerostar Mini-vans all models '86 thm '92 Bronco and Pick-ups '73 thm '79 Bronco and Pick-ups '80 thm '91 Courier Pick-up all models '72 thm '82 Ford Engine Overhaul Manual Escort/Mercury Lynx all models '81 thm '90 Escort/Mercury Tracer '91 thm '93 Explorer & Mazda Navajo '91 thm '92 Fairmont & Mercury Zephyr '78 thm '83 Fiesta all models '77 thm '80 Ford & Mercury Full-size, Ford LTD & Mercury Marquis ('75 thm '82); Ford Custom 500, Country Squire, Crown Victoria & Mercury Colony Park ('75 thm '87);
XR-7 & Lincoln '654
models
all
thm
Ford Torino,Grcin Torino, Elite, Ranchero pick-up, LTD II, Mercury Montego, Comet,
front
TurtJO '59 thru '77
348
Full-size Front-Wheel Drive '88 K-Cars - see DOCXSE Aries (723)
'68
FORD •1476
359 '2020
124 Sport Coupe & Spider X1/9 all models '74 thm '80
094 273
Lumina - see GENERAL MOTORS (1671) Lumina APV - see GENERAL MOTORS (2035) Luv Pick-up all 2WD & 4WD '72 thru '82 Monte Cario all models '70 thru '88 Nova all V8 models '69 thru '79 Nova and Geo Prizm all front wheel drive
31 9
'83 thru '87
models
FIAT
Full-size Sedans Caprice, Impala, BIscayne, Bel Air & Wagons '69 thru '90
Jeep CJ - see JEEP (412) Mid-size models, Concord, Hornet, Gremlin & Spirit '70 thru '83 (Renault) Alliance & Encore
for your vetiicle,
to include later
model years
CA 91320 • (805)
-
consult your
498-6703
HAYNES AUTOMOTIVE MANUALS NOTE: New manuals
are
added
HONDA 2067 160 633 297 1227
Civic
•601
basis.
Haynes dealer for the
If
you do not see a
latest
all
Prelude
models
CVCC
1137 •1341 *771
876 •982 '981
listing for your vehicle,
product information.
NISSAN
Accord CVCC all models 76 thru '83 Accord all models '84 thru '89 Accord all models '90 thm '93 Civic 1200 all models '73 ttim '79 Civic 1300 & 1500 CVCC '80 thm '83 Civic 1 500 CVCC all models '75 thru '79
351 1221
on a periodic
to this list
consult your local
SAAB
300ZX all models including TuttM '84 thm '89 Maxima all models '85 thm '91
247 •980
99 all models including TurtX) '69 thm '80 900 all models including Turtx) '79 thm '88
Pick-ups/Pathfinder gas models '80 thm '93 Pulsar all models '83 thm '86
Sentra all models Stanza all models
'82 '82
thm thm
SUBARU
'90 '90
237
'84 thru '91 all models '79 thru '89
& 1600 '71 thm '79 800 2W0 & 4WD '80 thm '89
1100, 1300, 1400
•681
1
600 &
1
OLDSMOBILE HYUNDAI '1552
Excel
models
all
Bravada
SUZUKI
Calais
'1626
- see CHEVROLET S-10 (831) see GENERAL MOTORS (1420) Custom Cruiser - see BUICK Full-size
'86 thru '93
-
Samurai/Sidekick and Geo Tracker all models '86 thm '93
RWD (1551) '658
ISUZU •1641
XJ6 all 6 cyl models '68 thru '86 XJ12 & XJS all 1 2 cyl models '72
412
thm
'88
Delta 88 Royale
-
see
BUICK Full-size
RWD (1551) Firenza - see GENERAL MOTORS (766) Ninety-eight Regency - see BUICK Full-size
RWD (1551), FWD (1627) Cherokee, Comanche & Wagoneer Limited models '84 thai '93 CJ all models '49 thru '86 Wrangler all models '87 thru '92
Ninety-eight Regency Brougham - see BUICK Full-size RWD (1551) Omega - see PONTIAC Phoenix (551) Silhouette - see GENERAL MOTORS (2035)
all
•1777
'74
FWD (1551), RWD (1627) thru '85
JEEP •1553
standard gasoline V6 &
all
Cutlass Ciera - see GENERAL MOTORS (829) Cutlass Supreme - see GM (1671) Delta 88 - see BUICK Full-size RWD (1551) Delta 88 Brougham - see BUICK Full-size
JAGUAR •242 •478
Cutlass
V8 models
&
Piclc-up, all gasoline models Pick-up, '81 thru '93; Trooper, '84 thru '91
Trooper
TOYOTA Camry
1023 150 935 •2038 1 139
models '83 thm '91 Sedan all models '71 thm '74 Rear Wheel Drive '71 thm '85 Front Wheel Drive '86 thm '92 Supra all models '79 thm '92 Corolla all models '75 thm '79 Cor«>lla all rear wtieel drive models '80 thm '87 Corolla all front wheel drive models '84 thm '92 Corolla Tercel all models '80 thm '82 Corona all models '74 thm '82 Cressida all models '78 thm '82 Land Cruiser all models '68 thm '82 MK II all 6 cyl models '72 thm '76 MR2 all models '85 thm '87 Pick-up all models '69 thm '78 Pick-up all models '79 thm '92 Previa all models '91 thm '93
361 961 '1025
636 360 532 313 200 •1339
LADA
304
PEUGEOT
& 1600 all models
1200, 1300. 1500
663
including Riva "74 thru '91
MAZDA 648 '1082
267 370 757 •2047
460 •1419
504
all
diesel
models
'74
thm
•656 •2048
'83
TRIUMPH
PLYMOUTH
626 Sedan & Coupe (rear wheel drive) all models '79 thm '82 626 & MX-6 (front wheel drive) all models '83 thm '91 B Series Pick-ups '72 thm '93 GLC Hatchback (rear wheel drive) all models '77 thm '83 GLC (front wheel drive) '81 thm '85 MPV all models '89 thm '93 RX-7 all models '79 thm '85 RX-7 all models '86 thm '91
1 1
Laser - see MITSUBISHI Eclipse (2097) For other PLYMOUTH titles, see DODGE listing.
GT6 &
2
113 322
190 Series
all
& Karmann Ghia cill models '54 thm '79 Dasher all gasoline models '74 thm '81 Beetle
T1000 - see CHEVROLET Chevette (449) J-2000 - see GENERAL MOTORS (766) 6000 - see GENERAL MOTORS (829) Bonneville
Bonneville
-
238 '884
Rabbit, Jetta, Scirocco,
see Buick Full-size
models
gasoline models, '84
346
thm
'88
230, 250 & 280 Sedan, Coupe & Roadster 6 cyl sohc models '68 thm '72 280 123 Series gasoline models '77 thm '81 350 & 450 Sedan, Coupe & Roadster all
983 698
all
697
models
'71
thm
1232 555 867
Turtx) '76
thm
'85
551
See FOftD
Brougham - see Buick
Catalina - see Buick Full-size (1551) Fiero all models '84 thm '88 Firebird V8 models except Turtx) '70 thm
082 226 '81
Firebird all models '82 thm '92 Full-size Rear Wheel Drive - see BUICK Oldsmobile, Pontiac Full-size (1551) Full-size Front Wheel Drive - see BUICK Oldsmobile, Pontiac Full-size FWD (1627) - see GENERAL MOTORS (1420) Grand Grand Prix - see GENERAL MOTORS (1671) Grandville - see BUICK Full-size (1551) Parisienne - see BUICK Full-size (1551) Phoenix & Oldsmobile Omega all X-car
Roadster & GT Coupe models '62 thm '80 MG Midget & Austin Healey Sprite Roadster '58 thm '80
'264
239 397
Cordia, Tredia, Galant, Precis '83
thm
'1027
&
'
141
079 097 768
Marina 1.8 all models '71 thm '78 Minor 1000 sedan & wagon '56 thm '71
shown
with
updated
924 944
all all
models Including Turtx) models Including Turtx)
'76
'83
thm thm
'82 '89
RENAULT
(Austin)
Listings
91 1 all Coupe & Targa models except Turbo & Can-era 4 '65 thm '89 914 all 4 cyl models '69 thm '76
'93
Pick-up & Montero '83 thm '93 Eclipse, Eagle Talon & Plymouth Laser '90 thm '94
MORRIS 074 024
an
thm
'92
diesel
models thm Transporter 1600 all models '68 thm '79 Transporter 1700, 1800 & 2000 all models '72 thm '79 Type 3 1500 & 1600 all models '63 thm '73 Vanagon all air-cooled models '80 thm '83
VOLVO 203 129 '270
400 '1550
1479 1654 1667 1480
PORSCHE
MITSUBISHI Mirage
& Pick-up gas
Convertible '80
& 1800 Sports '61 thm '73 models '66 thm '74 all models '74 thm '90 ail models '75 thm '82 & 7P0 Series all models '82 thm '88
120, 130 Series
140 240 260 740
Series Series Series
all
SPECIAL MANUALS
MGB all
•2022 •2097
&
models '80 thm '84 Sunbird - see GENERAL MOTORS (766) Trans Sport - see GENERAL MOTORS (2035)
Listing
MG
'1669
084 1029
'91
& Pick-up all '84
'77
Am
MERCURY
thm
RWD
'80
Diesel 123 Series 200D, 2200, 240D, 240TD, 300D, 300CD, 300TD, 4- & 5-cyl incl.
'74
Rabbit, Jetta
Full-size (1551)
four-cylinder
'74
vw
PONTIAC
MERCEDES-BENZ
all
all models '62 thm all models '62 thm '81 models '75 thm '81
Vitesse
Spitfire
TR7
FWD (1627), RWD (1551) '1643
all
Carina Celica Celica Celica
asterisk
(')
to include later
081
5 Le Car all models '76 thm '83 8 & 10 58.4 cu in engines '62 thm
'72
2 Saloon & Estate 1 289 cc engine '70 thm '80 5 & 1 7 all models '73 thm '79 16 89.7 cu in & 95.5 cu in engines '65 thm '72 Alliance & Encore - see AMC (934) 1
1
indicate model coverage as of this phnting. These titles will be periodically model years - consult your Haynes dealer for more information.
Haynes North America,
Inc.,
861 Lawrence Drive,
Newbury
Park,
1762 1 736 1 763 482 2069 1666 299 393 300
Automotive Body Repair & Painting Manual Automotive Electrical Manual Automotive Emissions Control Manual Automotive Heating & Air Conditioning Manual Chevrolet Engine Overhaul Manual GM and Ford Diesel Engine Repair Manual Ford Engine Overhaul Manual Fuel Injection Manual Holley Carburetor Manual Small Engine Repair Manual SU Carburetors thm '88 Weber Carburetors thm '79 Zenith/Stromt>erg CD Carburetors thm '76
Over 100 Haynes motorcycle manuals also available
CA 91320 • (805) 498-6703
CARBON DEPOSITS
NORMAL
Symptoms: Dry
Symptoms: Brown
sooty deposits indicate a rich mixture or weak ignition. Causes misfiring, hard
starting
and
hesitation.
Recommendation: Check
for
tan color
and
to grayishslight electrode
wear. Correct heat range for engine and operating conditions.
cleaner, high float
Recommendation: When new
choke and worn ignition points. Use a spark plug with a longer core nose for
spark plugs are installed', replace with plugs of the same heat range.
a clogged
air
level, sticky
greater anti-fouling protection.
ASH DEPOSITS Symptoms:
OIL DEPOSITS
Symptoms: caused by poor
Oily
coating
control. Oil
oil
leaking past worn valve guides or piston rings into the
Light brown deposits encrusted on the side or center electrodes or both. Derived from oil and/or fuel addi-
is
combustion chamber. Causes hard starting, misfiring and hesition.
Recommendation:
Correct
the mechanical condition with necessary repairs and install new plugs.
TOO HOT Symptoms: sulator,
absence
Blistered, white
of deposits. Results in life.
Recommendation: Check
for
the correct plug heat range,
over-advanced
ignition timing,
lean fuel mixture, intake manifold vacuum leaks and sticking valves. Check the coolant level and make sure the radiator is not clogged.
the spark, causing misfiring and hesitation during acceleration.
Recommendation:
exces-
prevent seepage of oil into the combustion chambers. Also try changing gasoline brands.
WORN Symptoms:
Rounded
poor
fuel
economy.
Recommendation: with new plugs of
DETONATION
engine
Replace the
same
heat range.
Symptoms:
electrodes. Insulators are white, but may be dirty due to misfiring or flying debris in the combustion
elec-
trodes with a small amount of deposits on the firing end. Normal color. Causes hard starting in damp or cold weather and
PREIGNITION
to
If
sive deposits accumulate over a short time or low mileage, install new valve guide seals to
Symptoms: Melted
chamber. Can lead damage.
may
mask
in-
eroded electrode and
shortened plug
Excessive amounts
tives.
Insulators may be cracked or chipped. Improper gap setting techniques can also result in a fractured insulator tip.
Can
lead to piston
damage. for
Recommendation: Make sure
the correct plug heat range,
the fuel anti-knock values meet engine requirements. Use care when setting the gaps on new plugs. Avoid lugging the engine.
Recommendation: Check over-advanced
ignition timing,
lean fuel mixture, clogged cooling system and lack of lubrication.
HIGH SPEED GLAZING Symptoms:
Insulator has yellowish, glazed appearance. Indicates that combustion
chamber temperatures have risen suddenly during hard acceleration. Normal deposits melt to form a conductive coating. Causes misfiring at high
speeds.
Recommendation:
Install
new
plugs. Consider using a colder plug if driving habits warrant.
de-
posits lodge between the electrodes. Heavy deposits accumulate and bridge the elec-
trode gap. The plug ceases to resulting in inder.
fire,
a dead
Recommendation: Locate
cyl-
trodes.
After long periods misfiring, deposits can
loosen when normal combustemperature is restored by an overdue tune-up. At high speeds, deposits flake off the piston and are thrown against the hot insulator, causing mistion
firing.
Recommendation: Replace the plugs with new ones or clean and reinstall the originals.
Symptoms: May be caused by a foreign object
in
the
combus-
tion chamber or the piston striking an incorrect reach (too long) plug. Causes a dead cylinder and could result in piston
damage. the
and remove the deposits from between the elec-
faulty plug
of
MECHANICAL DAMAGE
GAP BRIDGING Symptoms: Combustion
SPLASHED DEPOSITS Symptoms:
Recommendation:
Remove
the foreign object from the engine and/or install the correct reach plug.
Every m^hual based qn a complete teardovyn and rebuild!
L
Haynes mechanic, author and photographer with 199^Qirysler
Md^ls covered b^liis manual: All f uif-size
front-wheel
drfv*e
models
New Yorker
.
a
Chrysler New Yorker {V6 engine), Imperial, Fpth Avenye (1990 thru 1993), LeBar^on Landau & Sedan (1990 thru 1993), ip)dge Dyr>3sty * Does hot cover turbo models LeBaron Coupe, Convertible arid GTS models cow^^gd in Haynes manual #1337
^ '
i
^ ,-^
' -
Haynes Manuals ExplairwBe^: • • • •
•
step-by-step procedures t^ed to hundreds6f easy-to-foHow phcftos Written from "hands-ori"emerience...usmg comnioniBgIs Quick an^easy troubleshooting sections Detailed x^iring diagrams Color sp^k plug diagnosis