Full-Auto Cobray M-11/9 Conversion Manual 0879472383, 9780879472382
Full Auto Cobray M-11/9 Conversion Manual. Desert Publications. 2005. Pages 16 and 17 are missing. This manual describ
131 66 2MB
English Pages 13 Year 2005
Recommend Papers


![Select Fire AK-47 Conversion Manual [1 ed.]](https://ebin.pub/img/200x200/select-fire-ak-47-conversion-manual-1nbsped.jpg)


File loading please wait...
Citation preview
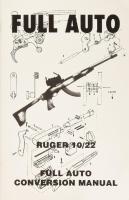
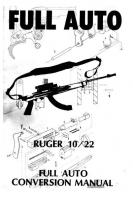
FULL-AUTO COBRAY M-11/9
CONVERSION
MANUAL
FULL-AUTO
COBRAY M-11/9 TABLE OF CONTENTS BEFORE VOU WRI
SS
eee 1
| PREFACE
Dene
2
YOek ea
4
UNCOCKING THE HAMMER...........cssssscseesssssssses 8 REMOVING THE HAMMER.........ssscssssssesssseeseeee 10 MODIFICATION OF THE HAMMER.............---- 14 TESTING
II
|
20 |
il
FULL-AUTO COBRAY
FULL-AUTO COBRAY
CAUTION!
BEFORE YOU BEGIN
The legal construction and possession of a fully automatic weapon is controlled by the Bureau of Alcohol, Tobacco, and Firearms division of the U.S. Treasury Department. All conversions must be done by a licensed Class II manufacturer. In addition, an authorized application must be secured from the B.A.T.F. governmental agency before any construction begins. (State and local laws may prohibit ownership of this type of weapon.) Information provided in this book is for academic purposes only. The publisher, Butokukai, assumes no responsibility or liability for illegal or improper firearm modifications, which may result in any gun damage or bodily harm.
STEP #1 Get the proper license and approval from the U.S. Government B.A.T.F. STEP #2 Read through the book several times
so you are familiar with each step of the conversion. STEP #3 needed.
Acquire the tools and equipment
STEP #4 Note: This step is very important! If you are not completely familiar with the design and function of the trigger disconnector assembly, you should study it very carefully. Make diagrams, take still pictures or even video tape the location of all of the various parts. Whatever it takes, you must be able to reassemble the complete trigger mechanism.
FULL-AUTO COBRAY
FULL-AUTO COBRAY
PREFACE The Cobray M-11/9mm represents the most popular configuration for modern machine pistols and sub-machine guns. Manufactured by S.W. Daniel, INC., the M-11 is the semi-automatic version of the very popular M-10 sub-machine gun of the same company. Featuring open-bolt action and loads of accessories, the M-11 has proven to be reliable and rugged, as well as fun to shoot.
This manual describes a simple, cost-effective method of converting your Cobray M-11/9mm into a full-time, full-auto sub-machine gun. Although this conversion does not change the M-11 intoa
full-fledged M-10 S.M.G., it will provide details for the proper modifications to the M-11, creating an
“M-11 S.M.G.” The process is easy and takes but one afternoon of tinkering to get it “just right!” Because the M-11 will be full-time full-auto, unlike the select-fire M-10, it may be wise to make a “conversion kit” for your weapon. Very simply put, extra parts for the weapon should be purchased from the manufacturer and kept aside for modification. With a set of modified parts and a set of un-modified parts you may change from semiautomatic to fully-automatic in a few short minutes-
and back again in the same short time.
The conversion method described in this book may be done with NO MONEY and only the most basic of tools. Before you begin, read through this publication completely to gain an understanding of the entire conversion process. Work through problems and answer questions before any
alterations are made to the firearm. With a good working knowledge of the firearm, and a grasp of what the conversion actually does, the process should go very smoothly! AUTHOR'S NOTE: The M-11 pictured on the cover and in the illustrations is a “carbine” version with an extended barrel. All other parts are exactly like the standard “hand-gun” configuration with the shorter barrel.
FULL-AUTO COBRAY
FULL-AUTO COBRAY
DISASSEMBLY The complete disassembly instructions for the Cobray M-11/9 are contained within the owner’s manual, or may be obtained from the manufacturer. The procedure is very simple and requires only a screwdriver, or a similar object, to remove an E-
clip. Below is described the complete procedure. To begin, remove the magazine and clear the chamber. Check and double-check the chamber for a live round. Remember to keep the weapon on “safe” while handling.
tam
The first step in the actual disassembly of the weapon is the removal of the “upper bolt carrier assembly.” See Figure 1A. This assembly is composed of the barrel, receiver, bolt and various
other minor parts. The complete assembly constitutes the top half of the weapon. For our purposes, the assembly needs only to be removed and not broken down into its component parts. Locate the “receiver pin.” The pin runs completely through the side of the weapon, holding the upper bolt carrier assembly in place. It is located at the front, bottom corner of the receiver, just below where the barrel attaches to the rest of the gun. Depress the pin so that it passes completely through the receiver. The pin may have been inserted from either side of the receiver and, therefore, may be removed accordingly. The upper bolt carrier assembly may now be lifted up and away from the rest of the weapon. Place the assembly aside until it is needed for re-assembly. See figure 6A.
COBRAY
M-11/S PROFILE
A) RECEIVER PIN
FULL-AUTO COBRAY
FULL-AUTO COBRAY
COBRAY M-11/3 DISASSEMBLED A) UPPER BOLT CARRIER ASSEMBLY EAS.a
The firing mechanism of the weapon is now exposed within the lower half of the receiver. From the rear of the mechanism, the sear plate, hammer, trigger, and safety may be identified. See Figure 8A. The hammer should be in the “cocked” position, latched into the sear plate. The next step in the
disassembly process
may
proceed
danger of flying springs and parts.
without
the
LOWER RECEIVER DETAIL A) SAFETY LEVER 8) SEAR PLATE [ENTIRE A-FRAME LOCKING STRUCTURE) C) HAMMER PIN AND RETAINER CLIP 0) HAMMER E) TOP OF TRIGGER F) HAMMER SPRING
FULL-AUTO COBRAY
FULL-AUTO COBRAY
UNCOCKING THE HAMMER To un-cock the hammer, grasp the weapon by the portion of the receiver behind the handle. Place the thumb of this hand on the top of the hammer. Apply enough pressure to the hammer to disengage it from the sear plate, but do not depress it completely. With the other hand, move the safety level to the “fire” position. Using the same hand,
pull the trigger. See Figure 11A. As the trigger is pulled, the sear plate should slide to the rear of the weapon. This will cause the hammer to disengage completely from the sear plate, thereby releasing the hammer. Care must be taken to ensure that the hammer does not slip from under the thumb when the trigger is pulled — it is under much tension from the hammer spring. Use the thumb to lower the hammer to rest against the floor of the receiver housing. Release the trigger and return the safety lever to the “safe” position. The weapon is now safe for further disassembly.
HANDS POSITIONED TO UNCOCK HAMMER
FULL-AUTO COBRAY
FULL-AUTO COBRAY
REMOVING THE HAMMER To
remove
the hammer
from
the weapon,
locate the hammer pin and its retainer-clip (an “Eclip”). The hammer pin passes completely through the receiver, traversing from the side, through the hammer, and exiting the other side. See Figure 10A. The retainer-clip is located at the end of the hammer pin, on the exterior of the weapon. The clip is usually on the serial number side of the gun, but may be on the other, as the hammer pin may be inserted either way
;
Can LOWER RECEIVER - HAMMER
REMOVAL
A) HAMMER PIN 8) HAMMER AND SPRING ASSEMBLY C) RETAINER CUP
Using a flat-head screwdriver, or a similar object, pop the retainer clip off of the hammer pin. With this, the hammer pin may be pushed through,
and out of, the weapon. See Figure 13A. This should free the hammer, along with its spring, which may be removed by lifting up and foreward. It is important to remember how the hammer, and its LOWER RECEIVER PROFILE A) RETAINER CLIP B) SAFETY LEVER C) TRIGGER
10
associated parts, were positioned so that they may be replaced properly upon re-assembly
FULL-AUTO COBRAY
FULL-AUTO COBRAY
The hammer and the hammer spring are attached as one unit, The rest of the weapon may be
set aside at this time. The hammer and the hammer spring should be closely examined, and their relative positions noted. It is important that thay are reassembled correctly after the modificaton,
The spring may be removed by spreading it over the ends of the hammer’s axle-posts. See figure 16A. Be gentle when spreading the hammer spring to avoid bending it out of shape. The hammer is
HAMMER AND HAMMER SPRING DETAIL A) HAMMER SPRING
B) HAMMER C) AXLE
12
13
FULL-AUTO COBRAY
FULL-AUTO COBRAY
MODIFICATION OF THE HAMMER that
When cocked and ready to fire, the sear plate
governs the semi/full-auto capabilities of the M-11. It is the interaction between the hammer and the
The hammer
is the primary mechanism
catches the hook nearest the axle of the hammer,
sear plate that must be altered in order to create a full-auto weapon from the normally semi-auto M-11 Cobray. To understand how to properly modify the hammer, its interaction with the sear plate must be explained. Place the hammer on a flat surface with the “hooked” side down, as if it were in the “cocked” position in the weapon. See figure 19A.
holding the hammer back. When the trigger is depressed, the sear plate slides to the rear, disengaging the hook and releasing the hammer. The hammer then swings forward and strikes the firing pin at the rear of the bolt, firing the weapon The recoil of the discharging round causes the bolt to slide to the rear, pushing the hammer back to its original position.When the hammer
reaches this
position, and the trigger is still depressed, the sear plate catches the hook farthest from the axle of the hammer. This holds the hammer back so that only one round is discharged with each pull of the trigger. When the trigger is released, the sear plate slides forward again, catching on the hook nearest the axle of the hammer and holding the hammer ready in the “cocked” position once again. The
cycle begins again with the next pull of the trigger.
HAMMER PROFILE A) HOOK FARTHEST FROM AXLE B) HOOK NEAREST AXLE C) AXLE
14
15
FULL-AUTO COBRAY
FULL-AUTO COBRAY
Using a good metal file or a hand-held precision grinder, round-off the top and bottom edges of the end of the hook. Be careful not to remove too much metal from the end, short-ending
When all seems to work properly, clean all the parts of metal filings and lubricate properly. Be sure
to lubricate the newly ground surfaces and check for
the overall length, thereby ruining the delay. Only
burrs. Replace the hammer spring on the hammer and, with the safety ON, reassemble the weapon in
remove a little at a time, periodically replacing the hammer within the receiver to check its interaction
the reverse order of disassembly. The hammer needs
with the sear plate. The overall length of the hook should only be reduced by 1/16” to 3/32” depending upon the tolerances of the particular weapon. The hook should just barely contact the sear plate when the trigger is in the “pulled” position.
The hook should pass the sear plate with only minimal effort and slight friction. If the hook seems
to be locked down in the “cocked” position before the “upper bolt carrier assembly” may be replaced. When
the weapon is fully assembled, be certain that
it is still unloaded, move the safety to “fire” and pull the trigger. Even though dry-firing is not recommended normally, this is to ensure proper operation of the weapon. Cock the weapon again.
Sometimes the M-11 is difficult to cock after dry-
to be ground correctly but there is still a little too
firing, but this is normal. Just give the charging
much friction, use the file or grinding tool to smooth the contact surface of the sear plate (the back edge).
handle a swift, powerful pull to the rear and it should break free from any stickage. Return the weapon to the “safe” mode to begin testing.
This may be done with the sear plate still in the
weapon. Only a very minute amount of grinding should be done — just enough to take the “bite” out of the sear plate.
19
FULL-AUTO COBRAY
FULL-AUTO COBRAY
TESTING Testing should be conducted at a safe gun range or at an unpopulated area with a good backstop. Observe all normal safety precautions and follow the usual safety guidelines while testing the newly converted M-11 Cobray. Load and chamber the weapon in the normal manner. Fire the weapon, depressing the trigger until the firing stops. If the weapon dispenses all of the rounds with a single pull of the trigger, leaving none in the magazine or in the chamber, then re-load and
try some controlled
bursts.
If this,
too,
is
successful then the modification is complete. More than likely, however, one of three minor problems will occur: 1) Only one round will fire with a pull of the trigger, with another round able to be fired with the next pull, etc., just as in normal operation of the unmodified weapon. 2) Only one round will fire with the pull of the trigger, but no other rounds will fire with an additional pull of the trigger without first re-cocking the weapon, ejecting an un-fired round.
3) Only one round or a short burst will fire, necessitating a release of the trigger and another
pull, firing another short burst, and again with each subsequent pull of the trigger. The first problem is very simple. If the weapon
is acting as if it has not been modified, firing one round with each trigger pull, then the hammer has not been ground enough. To remedy this, remove the hammer again and try a little more grinding. The hook on the hammer must be down-sized a little more than it had been previously. Reassemble the weapon with the re-ground hammer and begin the testing procedure again. The second problem is a bit more complicated. If the weapon fires one round with a trigger pull, but will fire no others without first re-cocking (thereby
ejecting an un-fired round), then too much grinding has been done. If too much metal is removed from the hook of the hammer, there will not be enough interaction between it and the sear plate. This will allow the hammer to follow the bolt too closely on its return stroke, causing the hammer to fall without
enough force to fire the next round. With this, the
20
21
FULL-AUTO COBRAY
FULL-AUTO COBRAY
hammer remains forward against the rear of the bolt with a live round still in the chamber. The weapon must be re-cocked (pulling the bolt to the rear) to - lock the hammer back down, making it ready to fire again but ejecting the unfired round in the process. To remedy this problem one has a few options. The first, and easiest method is to simply start over again using a brand-new hammer. This, however, is not the most cost-effective means by which to solve the problem. The cheapest solution is to tack-ona welding bead to the ground surface, thereby building it up for another attempt at shaping and grinding. This method of reviving the overly ground hammer has been tried and works very well. The third problem is probably the most common. The weapon will fire a few rounds (a burst) with a pull of the trigger, then it will stop. Releasing and then depressing the trigger will fire another burst, and so on. The weapon may also fire a burst followed by a short delay and another burst with a single pull of the trigger. This problem is caused by slightly too much friction between the hammer and the sear plate. For the most part, the
hook on the hammer has been ground properly, but it just needs to be smoothed some. This may be done with a fine sandpaper or something similar. Also, smooth the sear plate where it contacts the ground surface. Be sure all surfaces are free of dirt and metal-filings and that they have been properly lubricated. “Bursting” does not necessarily point to a problem. The modification has a break-in period wherein only short bursts will occur. This break-in should only take about 100 rounds or so. If, aftera significant number of rounds have been put through the
weapon,
the
full-auto
function
is still not
working properly, then try the above mentioned remedy.
When all is working well, controlled bursts are possible as in a normal S M.G. An extended, highcapacity magazine is highly recommended for maximum effectiveness. The smaller standard magazines will be depleted with two or three bursts. Once all the minor adjustments are made, the M11/9 full-auto conversion is very reliable and great to shoot.