Haynes Saab 9-3 Owners Workshop Manual [4614] 1844256146, 9781844256143
Haynes Saab 9-3 Owners Workshop Manual - A. K. Legg - Haynes Publishing - 2007.
128 6 44MB
English Pages 340 Year 2007
Recommend Papers


![Haynes Saab 9-3 Owners Workshop Manual [4614]
1844256146, 9781844256143](https://ebin.pub/img/200x200/haynes-saab-9-3-owners-workshop-manual-4614-1844256146-9781844256143.jpg)
File loading please wait...
Citation preview
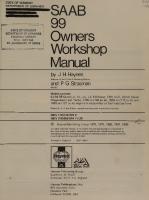
SAAB 9-3 1998 to Aug 2002 (R to 02 reg) Petrol & Diesel
4
The best selling car manuals in the world
and not forgetting... We don’t just publish car manuals, you know! In addition to the hundred million worldwide, Haynes also produce a wide range of practical books and manuals computing, caravanning, cycling and driving tuition —- and there’s our innovative as well. No matter what the subject, our essential no-nonsense, easy-to-follow Haynes
Seana anua
eves
suito youR owe
plus car manuals we have sold on subjects such as home DIVY, and highly successful Family Series approach remains the same.
Classic
Jaguar XJ6 se:
th BikeBoox
balarer he
Sai
ileey 4
APA
OAD
INR
We also publish and distribute hundreds of books and DVDs covering general motoring and transport subjects, including all aspects of motorsport, classic cars, sports cars, motorcycling, military vehicles, aviation, model cars, cycling, golf, history and much, much more. Washing
=)
NEMiuMMemene
=)
| \'/(0)\0) (r=)¢=)\F-\p) ay
Paul Frere
Check out our website at www.haynes.co.uk to find your nearest stockist or to view or download our online catalogue. All Haynes publications are available variously through car accessory shops, book stores and mail order outlets.
Haynes Publishing, Sparkford, Yeovil, Somerset BA22 7JJ, England Telephone France
(01963) 442030 ¢ E-mail
01 47 17 66 29
Sweden
[email protected] e Website
018 124016 * USA
805 498-6703 ¢ Australia
www.haynes.co.uk
613 9763-8100
Illegal Copying It is the policy of Haynes Publishing to actively protect its Copyrights and Trade Marks. Legal action will be taken - against anyone who unlawfully copies the cover or contents of this Manual. This includes all forms of unauthorised fefe) obTate iarediU(e Tare] digital, mechanical, and electronic in any form. Authorisation from Haynes Publishing will only be provided expressly and in writing. Illegal copying will also be reported to the appropriate statutory authorities in whichever jurisdiction the offence takes place.
PU ULILULLCA UIT UALUCUVRLU OSL CHETAAHLHET 3
8002
01535
6944
aab 9-3
wners Workshop Manual A K Legg ase mimi »dels covered
(4614 - 336)
supe, Hatchback & Convertible, including special/limited editions etrol: 2.0 litre (1985cc) & 2.3 litre (2290cc), inc. turbo urbo-Diesel: 2.2 litre (2171cc)
Jso covers Convertible models to August 2003 Joes NOT cover new Saab 9-3 range introduced September 2002 (Convertible September 2003)
© Haynes Publishing 2007
age FGHIJ e
A book in the Haynes Owners Workshop Manual Series
KLMNO PQRST
All rights reserved. No part of this book may be reproduced or
transmitted in any form or by any means, electronic or mechanical, inciuding photocopying, recording or by any information storage or retrieval system, without permission in writing from the copyright holder.
Printed in the USA Haynes Publishing Sparkford, Yeovil, Somerset BA22 7JJ, England
ISBN 978 1 84425 6143
Haynes North America, Inc 861 Lawrence Drive, Newbury Park, California 91320, USA
‘itish Library Cataloguing in Publication Data . . catalogue record for this book is available from the British Library.
Haynes Publishing Nordiska AB Box 1504, 751 45 UPPSALA, Sverige
Contents LIVING WITH YOUR
SAAB 9-3
Safety first!
Page
0e5
Introduction to the Saab 9-3
Page
06
If your car won’t start
Page
097
Jump starting
Page
0¢8
Wheel changing
Page
0*9
Identifying leaks
Page
0¢10
Towing
Page
Oe11
Page
0012
Roadside Repairs
Weekly Checks
COVENTRY
CITY
LIBRARIES
Introduction Underbonnet check points
Page
0e12
Page
0e13
Coolant level
Page
0°14
Brake (and clutch) fluid level
Page
0°14
Page
0°15
Engine oil level
Tyre condition and pressure
201535694
ee
Washer fluid level
Electrical systems
ee
629.222
| ise acl
a
Er
Page
0°16
Page
0°16
Battery
Page
0°17
Wiper blades
Page
0e17
Lubricants and fluids
Page 0°18
Tyre pressures
Page 0°18
MAINTENANCE Routine maintenance and servicing Petrol engine models
Page
1Ae1
MeManieianceschedios > «©... .., 0... \ | RRO SPageitaes Maintenance procedures
Page
1Ae5
Dieccronomieiodcisieimioe ss) SIN eee pen MatManicnancecchedtioy = Ct peagennes Maintenance pecedges
Ss. ja
OP.
“yl
Se
Sep
eee
eee
Illegal Copying It is the policy of Haynes Publishing to actively protect its Copyrights and Trade Marks. Legal action will be taken against anyone who unlawtully copies the cover or contents of this Manual. This includes all forms of unauthorised copying including digital, mechanical, and electronic in any form. Authorisation from Haynes Publishing will only be provided expressly and in writing. Illegal copying will also be reported to the appropriate statutory authorities.
Contents REPAIRS & OVERHAUL Engine and Associated Systems Petrol engine in-car repair procedures
Page
Diesel engine in-car repair procedures
Page
2Be1
Engine removal and overhaul procedures
Page
2Ce1
Cooling, heating and air conditioning systems
Page
3¢e1
Petrol engine fuel and exhaust systems
Page
4Ae1
Diesel engine fuel and exhaust systems
Page
4Be1
Emission control systems
Page
4Ce1
Starting and charging systems
Page
5Ae1
Ignition system — petrol engines
Page
5Be1
Preheating system — diesel engines
Page
5Ce1
Page
6¢1
2Ae1
Transmission Clutch
2
Manual transmission
Page
7Ae1
Page
7Be1
Page
8e1
Page
96e1
Page
10¢1
Bodywork and fittings
Page
11¢1
Body electrical system
Page
12¢1
Wiring diagrams
Page 12°17
Automatic transmission
:
Driveshafts
Brakes and suspension Braking system Suspension and steering systems
sa
Body equipment
REFERENCE
Page
REFe1
Conversion factors
Page
REFe2
Buying spare parts
Page
REFe3
Vehicle identification numbers
Page
REFe3
General repair procedures
Page
REFe4
Jacking and vehicle support
Page
REFe5
Disconnecting the battery
Page
REFe5
Radio/cassette unit anti-theft system — precautions
Page
REFe5
Tools and working facilities
Page
REFe6
MOT test checks
Page
REFe8
Fault finding
Page REFe12
Glossary of technical terms
Page REFe20
Index
Page REFe24
o4 Advanced Driving
Advanced driving For many people, the process of ‘learning to drive’ doesn’t go much further than learning how to pass the driving test because of a common belief that good drivers are made by ‘experience’. Learning to drive three driving skills:
[_] Quick reactions.
by ‘experience’
teaches
(Whoops, that was
close!) _] Good handling skills. (Horn, swerve,
Many people see the words ‘advanced driving’ and believe that it won’t interest them or that it is a style of driving beyond their own abilities. Nothing could be further from the truth. Advanced driving is straightforward
safe, sensible driving - the sort of driving we should all do every time we get behind the wheel. An average of 10 people are killed every day on UK roads and 870 more are injured, some seriously. Lives are ruined daily, usually because somebody did something stupid. Something like 95% of all accidents are due to human error, mostly driver failure. Sometimes we make genuine mistakes everyone does. Sometimes we have lapses of concentration. Sometimes we deliberately take risks.
brake, horn). |_|] Reliance on vehicle technology. (Great stuff this ABS, stop in no distance even in the wet...) Drivers whose skills are ‘experience based’ generally have a lot of near misses and the odd accident. The results can be seen every day in our courts and our hospital casualty
these skills, all driving situations can be approached and negotiated in a safe, methodical way, leaving nothing to chance. Concentration means applying your mind to safe driving, completely excluding anything that’s not relevant. Driving is usually the most dangerous activity that most of us undertake in our daily routines. It deserves our full attention.
Observation
means
not just looking,
but
seeing and seeking out the information found in the driving environment. Anticipation means asking yourself what is happening, what you can reasonably expect to happen and what could happen unexpectedly. (One of the commonest words used in compiling accident reports is ‘suddenly’.)
departments. Advanced drivers have learnt to control the risks by controlling the position and speed of
their vehicle. They avoid accidents and near misses, even if the drivers around them make mistakes.
The key skills of advanced driving are concentration, effective all-round observation, anticipation and planning. When good vehicle handling is added to
Planning is the link between seeing something and taking the appropriate action. For many drivers, planning is the missing link. If you want to become a safer and more skilful driver and you want to enjoy your driving more, contact the Institute of Advanced Motorists at www.iam.org.uk, phone 0208 996 9600, or write to IAM House, 510 Chiswick High Road, London W4 5RG for an information pack.
Safety First! o-s Working on your car can be dangerous. This page shows just some of the potential risks and hazards, with the aim of creating a safety-conscious attitude.
General hazards
e Mains voltage is also dangerous. Make sure that any mains-operated equipment is correctly earthed. Mains power points should be protected by a residual current device (RCD) circuit breaker.
Fume or gas intoxication
Scalding ¢ Don’t remove the radiator or expansion tank cap while the engine is hot. ¢ Engine oil, automatic transmission fluid or power steering fluid may also be dangerously hot if the engine has recently been running.
Burning ¢ Beware of burns from the exhaust system and from any part of the engine. Brake discs and drums can also be extremely hot immediately after use.
Crushing
e Exhaust fumes are poisonous; they often contain carbon monoxide, which is rapidly fatal if inhaled. Never run the engine ina confined space such as a garage with the doors shut.
ae)
\
/
=\
e Fuel vapour is also
poisonous, as are the vapours from some cleaning solvents and paint thinners.
¢ Take care if loosening or tightening hightorque nuts when the vehicle is on stands. Initial loosening and final tightening should be done with the wheels on the ground.
e Avoid skin contact with battery acid and with any fuel, fluid or lubricant, especially antifreeze, brake hydraulic fluid and Diesel fuel. Don’t syphon them by mouth. If such a substance is swallowed or gets into the eyes, seek medical advice. e Prolonged contact with used engine oil can cause skin cancer. Wear gloves or use a barrier cream if necessary. Change out of oilsoaked clothes and do not keep oily rags in your pocket. e Air conditioning refrigerant forms a poisonous gas if exposed to a naked flame (including a cigarette). It can also cause skin burns on contact.
Fire
Asbestos
¢ Fuel is highly flammable; fuel vapour is explosive. ¢ Don’t let fuel spill onto a hot engine.
e Asbestos dust can cause cancer if inhaled or swallowed. Asbestos may be found in gaskets and in brake and clutch linings. When dealing with such components it is safest to assume that they contain asbestos.
venture under a car which is only supported by a jack.
¢ Do not smoke or allow naked lights (including pilot lights) anywhere near a vehicle being worked on. Also beware of creating sparks (electrically or by use of tools). ¢ Fuel vapour is heavier than air, so don’t work on the fuel system with the vehicle over an inspection pit. ¢ Another cause of fire is an electrical overload or short-circuit. Take care when repairing or modifying the vehicle wiring. ¢ Keep a fire extinguisher handy, of a type suitable for use on fuel and electrical fires.
Electric shock
* Ignition HT voltage canbe
>
Be ype
eae
Ug
ad
dangerous,
especially to people with heart
aig
problems or a pacemaker. Don’t work on or near the
Big ee
the engine running or the ignition switched on.
é 3
exposed to temperatures above 400°C. The rubber changes into a charred or sticky substance containing the acid. Once formed, the acid remains dangerous for years. If it gets onto the skin, it may be necessary to amputate the limb concerned. ¢ When dealing with a vehicle which has suffered a fire, or with components salvaged from such a vehicle, wear protective gloves and discard them after use.
The battery e Batteries contain sulphuric acid, which
attacks clothing, eyes and skin. Take care when topping-up or carrying the battery. e The hydrogen gas given off by the battery is highly explosive. Never cause a spark or allow a naked light nearby. Be careful when connecting and disconnecting battery chargers or jump leads.
Air bags e Air bags can cause injury if they go off accidentally. Take care when removing the steering wheel and/or facia. Special storage instructions may apply.
Diesel injection equipment e Diesel injection pumps supply fuel at very high pressure. Take care when working on the fuel injectors and fuel pipes. Warning: Never expose the hands, face or any other part of the body to injector spray; the fuel can penetrate the skin with potentially fatal results.
Remember... DO
DON’T
© Do use eye protection when using power tools, and when working under the vehicle.
© Don’t attempt to lift a heavy component which may be beyond your capability — get assistance.
° Do wear gloves or use barrier cream to protect your hands when necessary. * Do get someone to check periodically that all is well when working alone on the vehicle. ¢ Do keep loose clothing and long hair well out of the way of moving mechanical parts. ° Do remove rings, wristwatch etc, before working on the vehicle — especially the electrical system.
_¢
ignition system with
ve
Hydrofluoric acid ° This extremely corrosive acid is formed when certain types of synthetic rubber, found in some O-rings, oil seals, fuel hoses etc, are
Poisonous or irritant substances
¢ When working under or near a raised vehicle, always supplement the jack with axle stands, or use drive-on
Special hazards
e Do ensure that any lifting or jacking equipment has a safe working load rating adequate for the job.
© Don’t rush to finish a job, or take unverified short cuts.
¢ Don’t use ill-fitting tools which may slip and cause injury. ¢ Don’t leave tools or parts lying around where someone can trip over them. Mop up oil and fuel spills at once. © Don’t allow children or pets to play in or near a vehicle being worked on.
oe¢ Introduction to the Saab 9-3
Saab 9-3 Convertible
The Saab 9-3 was introduced in the UK in March 1998, as a replacement for the 900. It is based on the Vauxhall Vectra chassis, and is available as a 2-door Convertible, 3-door Coupe, or 5-door Hatchback. Petrol engines available are 2.0 litre and 2.3 litre, both turbo and non-turbo, and the diesel engine is a 2.2 litre turbo. The petrol engine has two chain-driven overhead camshafts (DOHC) with 16 valves acting on hydraulic tappets, and a balancer shaft. The diesel engine has a chaindriven, single overhead camshaft (SOHC) with16 valves acting on hydraulic tappets. Standard equipment includes powerassisted steering, anti-lock brakes, remote deadlock central locking, twin front and side airbags, electric windows and mirrors, and air conditioning. Optional extras include electric sunroof, electric front seats, leather upholstery and CD autochanger. Models may be fitted with a five-speed
manual transmission or four-speed automatic transmission mounted on the left-hand side of the engine. All models have front-wheel-drive with fully-independent front and rear suspension, incorporating
struts,
gas-filled
shock
absorbers, and coil springs. For the home mechanic, the Saab 9-3 is a relatively straightforward vehicle to maintain and repair, since design features have been incorporated to reduce the actual cost of ownership to a minimum, and most of the items requiring frequent attention are easily accessible.
Your Saab 9-3 manual The aim of this manual is to help you get the best value from your vehicle. It can do so in several ways. It can help you decide what work must be done (even should you choose to get it done by a garage), provide information on
routine maintenance and servicing, and give a logical course of action and diagnosis when random faults occur. However, it is hoped that you will use the manual by tackling the work yourself. On simpler jobs, it may even be quicker than booking the car into a garage and going there twice, to leave and collect it. Perhaps most important, a lot of money can be saved by avoiding the costs a garage must charge to cover its labour and overheads. The manual has drawings and descriptions to show the. function of the various components, so that their layout can be understood. Then the tasks are described and photographed in a clear step-by-step sequence. References to the ‘left’ or ‘right’ are in the sense of a person in the driver’s seat, facing forward.
Acknowledgements Thanks are also due to Draper Tools Limited, who provided some of the workshop tools, and to all those people at Sparkford who helped in the production of this manual. We take great pride in the accuracy of information given in this manual, but vehicle manufacturers make alterations and design changes during the production run of a particular vehicle of which they do not inform us. No liability can be accepted by the authors or publishers for loss, damage or injury caused by any errors in, or omissions from, the information-given.
Project vehicle The main vehicle used in the preparation of this manual, and which appears in many of the Saab 9-3 Hatchback
photographic sequences, was a 2001 Saab SE Convertible fitted with the 2.0 litre turbocharged petrol engine and automatic transmission.
Roadside repairs o-7 The following Pages are intended to help in dealing with common roadside emergencies and breakdowns. You will find more detailed fault finding information at the back of the manual, and repair information in the main chapters.
If your car won’t3 start and the starter motor doesn’tP| turn
If your car won’t] start even though the starter motor turns as normal
|]
Is there fuel in the tank? || Is there any moisture on electrical components under the bonnet? Switch off the ignition, then wipe off any obvious dampness with a dry cloth. Spray a water-repellent aerosol product (WD-40 or equivalent) on ignition and fuel system electrical connectors.
Open the bonnet and make sure that the battery terminals are clean and tight. Switch on the headlights and try to start the engine. If the headlights go very dim when you're trying to start, the battery is probably flat. Get out of trouble by jump starting (see next page) using a friend’s car.
Check that the ignition discharge module wiring is securely connected.
Check that the mass airflow meter wiring is securely connected.
Check the engine wiring loom multiplugs for security.
Check that electrical connections are secure (with the ignition switched off) and spray them with a water-dispersant spray like WD-40 if you suspect a problem due to damp
of the that none Check compartment fuses have blown.
engine
os Roadside repairs Jump starting
APNasaay
When jump-starting a car using a booster battery, observe the following precautions:
Vv
Vv
Before connecting the booster battery, make sure that the ignition is switched off.
A
HINT
If the battery is being jump-started from the battery in another vehicle, the two vehicles MUST NOT TOUCH each other.
leaving the lights on.
Make sure that the transmission is in neutral (or PARK, in the case of automatic transmission).
alternator itself faulty).
The charging system is not working properly (alternator drivebeit slack or broken, alternator wiring fault or
v
‘se
of trouble, but you must correct whatever made the battery go flat in the first place. There are three possibilities: The battery has been drained by
Make sure that the booster battery is the same voltage as the discharged one in the vehicle.
repeated attempts to start, or by
Ensure that all electrical equipment (lights, heater, wipers, etc) is switched off. Take note of any special precautions printed on the battery case.
Jump starting will get you out
3 battery itself is at fault (electrolyte low, or battery worn out).
Se
Connect one end of the red jump lead to the positive (+) terminal of the flat # battery
Connect the other end of the red lead to
| the positive (+) terminal of the booster battery.
Connect one end of the black jump lead to the negative (-) terminal of the booster battery
Connect the other end of the black jump lead to a suitable metal part of the engine on the car to be started ST
— ‘heaps
Make sure that the jump leads will not come into contact with the fan, drivebelts or other moving parts of the engine.
Start the engine using the booster battery and run it at idle speed. Switch on the lights, rear window demister and heater blower motor, then disconnect the jump leads in the reverse order of connection. Turn off the lights etc.
Roadside repairs o-9
Wheel changing
AN
Warning: Do not change a wheel in a situation where you risk being hit by another vehicle. On busy roads, try to stop in a lay-by or a gateway. Be wary of passing traffic while changing the wheel - it is easy to become distracted by the job in hand.
Preparation When a puncture occurs, stop as soon as it is safe to do so. Park on firm level ground, if possible, and well out of the way of other traffic. Use hazard warning lights if necessary.
If you have one, use a warning triangle to alert other drivers of your presence. Apply the handbrake and engage first or reverse gear (or Park on models with automatic transmission).
Chock the wheel diagonally opposite the one being removed — a couple of large stones will do for this. If the ground is soft, use a flat piece of wood to spread the load under the jack.
Changing the wheel
ee
J
The spare wheel, jack and wheel removal tools are stored beneath a cover in the
luggage compartment.
Before you raise the car, loosen each wheel bolt by half a turn only.
Unscrew the retaining nut and lift out the spare wheel. Place it beneath the sill as a precaution against the jack failing. Note that the spare wheel is of the ‘space saver’ type.
Locate the jack head below the reinforced jacking points (indicated by the cut-outs in the sill), nearest the wheel to be changed. Turn the handle until the base of the jack touches the ground then make sure that the base is located directly below the sill. Raise the vehicle until the wheel is clear of the ground.
Where fitted, pull the wheel trim from the wheel. On models with alloy wheels, use the plastic tool provided to prise the cap from the locking wheel bolt, then fit the special
adapter.
.
If the tyre is flat make sure that the vehicle is raised sufficiently to allow the spare wheel to be fitted. Remove the bolts and lift the wheel from the vehicle. Place it beneath the sill in place of the spare as a precaution
against the jack failing.
Finally... Remove the wheel chocks. Stow the jack and tools in the correct locations in the car. Check the tyre pressure on the wheel just fitted. If it is low, or if you don’t have a pressure gauge with you, drive slowly to the nearest garage and inflate the tyre to the right pressure.
[_] Have the damaged tyre or wheel repaired as soon as possible. 7 Fit the spare wheel, then insert each of the wheel bolts and tighten them moderately using the wheel brace.
Lower the vehicle to finally tighten the wheel sequence. Note that should be tightened to the the earliest opportunity.
the ground, then bolts in a diagonal the wheel bolts specified torque at
(
Warning: You should not exceed 50 mph when driving the vehicle with a space saver spare wheel fitted - consult your vehicle handbook for further information.
o10 Roadside repairs Identifying leaks Puddles on the garage floor or drive, or obvious wetness under the bonnet or underneath the car, suggest a leak that needs investigating. It can sometimes be difficult to
Warning: Most automotive oils and fluids are poisonous. Wash them off skin, and change out of contaminated clothing,
decide where the
without delay.
leak is coming
from,
especially if the engine bay is very dirty already. Leaking oil or fluid can also be blown rearwards by the passage of air under the car, giving a false impression of where the problem lies.
Sump oil
ay
7 Okina S Hines he od de : clue to what's leaking. Some fluids are distinctively enlourod.
It may help to clean the car carefully and to park it over some clean paper overnight as an aid to locating the source of the leak. Remember that some leaks may only
occur while the engine is running.
Oil from filter
Gearbox oil
...or from the base of the oil filter.
Gearbox oil can leak from the seals at the
feat
cl
Engine oil may leak from the drain plug...
pees
inboard ends of the driveshafts.
Antifreeze
Brake fluid
Power steering fluid St TE
Leaking antifreeze often leaves a crystalline deposit like this.
A leak occurring at a wheel is almost certainly brake fluid.
Power steering fluid may leak from the pipe connectors on the steering rack.
Roadside Repairs 0«11 Towing When all else fails, you may find yourself having to get a tow home - or of course you may be helping somebody else. Long-distance recovery should only be done by a garage or breakdown service. For shorter distances, DIY towing using another car is easy enough, but observe the following points: e The front towing eye is behind the vent grille on the right-hand side of the front bumper. Squeeze together the horizontal bars to remove the grille (see illustration). e The rear towing eye is provided beneath the rear of the vehicle (see illustration). e Use
a proper
tow-rope
—- they are
not
expensive. The vehicle being towed must display an ON TOW sign in its rear window. e Always turn the ignition key to the ‘on’ position when the vehicle is being towed, so that the steering lock is released, and that the direction indicator and brake lights will work.
Front towing eye
® Only attach the tow-rope to the towing eyes provided. The front towing eye is in the vehicle tool kit, and screws into the hole in the subframe; use the wheel brace to fully tighten the eye. The rear towing eye is located beneath the centre of the rear bumper and is permanently fitted. © Before being towed, release the handbrake and select neutral on the transmission. On models with automatic transmission, special precautions apply, as follows (if in doubt, do not tow, or transmission damage may result):
a) The car may only be towed in the forward direction. b) The gear selector lever must be in the N position. c) The vehicle must not be towed at a speed exceeding 30 mph, nor for a distance of more than 30 miles. © Note that greater-than-usual pedal pressure
will be required to operate the brakes, since the vacuum servo unit is only operational with the engine running. e Since the power steering will not be functional, greater-than-usual steering effort will also be required. e The driver of the car being towed must keep the tow-rope taut at all times to avoid snatching. e Make sure that both drivers know the route before setting off. © Only drive at moderate speeds and keep the distance towed to a minimum. Drive smoothly and allow plenty of time for slowing down at junctions. © The driver of the towing vehicle must accelerate very gently from a standstill and must bear in mind the extra length of the vehicle being towed when pulling out at junctions, roundabouts, etc.
Rear towing eye
o-12 Prelims
Introduction There are some very simple checks which need only take a few minutes to carry out, but which could save you much inconvenience and expense. These Weekly Checks require no great skill or special tools, and the small amount of time they take to perform could well prove to be very well spent, for example:
[_|Keeping an eye on tyre condition and pressures, will not only help to stop them wearing out prematurely, but could also save your life. [ |Many breakdowns are caused by electrical problems. Battery-related faults are particularly common, and a quick check on a regular basis will often prevent the majority of these.
lf your car develops a brake fluid leak, the first time you might know about it is when your brakes don’t work properly. Checking the level regularly will give advance warning of this kind of problem. If the oil or coolant levels run low, the cost of repairing any engine damage will be far greater than fixing the leak.
Underbonnet check points dewbayaealls
1.9 litres
Cooling system Antifreeze mixture”: SOV AMESPAD 0.dnc. cia PORMOORS Otoko dae REE RARE c= ee I O/ONCIMIERT OOZES Pent wn rete*Lele stores, TO) LOGIE cS: SRB Ge el SOROS eC Reece ee Right-hand engine mounting: WOMTUMGI COVE lanmrent eyamar te. Sasin oe mics ayant oes fice ieke sae HQMOOG Vamenta errr te«rere Ghee he ees 5,arate wastes ia Fle Snages,cers To bracket: SMEG | dire cad vite S Ble SES DIS ORES HOE eee cae at ee en
SLAC Seer Ren CaStop AA. Xeuegtosiets icy efrigey 5 llc)ShanesSoka uoraayra Left-hand engine mounting: BracKemtonhenshlsslOnmpean as testes cis mechanic DIY BQ | some experience
SN By EN
é
Specifications General Briveshatt LVOCme
saunas
Steel shafts with outer constant velocity joints and inner tripod joints. Intermediate shaft from right-hand side of transmission to driveshaft Use only special grease supplied in sachets with gaiter/overhaul kits; joints are otherwise prepacked with grease and sealed
ela Ase ae Se isihotieel o
Lubrication (overhaul or repair only)........--
Joint grease quantity wictstele clove: Be ooo ees Damepercecrtn Orc Outs piOink eeeemieb easiness oe levels $\-)k Snes Vata > ok ee Se Nigh ks[OUItN i eens etc
80g
Torque wrench settings
Nm 290
Ibf ft 214
170
125
ee aes Driveshaft/hub nut (without groove)........-- Ot Driveshaft/hub nut (with top groove): Seer eS ee eoee kere ae he Meakdid Geers Ee en re cee eae aren Sneed Sel (IO ee Ree ane Intermediate driveshaft bracket-to-engine bolts SD, BMS ee ene as cee ere ioe USO Pa Se Nate svete A
4
General information
Power is transmitted from the transmission final drive to the roadwheels by the driveshafts. The outer joints on all models are of ‘constant velocity’ (CV) type, consisting of six balls running in axial grooves. The driveshaft outer joints incorporate stub axles which are splined to the hubs located in the front suspension hub carriers. The inner ‘universal’ joints are designed to move in a smaller arc than the outer CV joints, and can also move axially to allow for movements of the front suspension. They are of tripod type consisting of a threearmed ‘spider’ with needle bearings and outer race, splined to the driveshaft, and an outer
175g
Angle-tighten a further 45°
housing with three corresponding cut-outs for the bearing races to slide in. An intermediate shaft, with its own support bearing, is fitted between the transmission and right-hand driveshaft - a design which equalises driveshaft angles at all suspension positions,
and
18 81
24 110
reduces
driveshaft
flexing,
improving directional stability under hard acceleration. On 2.3 litre turbo petrol engine models, the intermediate shaft has splines on its outer end, to engage the inner joint of the driveshaft, however, on all other models, the driveshaft inner joint housing and intermediate shaft are integral. The universal and CV joints allow smooth transmission of drive to the wheels at all steering and suspension angles. The joints are protected by rubber gaiters, and are packed with grease to provide permanent lubrication. In the event of wear being detected, the joint
can be renewed separately from the driveshaft. The joints do not require additional lubrication, unless they have been renovated or the rubber gaiters have been damaged, allowing the grease to become contaminated. Refer to Chapter 1A or 1B for details of checking the condition of the driveshaft gaiters.
2
Driveshafts removal and refitting
Hii Removal 4 Park the vehicle on a level surface, apply the handbrake and chock the rear wheels. 2 Remove the wheel trim (or wheel centre cap for vehicles fitted with alloy wheels), then loosen the driveshaft nut, bearing in mind
‘ 4
-8e2 Driveshafts Pee
ree
en
ee
ee
ee
the driveshaft itself, otherwise the gaiter may be damaged. 9 To remove the right-hand side driveshaft on 2.3 litre turbo petrol engine models, pull the inner joint stub from the splines in the intermediate shaft. If necessary, use a lever to help release the internal circlip from the
groove. 10
2.4 Unscrewing the driveshaft nut
the high torque to which this nut is tightened -— select a sturdy wrench and close-fitting socket to loosen it. 3 Apply the handbrake, then jack up the front of the vehicle and support it on axle stands (see Jacking and vehicle support). Remove the roadwheel. 4 Unscrew and remove the driveshaft nut (see illustration). Discard the nut and obtain a new one which will have top grooves on it. 5 Unscrew the nut securing the anti-roll bar to the lower suspension arm support bar, and remove the washer and rubber bush. 6 Unscrew the nut, then disconnect the lower arm balljoint from the hub carrier/strut using a balljoint separator tool (see Chapter 10).
On all diesel models, and petrol models
except the 2.3 litre turbo petrol engine, the right-hand driveshaft inner joint housing forms part of the intermediate shaft (see Section 5), and the driveshaft is removed by separating the outer section at the inner joint. Mark the inner joint housing and driveshaft in relation to each other, then loosen the clip, ease off the rubber gaiter, and pull the tripod out of the housing.
Refitting
in the transmission side gear, in which case careful use of a lever against the transmission casing will be required. Lever against a block of wood to prevent damage to the casing, and take care not to damage the oil seal as the driveshaft is being removed (see illustration). Note: Pull only on the inner joint housing, not
11 Where applicable, check the condition of the circlip on the inner end of the driveshaft and, if necessary, renew it (see illustration). 12 Clean the splines on each end of the driveshaft and in the hub, and where applicable wipe clean the oil seal in the transmission casing. Check the oil seal and if necessary renew it as described in Chapter 7A or 7B. Smear a little oil on the lips of the oil seal before fitting the driveshaft. 13 To refit the outer section of the righthand driveshaft where removed separately, fill the inner joint with the specified quantity of grease, then locate the driveshaft tripod into the housing, aligning the previously-made marks. Ease the gaiter onto the housing, and refit the clip. 14 To refit the right-hand side driveshaft on 2.3 litre turbo petrol engine models, locate the inner joint stub into the splines in the intermediate shaft, and press in until the internal circlip engages the groove. 15 To refit the left-hand driveshaft, locate the inner end of the driveshaft into the transmission — turn the driveshaft as necessary to engage the splines. Press in the driveshaft until the internal circlip engages the groove. Check that the circlip is engaged by attempting to pull out the driveshaft with only moderate force. 16 Engage the outer end of the driveshaft with the splines in the hub, then press down the lower suspension arm and guide the bottom
2.7 Removing the driveshaft from the splines in the hub
2.8 Withdrawing the driveshaft from the transmission
Press the lower suspension arm down as far _ as possible, and move the hub carrier/strut to one side. Take care not to damage the balljoint rubber boot, and do not strain the brake hoses and brake pad wear warning wiring. Note: Discard the balljoint nut as it must not be reused. Obtain a new one. 7 Using a mallet, carefully tap the driveshaft inwards from the splines in the hub while pulling out the bottom of the strut (see illustration). 8 To remove the left-hand side driveshaft, position a container beneath the transmission to catch spilt oil, then pull out the driveshaft.
The internal driveshaft circlip may be tight
ee
of the hub carrier/strut onto the balljoint on the lower arm. Screw on the new nut and tighten to the specified torque (see Chapter 10). 17 Insert the anti-roll bar mounting in the lower arm support bar, then fit the rubber bush and washer and tighten the nut to the specified torque (see Chapter 10). 18 Screw on the new driveshaft nut and tighten just moderately at this stage. 19 Check and if necessary top-up the transmission oil/fluid level with reference to Chapter 1A or 1B. 20 Refit the roadwheel, then lower the vehicle to the ground and tighten the bolts to the specified torque. 21 Fully tighten the driveshaft nut to the specified torque and angle, and refit the wheel trim/cap.
3
Driveshafts - inspection, joint 2 renewal and cleaning
HE:
Inspection 1 If any of the checks described in Chapter 1A or 1B reveal apparent excessive wear
or play, first check that the hub nut (driveshaft outer nut) is tightened to the specified torque. Repeat this check on the hub nut on the other side. 2 To check for driveshaft wear, road test the vehicle, driving it slowly in a circle on full steering lock (carry out the test on both left and right lock), while listening for a metallic clicking or knocking sound coming from the front wheels. An assistant in the passenger seat can listen for the sound from the nearside joint. If such a sound is heard, this indicates wear in the outer joint. 3 If vibration proportional to roadspeed is felt through the car when accelerating or on overrun, there is a possibility of wear in the inner joints. For a more thorough check, remove and dismantle the driveshafts where possible as described in the following sub-Sections. Refer to a Saab dealer for information on the availability of driveshaft components. 4 Continual noise from the area of the righthand driveshaft, increasing with roadspeed, may indicate wear in the support bearing.
2.11
Checking the circlip on the inner end of the driveshaft
Driveshafts
3.6 Remove the clip...
3.7 ... release the rubber gaiter from the joint housing...
3.9a
8¢3
... then use circlip pliers to open the circlip...
Outer joint renewal ' 5 Remove the driveshaft as described in Section 2, then thoroughly clean it and mount it in a vice. It is important that foreign matter, such as dust and dirt, are prevented from entering the joint. 6 Release the large clip securing the rubber gaiter to the outer joint housing (see illustration), then similarly release the small clip securing the rubber gaiter to the driveshaft. Note the fitted position of the gaiter. 7 Slide the rubber gaiter along the driveshaft, away from the joint (see illustration). Scoop out as much of the grease as possible from the joint and gaiter. 8 Using a dab of paint, mark the outer joint and driveshaft in relation to each other to ensure correct refitting. 9 Using circlip pliers at the inner end of the joint, open the circlip then slide the joint from the end of the driveshaft (see illustrations). If it is tight, use a hammer and soft drift to tap the joint hub from the splines. Note that on later models, it may not be necessary to open the circlip, as it will release from the driveshaft as the joint is being tapped off. 40
With the joint removed,
slide the rubber
gaiter and small clip from the driveshaft (see illustration). Check the rubber gaiter for cracks or slits, and renew it if necessary.
3.11
3.9b ... and slide the outer joint from the end of the driveshaft
3.10 Removing the outer rubber gaiter
141 Thoroughly clean the splines of the driveshaft and outer joint, and also the rubber gaiter contact surfaces. If the joint has been contaminated with road grit or water, it must be dismantled and cleaned as described later in this Section. Check the condition of the circlip which is captive in the outer joint, and renew it if necessary (see illustration). 12 Locate the gaiter, together with small clip, on the outer end of the driveshaft. Smear a little grease onto the driveshaft to facilitate
14 Locate the outer joint onto the driveshaft splines in its previously-noted position, and press it on until the internal circlip engages with the groove. 15 Reposition the rubber gaiter onto the joint outer housing in its previously-noted position, then refit the two clips. Tighten the clips securely. 16 Refit the driveshaft with reference to Section 2.
this. 13 Pack the joint with the specified quantity of grease, working it well into the cavities of the housing (see illustration).
The circlip is captive in the outer joint
Inner joint renewal 47 Remove the driveshaft as described in Section 2 and, on all diesel models, and petrol models except the 2.3 litre turbo,
3.13 Pack the CV joint with grease from the service kit
8°4
Driveshafts 29 To dismantle the outer joint, mount it vertically in a soft-jawed vice, then turn the splined hub and ball cage so that the balls can be removed individually. Remove the hub followed by the ball cage. 30 The inner joint is dismantled during removal, and, the tripod joint bearings should be washed in suitable solvent to remove all traces of grease. 31 Thoroughly clean the inner and outer joint
oA 3.20a
Remove the circlip...
remove the inner joint housing/intermediate shaft as described in Section 5. On 2.3 litre turbo models, mark the inner joint housing and driveshaft in relation to each other, then loosen the clip, ease off the rubber gaiter, and pull the tripod out of the housing. 18 Release the small clip securing the rubber gaiter to the driveshaft. Note the fitted position of the gaiter. Where the original factory gaiter is fitted, it will be necessary to bend up the metal plate to release it from the joint housing, however, it is not necessary to bend the plate down for the refitting procedure. 19 Slide the rubber gaiter along the driveshaft, away from the joint. Scoop out as much of the grease as possible from the joint and gaiter. 20 Mark the driveshaft and tripod in relation to each other using a centre-punch or dab of paint. Using circlip pliers, expand and remove the circlip from the end of the driveshaft, then use a puller to remove the tripod together with the needle roller bearings (see illustrations). Note that the chamfered edge of the tripod faces the centre of the driveshaft. 21 Slide the rubber gaiter and small clip from the driveshaft. Check the rubber gaiter for cracks or slits, and renew it if necessary. 22 Thoroughly clean the splines of the driveshaft and inner joint, and also the rubber gaiter contact surfaces. If the joint has been exposed to road grit or water, it should be thoroughly cleaned as described later in this Section. Check the condition of the circlip and renew it if necessary. Check that the three tripod bearings are free to rotate without
3.20b ... then use a puller to remove the spider from the driveshaft splines
resistance, and that they are not excessively worn. 23 Locate the gaiter, together with small clip, on the inner end of the driveshaft in its
previously-noted position. Smear a little grease onto the driveshaft to facilitate this. Tighten the small clip. 24 Locate the tripod on the driveshaft splines, chamfered edge first, making sure that the previously-made marks are aligned (see illustration). Using a socket or metal tube, drive the tripod fully onto the driveshaft, then refit the circlip, making sure that it is correctly located in its groove. 25 Pack the tripod joint and inner joint housing with the specified quantity of grease, working it well into the bearings. 26 On all diesel models, and petrol models except the 2.3 litre turbo, refit the inner joint housing/intermediate shaft with reference to Section 5. On 2.3 litre turbo models, locate the inner joint housing onto the tripod in its previously-noted position. Reposition the rubber gaiter onto the inner joint housing in its previously-noted position, then refit and tighten the clip. If crimp-type clips are being fitted, use a Crimping tool to tighten them (see illustration). 27 Refit the driveshaft with reference to Section 2.
Joint cleaning 28 Where a joint has been contaminated with road grit or water through a damaged rubber gaiter, the joint should be completely dismantled and cleaned. Remove the joint as described previously in this Section.
housings, together with the ball-bearings, cages and hubs, removing all traces of grease and foreign matter. 32 To reassemble the outer joint, first insert the cage, followed by the splined hub. Manoeuvre the hub and carrier so that the balls can be inserted one at a time.
4 Driveshaft gaiters - renewal
oe
x
Aw ~w 1 Obtain a kit comprising new gaiters and retaining clips from a Saab dealer or motor factor. 2 Removal and refitting of the gaiters is described in Section 3.
5
Intermediate driveshaft and support bearing assembly removal, overhaul and refitting
S x ~
Removal 1 Apply the handbrake, then jack up the front of the vehicle and support it on axle stands (see Jacking and vehicle support). Remove the right-hand front roadwheel. 2 Working under the right-hand wheel arch, undo the fasteners and remove the splash cover for access to the right-hand side of the engine.
Petrol engine models 3 Disconnect the battery negative lead (refer to Disconnecting the battery in the Reference Chapter at the end of this manual). 4 In the engine compartment, remove the engine top cover. 5 On RHD models only, unbolt the engine compartment stay between the front suspension strut towers.
H31091
3.24 On the inner joint, make sure that the chamfer is located against the inner shoulder on the driveshaft
3.26 Using a crimping tool to tighten the gaiter clips
6 Note the fitted routing of the auxiliary drivebelt, and mark it with an arrow to indicate its normal running direction. 7 Using a square-drive extension bar, turn the tensioner clockwise to release its tension, then slip the auxiliary drivebelt off of the crankshaft, alternator, air conditioning compressor and idler pulleys. Release the tensioner. 8 Using an 8.0 mm Allen key, unbolt the tensioner from the engine. Also, unscrew and remove the alternator upper mounting bolt. 9 Unscrew the nut securing the anti-roll bar to the lower suspension arm support bar, and remove the washer and rubber bush. 10 Unscrew the nut, then disconnect the lower
Driveshafts
5.11
Intermediate driveshaft dust seal
arm balljoint from the hub carrier/strut using , a balljoint separator tool (see Chapter 10). Press the lower suspension arm down as far as possible, and move the hub carrier/strut to one side; use a block of wood to hold the lower arm down. Take care not to damage the balljoint rubber boot, and do not strain the brake hoses and brake pad wear warning wiring. 41 On 2.3 litre turbo models, pull the inner joint stub from the splines in the intermediate shaft, and support the driveshaft to one side. lf necessary, use a lever to help release the internal circlip from the groove. Note that the bearing dust seal may have come away with the driveshaft (see illustration). 42 On models except the 2.3 litre turbo, mark the driveshaft inner joint housing and driveshaft in relation to each other, then loosen the clip, ease off the rubber gaiter, and pull the tripod out of the housing. Support the driveshaft to one side, and cover to prevent dust and dirt entry into the joint. 413 On the rear of the alternator, unscrew the nuts and disconnect the battery positive cable together with the warning light cable. 14 Unscrew the alternator lower mounting bolt and position the alternator to one side (refer to Chapter 5A if necessary).
Diesel engine models 45 Unscrew the nut securing the anti-roll bar to the lower suspension arm support bar, and remove the washer and rubber bush. 46Unscrew the nut, then disconnect the lower arm balljoint from the hub carrier/strut using a balljoint separator tool (see Chapter 10). Press the lower suspension arm down as far as possible, and move the hub carrier/strut to one side; use a block of wood to hold the lower arm down. Take care not to damage the balljoint rubber boot, and do not strain the brake hoses and brake pad wear warning
wiring. 47 Mark the driveshaft inner joint housing and driveshaft in relation to each other, then loosen the clip, ease off the rubber gaiter, and pull the tripod out of the housing. Support the
5.19 Intermediate driveshaft support bearing bracket bolts driveshaft to one side, and cover to prevent dust and dirt entry into the joint.
All models 18 Position a container beneath the transmission to catch spilled oil/fluid when the intermediate shaft is removed. 19 Unscrew the bolts securing the support bearing bracket to the rear of the cylinder block (see illustration). 20 Using a screwdriver, lever the bracket away from the dowels on the cylinder block, then withdraw the intermediate driveshaft from the splined sun gear in the transmission (see illustration).
Overhaul 21 The intermediate shaft must now be removed from the bearing. On 2.3 litre turbo petrol engine models, use circlip pliers to extract the outer small circlip from the end
of the intermediate shaft, then support the
bracket in a vice, and press or drive out the shaft. If the shaft is being renewed, extract the inner small circlip from the shaft as well (see illustrations). On all other models, extract the small inner circlip from the shaft, support the bracket and drive out the shaft from the transmission end. 22 Using circlip pliers, extract the large circlip securing the bearing in the bracket. The bearing must now be pressed or driven out of the bracket. Support the bracket in a vice to do this.
5.21a
Intermediate shaft bearing small circlip (A) and large circlip (B)
8¢5
5.20 Removing the intermediate driveshaft from the transmission 23 Support the bracket with its open end upwards, then locate the new bearing and press or drive it fully in using a metal tube on the outer race. Fit the large circlip to secure the bearing in the bracket. 24 On 2.3 litre turbo petrol engine models, refit the small circlip to the driveshaft, mount the intermediate shaft in a vice, then refit the bearing with bracket onto the driveshaft and press or drive on the bearing inner race until it contacts the circlip. Make sure that the bracket is fitted the correct way round, and press only on the inner race. Refit the small circlip in the groove, making sure that the concave side faces the bearing, then fit a new dust seal over the outer end of the bearing. 25 On models except the 2.3 litre turbo, support the inner bearing race on a metal tube, then press or drive the intermediate shaft fully into the bearing. Make sure the shaft is fitted the correct way round. Refit the small inner circlip.
Refitting 26 Refitting is a reversal of removal, but note the following additional points: a) Check the transmission oil seals and if necessary renew them with reference to Chapter 7A or 7B. b) Tighten all mounting nuts/bolts to the specified torque, where given. c) Top-up the transmission oil/fluid with reference to Chapter 1A or 1B.
5.21b
Inner small circlip on the driveshaft
Qet
Chapter 9 Braking system Contents
Section number
Section number
: Anti-lock Braking System (ABS) components — general information and fault finding .............0.e eee eee 22 Anti-lock Braking System (ABS) components — ‘Geel neh cas Gs oo on ne reo wNRIponeee oy oseb cer ok 23 Brake Wid l6Vel CHECK icmusieye «wk Glee aca me ae See Weekly checks Brake TMG Kame Walle: crras selene acca sieawle Tes See Chapter 1A or 1B eee eee ee eee 20 Brake pedal — removal and refitting ............. 6 Front brake caliper - removal, overhaul and refitting............. 8 Front brake disc — inspection, removal and refitting ............. Front brake pad wear check ............-.. See Chapter 1A or 1B 4 tees eee 2... 6... cee eee Front brake pads — renewal... 1 CHELAlIMONMaLION) axe reeyemle «aie a staeocmcaies ama ewe ce eee 5... cece ee eee eee eee ee 16 Handbrake — adjustment ......... Handbrake cables — removal and refitting ...........---+0.0+5- Uz Handbrake lever — removal and refitting.............0--+eeeees 18
Handbrake ON warning light switch - removal, testing and refitting Handbrake shoes — inspection, removal and refitting ..........-. 1... +++ +se seer rere eens Hydraulic pipes and hoses — renewal... eee e teeters esses..-1. .... bleeding — system Hydraulic Master cylinder - removal, overhaul and refitting ............+-+Rear brake caliper — removal, overhaul and refitting......-....-. Rear brake disc — inspection, removal and refitting............--. Rear brake pad wear check........-.---+5:: See Chapter 1A or eee Rear brake pads — renewal. ... 0.00.6 cece ee eee eee Stop-light switch - removal, testing and refitting............++-+: Vacuum pump (electric) - removal and refitting.....-.....+++++: Vacuum pump (mechanical) - removal and refitting .........---Vacuum servo unit — testing, removal and refitting ............-. Vacuum servo unit non-return valve — removal, testing and refitting
19 10 3 2 11 7 9 1B 5 21 14 15 13 12
Degrees of difficulty Easy, suitable for novice with little experience
Fairly easy, suitable for beginner with some experience
Ax
Fairly difficult,
SS
Difficult, suitable
SS | Very difficult, w suitable for expert
suitable for competent SN for experienced DIY Ww DIY mechanic
mw
mechanic
x
DIY or professional
Specifications General Brake system type and layout: le wb OREN SONORA SER {i6)GAUGE oan "SBY6
FTI
ee
ea
oI
ccc
kg
RES
Oe
Loe
ene ites coke oe oicir 2 Ei mile! eg 4 =
Diagonally-split dual hydraulic circuits; front left/rear right and front right/rear left. Discs fitted front and rear, ventilated at the front. Singlepiston, sliding calipers on front, double-piston fixed calipers on rear. Anti-lock Braking System (ABS) fitted as standard on all models. Traction control (TCS) option on some models Lever and cable operation, acting on shoes in drums incorporated in
rear discs
Front brakes Discs:
Type tye settee lets rete =v eietee rere nln vle a Giitsicereliaineterree Thickness (new disc) Minimum thickness after grinding seer sree teen neens Minimum wear thickneSS ......-.00+«cit favre tara eae) emerentats SAMeNieI=t>, Neri Suet eens mete NAAXITALITIORLIMISOLIL 60s eee eee rere Maximum variation in disc thickneSS .......-
Calipers: Type Piston diameter Pads: eer er eres Minimum friction material thickness. ...-.--+++++eer errr errr errs +. .....device warning acoustic for Thickness
Ventilated
288.0 mm (308.0 mm on Viggen) 25.0 mm 23.5 mm 22.0 mm 0.08 mm 0.015 mm
Single-piston, floating 57.0 mm 5.0 mm 3.0 mm
9e2 Braking system Dees.
rte
ye oN
in
ee
TS
aa
Rear brakes Discs:
Solid 286.0 mm 10.0 mm 8.5 mm 8.0 mm 0.08 mm 0.015 mm 160.0 mm 0.08 mm
Type OMtsiGerdiamieteldensve a0 eis «fos e ue ss eho HIMGKMESS (NEW CISC) tate vist scene o< yeior Minimum thickness after grinding ......... Minimum wear thickness ..............-MaxiimUnmainUn=OUlbnas steels wee 2 ce ere Maximum variation in disc thickness ....... Handbrake drum inner diameter........... Handbrake drum maximum out-of-round ... Calipers:
Fixed, double-piston 35.0 mm
Type PISOMIGIAMGLCM cruticic eer Gis.s sare wun xa ese es Pads: Minimum friction material thickness........ Handbrake: Shoe minimum friction material thickness .. .
5.0 mm 0.5mm
ABS components Front wheel sensors: FSSIStAMGCM masseter att sia cis’5)sisilva sueh atone
Clearance between sensor and tooth (not adjustable)............
1600 + 160 ohms at 20°C 0.3 to 1.8mm
Rear wheel sensors:
RESIST AMG Camm memeeae te asec: oss cece. ace,aicisicce sere eaeiend onc eneneaeey satsOAKS
1130 + 115 ohms at 20°C
Torque wrench settings
Nm
FNS QMVCAUIG UMONgMUCSmrmtacic save misis yceneyercis equ Suede Gui ehcteum eats & SS SmVChaulliGrMitmMOURMEMGMNUte at n« oc crete 4 oeecselm «cele e oi ola EretkercallpcmGuicleiOOltStts cm w.stese diecast ote sa cern yest) weredeeee molar Front brake caliper bracket to hub carrier... ...........000000 eee oma niaxomoOsenolcallpeharmrscrde cern tir ean tof euler fare elores meamOnaKercallpeh to backplate. . 2. «occ ee neue ee ene ce cns aren MOCmWINCCHMUDCOMCAn AX cn cre a neers a ew ta 4 satu aen eayecs veevonies is Hh LOMITA MOSELUMMOMN MULL tem asceta pis Mecteicteeuer soca, «2 ceeds cesare sities ioGira aces Vacuum pump lubrication banjo bolt (petrol models)............... Vacuum pump (mechanical) mounting bolt: FaetrOlsa OCC Steep aate suniers fe cite Acts vere hie cos stviarat eyascuas 5 (east aoe aie eck DISSE EMO CS Streeters eas cee harris Niessen ous, oath de coche aia anectate
15 20 28 110 40 80 50 18 25
1 General information
Braking is achieved by a dual-circuit hydraulic system, assisted by a vacuum servo unit. All models have discs fitted at the front and rear. The front discs are ventilated, to improve cooling and reduce brake fade. The dual hydraulic circuits are diagonallysplit; on LHD models, the primary circuit operates the front left and rear right brakes, and the secondary circuit operates the front right and rear left brakes. On RHD models, the circuits are opposite. This design ensures that at least 50% of the vehicle’s braking capacity will be available, should pressure be lost in one of the hydraulic circuits. Under these circumstances, the diagonal layout should prevent the vehicle from becoming unstable if the brakes are applied when only one circuit is operational. The front brake calipers are of floating single-piston type. Each caliper has two brake pads, one inboard and one outboard of the
22 8
disc. During braking, hydraulic pressure forces the piston along its cylinder, and presses the inboard brake pad against the disc. The caliper body reacts to this effort by sliding along its guide pins, bringing the outboard pad into contact with the disc. In this manner, equal pressure is applied to each side of the disc by the brake pads. When the brake pedal is released, the hydraulic pressure drops and the piston seal retracts the piston from the brake pad. The rear brake calipers are of fixed doublepiston type with two brake pads, one inboard and one outboard of the disc. The pistons operate independently of each other. The rear discs incorporate drums with internal brake shoes for operation of the handbrake. A single primary cable together with two secondary cables from the handbrake lever, operate the lever on each rear brake. The handbrake is not self-adjusting, and must be manually-adjusted regularly. On petrol engine models, the brake vacuum servo unit uses engine inlet manifold vacuum to boost the effort applied to the master cylinder by the brake pedal. On automatic transmission turbo petrol models,
the inlet manifold vacuum is supplemented by a voltage-variable-speed electric vacuum pump. The pump switches on when the inlet manifold vacuum is less than 0.35 bar, and switches off when the vacuum exceeds 0.4 bar. The pressure is monitored by a pressure sensor located on the inlet manifold. Non-return valves in the vacuum lines, isolate the inlet manifold and electric vacuum pump to maintain the required vacuum in the lines. The system is only operational with the ignition on and D selected. From 2000 MY-on (late 1999), the electric vacuum pump was superseded by a mechanical vacuum pump mounted on the left-hand end of the cylinder head and driven by the camshaft. From 2001 MY-on, manual transmission turbo models are fitted with a supplementary ‘ejector’ device to boost the vacuum to the vacuum servo. The device is
fitted in the charge air pipe, and operates by speeding up the flow of air across a venturi, thus providing vacuum to the servo. On diesel engine models, vacuum for the brake vacuum servo unit is supplied continuously by a pump driven directly from the exhaust camshaft. The anti-lock braking system (ABS) fitted as
Braking system memes eee ee eae ae eee a plastics; if any is spilt, it should be washed Bleeding sequence standard to all models prevents wheel lock-up under heavy braking, and not only optimises stopping distances, but also improves steering control. By electronically monitoring _ the speed of each roadwheel in relation to the other wheels, the system can detect when a wheel is about to lock-up, before control is actually lost. The brake fluid pressure applied to that wheel’s brake caliper is then decreased and restored (‘modulated’) several times a second until control is regained. The system components comprise four wheel speed sensors, a hydraulic unit with integral Electronic Control Unit (ECU), brake lines and a dashboard-mounted warning light. The four wheel sensors are mounted on the wheel hub carriers. Each wheel has a rotating toothed (hub mounted on the driveshaft (front) or on the hub (rear). The wheel speed sensors are mounted in close proximity to these hubs. The teeth produce a voltage waveform whose frequency varies with the speed of the hubs. These waveforms are transmitted to the ECU, and used to calculate the rotational speed of each wheel. The ECU has a self-diagnostic facility, to inhibit the operation of the ABS if a fault is detected, lighting the dashboardmounted warning light. The braking system will then revert to conventional, non-ABS operation. If the nature of the fault is not immediately obvious upon inspection, the vehicle must be taken to a Saab dealer, who will have the diagnostic equipment required to interrogate the ABS ECU electronically and pin-point the problem. The traction control system (TCS) is available as an option on some models, and uses the basic ABS system, with an additional pump and valves fitted to the hydraulic actuator. If wheelspin is detected at a speed below 30 mph, one of the valves opens, to allow the pump to pressurise the relevant brake, until the spinning wheel slows to a rotational speed corresponding to the speed of the vehicle. This has the effect of transferring torque to the wheel with most traction. At the same time,
off immediately, using copious quantities of fresh water. Finally, it is hygroscopic (it absorbs moisture from the air) - old fluid may be contaminated and unfit for further use. When topping-up or renewing the fluid, always use the recommended type, and ensure that it comes from a freshlyopened sealed container.
General
9e3 eoe as
11 If the system has been only partially disconnected, and suitable precautions were taken to minimise fluid loss, it should only be necessary to bleed that part of the system (ie, the primary or secondary circuit). 12 If the complete system is to be bled, then it should be done working in the following sequence (Note: On LHD models use opposite sides): a) Right-hand front brake. b) Left-hand rear brake. c) Left-hand front brake. d) Right-hand rear brake.
4 The correct operation of any hydraulic system is only possible after removing all air from the components and circuit; this is achieved by bleeding the system. Bleeding 2 During the bleeding procedure, add only clean, unused hydraulic fluid of the Basic (two-man) method recommended type; never re-use fluid that 13 Collect together a clean glass jar, a has already been bled from the system. suitable length of plastic or rubber tubing Ensure that sufficient fluid is available before which is a tight fit over the bleed screw, and starting work. a ring spanner to fit the screw. The help of an 3 lf there is any possibility of incorrect assistant will also be required. fluid being already in the system, the brake 14 Remove the dust cap from the first bleed components and circuit must be flushed screw in the sequence (see illustration). Fit completely with uncontaminated, correct fluid, the spanner and tube to the screw, place the and new seals should be fitted to the various other end of the tube in the jar, and pour in components. sufficient fluid to cover the end of the tube. 4 lf hydraulic fluid has been lost from the 45 Ensure that the master cylinder reservoir system, or air has entered because of a fluid level is maintained at least above the MIN leak, ensure that the fault is cured before level mark throughout the procedure. proceeding further. 16 Have the assistant fully depress and 5 Park the vehicle over an inspection pit or on release the brake pedal several times to buildcar ramps. Alternatively, apply the handbrake up initial pressure in the system. then jack up the front and rear of the vehicle 17 Unscrew the bleed screw approximately and support it on axle stands (see Jacking and half a turn then have the assistant slowly vehicle support). For improved access with the the brake pedal down to the floor depress vehicle jacked up, remove the roadwheels. and hold it there. Tighten the bleed screw and 6 Check that all pipes and hoses are secure, have the assistant slowly release the pedal to unions tight and bleed screws closed. Clean its rest position. any dirt from around the bleed screws. 18 Repeat the procedure given in para7 Unscrew the master cylinder reservoir cap, graph 17 until the fluid emerging from the bleed and top the master cylinder reservoir up to screw is free from air bubbles. After every two or the MAX level line; refit the cap loosely, and three depressions of the pedal, check the level remember to maintain the fluid level at least of fluid in the reservoir and top-up if necessary. above the MIN level line throughout the 19 When no more air bubbles appear, further of risk a procedure, otherwise there is the throttle plate is closed slightly, to reduce securely tighten the bleed screw, remove the air entering the system. the torque from the engine. tube and spanner, and refit the dust cap. Do doone-man, of number 8 There is a not overtighten the bleed screw. it-yourself brake bleeding kits currently 20 Repeat the procedure on the remaining is It shops. ing accessory -bleed motor system from ic available 2 Hydraul screws in the sequence, until all air is removed a recommended that one of these kits is used the system and the brake pedal feels firm from my whenever possible, as they greatly simplify the again. y7 of risk the reduce bleeding operation, and also expelled air and fluid being drawn back into fluid is Hydraulic Warning: the system. If such a kit is not available, the poisonous; wash off immediately basic (two-man) method must be used, which and thoroughly in the case of A is described in detail below. medical immediate seek skin contact, and If a kit is to be used, prepare the vehicle 9 into advice if any fluid is swallowed or gets described previously, and follow the kit as the eyes. Certain types of hydraulic fluid rer’s instructions, as the procedure manufactu when ignite may are inflammable, and slightly according to the type being vary may brought into contact with hot components; generally, they are as outlined below in used; system, hydraulic any when servicing the relevant sub-section. it is safest to assume that the fluid is 40 Whichever method is used, the same inflammable, and to take precautions must be followed (paragraphs 11 sequence petrol is it though as wil against the risk of fire ensure the removal of all air from to 12) also and that is being handled. Hydraulic fluid is .14 Dust cap on the caliper bleed screw the system. an effective paint stripper, and will attack
S
ge4 Braking system
2.22 Using a one-way valve kit to bleed the rear brake circuit
Using a one-way valve kit 21 As the name implies, these kits consist of a length of tubing with a one-way valve fitted, to prevent expelled air and fluid being drawn back into the system; some kits include a translucent container, which can be positioned so that the air bubbles can be more easily seen flowing from the end of the tube. 22 The kit is connected to the bleed screw, which is then opened (see illustration). The
31 Check the feel of the brake pedal. If it feels at all spongy, air must still be present in the system, and further bleeding is required. Failure to bleed satisfactorily after a reasonable repetition of the bleeding procedure may be due to worn master cylinder seals.
3
Hydraulic pipes and hoses - renewal
' Using a pressure-bleeding kit 24 These kits are usually operated by a reservoir of pressurised air contained in the spare tyre. However, note that it will probably be necessary to reduce the pressure to a lower level than normal; refer to the instructions supplied with the kit. 25 By connecting a pressurised, fluid-filled container to the master cylinder reservoir, bleeding can be carried out simply by opening each screw in turn (in the specified sequence), and allowing the fluid to flow out until no more air bubbles can be seen in the expelled fluid. 26 This method has the advantage that the large reservoir of fluid provides an additional safeguard against air being drawn into the system during bleeding. 27 Pressure-bleeding is particularly effective when bleeding ‘difficult?’ systems, or when bleeding the complete system at the time of routine fluid renewal.
All methods 28 When bleeding is complete, and firm pedal feel is restored, wipe off any spilt fluid, securely tighten the bleed screws, and refit the dust caps.
oe
it to shape, following the line of the original, before fitting it to the car. Alternatively, most motor accessory shops can make up brake pipes from kits, but this requires very careful measurement of the original, to ensure that the new one is of the correct length. The safest answer is usually to take the original to the shop as a pattern. 5 On refitting, do not overtighten the union nuts.
VG4: 6
user returns to the driver’s seat, depresses
the brake pedal with a smooth, steady stroke, and slowly releases it; this is repeated until the expelled fluid is clear of air bubbles. 23 Note that these kits simplify work so much that it is easy to forget the master cylinder reservoir fluid level; ensure that this is maintained at least above the MIN level line at all times.
4.2 Using slip-joint pliers to press the piston into the caliper
3.2 Rear brake flexible hose located
between the underbody and trailing arm
1 If any
pipe or hose
is to be renewed,
minimise fluid loss by first removing the master cylinder reservoir cap, then tightening it down onto a piece of polythene to obtain an airtight seal. The cap incorporates a level warning float and, alternatively, hose clamps can be fitted to flexible hoses to isolate sections of the circuit;
metal brake pipe unions can be plugged (if care is taken not to allow dirt into the system) or capped immediately they are disconnected. Place a wad of rag under any union that is to be disconnected, to catch any spilt fluid. 2 If a flexible hose is to be disconnected, unscrew the brake pipe union nut before removing the spring clip which secures the hose to its mounting bracket (see illustration). Where applicable, unscrew the banjo union bolt securing the hose to the caliper and recover the copper washers. When removing the front flexible hose, pull out the spring clip and disconnect it from the strut. 3 To unscrew
union nuts, it is preferable to
obtain a ‘split’ brake pipe spanner of the correct size; these are available from most motor accessory shops. Failing this, a closefitting open-ended spanner will be required, though if the nuts are tight or corroded, their flats may be rounded-off if the spanner slips. In such a case, a self-locking wrench is often
the only way to unscrew a stubborn union, but it follows that the pipe and the damaged nuts must be renewed on reassembly. Always clean a union and surrounding area before disconnecting it. If disconnecting a component with more than one union, make a careful note of the connections before disturbing any of
29 Check the hydraulic fluid level in the master cylinder reservoir, and top-up if
them.
necessary (see Weekly checks). 30 Discard any hydraulic fluid that has been bled from the system; it will not be fit for reuse.
4 If a brake pipe is to be renewed, it can be obtained, cut to length and with the union nuts and end flares in place, from a dealers parts shop. All that is then necessary is to bend
When refitting hoses to the calipers, always use new copper washers and tighten the banjo union bolts to the specified torque. Make sure that the hoses are positioned so that they will not touch surrounding bodywork or the roadwheels. 7 Ensure that the pipes and hoses are correctly routed, with no kinks, and that they are secured in the clips or brackets provided. After fitting, remove the polythene from the reservoir, and bleed the hydraulic system as described in Section 2. Wash off any spilt fluid, and check carefully for fluid leaks.
4 Front brake pads - renewal
EN
S
SN
Warning: Renew BOTH sets of front brake pads at the same time - NEVER renew the pads on only one wheel, as uneven braking may result. Note that the dust created by wear of the pads may contain asbestos, which is a health hazard. Never blow it out with compressed air, and do not inhale any of it. Use brake cleaner or methylated spirit to clean brake components. 1 Apply the handbrake, then jack up the front of the vehicle and support it on axle stands (see Jacking and vehicle support). Remove both front roadwheels. 2 Using slip-joint pliers (see illustration), press the piston fully into the caliper. Note: Provided that the master cylinder reservoir has not been overfilled with hydraulic fluid, there should be no spillage, but keep a careful watch on the fluid level while retracting the piston. If the fluid level rises above the MAX level line at any time, the surplus should be syphoned off or ejected via a plastic tube connected to the bleed screw.
Braking system
4.3a Lever out the retaining spring...
3 Carefully lever off the retaining spring from ithe holes on the outer surface of the caliper, noting how the spring is located on the caliper mounting bracket (see illustrations) 4 Remove the dust caps from the inner ends of the guide bolts (see illustration). 5 Unscrew the guide bolts from the caliper, and lift the caliper and pads away from the mounting bracket (see illustrations). Tie the caliper to the suspension strut using a suitable piece of wire. Do not allow the caliper to hang unsupported on the flexible brake hose. 6 Remove the inner and outer pads from the caliper, noting that the inner one is retained in the piston by a spring clip attached to the pad backing plate (see illustrations). Note: An acoustic wear warning device is fitted to the outer pad, consisting of a metal strip which contacts the brake disc when the thickness of
Bee
4.5a
4.3b
...and remove it from the caliper
the friction material is less than 3.0 mm. This device causes a scraping noise which warns the driver that the pads are worn excessively. 7 Brush the dirt and dust from the caliper, but take care not to inhale it. Carefully remove any rust from the edge of the brake disc. 8 Measure the thickness of the friction material on each brake pad (excluding the backing plate). If either pad is worn at any point to the specified minimum thickness or less, all four pads must be renewed. The pads should also be renewed if any are contaminated with oil or grease; there is no satisfactory way of degreasing friction material. Trace and rectify the cause of contamination before reassembly. 9 If the brake pads are still serviceable, clean them using a clean, fine wire brush or similar, paying particular attention to the sides and
mi.
... then unscrew the guide bolts...
4.5b
...and lift the caliper and pads away from the mounting bracket
9e5 —
4.4 Remove the dust caps...
back of the metal backing. Carefully clean the pad locations in the caliper body/mounting bracket. 10 Prior to fitting the pads, check that the guide | bolts are a good fit in the caliper bushes. Brush the dust and dirt from the caliper and piston (see Warning at the beginning of this Section). Apply a little high melting-point copper brake grease to the areas on the pad backing plates which contact the caliper and piston. Inspect the dust seal around the piston for damage, and the piston for evidence of fluid leaks, corrosion or damage. If attention to any of these components is necessary, refer to Section 6. 41 Fit the inner pad to the caliper, ensuring that its clip is correctly located in the caliper piston. Make sure that the arrows on the pad point in the normal, forward direction of rotation of the brake disc (see illustrations).
4.6a Remove the outer pad from the caliper...
2
Veg
i feted
4.6b ... then the inner pad, noting that it is retained in the piston by a spring clip
4.11a
Outer (A) and inner (B) front brake pads
4.11b The pads must be fitted with the arrow pointing the normal, forward rotation of the brake disc
9°6 Braking system
5.2 Using a punch to drive out the rear brake pad retaining pins
5.3 Removing the anti-squeal spring
5.5a Removing the inner rear brake pad
12 Fit the outer pad to the caliper mounting
9 Prior to fitting the pads, clean and check the pad retaining pins. Brush the dust and dirt from the caliper and piston (see Warning at the beginning of this Section). Apply a little high melting-point copper brake grease to the areas on the pad backing plates which contact the caliper and piston (see illustration). Inspect the dust seal around the pistons for damage, and the pistons for evidence of fluid leaks, corrosion or damage. If attention to any of these components is necessary, refer to Section 7. 10 If new brake pads are to be fitted, the caliper pistons must be pushed back into the cylinder to make room for them. Either use a G-clamp or similar tool, or use suitable pieces of wood as levers. Provided that the master cylinder reservoir has not been overfilled with hydraulic fluid, there should be no spillage, but keep a careful watch on the fluid level while retracting the piston(s). If the fluid level
Warning: Renew BOTH sets of rear brake pads at the same time NEVER renew the pads on only one wheel, as uneven braking may result. Note that the dust created by wear of the pads may contain asbestos, which is a health hazard. Never blow it out with compressed air, and do not inhale any of it. Use brake cleaner or methylated spirit to clean brake components.
1 Chock the front wheels, then jack up the rear of the vehicle and support on axle stands (see Jacking and vehicle support). Remove the rear roadwheels. 2 Note how the anti-squeal spring is located, then drive out the upper and lower pad retaining pins from the outside of the caliper using a punch (see illustration). 3 Remove the anti-squeal spring (see illustration). 4 Move the pads away from the disc slightly using a suitable lever or a pair of large adjustable pliers, then withdraw the outer pad from the caliper using pliers or a special removal tool. 5 Withdraw the inner pad from the caliper (see illustrations). 6 Brush the dirt and dust from the caliper, but take care not to inhale it. Carefully remove any rust from the edge of the brake disc. 7 Measure the thickness of the friction material on each brake pad (excluding the backing plate). If either pad is worn at any point to the specified minimum thickness or less, all four pads must be renewed. The pads should also be renewed if any are contaminated with oil or grease; there is no satisfactory way of degreasing friction material. Trace and rectify the cause of contamination before reassembly. 8 If the brake pads are still serviceable, clean them using a clean, fine wire brush or similar, paying particular attention to the sides and back of the metal backing. Carefully clean the pad locations in the caliper body/mounting bracket.
5.5b Using a removal tool to remove the inner rear brake pad
5.9 Apply a little high melting-point brake grease to the backs of the brake pads
bracket,
ensuring
that its friction
material
is facing the brake disc. The acoustic wear indicators must face downwards. 13 Slide the caliper and inner pad into position over the outer pad, and locate it in the mounting bracket. 14 Insert the caliper guide bolts, and tighten them to the specified torque setting. 15 Refit the guide bolt dust caps. 16 Refit the retaining spring to the caliper, ensuring that its ends are correctly located in the caliper holes. 17 Depress the brake pedal repeatedly, until normal pedal pressure is restored.
18 Repeat the above procedure on the remaining front brake caliper. 19 Refit the roadwheels, then lower the vehicle to the ground and tighten the roadwheel bolts to the specified torque setting. 20 Check the hydraulic fluid level as described in Weekly checks.
5
Rear brake pads — renewal
rises above the MAX level line at any time, the
surplus should be syphoned off or ejected via a plastic tube connected to the bleed screw. Warning: Do not syphon the fluid by mouth, as it is poisonous; use a syringe or an old poultry baster.
11 Using a steel rule, check that the cutaway recess in the pistons are positioned as shown (see illustration). The recesses must be at the bottom of the caliper. If necessary, carefully turn the pistons to their correct positions. 12 Locate the new pads in the caliper. Ensure that the friction material faces the disc, and check that the pads are free to move. 13 Locate the anti-squeal spring on the pads,
5.11
Correct position of the piston in the rear brake caliper
Braking system 9e7 then insert the pad retaining pins from the inside edge of the caliper, while depressing the spring. Tap the pins firmly into the caliper. 14 Depress the brake pedal repeatedly until ‘normal pedal pressure is restored. 15 Repeat the above procedure on the remaining rear brake caliper. 16 Refit the roadwheels, then lower the vehicle to the ground and tighten the roadwheel bolts to the specified torque setting. 17 Check the hydraulic fluid level as described in Weekly checks. einuaiil
6
Front brake caliper removal, overhaul and refitting
6.5a
6.5b ... and remove the caliper mounting bracket from the hub carrier
Unscrew the bolts...
eS
x
|
Removal 1 Apply the handbrake, then jack up the front of the vehicle and support it on axle stands (see Jacking and vehicle support). Remove the roadwheel. 2 Minimise fluid loss by first removing the master cylinder reservoir cap, then tightening it down onto a piece of polythene to obtain an
airtight seal. Alternatively, use a brake hose clamp to clamp the flexible hose leading to the brake caliper. 3 Clean the area around the caliper brake hose union. Note the fitted angle of the hose (to ensure correct refitting), then unscrew and * remove the union bolt and recover the copper sealing washer from each side of the hose union. Discard the washers; new ones must be used on refitting. Plug the hose end and caliper hole, to minimise fluid loss and prevent the ingress of dirt into the hydraulic system. 4 Remove the brake pads as described in Section 4, then remove the caliper from the vehicle. 5 If necessary, unbolt the caliper mounting _ bracket from the hub carrier (see illustrations).
Overhaul 6 With the caliper on the bench, clean away all external dirt and debris. 7 Withdraw the piston from the caliper body, and remove the dust seal. The piston can be withdrawn by hand, or if necessary pushed
out by applying compressed air to the brake hose union hole. Only low pressure should be required, such as from a foot pump. 8 Using a small screwdriver, carefully remove the piston seal from the caliper, taking care not to mark the bore. 9 Remove the guide bushes from the caliper body. 40 Thoroughly clean all components, using only methylated spirit or clean hydraulic fluid. Never use mineral-based solvents such as petrol or paraffin. Dry the components using compressed air or a clean, lint-free cloth. If available, use compressed air to blow clear
the fluid passages. 41. Check all components, and renew any that are worn or damaged. If the piston and/or
cylinder bore are scratched excessively, renew the complete caliper body. Similarly check the condition of the guide bushes and bolts; both bushes and bolts should be undamaged and a reasonably tight sliding fit. If there is any doubt about the condition of any component, renew it. Renew the caliper seals and dust covers as
a matter of course; these are available as a repair kit, together with assembly grease. 42 Onreassembly, ensure that all components are absolutely clean. 13 Lubricate the new seal with the grease supplied, or dip it in clean hydraulic fluid. Locate the seal in the cylinder bore groove, using only the fingers to manipulate it into position. 14 Fill the inner cavity of the dust seal with the grease supplied, or dip it in clean hydraulic fluid, then locate it on the piston. 15 Locate the piston on the caliper, then carefully press it fully into the bore, twisting it from side-to-side to ensure it enters the internal seal correctly. At the same time, make sure that the inner end of the dust seal enters the groove on the caliper body, and the outer end enters the groove in the piston. 16 Insert the guide bushes in the caliper body, using suitable grease to lubricate them.
Refitting 17 Locate the caliper mounting bracket on the hub carrier, then apply locking fluid to the threads of the mounting bolts, insert them, and tighten to the specified torque. 18 Refit the brake pads as described in Section 4, together with the caliper which at this stage will not have the hose attached.
7.2 Brake hose clamp fitted to the flexibl hose leading from the body to the brake line on the rear axle
i)
19 Position a new copper sealing washer on each side of the hose union, and connect the brake hose to the caliper. Ensure that the hose is correctly positioned against the caliper body lug, then install the union bolt and tighten securely. 20 Remove the brake hose clamp or the polythene, where fitted, and bleed the hydraulic system as described in Section 2. Note that, providing the precautions described were taken to minimise brake fluid loss, it should only be necessary to bleed the relevant
front brake. R 21 Refit the roadwheel, then lower the vehicle to the ground and tighten the roadwheel bolts to the specified torque.
7
Rear brake caliper removal, overhaul and refitting
HEE
Removal 4 Chock the front wheels, then jack up the rear of the vehicle and support on axle stands (see Jacking and vehicle support). Remove the roadwheel. 2 Minimise fluid loss by first removing the master cylinder reservoir cap, then tightening it down onto a piece of polythene to obtain an airtight seal. Alternatively, use a brake hose clamp on the flexible hose leading to the brake line on the rear axle (see illustration). 3 Clean the area around the hydraulic line union nut, then loosen the nut (see illustration). Do not fully unscrew the nut at this stage.
7.3 Unscrewing the hydraulic line union nut from the rear brake caliper
9e8 Braking system
7.5 Removing the rear brake caliper mounting bolts
4 Remove the brake pads as described in Section 5. 5 Unscrew and remove the mounting bolts securing the caliper to the backplate (see illustration). Recover the cover plate from under the bolt heads. 6 Fully unscrew the union nut and disconnect the hydraulic line from the caliper, then withdraw the caliper from the disc (see illustration). Tape over or plug the hydraulic line to prevent entry of dust and dirt.
Overhaul 7 With the caliper on the bench, clean away all external dirt and debris. 8 Withdraw the piston(s) from the caliper body, and remove the dust seal(s). The piston(s) can be withdrawn by hand, or if necessary pushed out by applying compressed air to the brake hose union hole. Only low pressure should be required, such as from a foot pump. Caution: Keep each piston identified for position to ensure correct refitting. 9 Using a small screwdriver, carefully remove the piston seals from the caliper, taking care not to mark the bores. 10 Thoroughly clean all components, using only methylated spirit or clean hydraulic fluid. Never use mineral-based solvents such as petrol or paraffin. 11 Dry the components using compressed air or a clean, lint-free cloth. If available, use compressed air to blow clear the fluid passages. 12 Check all components, and renew any that are worn or damaged. If the piston(s) and/ or cylinder bore(s) are scratched excessively, renew the complete caliper body. Renew the caliper seals and dust covers as a matter of course; these are available as a repair kit, together with assembly grease. 13 Onreassembly, ensure that all components are absolutely clean. 14 Lubricate the new seal(s) with the grease supplied, or dip them in clean hydraulic fluid, then locate them in the cylinder bore groove(s),
7.6 Removing the rear brake caliper
using only the fingers to manipulate them into position. 15 Fill the inner cavities of the dust seals with the grease supplied, or dip them in clean hydraulic fluid, then locate them on the pistons.
16 Working on each piston at a time, locate the piston on the caliper so that the cutaway recesses are positioned as described in Section 5. Carefully press the piston fully into the caliper body, twisting it from side-to-side to ensure it enters the internal seal correctly. At the same time, make sure that the inner
end of the dust seal enters the groove on the caliper body, and the outer end enters the groove in the piston. Make sure that the piston cutaway recesses are positioned as described in Section 5.
Refitting 17 With both pistons refitted, locate the caliper over the disc and onto the backplate, then insert the hydraulic line and screw in the union nut. Do not fully tighten the nut at this stage. 18 Apply a little locking fluid to the threads of the mounting bolts, then refit the cover plate and bolts, and tighten the bolts to the specified torque. 19 Refit the brake pads (See Section 5).
8.5 Checking the front brake disc with a dial gauge
20 Fully tighten the hydraulic union nut. 21 Remove the polythene, where fitted, and bleed the hydraulic system as described in Section 2. Note that, providing the precautions described were taken to minimise brake fluid loss, it should only be necessary to bleed the relevant rear brake. 22 Refit the roadwheel, then lower the vehicle to the ground and tighten the roadwheel bolts to the specified torque.
8
Front brake disc - inspection, removal and refitting
S SN x
Inspection 1 Apply the handbrake, then jack up the front of the vehicle and support it on axle stands (see Jacking and vehicle support). Remove both front roadwheels. 2 For an accurate check and for access to each side of the disc, the brake caliper should be unbolted and suspended to one side as described in Section 4. 3 Check that the brake disc securing screw is tight, then fit spacers approximately 10.0 mm thick to each of the roadwheel bolts, and refit and tighten the bolts. This will hold the disc in its normal running position. 4 Rotate the brake disc, and examine it for deep scoring or grooving. Light scoring is normal, but if excessive, the disc should be removed and either renewed or machined (within the specified limits) by an engineering works. The minimum thickness is given in the Specifications at the beginning of this Chapter. 5 Using a dial gauge, or a flat metal block and feeler blades, check that the disc runout does not exceed the figure given in the Specifications (see illustration). 6 If the disc run-out is excessive, remove the disc as described later, and check that the
Braking system
8.11a
Front brake disc securing screw
disc-to-hub surfaces are perfectly clean. Refit the disc and check the run-out again. If the ‘run-out is still excessive, the disc should be renewed. 7 Using a micrometer check that the disc thickness is not less than that given in the Specifications. Take readings at several points around the disc. 8 Repeat the inspection on the other front brake disc.
Removal 9 Remove the roadwheel bolts and spacers used when checking the disc. 10 Remove the disc pads as described in Section 4, then tie the caliper to one side. Also remove the front brake caliper mounting bracket with reference to Section 6. 11 Remove the securing screw and withdraw the disc from the hub. If the screw is tight, use an impact driver to loosen it (see illustrations).
Refitting 12 Refitting is a reversal of removal, but make sure that the mating faces of the disc and hub are perfectly clean, and apply a little locking fluid to the threads of the securing screw before tightening it. If a new disc is being fitted, remove the protective coating from the surface, using an appropriate solvent. Refit the disc pads as described in Section 4, then refit the roadwheel and lower the vehicle to the ground.
8.11b
9
Using an impact driver to loosen the brake disc securing screw
Rear brake disc - inspection,
removal and refitting
S w ~
Inspection 1 Chock the front wheels, then jack up the rear of the vehicle and support on axle stands (see Jacking and vehicle support). Remove both rear roadwheels. 2 For an accurate check and for access to each side of the disc, the brake caliper should be unbolted and suspended to one side as described later in Section 7. 3 Check that the brake disc securing screw is tight, then fit spacers approximately 10.0 mm thick to each of the roadwheel bolts, and refit and tighten the bolts. This will hold the disc in its normal running position. 4 Rotate the brake disc, and examine it for deep scoring or grooving. Light scoring is normal, but if excessive, the disc should be removed and either renewed or machined (within the specified limits) by an engineering works. The minimum thickness is given in the Specifications at the beginning of this Chapter. 5 Using a dial gauge, or a flat metal block and feeler blades, check that the disc runout does not exceed the figure given in the Specifications. 6 If the disc run-out is excessive, remove the disc as described later, and check that the disc-to-hub surfaces are perfectly clean. Refit
8.11c
Removing the front brake disc
the disc and check the run-out again. If the run-out is still excessive, the disc should be renewed. 7 Using a micrometer check that the disc thickness is not less than that given in the Specifications. Take readings at several points around the disc. 8 Repeat the inspection on the other rear brake disc.
Removal 9 Remove the roadwheel bolts and spacers used when checking the disc. 10 Remove the disc pads as described in Section 5. 11 Carefully release the rear brake hydraulic line from the clip on the rear axle, taking care not to bend the line excessively. 12 Unbolt and remove the rear brake caliper with reference to Section 7, and tie it to one side. A convenient place to secure the caliper on the left-hand side, is to the exhaust system,
using a long plastic cable tie. 13 Using a screwdriver through the access hole, back off the handbrake shoe adjustment with reference to Section 16 (see illustration). 14 Remove the securing screw and withdraw the disc from the hub (see illustrations).
Refitting 15 Refitting is a reversal of removal, but make sure that the mating faces of the disc and hub are perfectly clean, and apply a little locking fluid to the threads
of the securing
e 9.13 Back off the handbrake shoe adjustment using a screwdriver through the access hole in the disc
9.14a
Remove the screw...
9e9
9.14b
screw
%
... and remove the rear brake disc
9e10
Braking system
before tightening it. If a new disc is being fitted, remove the protective coating from the surface, using an appropriate solvent. Adjust the handbrake as described in Section 16, - then refit the roadwheel and lower the vehicle to the ground.
x,
10 Handbrake shoes - inspection, removal and refitting
ne
Warning:
af ; 2
Renew
rear brake shoes
BOTH
WH @ sets
of
at the same
time. Note that the dust created by wear of the pads may contain asbestos, which is a health hazard. Never blow it out with compressed air, and do not inhale any of it. Use brake cleaner or methylated spirit to clean brake components.
Inspection 1 The handbrake operates independently of the footbrake, using brake shoes inside drums integral with the discs. 2 A quick check of the handbrake shoe wear ‘may be made without removing the rear brake disc. Chock the front wheels, then jack up the rear of the vehicle and support it on axle stands (see Jacking and vehicle support). Turn the brake disc so that the automatic adjuster is visible through the hole in the disc (see Section 16). If the adjuster has more than 10 threads visible, the shoes are worn excessively and should be renewed.
10.8a
Handbrake shoes fitted to the rear brake backplate
10.6
Unhook and remove the cable return
spring 3 For athorough check, remove the rear brake disc as described in Section 9, then check the minimum thickness of the friction material on each handbrake shoe. If any one of the shoes has worn below the specified limit, all four handbrake shoes must be renewed as a set.
Removai 4 With the rear brake disc removed, clean the dust and dirt from the brake shoes and backplate. 5 It is possible to remove and refit the shoes without removing the rear hub, however, we found it much easier with the hub removed and the backplate on the bench, particularly for the reassembly procedure. Refer to Chapter 10 and remove the rear hub, and the backplate complete with handbrake shoes.
10.8b
10.7 Disconnecting the handbrake cable end fitting from the lever on the backplate
6 Unhook the cable return spring from the hole in the backplate and from the cable end fitting (see illustration). 7 Unhook the cable end fitting from the lever on the bottom of the backplate (see illustration). 8 Note the fitted position of all components, and if necessary make a sketch of them (see illustrations). 9 Remove the shoe hold-down cups, springs and pins by depressing the cups and turning them through 90° using a pair of pliers (see illustration). If the hub is still fitted, insert a suitable tool through the hole in the hub flange. 10 Carefully lift the shoes directly from the backplate anchors and guide the expander lever through the rubber grommet (see illustration).
Handbrake shoe adjuster (left-hand rear brake)...
10.8c
BS 10.8d
...and hold-down springs
10.9 Removing the handbrake shoe holddown cups, springs and pins
10.10
...expander...
ASS
Lift the shoes directly from the backplate
Braking system 9e11
4d
4 10.11a
Remove the adjuster...
11 Pull the shoes apart and remove the adjuster, followed by the upper return spring
\(see illustrations). 12 Swivel the upper ends of the shoes inwards, and remove the expander from the bottom ends (see illustrations). 13 Unhook the lower return spring from the shoes (see illustration). 14 Dismantle the adjuster and expander components for cleaning (see illustration). 15 If both handbrake assemblies are dismantled at the same time, take care not to mix them up. 16 Clean all components, then examine them for wear and damage. Renew worn or damaged components. Make sure that the expander and adjuster operate freely and are not seized — apply a spot of oil to the expander pivots, and apply a little high melting-point grease to the threads of the adjuster before
10.12b
... and remove the expander
10.11b
... followed by the upper return spring
reassembling it. Set minimum length.
adjuster
to its
Swivel the upper ends of the shoes inwards...
11 Master cylinder - removal,
overhaul and refitting
Refitting 17 Clean the backplate thoroughly, and apply a little copper
grease to the shoe contact
points (see illustration). 18 Assemble the shoes onto the backplate using a reversal of the removal procedure. 19 Refit the backplate and rear hub with reference to Chapter 10. 20 Hook the cable end fitting on the expander lever and locate the cable holder in the bracket. 21 Hook the cable return spring in the backplate hole and on the end fitting. 22 Refit the rear brake disc and caliper as described in Section 9. 23 Adjust the handbrake shoes as described in Section 16, then refit the roadwheels and lower the vehicle to the ground.
10.13
Unhook the lower return spring
i.
40.14 Dismantling the expander
the
10.12a
10.17
:
A
f
i
Apply a little copper grease to the shoe contact points
EN x
Removal 4 Exhaust the vacuum present in the brake servo unit by repeatedly depressing the brake pedal. 2 Onleft-hand drive models, remove the main fusebox and holder, then disconnect the wiring from the anti-theft alarm switch. To provide more working room, unbolt and remove the bracket. 3 Disconnect the wiring from the brake fluid warning switch in the reservoir filler cap. 4 Syphon out the fluid from the reservoir. Alternatively, open any convenient bleed screw in the system, and gently pump the brake pedal to expel the fluid through a plastic tube connected to the bleed screw (see Section 2). Warning: Do not syphon the fluid by mouth, as it is poisonous; use a syringe or an old poultry baster. 5 Place cloth rags beneath the master cylinder to catch spilt fluid. 6 Onmanual transmission models, disconnect the clutch hydraulic hose from the brake fluid reservoir. 7 Refit the filler cap on the reservoir, then carefully lever the reservoir from the rubber grommets in the top of the master cylinder using a wide-bladed screwdriver. 8 Note the position of the brake lines, then unscrew the union nuts and move the lines to one side so that they are just clear of the master cylinder. Do not bend the brake lines excessively. If available, use a split spanner to unscrew the nuts, as they can be very tight. Tape over or plug the outlets of the brake lines and master cylinder. 9 Unscrew the mounting nuts and withdraw the master cylinder from the front of the vacuum servo. Recover the seal. Wrap the master cylinder in cloth rags and remove it from the engine compartment. Take care not to spill fluid on the vehicle paintwork.
Overhaul 10 Before dismantling the master cylinder check on the availability and cost of parts,
~ 9e12
Braking system
11.12 Exploded view of the brake master cylinder
Fluid reservoir rubber seal Cover Lock-pin Fluid reservoir rubber seal Master cylinder body Secondary piston assembly Primary piston assembly Circlip ANDAAWMH-
12 Vacuum servo unitnon_ return valve - removal, testing and refitting
WUE
Removal 4 The non-return valve is located in the hose leading from the vacuum servo unit to the inlet manifold. It cannot be obtained separately from the hose. 2 Carefully ease the hose adapter from the rubber grommet on the front of the servo unit. 3 Unscrew the union nut and disconnect the hose from the inlet manifold. 4 Release the hose from the support and remove from the engine compartment.
Testing 5 Examine the check valve and hose for signs of damage, and renew if necessary. The valve may be tested by blowing through the hose in both directions. Air should flow through the valve in one direction only — when blown through from the servo unit end. Renew the
valve and hose complete if necessary. 6 Examine the sealing grommet in the vacuum servo unit for signs of damage or deterioration, and renew as necessary. as it may be more economical to renew the complete unit. 11 Clean all dirt and debris from the exterior of the master cylinder. 12 Prise out the reservoir rubber seals from the top of the master cylinder (see illustration). 13 Remove the cover and the lock-pin from the fluid aperture to the secondary piston. 14 Using circlip pliers, extract the circlip from the mouth of the master cylinder while slightly depressing the piston against the spring tension. 15 Remove the primary and secondary pistons, together with their springs, from the master cylinder bore, noting their order of removal. If the pistons are tight, tap the cylinder on the work bench or on a block of wood to release them. 16 Thoroughly clean the master cylinder components with methylated spirit or clean brake fluid, and examine them for wear and damage. |n particular, check the bore surfaces and rubber seals. The bore surface must not be pitted or scored, and the rubber seals must not be perished or worn. Clean the fluid entry ports of any rust or sediment. 17 Ifthe cylinder bore is in good condition but the rubber seals are worn excessively, obtain new seals or complete new pistons and seals. 18 Lubricate the seals and bore surface with clean brake fluid. Insert the secondary piston assembly with the slot in line with the top of the cylinder, and then insert the lock-pin and cover to hold the piston in place. Make sure that the seal lip is not damaged as it enters the cylinder. 19 Insert the primary piston assembly, again
making sure that the seal lip is not damaged as it enters the cylinder. 20 Depress the primary piston, then fit the circlip in the groove in the cylinder mouth. Release the piston. 21 Dip the rubber seals in clean fluid and locate them in the apertures on the top of the master cylinder.
Refitting 22 Ensure the mating surfaces are clean and dry then fit the new seal to the rear of the master cylinder. 23 Fit the master cylinder to the studs on the vacuum
servo
unit, ensuring that the servo
unit pushrod enters the master cylinder piston centrally. Fit the retaining nuts and tighten them securely. 24 Remove the tape or plugs, and reconnect the brake lines to the master cylinder. Tighten the union nuts initially with the fingers to prevent cross-threading, then fully tighten them with a spanner. 25 Locate the fluid reservoir stubs in the rubber seals, and press firmly until it is fully entered. 26
On
manual
transmission
models,
reconnect the clutch hydraulic hose to the brake fluid reservoir. 27 Fill the fluid reservoir with fresh brake fluid up to the MAX level mark. 28 Reconnect the wiring to the brake fluid warning switch in the reservoir filler cap. 29 On left-hand drive models, reconnect the
Refitting 7 Refitting is a reversal of removal, but tighten the union nut securely. On completion, start the engine and check the function of the brakes; also check that there are no air leaks.
13 Vacuum servo unit testing, removal and refitting
ao SN
x
Testing 1 To test the operation of the servo unit, with the engine off, depress the footbrake several times to dissipate the vacuum. Now start the engine, keeping the pedal firmly depressed. As the engine starts, there should be a noticeable ‘give’ in the brake pedal as the vacuum builds-up. Allow the engine to run for at least two minutes, then switch it off. The brake pedal should now feel normal, but further applications should result in the pedal feeling firmer, the pedal stroke decreasing with each application. 2 If the servo does not operate as described, first inspect the servo unit check valve as described in Section 12. 3 If the servo unit still fails to operate satisfactorily, the fault lies within the unit itself. Repairs to the unit are not possible; if faulty, the servo unit must be renewed.
wiring to the anti-theft alarm switch. Refit the bracket, main fusebox and holder. 30 Bleed the hydraulic system as described
Right-hand drive models
in Section 2. Thoroughly check the operation of the braking system before using the vehicle on the road.
4 Remove both windscreen wiper arms as described in Chapter 12. 5 Remove the plastic cover from the engine
Removal
Braking system 9013
13.11b
13.11c
... extract the spring clip...
...and remove the pushrod pivot
pin
spring... compartment rear bulkhead area for access to the wiper linkage. Disconnect the wiring then jundo the mounting screws and lift out the wiper linkage assembly. 6 Remove the engine top cover, then unbolt the support bar from between the front suspension turrets. 7 Remove the brake master cylinder as described in Section 11. 8 Prise out the access plugs and unscrew the vacuum servo unit upper mounting bracket bolts. 9 Ease the vacuum hose adapter from the rubber grommet in the front of the vacuum servo unit. 10 Inside the vehicle, remove the lower trim panel from the right-hand side of the facia. 11 Unhook the brake pedal return spring, then extract the spring clip and pull out the pivot pin securing the pushrod clevis to the brake pedal (see illustrations). 12 Remove the cruise control unit, and position it to one side (refer to Chapter 4A). 13 Withdraw the servo unit and upper mounting bracket from the bulkhead, and remove from the engine compartment. 14 Undo the nuts and remove the bracket from the rear of the servo unit.
Refitting 15
Fit the bracket to the rear of the servo unit,
and tighten the nuts. 16 Locate the servo unit and mounting bracket on the bulkhead making sure that the upper bracket locates correctly on the lower bracket. 17 Apply locking fluid to the threads of the
13.18
Fitted position of the brake pedal return spring
upper mounting bracket bolts, then insert and tighten them. Refit the access plugs. 18 Inside the vehicle, connect the pushrod clevis on the pedal, then insert the pivot pin and secure with the spring clip. Reconnect the brake pedal return spring (see illustration). 19 Adjust the brake stop-light switch with reference to Section 21. 20 Refit the lower trim panel. 21 Press the vacuum hose adapter in the rubber grommet in the front of the vacuum servo unit. 22 Refit the cruise control unit with reference to Chapter 4A. 23 Refit the brake master cylinder with reference to Section 11, and bleed the brake hydraulic system as described in Section 2. 24 Refit the support bar between the front suspension turrets and tighten the mounting bolt. Refit the engine top cover.
25 Refit the wiper linkage assembly and tighten the mounting screws. Reconnect the wiring and refit the plastic cover to the rear bulkhead area. 26
Refit the windscreen
wiper arms
with
reference to Chapter 12. 27 Oncompletion, start the engine and check for air leaks at the vacuum hose-to-servo unit connection. Check the operation of the braking system.
Left-hand drive models
pedal pushrod and remove from the engine compartment.
Refitting 36 Locate the servo unit on the bracket and at the same time engage the sleeve with the pedal pushrod. With all the studs engaged, refit and tighten the mounting nuts and washers. 37 With the pedal pushrod fully engaged, press on the spring clip to secure. Check that the pushrod is engaged by attempting to pull it out of the sleeve. 38 Locate the rubber gaiter on the bulkhead. 39 Refit the fusebox. 40 Press the vacuum hose adapter into the rubber grommet on the front of the servo unit. 41 Refit the brake master cylinder with reference to Section 11, and bleed the brake hydraulic system as described in Section 2. 42 Where applicable, refit the air induction silencer over the throttle body. 43 Refit the support bar between the front suspension turrets and tighten the mounting bolts. 44 Oncompletion, start the engine and check for air leaks at the vacuum hose-to-servo unit connection. Check the operation of the braking system.
14 Vacuum pump (electric) - removal and refitting
|
Removal 28 Unbolt the support bar from between the front suspension turrets. 29 Where applicable, unclip and remove the air induction silencer from above the throttle body. 30 Remove the brake master cylinder as described in Section 11. 31 Carefully ease the hose adapter from the rubber grommet on the front of the servo unit. 32 For improved access, move the fusebox to one side. 33 Unscrew and remove the mounting nuts and washers securing the vacuum servo unit to the bracket. 34 Ease the rubber gaiter from the bulkhead behind the vacuum servo unit, and pull it towards the servo unit to expose the pedal pushrod. 35 Prise the spring clip from the sleeve, then withdraw the servo unit forwards from the
De NS
x
Note: The electric vacuum pump is only fitted to pre-2001 MY petrol turbo models with automatic transmission.
Removal 1 Apply the handbrake, then jack up the front of the vehicle and support it on axle stands (see Jacking and vehicle support). Remove the left-hand front wheel. 2 Remove the wheel arch liner and, where applicable, the engine undershield. 3 Disconnect the vacuum hose from the
pump. 4 Disconnect the wiring. 5 Unscrew the mounting nuts and bolts and withdraw the vacuum pump.
Refitting 6 Refitting is a reversal of removal.
9e14
Braking system
a.
oe
15.7 Depress the red locking ring to release the vacuum hose
15 Vacuum pump (mechanical) - removal and refitting
& aS
x
Note; 2001 MyY-on petro! turbo models with automatic transmission are fitted with a mechanical vacuum pump, as are all diesel models.
Removal Petrol models 1 The vacuum pump is bolted directly to the left-hand end of the cylinder head. First, remove the engine top cover. 2 Disconnect the vacuum hose from the pressure sensor located on the side of the turbocharger. _3 Undo the screw, and detach the bypass
-. pipe from the turbocharger inlet pipe. 4 Disconnect the bypass charge air pipe.
valve from
the
15.11
5 Disconnect the wiring from the temperature sensor on the charge air pipe. 6 Loosen the clips securing the charge air pipe to the throttle body and turbocharger, then unscrew the mounting bolt from the bracket on the cylinder head, and withdraw the pipe from the engine compartment. Temporarily tape over or cover the turbocharger and throttle body apertures. 7 Disconnect the vacuum hose from the vacuum pump on the left-hand end of the cylinder head. To do this, press in the red locking ring while pulling the hose out (see illustration). 8 Disconnect the wiring from the ignition discharge module on the cylinder head. 9 Unscrew and remove the battery clamp mounting bolt, and move the battery as far forwards as possible on the battery tray. 10 Place some cloth rags below the vacuum pump lubrication banjo, then unscrew and remove the banjo bolt. Recover the outer seal.
15.13
head (diesel models)
Mechanical brake vacuum pump mounting bolts (petrol models) 141 Unscrew the pump mounting bolts, including the bracket bolt, then withdraw it from the cylinder head (see illustration). Recover the inner lubrication seal and the main pump seal. Discard all seals as new ones must be used for refitting.
Diesel models 12 The vacuum pump is bolted directly to the left-hand end of the cylinder head (see illustration). First, remove the engine top cover. 13 Disconnect the main brake servo vacuum line from the vacuum pump by counterholding the large union nut and unscrewing the small one (see illustration). 14 Disconnect the small vacuum hose from the bottom of the vacuum pump. 15 Unscrew the mounting bolts, and withdraw the pump from the cylinder head. 16 Remove the O-ring from the groove in the pump. Discard the O-ring and obtain a new
one.
Unscrew the union nut and disconnect the pipe from the vacuum pump (diesel models)
Braking system
915
17.7 Handbrake rear cable guide sleeves and brackets
6 Disconnect the left- and right-hand return springs from the holes in the backplates and H31095 16.6
Handbrake cable adjustment nut and equaliser bar
resistance is felt when turning the rear wheels.
Refitting 17 Refitting is a reversal of removal, but note the following additional points: a) Clean the mating faces of the pump and cylinder head, and fit new O-ring(s). b) Position the pump drive dog so that it will engage with the slot in the end of the camshaft when refitted. c) On petro! models, fit a new O-ring seal to the lubrication banjo bolt. d) Tighten all nuts and bolts to the specified torque, where given.
16 Handbrake - adjustment
SS
xRR
1 It is normally only necessary to adjust the handbrake after dismantling or renewing the handbrake shoes or cables. First chock the front wheels, then jack up the rear of the vehicle and support on axle stands (see Jacking and vehicle support). Remove both rear wheels. Fully release the handbrake lever. 2 Check that the cables are not pulling the expander levers on the rear backplates. If they are, loosen the cable adjusting nut as necessary with reference to paragraph 6.
3 Working on each side at a time, adjust the shoe positions as follows. Turn the rear disc/drum until the access hole is positioned over the upper adjuster serrations. Using a screwdriver through the hole, turn the adjuster serrations until the disc/drum is locked. Now back off the serrations until the disc/drum is just free to turn. Repeat the adjustment on the remaining disc/drum. 4 Refit the rear wheels and tighten the bolts. 5 Set the handbrake lever on the 2nd notch. 6 The handbrake cable adjustment nut is located at the front of the equaliser bar, above a heat shield on the underbody. Unscrew the nuts and lower the heat shield (see illustration). 7 Tighten the cable adjusting nut until slight
Fully release the handbrake lever and check that the rear wheels turn freely, then set the lever on the 3rd to 6th notch and check that the rear wheels are locked firmly. If necessary, make a final adjustment of the adjusting nut. 8 If only one rear wheel locks, one of the brake cables may be seized, and this must be attended to before finally adjusting the handbrake. 9 On completion, lower the vehicle to the ground. -~
17 Handbrake cables -
ae
removal and refitting
>
x
shoe operating levers. 7 Remove the rear cable guide sleeves from the brackets, and unhook the cable end fittings from the shoe operating levers on each side (see illustration). 8 Pull the cables from the holes on the rear axle and from the brackets behind the rear heat shield. 9 Release the cables from the front bracket near the cable adjuster. 10 Remove the remaining plastic ties and withdraw the cable components from under the vehicle.
Refitting 11 Refitting is a reversal of removal, but finally adjust the handbrake as described in Section 16.
18 Handbrake lever removal and refitting
Note: This Section describes the removal and
refitting of the secondary handbrake cables.
Removal 41 One primary and a double secondary cable are fitted. An equaliser is attached to the front of the secondary inner cables, and the primary cable is attached to the centre of the equaliser. The secondary cables and equaliser are supplied as one assembly, as are the primary cable and handbrake lever. First, chock the front wheels then jack up the rear of the vehicle and support on axle stands (see Jacking and vehicle support). Remove both rear roadwheels. 2 Unscrew the nuts from the underbody and move the centre and rear exhaust heatshields to one side. 3 At the equaliser bar at the front of the cables, measure the length of exposed thread protruding from the adjustment nut to the end of the handbrake lever pull-rod. This will act as a guide when refitting the cables.
4 Unscrew the adjusting nut and remove the equaliser from the rear of the pull-rod. 5 Support the fuel tank, then unscrew the nut from the left-hand tank strap and unhook the strap.
HHS
Removal 4 Chock the front wheels, then jack up the rear of the vehicle and support on axle stands (see Jacking and vehicle support). Remove both rear wheels. 2 Working at each rear wheel brake, disconnect the left- and right-hand return springs from the holes in the backplates and shoe operating levers. 3 Press the rear cable guide sleeves from the brackets on the left- and right-hand side of the rear axle. 4 Press out the front cable guide sleeve, then unhook the rear cable end fittings from the shoe operating levers. 5 Unscrew the nuts and move the exhaust heat shield located in front of the fuel tank. 6 Disconnect the front of the handbrake cables from the lever pull-rod. To do this, it will be necessary to unscrew the adjustment nut and slide off the equaliser bar, however, make a note of the number of threads visible as an aid to refitting. 7 Slide the rubber gaiter from the rear of the pull-rod. 8 Working inside the vehicle, remove the
9°16
Braking system
(oA 19.1
Handbrake ON warning light switch
driver’s seat and the centre console as described in Chapter 11. 9 Unscrew and remove the handbrake iever side mounting bolts, and also remove the handbrake warning light switch. Lift the lever assembly from the floor and remove from inside the vehicle.
Refitting 10 Refitting is a reversal of removal, but finally adjust the handbrake as described in Section 16. Tighten the handbrake lever mounting bolts securely.
19 Handbrake ON warning light & ~ switch - removal, testing and SS refitting EN
21.3 Remove the stop-light switch from the bracket...
1 Remove the clutch pedal and bracket as described in Chapter 6. 2 Extract the clip and remove the fulcrum pin holding the brake master cylinder pushrod to the brake pedal. 3 Disconnect the wiring from the pedal switch, then unscrew the nuts and withdraw the pedal bracket from inside the car. 4 Unscrew the nut and remove the pivot pin, then withdraw the pedal from the bracket.
Refitting 5 Refitting is a reversal of removal, but tighten all nuts and bolts to their correct specified torque where given.
21 Stop-light switch -
removal, testing and refitting
Removal 1 The handbrake ON warning light switch is mounted on the front of the handbrake lever mounting bracket (see illustration). Refer to Chapter 11 and remove the centre console. 2 Disconnect the wiring from the switch. 3 Undo the mounting screw and remove the switch.
Testing 4 Connect a multimeter or battery test probe to the wiring contact and switch body. 5 With the switch plunger at rest, there should be continuity and the multimeter should read no resistance, or the test light should light. With the plunger depressed, there should be infinity resistance or the test light should be extinguished. 6 Failure to operate correctly may indicate corroded contacts or ultimately a faulty switch. Check that there is a 12 volt supply to the wiring with the ignition switched on. Renew the switch if necessary.
Refitting
of the switch
Removal
< CxSs
20 Brake pedal removal and refitting
1 The stop-light switch is mounted on top of the pedal bracket. An internal spring tensions the switch plunger so that the contacts are normally closed, however, when the brake pedal is released, the pedal return spring tension is greater than the switch spring, so the contacts are separated when the pedal is in its released position. When the brake pedal is depressed, the switch supplies a current of 12 volts to the central electronic control unit, which then supplies the stop-lights with power. The control unit checks the three stoplight bulbs and if necessary displays a warning on the instrument panel. Where a trailer is being towed, current to the trailer stop-lights is supplied direct from the stop-light switch. 2 To remove the switch, first remove the lower trim panel from the facia with reference to Chapter 11.
Mh Testing Note: On automatic transmission ignore reference to the clutch pedal.
models,
can
be tested
using either
a multimeter (switched to the ohmmeter function), or a continuity tester made up of a flashlight bulb, dry cell battery and two pieces of wire. Connect the meter/tester to the switch connector terminals with the switch in its rest position, and check that the meter reads zero resistance or the tester lights up. 6 Press the switch plunger down, and check that the meter reads infinity resistance (opencircuit) or the tester is extinguished.
7 If the switch does not behave as described, or is intermittent in its operation, then a new switch must be fitted; the unit is not serviceable.
Refitting 8 Refit the brake stop-light switch by reversing the removal procedure.
22 Anti-lock Braking System (ABS) components - general information and fault finding.
Removal
3 Twist the switch either clockwise or anticlockwise 90° and withdraw it from the mounting bracket (see illustration). 4 Disconnect the wiring from the switch (see illustration).
7 Refitting is a reversal of removal.
Se
21.4 ... and disconnect the wiring
5 The switch is a single-pole device, and has normally-closed contacts. The operation
General information 1 The Anti-lock
Braking
System
(ABS)
is
managed by an Electronic Control Unit (ECU), which has the capacity to monitor the status and condition of all the components in the system, including itself. If the ECU detects a
fault, it responds by shutting down the ABS and illuminating the dashboard-mounted ABS warning light. Under these circumstances, conventional non-ABS braking is maintained. Note also that the warning light will be illuminated if the power supply to the ABS ECU is disconnected (eg, if the supply fuse blows). On models manufactured from late 1998, when the ABS warning light is illuminated, the standard brake warning light and central warning light are also illuminated. 2 If the ABS warning lights indicate a fault, it is very difficult to diagnose problems without the equipment and expertise to electronically ‘interrogate’ the ECU for fault codes. Therefore, this Section is limited firstly to a list of the basic checks that should be carried out, to establish the integrity of the system. 3 If the cause of the fault cannot be immediately identified using the check list described, the only course of action open is to take the vehicle to a Saab dealer for
Braking system examination. Dedicated: test equipment is needed to interrogate the ABS ECU to determine the nature of the fault.
Basic fault finding checks Brake fluid level 4 Check the brake fluid level (see Weekly checks). If the level is low, check the complete braking system for signs of leaks. Refer to Chapter 1A or 1B and carry out a check of the brake hoses and pipes throughout the vehicle. If no leaks are apparent, remove each roadwheel in turn, and check for leaks at the brake caliper pistons.
Fuses and relays . 5 The fuse for the ABS is located beneath ‘a cover on the end of the instrument panel. Remove the cover and pull out the fuse. Visually check the fuse filament; if it is difficult to see whether or not it has blown, use a multimeter to check the continuity of the fuse. {f any of the fuses are blown, determine the cause before fitting a new one — if necessary, have the vehicle inspected by a Saab dealer. 6 The ABS system relay is located beneath a cover on the left-hand side of the engine compartment. In general, relays are difficult to test conclusively without any electrical specification. However, the metal contacts inside a relay can usually be felt (and often heard) to open or close as it operates — if the relay in question does not behave in this way when the ignition switch is turned on, it may be faulty. It should be noted that this is not a conclusive test, and substitution with a known good relay of the same type is the only way to verify the component operation. If any of the relays is suspected of being faulty, it can be renewed by pulling it out of its socket — noting its orientation — and pushing in a new unit.
Electrical connections
and earthing points 7 The engine bay is a hostile environment for electrical connections, and even the best seals can sometimes be penetrated. Water, chemicals and air will induce corrosion on the connector’s contacts and prevent good continuity, sometimes intermittently. Disconnect the battery negative cable, then check the security and condition of all connectors at the ABS hydraulic unit, situated on the left-hand side of the engine bay. 8 Unplug each connector, and examine the contacts inside. Clean any contacts that are found to be dirty or corroded. Avoid scraping the contacts clean with a blade, as this will accelerate corrosion later. Use a piece of lintfree cloth in conjunction with a proprietary
cleaning solvent to produce a clean, shiny contact surface. 9 In addition, check the security and condition of the system electrical earthing point on the side of the hydraulic unit.
23 Anti-lock Braking System (ABS) components - removal and refitting
LS SN EN
Note: /f the ABS system is faulty, have it checked by a Saab dealer before removing any component.
Removal 1 Apply the handbrake, then jack up the front of the vehicle and support it on axle stands (see Jacking and vehicle support). Remove the relevant roadwheel. 2 Disconnect the wiring plug in the engine compartment. For the front right-hand sensor it will be necessary to remove the air cleaner assembly. For the front left-hand sensor, it will be necessary to move the main fusebox to one side. 3 Clean the area around the wheel sensor on the front hub carrier, then unscrew the mounting bolt and remove the sensor. 4 Prise the rubber grommet from the inner wing panel, and pull out the wiring. 5 Release the wiring from the retaining clips on the inner wing panel and brake hose.
Refitting 6 Refitting is a reversal of removal, but tighten the mounting bolt securely.
Rear wheel sensor Removal 7 The rear wheel sensors are integral with the rear wheel hubs, so this section essentially describes the removal of the hub. First, chock the front wheels then jack up the rear of the vehicle and support on axle stands (see Jacking and vehicle support). Remove the relevant roadwheel. 8 Remove the rear brake disc as described in Section 9. 9 Disconnect the wiring from the wheel sensor on the rear of the hub. 10 Unscrew the mounting nuts and withdraw the hub assembly from the rear axle. Leave the backplate, handbrake shoes and the spacer(s) hanging on the cable. Note: Discard the hub nuts as new ones must be used on refitting. Recover the shims where fitted.
Refitting Clean
the mounting
axle, backplate, spacer(s) and hub then mount the components in the correct order. Fit and progressively tighten the new nuts to the torque wrench setting given in the Specifications. 12 Reconnect the wiring to the wheel sensor. 13 Refit the rear brake disc (see Section 9) and adjust the handbrake shoes (see Section
16). 14 Refit the roadwheel, then lower the vehicle to the ground. 15 Depress the footbrake pedal firmly to set the rear brake pads in their normal position.
ABS/TCS hydraulic unit
Front wheel sensor
11
9¢17
faces
of the rear
Note: The ABS electronic control unit (ECU) is supplied as an integral part of the hydraulic unit and cannot be removed separately. After : fitting a new unit, the ECU must be calibrated by a Saab dealer using the Saab Tech2 handheld diagnostic instrument. Removal 16 Disconnect the battery negative lead (refer to Disconnecting the battery in the Reference Chapter). 17 Working in the left-hand rear corner of the engine compartment, release the fusebox holder. 18 Cut the plastic cable ties holding the battery positive cable to the main fusebox, then unscrew the nuts and position the fusebox to one side without disconnecting the wiring. If necessary, suspend the fusebox using a piece of string. 19 Minimise fluid loss by first removing the master cylinder reservoir cap, then tightening it down onto a piece of polythene to obtain an airtight seal. As the cap includes a fluid level warning switch, it may be preferable to fit a plain used cap if available. Also, place cloth rags beneath the unit to catch spilt fluid. 20 Disconnect the wiring plug from the electronic contro! unit and position the plug to one side. 21 Identify each hydraulic brake pipe for its location on the hydraulic unit, then unscrew the union nuts and disconnect the pipes. Tape over or plug the apertures and pipe ends to prevent entry of dust and dirt. 22 Unscrew the mounting nuts and remove the ABS hydraulic unit from the engine compartment. Take care not to spill hydraulic fluid on the vehicle paintwork.
Refitting 23 Refitting is a reversal of removal, but tighten the unit mounting nuts and the hydraulic brake pipe union nuts to the specified torque, and finally bleed the hydraulic system as described in Section 2.
1001
Chapter 10 Suspension and steering Contents
Section number
Section number
Front anti-roll bar — removal, overhaul and refitting.............. ROnURUb Dean NG) — NOMeWall ce canee eu aya cueceem. apa erebeceiiatevene e apne x mele
5 6
Front suspension lower arm — removal, overhaul and refitting. ..... Front suspension radius arm — removal, overhaul and refitting. ....
3 4
9 11 Rear shock absorber — removal and refitting............-.+-+-. if Steering and suspension check............-. See Chapter 1A or 1B
Front suspension strut/hub carrier — removal, overhaul and refitting
2
sees eens {le} Steering column —removal and refitting..............e
1 eee eee eee 06.00 sce General information... | Power steering fluid level check.............. See Chapter 1A or1B Power steering hydraulic system — draining, refilling and bleeding.. 15 Power steering pump — removal and refitting .................. 17 8 Rear anti-roll bar - removal and refitting ..............2..-006Rear axle assembly — removal, overhaul and refitting............ 10
Rear coil spring —- removal and refitting ...............-+...«+. Rear hub assembly — removal and refitting ............--.+-++6:
Steering column upper bearing — renewal..........-.-.-.++55: Steering gear assembly — removal and refitting..............+-sree Steering rack rubber gaiter — renewal ......---....eeeeee eee eees Steering wheel - removal and refitting............-..e eee eens Track rod end - removal and refitting. ...........0-e Wheel alignment and steering angles — general information.......
14 16 18 12 19 20
Degrees of difficulty Easy, suitable for
SS Fairly easy, suitable SS Fairly difficult,
novice with little experience
for beginner with EN | RQ | some experience