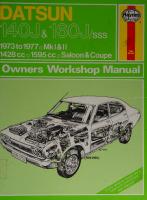
Haynes Datsun 140J & 160J MkIII Owners Workshop Manual 0856964301, 9780856964305
“248p. : 28cm Includes index”.
125 69
English Pages 252 Year 1979
Recommend Papers


- Author / Uploaded
- John H. Haynes
- Ian Coomber
- Similar Topics
- Technique
- Transportation: Cars, motorcycles
File loading please wait...
Citation preview
)Terry Davey) [Oxarves|
Digitized by the Internet Archive in 2023 with funding from Kahle/Austin Foundation
https://archive.org/details/datsunownersworkOO0O0Ohayn_i2i3
wners Workshoo Manual by J H Haynes Member of the Guild of Motoring Writers
and lan Coomber Models covered: UK:
Datsun 140J Mk III Saloon 1397 cc Datsun 160J Mk III Saloon 1595 cc Datsun 160J Mk II| Coupe/Hatchback 1595 cc
USA:
Datsun 510 Sedan 119 cu in (1952 cc) Datsun 510 Coupe/Hatchback 119 cu in (1952 cc) Datsun 510 Station Wagon 119 cu in (1952 cc)
Covers manual and automatic transmission versions
ISBN
O 85696 430 1
©
Haynes Publishing Group 1979
All rights any form recording in writing
rou
reserved. No part of this book may be reproduced or transmitted in or by any means, electronic or mechanical, including photocopying, or by any information storage or retrieval system, without permission from the copyright holder.
Printed in England
HAYNES PUBLISHING GROUP SPARKFORD
YEOVIL
SOMERSET
distributed in the USA by
HAYNES PUBLICATIONS INC 861 LAWRENCE DRIVE NEWBURY PARK CALIFORNIA 91320 USA
ENGLAND
Acknowledgements Thanks are due to the Nissan Motor Company Limited of Japan for the provision of technical information and certain illustrations. The Champion Sparking Plug Company supplied the illustrations showing the various spark plug conditions. The bodywork repair photographs used in this manual were provided by Lloyds Industries Limited who supply Turtle Wax’, ‘Dupli-Color Holts’, and other Holts range
products.
Lastly thanks are due to all those people at Sparkford who helped in the production of this manual. Particularly Brian Horsfall and Les Brazier, who carried out the mechanical work and took the photographs respectively; Lee Saunders who planned the layout of each page and David Nielson who edited the text.
About this manual [ts aim The aim of this manual is to help you get the best value from your car. It can do so in several ways. It can help you decide what work must be done (even should you choose to get it done by a garage), provide information on routine maintenance and servicing, and give a logical course of action and diagnosis when random faults occur. However, it is hoped that you will make full use of the manual by tackling the work yourself. On simpler jobs it may even be quicker than booking the car into the garage, and having to go there twice, to leave and collect it. Perhaps most important, a lot of money can be saved by avoiding the costs the garage must charge to cover its labour and overheads. The manual has drawings and descriptions to show the function of the various components so that their layout can be understood. Then the tasks are described and photographed in a step-by-step sequence so that even a novice can do the work.
/ts arrangement The
manual
is divided
into twelve
Chapters,
each
covering
a
logical sub-division of the vehicle. The Chapters are each divided into consecutively numbered Sections and the Sections into paragraphs (or
sub-sections), with decimal numbers following on from the Section they are in, eg 5.1, 5.2, 5.3 etc. It is freely illustrated, especially in those parts where there is a detailed sequence of operations to be carried out. There are two forms
of illustration: figures and photographs. The figures are numbered in sequence with decimal numbers, according to their position in the Chapter: eg Fig. 6.4 is the 4th drawing/illustration in Chapter 6. Photographs are numbered (either individually or in related groups) the same as the Section or sub-section of the text where the operation they show is described. There is an alphabetical index at the back of the manual as well as
a contents list at the front. References to the ‘left’ or ‘right’ of the vehicle are in the sense of a person facing forwards in the driver's seat. Whilst every care is taken to ensure that the information in this manual is correct no liability can be accepted by the authors or publishers for loss, damage or injury caused by any errors in, or omissions from, the information given.
Introduction to the Datsun
140J/160J Violet and 510 Series The Datsun models covered by this manual are the 140J and 160J Violet series for the European markets and the 510 Series for the
USA market. The 140J models use an overhead valve engine of 1397 cc whilst the 160J models are fitted with a single overhead camshaft engine of 1595 cc and the 510 models an engine of 1952 cc (119-1 cu in). The transmission system varies according to model and requirement, and can be a four-speed manual gearbox (full synchromesh), a three-speed fully automatic transmission with floor control selector or a five-speed manual gearbox with full synchromesh. All models are fitted with independent front suspension and 4 link coil spring at the rear except the Estate Car which has a semi elliptic rear suspension for greater load carrying. Drive to the rear axle is via a single or two piece (depending on
model) propeller shaft. The diaphragm spring clutch fitted to all manual transmission models is hydraulically operated except on the 140J models where a cable is used. The brakes are hydraulically operated and are servo assisted on all models. The front brakes are of the disc type and the rear are of the drum type. The handbrake which is cable operated, operates on the rear wheels only. Models manufactured for the USA have a wider range of accessories available and in order to comply with the regulations, a sophisticated emission control system is fitted to reduce the poisonous exhaust gases being freely released into the atmosphere. The emission control equipment fitted to California models differs slightly to comply
with the additional regulations of that State.
Page
Acknowledgements
2
About this manual
2
Introduction to the Datsun 140J/1604J Violet and 510 series
2
Use of English
7
Buying spare parts and vehicle identification numbers
6
Tools and working facilities
8
Jacking and towing
10
Lubrication chart
11
Routine maintenance
12
Chapter 1 Part A Overhead camshaft engines
16
Chapter 1 Part B Overhead valve engines
40
Chapter 2 Cooling system
53
Chapter 3 Fuel, exhaust and emission control systems
58
Chapter 4 Ignition system
97
Chapter 5 Clutch
107
Chapter 6 PartA Manual gearbox
115
Chapter 6 Part B Automatic transmission
143
Chapter 7 Propeller shaft
148
Chapter 8 Rear axle
151
Chapter 9 Braking system
156
Chapter 10 Chapter
171
11 Suspension and steering
208
Bodywork and fittings
224
Chapter 12 Index
Electrical system
243
ye oy
Datsun 160J Mk III Saloon
Datsun 160J Mk III Hatchback
Sy,
NSE
PERERA
ONS
ean
QQAG
WAU
Datsun 510 5-door Wagon
yy pp
Datsun 510 2-door Saloon
Buying spare parts and vehicle identification numbers Buying spare parts Spare parts are available from many sources, for example: Datsun garages, other garages and accessory shops, and motor factors. Our advice regarding spare parts is as follows: Officially appointed Datsun garages — This is the best source of parts which are peculiar to your car and otherwise not generally available (eg complete cylinder heads, internal gearbox components, badges, interior trim etc). It is also the only place at which you should buy parts if your car is still under warranty; non-Datsun components may invalidate the warranty. To be sure of obtaining the correct parts it will always be necessary to give the storeman your car's engine and chassis number, and if possible to take the old part along for positive identification. Remember that many parts are available on a factory exchange scheme — any parts returned should always be clean! It obviously makes good sense to go straight to the specialists on your car for this type of part for they are best equipped to supply you. Other garages and accessory shops — These are often very good places to buy material and components needed for the maintenance of
your car (eg oil filters, spark plugs, bulbs, fan belts, oils and grease, touch-up paint, filler paste etc). They also sell general accessories, usually have convenient opening hours, charge lower prices and can
often be found not far from home. Motor factors — Good factors will stock all of the more important components, (eg. pistons, valves, exhaust systems, brake cylinder/
pipes/hoses/seals/shoes
and
factors
will often
Vehicle identification numbers Modifications are a continuing and unpublished process in vehicle manufacture quite apart from major model changes. Spare parts manuals and lists are compiled upon a numerical basis, the individual vehicle numbers being essential to correct identification of the component required. The car identification number plate is \ocated in the centre of the bulkhead at the top, being visible on opening the bonnet (photo). The chassis number is stamped into the top of the cowling in the engine compartment.
The car serial number (510 models) is stamped into the bulkhead directly behind the engine. The engine serial number is on the right-hand side of the cylinder
block (photo).
10 N
Engine number Car serial number (510 models)
pads etc). Motor
provide new or reconditioned components on a part exchange basis — this can save a considerable amount of money.
Use of English As this book has been written in England, it uses the appropriate English component names, phrases, and spelling.
Some of these differ from
those used in America. Normally, these cause no difficulty, but to make sure, a glossary is printed below. In ordering spare parts remember the
parts list will probably use these words:
English
American
English
American
Aerial
Antenna
Layshaft (of gearbox)
Countershaft
Accelerator
Gas pedal
Leading shoe (of brake)
Primary shoe
Alternator
Generator (AC)
Locks
Latches
Anti-roll bar Battery Bodywork Bonnet (engine cover)
Stabiliser or sway bar Energizer Sheet metal Hood
Motorway Number plate Paraffin Petrol
Freeway, turnpike etc License plate Kerosene Gasoline
Boot lid
Trunk lid
Petrol tank
Gas tank
Boot (luggage compartment) Bottom gear Bulkhead Cam follower or tappet
Trunk 1st gear Firewall Valve lifter or tappet
‘Pinking’ Propeller shaft Quarter light Retread
‘Pinging’ Driveshaft Quarter window
Carburettor
Carburetor
Reverse
Recap Back-up
Catch Choke/venturi Circlip Clearance Crownwheel Disc (brake) Drop arm
Latch Barrel Snap-ring Lash Ring gear (of differential) Rotor/disk Pitman arm Convertible Generator (DC) Ground Prussian blue Station wagon Header Hard top Trouble shooting Float bowl Lash Coast
Rocker cover Roof rack Saloon Seized Side indicator lights Side light Silencer
Valve cover Car-top carrier Sedan Frozen Side marker lights Parking light Muffler
Spanner
Wrench
Drop head coupe
Dynamo Earth (electrical) Engineer's blue Estate car Exhaust manifold Fast back (Coupe)
Fault finding/diagnosis Float chamber Free-play
Freewheel Gudgeon pin Gearchange Gearbox Halfshaft Handbrake Hood Hot spot Indicator Interior light
Piston pin or wrist pin Shift Transmission Axleshaft Parking brake Soft top Heat riser Turn signal Dome lamp
Sill panel (beneath doors) Rocker panel Split cotter (for valve spring cap) Lock (for valve spring retainer) Split pin Cotter pin Steering arm Spindle arm Sump Oil pan Tab washer
Tang; lock
Tailgate Tappet
Liftgate Valve lifter Throw-out bearing High
Thrust bearing
Top gear Trackrod (of steering) Trailing shoe (of brake) Transmission Tyre Van Vice Wheel nut Windscreen Wing/mudguard
Tie-rod (or connecting rod) Secondary shoe Whole drive line Tire Panel wagon/van Vise Lug nut Windshield Fender
Miscellaneous points An ‘oil seal’ is fitted to components lubricated by grease! A ‘damper’ is a ‘shock absorber’, it damps out bouncing, and absorbs shocks of bump impact. haphazardly. Note that British drum brakes are different from the Bendix type that is common in America, so end furthest from the hydraulic wheel cylinder is on a pivot; interconnection between the shoes as on the phrase ‘Primary’ or ‘Secondary’ shoe does not apply. A shoe is said to be ‘Leading’ or Trailing’. A drum, as it rotates forward, reaches the shoe at the end worked by the hydraulic cylinder before the and this one has no self servo from the wrapping effect of the rotating drum.
Both names
are correct, and both are used
different descriptive names result. The shoe Bendix brakes is most uncommon. Therefore ‘Leading’ shoe is one on which a point on the anchor end. The opposite is a Trailing’ shoe,
Tools and working facilities Introduction A selection of good tools is a fundamental requirement for anyone contemplating the maintenance and repair of a motor vehicle. For the owner who does not possess any, their purchase will prove a considerable expense, offsetting some of the savings made by doing-it-
yourself.
However,
provided
quality, they will last worthwhile investment.
for
that the tools purchased many
years
and
prove
are of good an
extremely
To help the average owner to decide which tools are needed to carry out the various tasks detailed in this manual, we have compiled three lists of tools under the following headings: Maintenance and minor repair, Repair and overhaul, and Special. The newcomer to practical mechanics should start off with the Maintenance and minor repair tool kit and confine himself to the simpler jobs around the vehicle. Then, as his confidence and experience grows, he can undertake more difficult tasks, buying extra tools as, and when, they are needed. In this way, a Maintenance and minor repair tool kit can be built-up into a Repair and overhaul! tool kit over a considerable period of time without any major cash outlays. The experienced do-ityourselfer will have a tool kit good enough for most repair and overhaul procedures and will add tools from the Specia/ category when he feels the expense is justified by the amount of use to which these tools will be put. It is obviously not possible to cover the subject of tools fully here. For those who wish to learn more about tools and their use there is a book entitled How to Choose and Use Car Tools available from the publishers of this manual.
Sockets (or box spanners) to cover range in previous list
Reversible ratchet drive (for use with sockets) Extension piece, 10 inch (for use with sockets) Universal joint (for use with sockets) Torque wrench (for use with sockets) ‘Mole’ wrench - 8 inch Ball pein hammer Soft-faced hammer, plastic or rubber
Screwdriver Screwdriver Screwdriver Screwdriver
-
6 in long x % in dia (flat blade) 2 in long x % in square (flat blade) 14 in long x 4 in dia (cross blade) 3 in long x % in dia (electricians)
Pliers - electricians side cutters Pliers - needle nosed Pliers - circlip (internal and external)
Cold chisel - 4 inch
Maintenance and minor repair tool kit
Scriber (this can be made by grinding the end of a broken hacksaw
The tools given in this list should be considered as a minimum requirement if routine maintenance, servicing and minor repair operations are to be undertaken. We recommend the purchase of combination spanners (ring one end, open-ended the other); although more expensive than open-ended ones, they do give the advantages of both types of spanner. Combination spanners - 6, 7, 8,9, 10,11, Adjustable spanner - 9 inch
repairs to a motor vehicle, and are additional to those given in the Maintenance and minor repair list. Included in this list is a comprehensive set of sockets. Although these are expensive they will be found invaluable as they are so versatile - particularly if various drives are included in the set. We recommend the 4 in square-drive type, as this can be used with most proprietary torque wrenches. If you cannot afford a socket set, even bought piecemeal, then inexpensive tubular box spanners are a useful alternative. The tools in this list will occasionally need to be supplemented by tools from the Spec/a/ list.
& 12mm
blade) Scraper (this can be made by flattening and sharpening one end of a piece of copper pipe) Centre punch Pin punch
Hacksaw Valve grinding tool
Stee/ rule/straight edge Allen keys
Engine sump/gearbox/rear axle drain plug key (where applicable)
Selection of files
Spark plug spanner (with rubber insert) Spark plug gap adjustment tool Set of feeler gauges Brake adjuster spanner (where applicable) Brake bleed nipple spanner
Axle-stands Jack (strong scissor or hydraulic type)
Screwdriver - 4 in long x ¢ in dia (flat blade) Screwdriver - 4 in long x ¢ in dia (cross blade) Combination pliers - 6 inch Hacksaw, junior Tyre pump Tyre pressure gauge Grease gun (where applicable)
Oil can Fine emery cloth (1 sheet) Wire brush (small) Funnel (medium size)
Repair and overhaul tool kit These tools are virtually essential for anyone undertaking any major
Wire brush (large)
Special tools The tools in this list are those which are not used regularly, are expensive to buy, or which need to be used in accordance with their manufacturers’ instructions. Unless relatively difficult mechanical jobs are undertaken frequently, it will not be economic to buy many of these tools. Where this is the case, you could consider clubbing
together with friends (or a motorists’ club) to make a joint purchase, or borrowing the tools against a deposit from a local garage or tool hire specialist. The following list contains only those tools and instruments freely available to the public, and not those special tools produced by the vehicle manufacturer specifically for its dealer network. You will find occasional references to these manufacturers’ special tools in the text of this manual. Generally, an alternative method of doing the job
Tools and working facilities SSS sss sss SSS SS SSS
without the vehicle manufacturer's special tool is given. However, sometimes, there is no alternative to using them. Where this is the case and the relevant tool cannot be bought or borrowed you will have to entrust the work to a franchised garage. Valve spring compressor Piston ring compressor Balljoint separator
Universal hub/bearing puller /mpact screwdriver Micrometer and/or vernier gauge Carburettor flow balancing device (where applicable) Dial gauge Stroboscopic timing light Dwell angle meter/tachometer Universal electrical multi-meter Cylinder compression gauge Lifting tackle Trolley jack Light with extension lead
Buying tools
Spanner jaw gap comparison table Jaw gap (in)
Spanner size
0.250 0-275
fin AF: 7 mm AF
0-315
8 mm AF
0-340 0-354 0-375 0-393 0-433 0-437
¥ in AF;4 in Whitworth 9mm AF $ in AF 10 mm AF 11 mm AF i in AF
0-445
% in Whitworth;} in BSF
0.472
0.500 0-512 0.525 0-551 0-562 0.590
12 mm AF + in AF 13 mm AF 4 in Whitworth; % inBSF 14 mm AF & in AF 15 mm AF
0-629 0-669
16 mm AF 17mm AF
0-687 0-708
in AF 18 mm AF
0-710
$ in Whitworth; % in BSF
0-748
0-312
& in AF
For practically all tools, a tool factor is the best source since he will have a very comprehensive range compared with the average garage or accessory shop. Having said that, accessory shops often offer excellent quality tools at discount prices, so it pays to shop around. Remember, you don't have to buy the most expensive items on the shelf, but it is always advisable to steer clear of the very cheap tools. There are plenty of good tools around at reasonable prices, so ask the proprietor or manager of the shop for advice before making a purchase.
0-600 0-625
0-750
19 mm AF Zin AF
Care and maintenance of tools
0-820 0-866
% inWhitworth;> in BSF 22 mm AF
Having purchased a reasonable tool kit, it is necessary to keep the tools in a clean serviceable condition. After use, always wipe off any dirt, grease and metal particles using a clean, dry cloth, before putting the tools away. Never leave them lying around after they have been used. A simple tool rack on the garage or workshop wall, for items such as screwdrivers and pliers is a good idea. Store all normal spanners and sockets in a metal box. Any measuring instruments, gauges, meters, etc, must be carefully stored where they cannot be damaged or become rusty. Take a little care when tools are used. Hammer heads inevitably become marked and screwdrivers lose the keen edge on their blades fom time to time. A little timely attention with emery cloth or a file will soon restore items like this to a good serviceable finish.
Working facilities
0-812 0.875
0-920
Bin AF Fin AF
+ in Whitworth; % in BSF
0-937
in AF
0-944
24 mm AF
1-000 1-010 1-023 1-062 1-100 1-125
1 in AF & in Whitworth; 3 in BSF
1-181
30 mm AF
1-250 1-259
14 in AF 32 mm AF
1-300
$ in Whitworth; ¢ in BSF
1-390 1-417 1-437 1-480
#3in Whitworth; #3 inBSF 36 mm AF 14 in AF $ in Whitworth; 1 in BSF
1-574 1-614
40 mm AF; # in Whitworth 41 mm AF
1-625 1-670 1-687
12 in AF 1 in Whitworth; 14 in BSF 1% in AF
1-811
46 mm AF
1-812
1 in AF
1-200
Not to be forgotten when discussing tools, is the workshop itself. If anything more than routine maintenance is to be carried out, some form of suitable working area becomes essential. It is appreciated that many an owner mechanic is forced by circumstances to remove an engine or similar item, without the benefit of a garage or workshop. Having done this, any repairs should always be done under the cover of a roof. Wherever possible, any dismantling should be done on a clean flat workbench or table at a suitable working height. Any workbench needs a vice: one with a jaw opening of 4 in (100 mm) is suitable for most jobs. As mentioned previously, some clean dry storage space is also required for tools, as well as the lubricants, cleaning fluids, touch-up paints and so on which become necessary. Another item which may be required, and which has a much more general usage, is an electric drill with a chuck capacity of at least % in
1.312
essential for fitting accessories such as wing mirrors and reversing lights. Last, but not least, always keep a supply of old newspapers and clean, lint-free rags available, and try to keep any working area as clean as possible.
(8 mm). This, together with a good range of twist drills, is virtually
& in Whitworth;3 in BSF 2 in AF
1-500
26 mm AF
175inAF;27 mm AF $ in Whitworth; 3 in BSF 14 in AF
Yin Whitworth; }inBSF
13 in AF
14 in AF
1-860
14 in Whitworth; 17 in BSF
1-875
1¢ in AF
1-968 2.000
50 mm AF 2 in AF
2-050 2-165
14 in Whitworth; 13 in BSF 55 mm AF
2-362
60 mm AF
Jacking and towing Jacking points
Towing points
The pantograph type jack supplied with the car must only be used at the positions below the body sills. Other types of jack should be located below the front crossmember or rear axle differential casing. If axle-stands are to be used, then they must be positioned under the bodyframe sidemembers or rear axle casing. No other positions should be used forjacking or support purposes. When jacking up the car always chock a wheel on the opposite
If the vehicle has to be towed, any rope or cable should be connected to the hook attached to the front sidemember. On vehicles equipped with automatic transmission, the towing speed should not
side, in front and behind.
exceed 20 mph (30 km/h) nor the towing distance 6 miles (10 km) otherwise the transmission may be damaged due to lack of lubrication. If towing distances are excessive, disconnect the propeller shaft from the rear axle pinion flange and tie the shaft up out of the way. When towing another car, connect the rope to the rear towing hook on saloon and hardtop models, and to the rear leaf spring shackle on estate cars.
Detail Jacking points for Saloon and Coupe Jacking points for Estate Car
Front towing hook (1) and tie down hook (2)
Rear towing point — Estate Car
11
Recommended
lubricants
Component
Eine)
Castrol Product
ae eters teneusvemercaccan ets eacvatots scsieaeuetens aun etreten ses anit cotati Castrol GTX
Gearbox (2) Mantel tarnmcmrctes rust helene scanner ciclo ls cite steve. 0 dnnetey erocuasye Castrol Hypoy Light (8OEP) AUTOM AtiC ema tater ereitarta eke lecit enn ausherar ent manaa ateneanc uerogene Neses Castrol TQ Dexron ® RGA axie (3) merce kent
tavcc) shone olintarelie upntaier nie Masaeikmntssesoet ects Castrol Hypoy B (90 EP)
Eront: wheelibearings) (4) sa. a. cscs Clutchiand| brakefluiditeicretetcieis
eG
ccs os ener alee «5 6,40 Castrol LM Grease
cs steaprie iets) siete
sicie eta cue ane «ie DOT 3, DOT 4, or SAE J1703F
Note: The above are general recommendations only. Lubrication requirements vary from territory to territory and depend on vehicle usage. Consult the operators handbook supplied with the car.
Routine maintenance Maintenance is essential for ensuring safety and desirable for the purpose of getting the best in terms of performance and economy from the car. Over the years the need for periodic lubrication — oiling, greasing and so on — has been drastically reduced if not totally eliminated. This has unfortunately tended to lead some owners to think that because no such action is required, the items either no longer exist, or will last for ever. This is certainly not the case and it is essential to carry out regular visual examination as comprehensively as possible in order to spot any possible defects at an early stage before they develop into major and expensive repairs. The maintenance information given in this Section is not of a detailed nature as the information required to carry out the necessary tasks is to be found in the appropriate Chapters throughout this manual.
140J/ and 160J/ madels
Every 250 miles (400 km) or weekly — whichever comes first Engine Check the sump oil level; top-up if necessary Check the radiator coolant level, top-up if necessary
Check the necessary Steering
level
of the
electrolyte
in the
battery,
top-up
as
Check the tyre pressures Examine the tyres for wear or damage Brakes Check the reservoir fluid level Check the efficiency of service brake and handbrake Lights, wipers and horns Check that all lights work at the front and rear Check the windscreen washer reservoir fluid level
Every 3000 miles (5000 km) Engine Change the engine oil
Every 6000 miles (10 000 km) Engine Check drivebelts for cracks, fraying and wear. Check for correct tension Renew engine oil filter Drain and flush cooling system if filled with water Clean carburettor air cleaner (dry paper type) Clean spark plugs and check gap Check distributor cap, rotor, contact points and condenser
Check Clean Check Check Check Check
and adjust dwell angle, ignition timing and idling speed battery terminals and check specific gravity of electrolyte level of oil in carburettor damper condition of cooling, fuel and vacuum hoses exhaust system for security and leaks the air conditioning system hoses and connections for leaks
Steering Examine all steering linkage rods, joints and bushes for signs of wear or damage. Check steering wheel play Check front wheel hub bearing Check tightness of steering box mounting bolts Check level of oil in steering box » Check wheel alignment Brakes Examine disc pads and drum shoes for wear Examine all hydraulic pipes, cylinders and unions for signs of chafing, dents or leaks Check handbrake lever travel Adjust drum type brakes if necessary Suspension Examine all nuts, bolts and balljoints securing the front and rear suspension, and tighten as necessary Examine rubber bushes for signs of wear or deterioration Check operation of shock absorbers Transmission and differential Check oil level and top-up if necessary Check for oil leaks Check security of propeller shaft and driveshaft bolts Clutch Check fluid reservoir level and top-up if necessary Check pedal free movement and adjust if necessary Check for fluid leakage Body
Lubricate all locks and hinges Check that water drain holes at bottom of doors are clear Check windscreen wiper blades Check seat belts, buckles, retractors, anchor points and adjuster
Every 12 000 miles (20 000 km) Engine Check positive crankcase ventilation system Check fuel storage evaporation emission control system
Check cylinder head bolts, manifold nuts and carburettor securing nuts for correct torque Check operation of automatic temperature control air cleaner Fit new distributor breaker points Fit new spark plugs Lubricate distributor shaft and cam Check exhaust emission control system Steering
Check wheel balance Brakes Change brake fluid
Every 24 000 miles (40 000 km) Engine Drain and flush cooling system. Refill with antifreeze mixture Renew carburettor air cleaner filter (viscous paper type and dry
paper type) Check ignition wiring and coil
esl
\
&
Engine oil filter (typical)
TREAD WEAR INDICATOR
pg eT
gga
Topping-up the manual transmission
TIRE TREAD
aD
gga
Tire tread wear indicator
Tyre tread wear indicator
Checking battery electrolyte level
MIN. LEVEL
Checking hydraulic fluid level
Checking carburettor oil level
Checking fan belt tension
Checking automatic transmission fluid level Radiator drain plug
Routine maintenance
14
Center lever type
6 TO 7 CLICKS ——