Beginner’s Guide To 3D Printing
377 48 4MB
English Pages 59
Recommend Papers


File loading please wait...
Citation preview
Beginner‘s Guide to 3D Printing All you need to get started with 3D modeling and 3D printing
About This Guide
“
In a world of standardization, 3D printing is a breath of fresh air because it provides a unique way to create finished products that stand out from the rest. If you have an eye for design and a passion to create, let this beginner s 3D printing guide be the first step in your journey to self-expression. In this hands-on guide we will explain how 3D printing works, which materials to choose from and how to create the digital input a 3D printer needs: a 3D model. So let s get started!
Fabian Backer Community Manager at i.materialise
Beginner s—Guide—to—3D—Printing
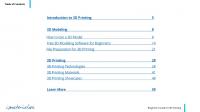
Table of Contents
Introduction to 3D Printing
5
3D Modeling
8
How to Get a 3D Model
8
Free 3D Modeling Software for Beginners
14
File Preparation for 3D Printing
21
3D Printing
28
3D Printing Technologies
28
3D Printing Materials
41
3D Printing Showcases
48
Learn More
59
Beginner s—Guide—to—3D—Printing
Introduction to 3D Printing
What is 3D Printing?
3D printing, also known as additive manufacturing, s a process where a physical object is made from a three-dimensional digital model, typically by superimposing several thin layers of a material.. The earliest use of additive manufacturing was for rapid prototyping during the late 1980s and 1990s. Instead of simply producing prototypes, 3D printers are now also used to create finished high-quality products. The process is getting faster and cheaper and is becoming more mainstream, shifting the creative power back to the individual. Because each object is built up uniquely, 3D printing is especially great for making
unique and customized items, or small series of objects..
Beginner s—Guide—to—3D—Printing
5
What is 3D Printing?
Traditionally, 3D printing has been used for concept cars, consumer electronics, surgical guides and prototypes. Nowadays, 3D printing is also used for jewelry and fashion design, art, architecture,
toys, and interior design. With i.materialise you can bring your ideas to life in 20 different materials and more than 100 possible color and finish combinations. This includes metals (gold, silver, steel), plastics (polyamide
nylon,
resin,
ABS,
rubber-like),
multicolor sandstone and even materials such as wood or ceramics.
Beginner s—Guide—to—3D—Printing
6
What is 3D Printing?
Here s—how—the—3D—printing—process—typically—works: It all starts with a 3D model. Before a printer can print something, you need to tell it what to print. Instead of creating a 2D file (like a Word document), you need a special 3D model for the 3D printer. The software of a 3D printer automatically slices the 3D model into razor-sharp layers. Finally the 3D printer will print the object layer by layer in the material of your choice. We will take a detailed look at the most popular 3D printing
technologies in a later chapter.
Beginner s—Guide—to—3D—Printing
7
How to Get a 3D Model
3D Modeling
A 3D model is a virtual representation of a three-dimensional object that is generated on a computer. It is a model that can be rotated and observed from all angles. A 3D model is the virtual input that a 3D printer needs to print an object. In the world of 2D files, your images can have several file formats (think about JPG, BMP, PNG, etc.). So there is not one single file format that everyone uses. For 3D files the situation is similar. Often, each specific 3D modeling software (we will learn more about those later) comes with its own file format. For 3D printing, however, STL (Standard Triangle Language) is by far the most common format. Most programs should be able to export files to STL or offer plugins that will allow you to do so. If you want to print with i.materialise, you just need to make sure that you can get your 3D model in one of these 42 file formats. But… how do you get your first 3D model?
Beginner s—Guide—to—3D—Printing
9
3D Modeling
Download a 3D Model The easiest and fastest way to get your first 3D model is
to download it. There are many sites out there that offer tens of thousands of 3D files. While most come for free, some professional designs might cost a few dollars. But as a beginner you can definitely start with free 3D models. This is one of the beauties of digital 3D modeling: files can easily be shared. To download your first 3D models, the best place to start is to take a look at our list of top 10 3D model databases. You will see which 3D model marketplaces offer downloads for free, which are the most popular, the
most professional, or the most specialized in 3D printing.
Beginner s—Guide—to—3D—Printing
10
3D Modeling
3D Scan an Object Rather than downloading an existing 3D model, you can also create your own. One way of doing so is by 3D
scanning it. There are tons of high-end scanning devices and scanning services out there, but you might want to start with a free smartphone app for your first try or turn your Xbox into a 3D scanner. To 3D scan your first object, the best place to start is to take a look at our list of top 20 3D scanners and 3D scanning software.
Beginner s—Guide—to—3D—Printing
11
3D Modeling
Hire a Professional 3D Modeler Another simple solution for getting a printable 3D model is to hire a professional 3D designer. You can find a list of 3D designers, their hourly fees, and their work on our 3D modeling platform. You can get in touch with a professional 3D modeler, show them your sketches or ideas, and ask them to create a 3D model just for you. While they take care of the actual 3D modeling and make sure that your file is printable in the material of your choice, you will of course own the design.
Beginner s—Guide—to—3D—Printing
12
3D Modeling
Get Started With 3D Modeling Software Last but not least, you can start learning how to use 3D modeling software yourself. This option gives you the most design freedom but is also quite time-intensive. It means that you will learn how to draw and design on your computer in a virtual, three-dimensional space. Our 3D modeling and 3D printing community here at i.materialise uses tons of different software to get the job done: from free online 3D designing apps to high-end professional software. In the next chapter we will take a detailed look at the most popular 3D modeling programs
for beginners. But you can also check out our ranking of the 25 most popular 3D modeling programs of our community here.
Beginner s—Guide—to—3D—Printing
13
Free 3D Modeling Software for Beginners
3D Modeling
Creating a printable design is the crucial first step in the 3D printing process
and everyone
seems to have a different opinion on which software is most suitable for getting the job done. Unfortunately, classifying and benchmarking different 3D design programs is a very complicated matter as everyone has different preferences and applications for 3D printing in mind. But we re going to take it step by step here. We will briefly describe the most popular free programs out there. We have tried to put them into different categories based on the style of 3D modeling that is predominant for each software. While you have to sculpt in some, you
merge geometric elements in others.
Beginner s—Guide—to—3D—Printing
15
3D Modeling
Solid Modeling/Box Modeling If you are just starting and have never created a 3D model before, TinkerCAD is absolutely indispensable. It s an easy, free and beginner-friendly app with a LEGO-approach. Basically you will combine different geometrical shapes together, in order to create new objects. TinkerCAD is great if you like geometrical designs and a geometrical way of thinking. It s very hard to create organic objects with the interface, however (like people, animals, etc.). We have a tutorial about how to create your first 3D print in TinkerCAD here. Take a look at it to get a better feel for this software. If you reach the limits of TinkerCAD and you like the logic behind this app, you can make the leap to similar, more sophisticated free software
such as 123D Design.
Beginner s—Guide—to—3D—Printing
16
3D Modeling
Parametric Design/Procedural Modeling Parametric 3D modeling software allows you to easily navigate and modify your 3D model by browsing back into the model history and changing its individual elements. Typically this software is most powerful if you want to focus
on precision. However, you won t have much free-style design freedom. FreeCAD is a free software that allows you to create precise geometric designs, such as technical parts, replacement parts, gadgets, cases, scale models etc.
You can learn the basics in our beginner-friendly FreeCAD tutorial. If you would prefer to code your 3D model,
OpenSCAD might be for you. This software uses programming language to create 3D objects. If you want to learn how to code your design, take a look at our OpenSCAD tutorial.
Beginner s—Guide—to—3D—Printing
17
3D Modeling
Digital Sculpting Digital sculpting is the way to go if you want to create organic designs: people, animals or creatures. This is
where your mouse movements matter the most, and mechanical precision matters the least. Meshmixer is a powerful, free software that lets you sculpt digitally and mash different 3D models together. Mold and refine surfaces in real-time like virtual clay! Once again, we have the right tutorial for you to get started. Sculptris also provides an excellent free gateway into the exciting world of 3D sculpting. Its features are easy to learn, even for someone
with no experience in digital art. Yet the 3D sculpting software is robust enough to create base models that can then be refined in other, more sophisticated applications (like ZBrush) later. Beginner s—Guide—to—3D—Printing
18
3D Modeling
Polygon Modeling/Contour Modeling In Polygon Modeling, your 3D object is basically a mesh based on vertices, edges and faces. This allows you to precisely edit parts of your object. By changing the coordinates of one or several vertices, you can change the shape of the model. That makes this way of modeling very powerful but also more difficult to start with. The most popular free software in this section is called Blender. However, it s also the most difficult program mentioned in this guide. The power of design freedom comes with a steep
learning curve. That s why we ve published video tutorials on how to get started as well as on how to turn your Blender model into a 3D print.
Beginner s—Guide—to—3D—Printing
19
3D Modeling
Line Modeling & Curve Modeling This is the process where models are based on drawing lines or curves in a 3D space. By joining these lines or curves together you will define the surface of your object. SketchUp is a software that architects, interior designers, and scale modelers love. SketchUp is mainly based on lines
3D models will be edgy as a result. Take a look at our tutorials to learn how to create your
first SketchUp 3D model and how to make it 3D printable. For curve modeling Moment of Inspiration and Rhinoceros are popular choices. Unlike SketchUp,
it doesn t focus on lines but rather on curves. This allows for great round shapes in product designs. You can check out our video tutorial to get a better understanding of Rhino. While Rhino doesn t come for free, it offers a free 90-day trial. Enough time to test it.
Beginner s—Guide—to—3D—Printing
20
File Preparation for 3D Printing
3D Modeling
Creating a model for 3D printing can seem somewhat intimidating at first. Despite offering you a lot of design freedom, 3D printable models still need to stick to certain design rules. In this chapter we will
briefly explain five important 3D modeling tips to ensure that your 3D model is perfectly printable.
Tip #1: Creating a Watertight 3D Model A printable model must not have any holes in its surface. Ask yourself the question: if I were to put water inside my model, would it flow out? If that s the case then you need to find those holes and close them. Sometimes this process is also called creating a manifold model . The design on the right is an example of a model that is not watertight. You can clearly see that there is a big gap in its surface.
Beginner s—Guide—to—3D—Printing
22
3D Modeling
Tip #2: Creating a 3D Model with Wall Thickness and Volume It s very important that every surface of your 3D model has been assigned a wall thickness. Wall thickness is simply the distance between one surface of your model and its opposite sheer surface. When using your 3D modeling software it is possible to design so-called paper-thin surfaces for visual purposes (i.e. for games) that do not feature any information about their thickness. However, 3D printers need to know how thick you intend the wall of your object to be (or if you want to print a completely solid model). The minimum wall thickness
primarily
depends
on
the
material you choose. You can learn how to choose the perfect wall thickness for your 3D print here.
Beginner s—Guide—to—3D—Printing
23
3D Modeling
Tip #3: Setting the Right Size for Small Details The details, or the small decorative parts of the object such as embossed or engraved text, need to be of a certain size or they will not appear on the printed object. The minimum size of the smallest features of the design depend heavily on the material of your choice. That s why you need to carefully read through the design guide of the material of
your choice first. This is especially important if you intend to add embossed or engraved details such as text. Sticking to the minimum detail size will make sure that everything is as readable as you intended.
Beginner s—Guide—to—3D—Printing
24
3D Modeling
Tip #4: Uploading Grouped Models Unfortunately so-called grouped models are a common reason for us to cancel orders. For example, users that upload the design on the right with six separate shells will get a notification that we cannot print their orders.
When you need more than one print, simply upload the separate objects individually. If you need exactly the same design several times, there s even a quantity discount. If you need many small Polyamide or Alumide parts (we will cover these materials later), then considering the addition of a grid container is an interesting option.
Beginner s—Guide—to—3D—Printing
25
3D Modeling
Tip #5: Hollowing Your Model Hollowing your model means that the interior of your object will not be solid. Solid designs are not necessarily
a problem
they will be stronger and harder to break (depending on the material), but they will also be more
expensive as more 3D printing material will be used. With a hollow model, the interior of your print will be empty (in theory). However, since our printers print layer by layer, 3D printing material can get trapped in the interior of your model (see the image in the middle below). If you would like to avoid this, you can add escape holes to your design. Material that is not used for building your 3D print can then be removed.
Beginner s—Guide—to—3D—Printing
26
3D Modeling
File Preparation Summary Let s take a deep breath. Don t worry: things sound more difficult than they are. If you are struggling to learn how to 3D model you can always find plenty of resources and tutorial videos online. Once again we want to point out our material design guides to you
you will find
valuable and precise instructions for each 3D printing material there. Follow these instructions and you will get a perfectly printable 3D object.
Beginner s—Guide—to—3D—Printing
27
3D Printing Technologies
3D Printing
If you believe that all 3D printers use filaments, and terms like Stereolithography and Laser Sintering cause you headaches, then this chapter is for you. In this chapter, we ll give you an overview about the most essential 3D printing technologies that are currently used on an industrial level. On the next pages we will show you how we print objects in metals, ceramics or resins and how it is possible to print moving and interlocking parts in one go. You will also learn that there is no one-size-fits-all approach when it
comes to 3D printing. Each technology comes with its own advantages and disadvantages.
Beginner s—Guide—to—3D—Printing
29
3D Printing
Filament-Based 3D Printing Home printers typically work with plastic filament. The technology behind this is often referred to as Fused Filament Fabrication (FFF). In our 3D printing factory, we have more professional, industrial-grade machines: our filament printers use a technology called Fused Deposition Modeling (FDM). In an FDM printer, a long plastic filament is fed through a spool to a nozzle where the material is liquefied and drawn on the platform, where it immediately hardens again. The nozzle moves to place the material in the correct location to build your model up layer by layer. When a layer is drawn, the platform lowers itself by one layer thickness
so the printer can start with the next layer.
Beginner s—Guide—to—3D—Printing
30
3D Printing
The printing material these printers use is called ABS. This material will give you a print that is strong and accurate. ABS is very useful for functional applications because it matches 80% of the properties of real injected production material. However, the surface quality of the models produced with this material is rougher compared to other materials.
Beginner s—Guide—to—3D—Printing
31
3D Printing
Powder-Based 3D Printing The next big family of printers that we have is not based on filament but on powder. Laser Sintering is
used to create 3D prints in Polyamide, Alumide, Aluminum, Titanium, Rubber-like and Wood. The interior of the printer is heated up to just below the melting point of the powder of your choice. The printer then spreads out an incredibly fine layer of this powder. A laser beam heats up the areas
that need to be sintered together just above the melting point. And voila: the parts that were touched by the laser are now fused together while the rest remains loose powder.
Beginner s—Guide—to—3D—Printing
32
3D Printing
The models are printed layer by layer with the help of a laser beam. After a layer is printed, a new layer of fresh powder is spread over the surface by a roller. After the printing job is finished, the result is a big block of powder that contains the printed (sintered) models inside. In order to get your prints we need to
dig into the box of un-sintered powder and brush it away. So why is this such a great technology? No supporting structure is needed! The un-sintered powder is the supporting material. This allows for complex designs, and even interlinking and moving parts.
Cleaning laser-sintered 3D prints. Photo by Flanders Investment & Trade (FIT). Copyright by Arthur Los.
33
3D Printing
Other materials such as Ceramics, Multicolor, Stainless Steel and High-Detail Stainless Steel also rely on powder, but are not laser sintered. Instead, a binder is used to glue parts together. We refer to this technology as Powder- & Binder-Based 3D Printing . The starting process of this technology is quite similar to Laser Sintering: a roller puts a thin layer of powder on a platform. However, instead of a laser beam, a special print head places a binding agent at specific points, printing a thin layer of your model that is able to bind to subsequent layers. This process is then repeated over and over again until your model is complete. Since your model was glued together, some post-processing is necessary with this 3D printing technology. The exact post-processing steps heavily depend on the material: Multicolor models get a bath in superglue, Ceramic prints are put in a drying oven and fired several times, High-
Detail Stainless Steel and Stainless Steel objects are placed in an oven for fusing. Stainless Steel models are additionally infused with Bronze for extra strength.
Beginner s—Guide—to—3D—Printing
34
3D Printing
Resin-Based 3D Printing Now we are getting into technology that is used by really big printers. Our Mammoth printers can print up to a length of 2.1 meters (6.9 feet)! These beasts use neither powder nor filament; they use liquid resin. Welcome to the world of Stereolithography. Materials used in this printing process include Paintable Resin, Transparent Resin and Prime Gray. The Stereolithography process takes place in a large tank and begins with a layer of liquid polymer spread over a platform. Since this piqued polymer is UV-sensitive, a UV laser hardens the area that will become
one layer of your 3D print. The rest of the layer stays liquid. The platform is then lowered and the next layer is drawn directly on top of the previous one. When the object is complete, it is raised out of the tank via the supporting platform
much like a submarine rising to the surface of the sea
with the excess liquid
flowing away.
Beginner s—Guide—to—3D—Printing
35
3D Printing
Stereolithography 3D—printer— Mammoth —by—Materialise.—Photo—by—Flanders Investment & Trade (FIT). Copyright by Arthur Los.
3D Printing
So what s the difference between this technique and Laser Sintering? Because a liquid material is used (and not powder), we need to add support material for overhanging parts and parts that stick out. The supports will then be removed manually after the model is taken from the machine. This means that the design freedom of this technology is somewhat limited. The main advantages of materials printed with Stereolithography are smooth surfaces and a lot of finishing and postprocessing possibilities.
Beginner s—Guide—to—3D—Printing
37
3D Printing
Lost-Wax 3D Printing and Casting We ve finally arrived at the last technology. To create part in Gold, Silver, Bronze and Brass, we use LostWax Printing and Casting. This technology builds upon modern 3D printing technology as well as traditional metal casting.
It all starts with 3D printing your model in wax. Next, one or more wax sprues will be attached to your model, which will then be placed in a flask and covered in a fine plaster. When the plaster solidifies, it forms the mold for casting the metal. The plaster mold is then put in an oven and heated for several hours to a point where the wax is completely burned out. Then, molten metal is poured in to fill the cavities left by the wax. Once the metal has cooled and solidified, the plaster mold is broken and the metal models are removed by hand. Finally, your model is filed and sanded to get rid of the sprues. It will be sanded, polished or sandblasted to create the finish you desire. How great is that: the cutting-edge technology of 3D printing meets the ancient technique of metal casting!
Beginner s—Guide—to—3D—Printing
38
3D Printing
Lost-Wax 3D Printing and Casting Explained
Beginner s—Guide—to—3D—Printing
39
3D Printing
Why Knowledge About 3D Printing Technologies Matters All these different technologies might sound confusing, but the important thing to keep in mind is the following: we cannot assume that Stainless Steel and Silver will have similar requirements simply because they are both metals. They are printed using different technologies (Laser Sintering and Lost-Wax Casting) and thus some design features will differ. Knowing the background about how these 3D printing technologies
work will help you to design better models. It will enable you to understand why specific designs might be printable in some materials but not in others.
Beginner s—Guide—to—3D—Printing
40
3D Printing Materials
3D Printing
3D Printing in Nylon Plastics For plastic 3D printing, the most popular choice is Polyamide
iPhone Cases by Pekka Salokannel. 3D printed in Polyamide.
a strong and flexible nylon plastic. Its natural color is white, but it can be dyed in several colors. Its surface is somewhat rough but it can be smoothened. The printing process (Laser Sintering) uses powdered Polyamide, and thus enables
designers to use it for interlocking and moving parts (i.e. creating a chain). Polyamide powder can be mixed with Aluminum particles,
which will give you a
sparkling 3D printing material called
Alumide. 3D prints in Rubber-Like (TPU 92A) are also build in laser sintering 3D printers and lead to flexible plastic objects!
Beginner s—Guide—to—3D—Printing
42
3D Printing
3D Printing in Resin Another popular plastic choice is based on resin. Resin 3D prints are made from a liquid Photopolymer
cured
with
UV
Frogs by Bert De Niel. 3D printed in Transparent Resin.
light
(Stereolithography), and feature a smooth surface. Resin 3D prints can be paintable or transparent. Resin printers can be huge
biggest
printers
millimeters!
If
can
you
print
need
up
prints
to
our
2100
with
an
extremely high level of detail, there s also an HD resin material. Scale modelers prefer a resin called Prime Gray which is known for its affordable price.
Beginner s—Guide—to—3D—Printing
43
3D Printing
3D Printing in Metal Titanium and Aluminum are our strongest 3D printing
Conceptual Handheld Device by Barney. 3D printed in Steel.
materials. They have a matte look and come with an upscale price. If you are looking for a cheaper alternative, Steel is a great choice. Steel comes in several colors and can be polished. If you re looking for an extreme level of detail, HD Stainless Steel might be what you are looking for. For tinkerers chromeplated Brass and Copper tend to be popular choices. While titanium and aluminum are laser-sintered directly, steel prints are created with the use of a binding agent and curing oven. Copper and chrome-plated Brass items are printed in wax and then casted.
Beginner s—Guide—to—3D—Printing
44
3D Printing
3D Printing in Precious Metals Skull Ring Born to Ride by Ziggy Hentze
Models in Sterling Silver, Gold, Brass and Bronze are
ZeroGrafx - Namibia. 3D printed in Brass.
3D printed in wax and then cast. Each of these metals has several finishing options. Gold objects can be created in 14k and 18k, and come in yellow, red, or white Gold. Silver comes in five different
finishes including gloss and antique finishes. Brass and bronze can be PU-coated and polished. As you ve probably already guessed, these materials are the most popular choices for jewelry designers.
Beginner s—Guide—to—3D—Printing
45
3D Printing
3D Printing in Other Materials Multicolor is the only material that enables you to print models with more than one color. Models made of multicolor are constructed from a fine, white, granular sandstone powder. The interior of the model stays white while coloring print heads paint the exterior of your model.
Powder-based printing technology is also used to create Ceramic prints. The printer s rolling mechanism spreads thin layers of ceramic powder on a platform, and a print head places an organic binder at specific locations. Ceramic prints are literally glued together, layer by layer, and then fired in an oven several times. Ceramic comes in seven different color finishes. Models printed in Wood are constructed from a very fine, brown powder made from wood chips. A wooden 3D print will have a brown, granular, rough look. Keep in mind that this material is slightly porous if forced, objects printed in wood can break.
Beginner s—Guide—to—3D—Printing
46
3D Printing
Talking Tom by Toyze. 3D printed in Multicolor.
Egg Cup by Bert De Niel. 3D printed in Ceramics.
Treasure Chest by Kurt Plagge. 3D printed in Wood.
Beginner s—Guide—to—3D—Printing
47
3D Printing Show Cases
Ceramics
two.parts by Christo Logan Photo by Juan Ude
Brass
Tree in Cross by Desmond Chan
Prime Gray (painted by hand)
Chassis Wien T1 by Guido Mandorf
Transparent Resin
Love Lamps by Sandro Lominashvili
Bronze
Sword Handle by Nils Anderssen
Polyamide (painted by hand)
White Rabbit and in the Name of Lucifer by Danny van Ryswyk
Polyamide
Jurassic Jaw by Dr. Roger Close
Polyamide
The Spine by Faraday Motion
Multicolor
Talking Tom by Toyze
Next Steps
Next Steps
Next Steps After Reading This Guide Step 1: Get some more inspiration! By visiting our blog and Instagram account you can discover some of the stunning designs that other users have designed and printed. Step 2: Find a 3D modeling software that suits your needs. Our website features a list of the 25 most popular 3D modeling programs, which could be useful in making a choice. Step 3: Learn more about our 3D printing materials. Browse through our table of materials and make sure to check out our design guides to learn how to create the perfect 3D model for your material. Step 4: Upload and print your design. After uploading your 3D model you will get your price quote instantly.
UPLOAD YOUR 3D MODEL
If you still have questions after reading this guide, contact us at [email protected] and one of our experts will gladly assist you.
Beginner s—Guide—to—3D—Printing
59