Smart Pointers in Rust 9780473679729, 9780473679736, 9780473679743, 9780473679750
103 54
English Pages [75] Year 2023
[Cover]
Introduction
Contents
Defining smart pointers
Understanding Rust
Defining smart pointers, again
Why use them?
Stdlib's smart pointers
Building your own smart pointers
Extension topics
Recap
Cheat sheet
Afterword
About Tim McNamara
Recommend Papers

![Understanding Pointers in C [3 ed.]
8176563587, 9788176563581](https://ebin.pub/img/200x200/understanding-pointers-in-c-3nbsped-8176563587-9788176563581.jpg)
![Pointers in C: A Hands on Approach [0.0]
9781430259114](https://ebin.pub/img/200x200/pointers-in-c-a-hands-on-approach-00-9781430259114.jpg)


- Author / Uploaded
- Tim McNamara
File loading please wait...
Citation preview
The Accelerated Guide to
SMART POINTERS IN RUST
TIM McNAMARA
accelerant.dev
First published by Accelerant Press, Lower Hutt, New Zealand.
© Tim McNamara 2023
ISBN:
978-0-473-67972-9 (paperback)
ISBN:
978-0-473-67973-6 (EPUB)
ISBN:
978-0-473-67974-3 (Kindle)
ISBN:
978-0-473-67975-0 (PDF)
A catalogue record for this book is available from the National Library of New Zealand. Kei te pātengi raraunga o Te Puna Mātauranga o Aotearoa te whakarārangi o tēnei pukapuka.
The Accelerated Guide to
Smart Pointers in Rust Tim McNamara
A short textbook for anyone who’s interested in understanding about Rust’s smart pointers, including people who don’t know what smart pointers are.
Introduction In this guide, we embark on a journey to explore the various types of smart pointers available in Rust, their use cases, and how they contribute to managing memory safely and efficiently. In some sense, they are the essence of Rust’s “zero-cost abstraction” philosophy, whereby you only pay for what you use. Smart pointers are powerful tools that provide additional functionality and guarantees compared to raw pointers. If you’re unsure what a raw pointer is, that’s okay, we’ll discuss that too. We’ll cover the core smart pointer types in Rust, including Box , Rc , Arc , RefCell , and Mutex . Each type will be thoroughly explained, accompanied by practical code examples that are linked directly in the Rust playground, so you can run them in your web browser. Furthermore, we will delve into best practices and common pitfalls associated with using smart pointers in Rust. This knowledge will empower you to write robust, efficient, and maintainable code while avoiding potential pitfalls along the way. Whether you are a Rust enthusiast, a curious learner, or a seasoned developer looking to enhance your memory management skills, this guide is here to support your journey. So let’s dive in and unlock the power of smart pointers in Rust! We begin by learning about what the term “smart pointer” actually means. 3
Contents 2. Defining smart pointers .................................................................................... 6 3. Understanding Rust ............................................................................................ 8 3.1. Ownership ...................................................................................................... 10 3.2. Borrowing ....................................................................................................... 12 3.3. Lifetimes ........................................................................................................ 14 4. Defining smart pointers, again .................................................................... 19 5. Why use them? .................................................................................................... 21 5.1. Automatic memory management ...................................................... 22 5.2. Prevent data races ................................................................................... 23 5.3. Add super powers to pointers ............................................................ 25 5.4. Simplify code .............................................................................................. 26 6. Stdlib’s smart pointers .................................................................................... 27 6.1. Box ........................................................................................................... 28 6.2. Rc ............................................................................................................. 32 6.3. Arc ........................................................................................................... 36 6.4. RefCell ................................................................................................... 39 6.5. Mutex ..................................................................................................... 42 6.6. RwLock .................................................................................................. 45 7. Building your own smart pointers .............................................................. 47 7.1. Drop .................................................................................................................. 48 7.2. Deref ................................................................................................................ 54 7.3. DerefMut ....................................................................................................... 58 8. Extension topics ................................................................................................ 62 8.1. Cyclic data structures ............................................................................. 63 8.2. Rc from scratch ................................................................................. 64 8.3. PhantomData ...................................................................................... 67 4
9. Recap ...................................................................................................................... 70 10. Cheat Sheet ........................................................................................................ 71 11. Afterword .............................................................................................................. 73 12. About Tim McNamara .................................................................................... 74
5
Defining smart pointers A smart pointer is a data structure that not only points to an object in memory but also provides additional features, such as dynamically allocating memory as required or reference counting. By encapsulating these responsibilities, smart pointers can help ensure memory safety and reduce the likelihood of programming errors, such as memory leaks or dangling pointers. In the Rust programming language, smart pointers are an essential tool for safe and efficient memory management while adhering to Rust’s ownership rules. Even if you’re unfamiliar with the term, you have already encountered a smart pointer. The String and its cousin Vec are both smart pointers. As well as holding references to the backing array that’s storing the data, they both provide contain the current length and capacity of that array. Now let’s connect the abstract concept of a smart pointer to some Rust-specific concepts. First, a smart pointer owns the data that it refers to. Some raw pointers, such as Rc offer shared ownership, but that shouldn’t be conflated with the reality that the initial pointer needs to have ownership over whatever it is counting references about. Secondly, smart pointers typically implement Deref where U is the data type that’s being pointed at. This means – along with Rust’s auto-deref behavior – that it’s possible for application programmers to use a smart pointer type in place of its referent largely without fuss.
6
You may have also heard the term fat pointer being used as a synonym for smart pointer, but for the purposes of this document we’ll consider these two terms to be distinct. They’re often used interchangeably because a fat pointer includes some metadata about the referent along side the memory address. That metadata is typically the length. This provides some extra capabilities over a raw pointer – specifically it’s possible to deduce what a valid memory access would be without needing to interpret any bytes. [Sidenote: This contrasts with text strings in C, which require the application to check whether the next byte is NULL ( 0x0 ) whenever it accesses the data.] However, because &T and &mut T are not considered smart pointers in the Rust ecosystem, and because they contain a length field when referring to dynamically-sized types (DSTs), we’ll avoid the use of the term fat pointer.
7
Understanding Rust Rust is a modern, programming language designed with performance, reliability, and productivity in mind. It originated in the world of systems programming and provides low-level control over system resources, similar to languages like C and C++, while offering strong guarantees for memory safety and thread safety, like managed languages such as Java and Python. Its expressive type system is much closer to something like Haskell than C. Its no-fuss build system has enabled a rich ecosystem of 3rd party packages. Memory safety is a crucial aspect of Rust. The language eliminates common programming errors at compile time, such as null pointer dereferences, buffer overflows, and many—but not all—data races, which can lead to security vulnerabilities and hard-to-debug issues. Rust achieves this by introducing a unique ownership system, coupled with borrowing and lifetime rules, which are checked at compile-time, ensuring that your code is safe without incurring runtime overhead. Smart pointers are a key tool in Rust’s memory management toolkit. They are data structures that not only hold a reference to an object in memory but also provide additional features, such as automatic memory management or reference counting. By using smart pointers, developers can productively work within Rust’s strict ownership and borrowing rules. They are considered a zero cost
8
abstraction because they are a compile-time construct that the compiler “boils away” during the build process. As we begin our journey, it’s essential first to grasp the concepts of ownership, borrowing and lifetimes. If you’ve skipped these concepts so far, please do take the time to read through the next few sections because gaining an understanding of what is happening will be very beneficial to you want to undesrstand how some of the smart pointer types behave.
9
Ownership Ownership is a core concept in Rust that allows it to guarantee memory safety without a garbage collector. The ownership system revolves around three primary rules: 1. Each value in Rust has a variable that’s called its owner. 2. There can only be one owner at a time. 3. When the owner goes out of scope, the value will be dropped. Let’s look at some code to illustrate these rules in action:
fn main() { let s1 = String::from("hello"); let s2 = s1; println!("{s1}"); }
We first create a String value and bind it to the variable s1 . Then, we bind the variable s2 to the value of s1 . Lastly, we try to print the value of s1 . If you try to compile this code, you’ll get an error because Rust’s ownership rules prevent it. When we assigned the value of s1 to s2 , Rust moved the ownership of the underlying String value from s1 to s2 . As a result, accessing s1 is no longer valid, and trying to use it will result in a compile-time error. This behavior prevents any potential double-free bugs or invalid memory access, ensuring memory safety. Now let’s look at another example where ownership is transferred through a function call:
10
fn main() { let s1 = String::from("hello"); takes_ownership(s1); println!("{s1}"); } fn takes_ownership(text: String) { println!("I have taken ownership of: {text}"); }
Here, we first create a String value and bind it to the variable s1 . We then call the takes_ownership() function, passing s1 as an argument. The ownership of the String value is moved from s1 to the text parameter in the function. As before, trying to print the value of s1 after transferring ownership produces a compile-time error.
11
Borrowing Rust provides a mechanism to temporarily “borrow” ownership of a value, allowing it to be used without transferring ownership permanently. There are two types of borrowing in Rust: immutable (also known as a shared borrow) and mutable (also known as a unique borrow). Let’s first see how immutable borrowing works:
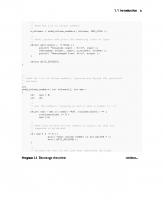
fn main() { let s1 = String::from("hello"); let only_ascii_bytes = only_ascii_bytes(&s1); if only_ascii_bytes { println!("Thank goodness for Unicode!"); } println!("{s1}"); } fn only_ascii_bytes(s: &String) ‑> bool { s.is_ascii() }
In this example, we pass a reference to s1 to the only_ascii_bytes() function using the & symbol, known as the reference operator. This creates an immutable borrow of s1 , which means the function can use the value without taking ownership. This allows us to print the value of s1 after the function call without any issues. Mutable borrowing is similar but allows the borrowed value to be modified. Here’s an example:
12
fn main() { let mut s1 = String::from("hello"); append_world(&mut s1); println!("{s1}"); } fn append_world(s: &mut String) { s.push_str(" world"); }
In this example, we first create a mutable String value – notice the mut keyword – and bind it to the variable s1 . We then call the append_world() function, passing a mutable reference to s1 using the &mut operator. This creates a mutable borrow of s1 , which allows the function to modify the value without taking ownership. Inside the append_world() function, we use the push_str() method String to append “ world” – string literals are of type “string slice”, &str , rather than String – to the original String . After the function call, we can print the modified value of s1 without triggering a compiler error about a moved value. It’s important to note that Rust enforces certain restrictions when it comes to borrowing: 1. Multiple immutable borrows can coexist: This is why they are also known as shared borrows. 2. Either one or the other, but not both, type of borrow can exist at the same time: You can have one or more immutable borrows, or one mutable borrow, but not both. This is sometimes referred to as the XOR rule.
13
Lifetimes Now that we have a solid understanding of ownership and borrowing, let’s dive into the concept of lifetimes and their annotations in Rust. Lifetimes are used to express the scope of a reference and ensure that references are valid for the duration of their use. Rust’s borrow checker uses lifetimes to prevent dangling references, which occur when a reference outlives the data it refers to. By default, Rust can infer lifetimes in most cases, so you don’t need to explicitly annotate them. However, there are situations where you need to provide lifetime annotations to help the compiler understand how references relate to each other. Let’s look at a small code example to understand the need for lifetime annotations:
fn main() { let s1 = String::from("hello"); let s2 = String::from("world"); let result = find_longest(&s1, &s2); println!("{result}"); } fn find_longest(t1: &str, t2: &str) ‑> &str { use std::cmp::Ordering::*; match t1.len().cmp(&t2.len()) { Greater => &t1, Equal => "", Less => &t2, } }
14
In this example, we have a function, find_longest() that takes references to two String values and returns a reference to the longest one. The fragment t1.len().cmp(&t2.len()) compares the lengths of t1 and t2 , returning a std::cmp::Ordering , which is then matched against. If you try to compile this code, you’ll get an error because Rust cannot determine whether the lifetime of the returned reference, which is itself a borrow, should be tied to s1 and s2 . To fix this, can add lifetime annotations to indicate that s1 and s2 have the same lifetime. Here’s the modified code with lifetime annotations:
fn main() { let s1 = String::from("hello"); let s2 = String::from("world"); let result = find_longest(&s1, &s2); println!("{result}"); } fn find_longest &t1, Equal => "", Less => &t2, } }
In this updated code, we’ve added a lifetime parameter 'a to the find_longest() function. This parameter is used to annotate the input references and the return type. The lifetime annotation 'a tells Rust that the returned reference will live at least as long as the shortest of the input references. You may have noticed that the empty string literal doesn’t play a large role in this process. String literals have the special 'static lifetime that indicates their lifetime will remain for the rest of the program. 15
Adding lifetime annotations does not change the lifetimes of the references. They are a way to express the relationships between the lifetimes of different references, helping the compiler verify that your code doesn’t create any dangling references. Let’s look at another example to understand how lifetimes work, this time using structs:
struct Person { fn new(name: &'a str) ‑> Person Author Author Book { Book { title, author, publication_year, } } fn display(&self) { println!( "{} ({}) by {}", self.title, self.publication_year, self.author.name ); } } fn main() { let author_name = "Maya Angelou"; let author = Author::new(&author_name); let book_title = "I Know Why the Caged Bird Sings";
17
let book = Book::new(&book_title, author, 1969); book.display(); let author_name2 = "Chimamanda Ngozi Adichie"; let author2 = Author::new(&author_name2); let book_title2 = "Americanah"; let book2 = Book::new(&book_title2, author2, 2013); book2.display(); }
[playground] In our library example, we define two structs, Author and Book , both with a lifetime parameter 'a . Re-using lifetime parameter names, particularly 'a , is common and does not imply that that the lifetimes are necessarily shared between the contexts using that name. Think of it being similar to a variable, but for lifetimes. The new() methods for both the Author and Book structs both make use of a lifetime parameter to ensure that the instances and their respective fields have compatible lifetimes. In the Book struct’s impl block, we also define a display() method to print out the book’s information. The display() method borrows the Book instance immutably, which is itself borrowing an Author immutably, which is also borrowing a String immutably. The original instances remain accessible after the method call. One consideration with borrowing is that adding a borrow places a constraint on an owner. The value’s owner, that is the variable that is bound to the value, is not able to become invalid to access until after the lifetimes of all of the references to the value have ended.
18
Defining smart pointers, again So, what are smart pointers? Smart pointers are data structures that act like pointers but have additional features, such as automatic memory management, enabling shared ownership and interior mutability. Unlike raw pointers, smart pointers implement traits that allow them to provide these extra features, making them safer and more convenient to use. To explain why they exist, it might be worthwhile to consider writing Rust without smart pointers. The following example shows how easy it is to avoid Rust’s ownership system.
fn main() { let x = 42; let ptr = &x as *const _; drop(x); let y = unsafe { *ptr }; println!("{y}"); }
In this example, we create an immutable reference to the variable x , then immediately cast it as a raw pointer as ptr . The syntax *const _ creates a “const pointer”, one that does not modify what is being referred to and asks Rust to infer the correct type. x is 19
then deleted with drop() , which is shorthand for std::mem::drop() and made available in local scope via the implicit prelude in all Rust code. ptr now points to invalid memory. That is, according to Rust’s lifetime rules, the value assigned to x has been dropped. However, when we go to dereference ptr later on within the unsafe block and then print the result, it’s surprising to notice this doesn’t generate an error at runtime. Instead, 42 is printed to the terminal. This ability to circumvent Rust’s ownersip system makes raw pointers very dangerous, which is why the unsafe keyword is necessary to dereference them.
20
Why use them? Smart pointers are useful for various tasks, including managing heap-allocated memory, sharing references across multiple owners, or providing interior mutability within immutable contexts. Although they come in several forms, each point type helps to enforce Rust’s ownership and borrowing rules, which ensures memory safety and prevents data races, also known as thread safety.
21
Automatic memory management Smart pointers automatically deallocate memory—or release resources, such as file handles or network connections—when they go out of scope, thanks to Rust’s Drop trait. The trait is somewhat magical, in the sense that it works implicitly by calls to drop() that are inserted by the compiler during lifetime analysis. This behavior assists to prevent memory leaks and ensure proper resource management. [Sidebar: While it is a useful mental model to have while you are learning, there is more precision needed than thinking of Drop trait as equivalent to when an object “[goes] out of scope".] Let’s look at how
Box
helps to manage memory:
fn main() { { // Heap‑allocate an i32 value let x = Box::new(42); } // x goes out of scope when its block ends, // and the memory is deallocated }
In this example, when x goes out of scope, the memory allocated on the heap is automatically deallocated, ensuring that no memory leaks occur.
22
Prevent data races The second advantage of smart pointers is preventing data races and improving concurrency safety. Some smart pointers, like Arc and Mutex , provide thread-safe mechanisms to share data across multiple threads while preventing data races. For instance, let’s see how Arc and share data safely across threads:
Mutex
can be used to
use std::sync::{Arc, Mutex}; use std::thread; fn main() { let counter = Arc::new(Mutex::new(0)); let mut handles = vec![]; for _ in 0..10 { let counter = Arc::clone(&counter); let handle = thread::spawn(move || { let mut num = counter.lock().unwrap(); *num += 1; }); handles.push(handle); } for handle in handles { handle.join().unwrap(); } println!("Result: {}", *counter.lock().unwrap()); }
[playground]
23
In this example, we use Arc for shared ownership across multiple threads and Mutex to ensure exclusive access to the data, preventing data races.
24
Add super powers to pointers The third advantage of smart pointers is that they provide additional functionality beyond raw pointers. For example, the smart pointer types Rc and Arc provide shared ownership through reference counting at runtime. This allows multiple owners to share the same data without having to worry about manual memory management or synchronization. Here’s an example of using
Rc
for shared ownership:
use std::rc::Rc; struct Secret(u32); fn main() { let data = Rc::new(Secret(1234)); let data_clone = Rc::clone(&data); println!("Original: {}", data); println!("Clone: {}", data_clone); }
In this example, data and data_clone share ownership of the same Secret , and reference counting ensures that the memory is deallocated when the last reference goes out of scope. Or, to be more precise, when Drop is invoked.
25
Simplify code The fourth advantage of smart pointers is that they simplify complex memory management patterns. By abstracting away lowlevel memory operations and providing safe, high-level interfaces, smart pointers reduce the likelihood of human error and make memory management more ergonomic and efficient. To sum up, smart pointers provide a safe and convenient way to manage memory and resources in Rust, helping developers avoid common memory-related pitfalls and write more reliable code.
26
Stdlib’s smart pointers This section provides the bulk of the book’s material. It describes what most commonly used smart pointers are, why they were created and touches on how to use them.
27
Box Let’s start with Box . Box is a smart pointer that allocates memory on the heap and allows you to move ownership of a value from the stack to the heap. It’s useful in situations where you want to store large data structures or transfer ownership of a value between different parts of your code. If you have never heard of the term “box” before in relation to computer science, then think of it as a reference to some value that can be shared between function calls. Essentially, it’s a reference to something that exists outside of the scope of a specific function, but it’s still not a global variable. I personally find the analogy, box, to be too stretched. Perhaps a better word would actually be “portal”. Use cases and scenarios for
Box
:
• Storing large data structures that would otherwise cause stack overflows • Transferring ownership between different parts of your code • Making enum representations more uniform • Creating recursive data structures, such as linked lists and trees
Heap allocation and ownership transfer Allocating very large objects on the stack can cause stack overflow. Box is the mechanism that Rust provides to allocate objects on the heap. Here’s an example of doing so:
28
fn main() { // Allocate a large array on the heap let data = Box::new([0; 1024 * 1024]); // Print out its length println!("Length: {}", data.len()); }
In this example, we use Box::new to allocate a large array on the heap. The Box takes ownership of the array, and when it goes out of scope, the memory is automatically deallocated. This pattern is common when an inner function wants to create some data structure but then pass the data structure back to the parent. Sending data back in a box will avoid the “this variable does not live long enough” error message that appears when you attempt to return a reference to a local variable.
Making enum representations more uniform Consider the case of an enum that has variants of wildly different sizes. Using values of the smaller-sized variants will be wasteful, as Rust always allocates enough memory for every variable to be able to be every variant.
enum Sizes { S, M, L, XL([0; 1024]), XXL([0; 1024 * 1024]) }
In this example, the XL and XXL variants are significantly larger than the S , M and L variants. You can reduce this variance by storing a reference 29
enum Sizes { S, M, L, XL(Box), XXL(Box) }
Recursive data structures Box is also useful for creating recursive data structures. Let’s take a look at an example of a singly-linked list implementation using Box . In our code, we’ll be using a List struct to conceptually represent the whole list as a collection type. Using a type to encapsulate the entire collection like this allows items to be stored uniformly, avoiding difficulties with ownership and means that there will be fewer problems if we want to refer to a specific Item as a local variable. Every Item is accessed via a Option , where None implies that we’ve reached the end of the list.
struct List(Option); struct Item(i32, Option);
To see these two types in action, let’s expand the code out into a fully working example. In the next code example, you’ll see an append() method implemented, which traverses the list and updates the last item to point to whatever’s being appended.
#[derive(Debug)] struct List(Option);
30
#[derive(Debug)] struct Item(i32, Option); impl List { fn append(&mut self, value: i32) { let mut current = &mut self.0; while let Some(ref mut next_item) = current { current = &mut next_item.1; } let item = Item(value, None); *current = Some(Box::new(item)); } } fn main() { let mut l = List(None); l.append(1); l.append(2); println!("{l:?}") }
[playground] By using Box , we can create a recursive data structure that stores its elements on the heap, allowing us to build linked lists of arbitrary length.
31
Rc Another commonly used smart pointer is Rc , which stands for reference counted. Rc enables shared ownership of a value, allowing multiple parts of your code to have read-only access to the same data without having to clone it. It uses reference counting to keep track of the number of references to the data, and deallocates the memory when the last reference goes out of scope.
Shared ownership and reference counting Here’s an example demonstrating shared ownership with
use std::rc::Rc; fn main() { let data = Rc::new("Hello, world!"); let data_clone1 = Rc::clone(&data); let data_clone2 = Rc::clone(&data); println!("Original: {}", data); println!("Clone 1: {}", data_clone1); println!("Clone 2: {}", data_clone2); println!("Reference count: {}", Rc::strong_count(&data)); }
Original: Hello, world! Clone 1: Hello, world!
32
Rc
:
Clone 2: Hello, world! Reference count: 3
In this example, we create an Rc to manage a string, and then create two clones of it. The Rc::clone function doesn’t actually clone the underlying data; it merely increments the reference count. When the last reference ( data , data_clone1 , and data_clone2 ) goes out of scope, the memory is deallocated. And to see what happens when one of the clones is dropped, here’s an example where one of the clones is passed to a function that takes ownership:
use std::rc::Rc; fn main() { let data = Rc::new("Hello, world!"); let data_clone1 = Rc::clone(&data); let data_clone2 = Rc::clone(&data); println!("Original: {}", data); println!("Clone 1: {}", data_clone1); println!("Clone 2: {}", data_clone2); println!("Reference count (before): {}", Rc::strong_count(&data)); take_ownership(data_clone2); println!("Reference count (after): {}", Rc::strong_count(&data)); } fn take_ownership(data: Rc) { println!("Data in function: {}", data); }
In this example, we create an Rc to manage a string and then create two clones of it. We pass data_clone2 to the take_ownership function, which takes ownership of the Rc instance.
33
When we run this code, the output shows the reference count before and after passing data_clone2 to the function:
Original: Hello, world! Clone 1: Hello, world! Clone 2: Hello, world! Reference count (before): 3 Data in function: Hello, world! Reference count (after): 2
As you can see, the reference count is decremented after the function call because the take_ownership() function takes ownership of data_clone2 , and it goes out of scope at the end of the function.
Creating a tree-like data structure Here’s an example of using
Rc
to create a tree:
use std::rc::Rc; struct Node { value: i32, next: Option, } fn main() { let node1 = Rc::new(Node { value: 1, next: None }); let node2 = Rc::new(Node { value: 2, next: Some(Rc::clone(&node1)) }); let node3 = Rc::new(Node { value: 3, next: Some(Rc::clone(&node2)) }); println!("Node 1: {:?}", node1); println!("Node 2: {:?}", node2); println!("Node 3: {:?}", node3); }
34
We create three nodes that reference each other using Rc. The next field of each node is an Option , which allows for the possibility of no next node (i.e., None ). This is similar to implementing a linked list in Section 6.1.3, except that there can now be much richer networks expressed than what is available with references and Box .
When to use Rc (and when to use something else) is well-suited for situations where you want to share readonly data among multiple parts of your code, without the overhead of cloning the data. Rc
Here are a few ideas for areas that might suit reference counting: • Implementing tree-like data structures, such as a file system or a DOM tree. • Storing shared configuration data, such as command-line arguments or environment variables. • Sharing large, immutable data structures, such as lookup tables or dictionaries. However, there are some limitations: •
is not thread-safe, meaning it should only be used in single-threaded environments. For multi-threaded scenarios, you can use Arc instead, which provides atomic reference counting. • Rc doesn’t support interior mutability out of the box. If you need mutable access to the underlying data, you can use RefCell in combination with Rc to achieve interior mutability. Rc
Despite these limitations, Rc is a valuable tool for efficient memory management and sharing data in single-threaded Rust applications.
35
Arc In a multithreaded application, sharing ownership of data between threads can be a bit more challenging than in single-threaded applications. This is where the Arc smart pointer comes in handy. Arc stands for “atomic reference counting”, which means it’s designed for use in concurrent environments where it needs to be safe to share ownership of a value across multiple threads. The word atomic has special meaning within the context of computer science. It derives from the original sense of the word atom, indivisible, rather than implying something about the type’s size (tiny, miniscule) that might be mentally closer to modern readers. Within the context of computing, an atomic operation has no intermediate states. It either succeeds or fails. This is guaranteed by the CPU. Arc enables you to share data structures between threads, at the cost of some runtime performance. Arc will also that the data is deallocated when there are no more references to it, while also preventing race conditions and other thread safety issues.
Atomic reference counting for thread-safe shared ownership Here’s an example demonstrating how Arc can be used for shared ownership across multiple threads:
36
use std::sync::Arc; use std::thread; fn main() { let data = Arc::new("Hello, world!"); let mut handles = vec![]; for _ in 0..3 { let data_clone = Arc::clone(&data); let handle = thread::spawn(move || { println!("Data in thread: {}", data_clone); }); handles.push(handle); } for handle in handles { handle.join().unwrap(); } }
In this example, we create an Arc to manage a string and then spawn three threads, each with a clone of the Arc . Each thread can safely read the shared data without data races or other concurrency-related issues. When the last reference to the data goes out of scope, the memory is deallocated.
Use cases for Arc is well-suited for situations where you need to share readonly data across multiple threads, such as: Arc
• Sharing large read-only data structures, like configuration settings or lookup tables, across worker threads. • Implementing shared state in concurrent algorithms or data structures, where multiple threads need to coordinate their work based on common information. It’s important to note that Arc only provides shared ownership and doesn’t allow multiple threads to mutate the underlying data 37
simultaneously. To achieve thread-safe mutation, you can use Arc in combination with other concurrency primitives like Mutex or RwLock . Arc is a powerful tool for managing shared data in concurrent Rust programs, allowing for efficient and safe data sharing across multiple threads.
38
RefCell RefCell is another smart pointer in Rust that provides interior mutability. Interior mutability means that you can mutate the data stored in a RefCell even if the RefCell itself is not mutable. It enforces Rust’s borrowing rules at runtime, which allows for greater flexibility in certain situations, albeit with some performance overhead and the risk of panics if the rules are violated.
Using RefCell to provide interior mutability Perhaps the best way to explain interior mutability is by example. Note that in the following example, the variable data is marked as immutable when it is initialized with let :
use std::cell::RefCell; fn main() { let data = RefCell::new(42); { let mut data_ref_mut = data.borrow_mut(); *data_ref_mut += 1; } let data_ref = data.borrow(); println!("Data: {}", data_ref); }
39
In this example, we create a RefCell to manage an integer value. We then borrow a mutable reference to the data using the borrow_mut method, modify the data, and release the mutable reference when it goes out of scope. Finally, we borrow an immutable reference to the data using the borrow method and print the value. Aside: Interior mutability in more detail Interior mutability is a concept in Rust that allows you to mutate data through an immutable reference. It essentially enables you to bypass Rust’s compile-time immutability and borrowing rules, allowing for greater flexibility in certain situations. In Rust, variables are immutable by default, which means that once they are initialized, their values cannot be changed. You can make a variable mutable using the mut keyword. However, Rust enforces strict borrowing rules at compile-time to guarantee memory safety: 1. You can have multiple immutable references to a piece of data, but no mutable references. 2. You can have exactly one mutable reference to a piece of data, but no immutable references. These rules ensure that no part of the code can accidentally mutate data that is being read by another part, preventing data races and other concurrency issues. However, in some cases, these rules can be too restrictive, and you may need more flexibility. This is where the concept of interior mutability comes into play. It allows you to mutate data even if the reference to the data is immutable. This is achieved by moving the borrowing rules enforcement from compile-time to runtime, using special smart pointers like RefCell , and Cell . In turn, all types offering interior mutability are built upon UnsafeCell .
40
Runtime borrow checking and the potential for panics enforces Rust’s borrowing rules at runtime, which means that if you violate the rules, your program will panic. Here’s an example that demonstrates a panic due to a violation of the borrowing rules: RefCell
use std::cell::RefCell; fn main() { let data = RefCell::new(42); let data_ref = data.borrow(); let mut data_ref_mut = data.borrow_mut(); // This will panic! println!("Data: {}", data_ref); }
In this example, we first borrow an immutable reference to the data using the borrow method. Then, we attempt to borrow a mutable reference to the same data using the borrow_mut method. Since Rust’s borrowing rules don’t allow mutable and immutable references to coexist, the program panics at runtime. is a useful tool for providing interior mutability in situations where you need more flexibility than the compile-time borrow checking offers. However, it’s essential to use it with caution, as violating the borrowing rules can lead to runtime panics. RefCell
41
Mutex Mutex is a smart pointer in Rust that provides exclusive, mutable access to data in a multi-threaded environment. Mutex is short for mutual exclusion and is used to protect shared data from data races and other concurrency-related issues.
Utilizing Mutex to protect shared data in a multithreaded environment The standard case for a mutex is when you wish to enable multiple threads to be able to modify and/or read some value. Here’s an example demonstrating how that works with Rust’s Mutex type:
use std::sync::{Arc, Mutex}; use std::thread; fn main() { let counter = Arc::new(Mutex::new(0)); let mut handles = vec![]; for _ in 0..10 { let counter_clone = Arc::clone(&counter); let handle = thread::spawn(move || { let mut num = counter_clone.lock().unwrap(); *num += 1; }); handles.push(handle); } for handle in handles {
42
handle.join().unwrap(); } println!("count: {}", *counter.lock().unwrap()); }
[playground] In this example, we create a Mutex to protect an integer value, which is wrapped in an Arc to allow for shared ownership across multiple threads. We then spawn 10 threads, each incrementing the counter by 1. By using the lock() method, we ensure that each thread has exclusive access to the counter when incrementing its value.
Locking and unlocking a Mutex to ensure exclusive access and prevent data races When using a Mutex , it’s important to understand the concepts of locking and unlocking. Locking a mutex grants exclusive access to the data it protects, and unlocking releases that access. In Rust, this is typically done using the lock() method, which returns a Result containing a mutable reference to the data. In the example above, we use the lock().unwrap() method to lock the mutex and obtain a mutable reference to the data. The unwrap() call is used to handle any potential errors (e.g., if the mutex is poisoned due to a panic in another thread). Once the mutex is locked, the thread has exclusive access to the data, ensuring that no data races can occur. When the mutable reference goes out of scope, the mutex is automatically unlocked, releasing the exclusive access and allowing other threads to lock the mutex. is an useful tool for protecting shared data in multithreaded Rust programs, ensuring that only one thread can access Mutex
43
the data at a time and preventing data races. However, mutual exclusion can be heavy-handed. If you have a read-heavy workflow, you may wish to consider using RwLock .
44
RwLock RwLock\ is conceptually very similar to Mutex , but there is more book keeping to do as a programmer. You are given two locks to interact with in your code, one for reading and the other for writing.
Both Mutex and RwLock are concurrency primitives in Rust designed to protect shared data in multi-threaded environments. The choice between using Mutex and RwLock depends on the specific use case and access pattern of the shared data. •
Mutex
:
Mutex provides exclusive access to the data it protects, meaning that only one thread can access the data at a time, whether it is for reading or writing. This can be suitable for situations where:
• The data is frequently updated, and exclusive access is necessary to maintain data consistency. • The overhead of managing separate read and write locks is not worth the added complexity or performance gain. •
RwLock
:
(Read-Write Lock) allows multiple threads to read the data simultaneously but requires exclusive access for writing. This can be more efficient in scenarios where: RwLock
• The data is read more frequently than it is updated. • The cost of contention for read access is higher, and allowing multiple concurrent readers can improve performance. You should consider using Mutex when exclusive access is required for both reading and writing, or when the overhead of 45
managing separate read and write locks outweighs the potential performance benefits. On the other hand, use RwLock when you have a read-heavy workload and allowing multiple concurrent readers can lead to improved performance and resource utilization. It’s important to note that the performance characteristics of Mutex and RwLock can also be platform-dependent, so it’s a good idea to benchmark and profile your specific use case to determine the most suitable choice for your application.
46
Building your own smart pointers Now that you’ve taken a look at some the of the types that are available to you, it would be helpful to understand a little more about how they’re implemented.
47
Drop The Drop trait is an essential concept in Rust related to resource management and automatic cleanup when a value goes out of scope. It plays a crucial role in smart pointers and the overall memory safety of Rust programs.
Definition and purpose of the Drop trait The Drop trait provides a way to run custom code when a value is about to go out of scope, allowing you to clean up resources associated with the value. This is particularly useful when managing resources like file handles, sockets, or heap-allocated memory. Implementing the Drop trait for a type allows you to define a drop() method that will be called automatically when an instance of the type is no longer needed.
pub trait Drop { fn drop(&mut self); }
48
How it relates to resource management and smart pointers The Drop trait is closely related to smart pointers in Rust, as many smart pointers implement the Drop trait to automatically manage resources when they go out of scope. This ensures proper resource cleanup and prevents resource leaks, contributing to the overall memory safety of Rust programs. The semantics of what happens during drop() are up to the type in question. For example, when a Box goes out of scope, it automatically deallocates the heap-allocated memory it manages by implementing the Drop trait. In contrast, Rc or Arc will update their internal reference count. Only when the count reaches zero will the memory they manage be automatically deallocated. The following code demonstrates how the Drop trait can work with a custom type:
struct CustomResource { name: String, } impl Drop for CustomResource { fn drop(&mut self) { println!("Releasing CustomResource: {}", self.name); } } fn main() { let resource = CustomResource { name: String::from("Resource 1"), }; let boxed_resource = Box::new(CustomResource { name: String::from("Resource 2"), }); println!("Custom resources created.");
49
} // Both resources are automatically dropped and cleaned up here.
In this example, we implement the Drop trait for a CustomResource type. When instances of this type and a Box go out of scope, their drop() methods are called, ensuring proper cleanup.
Automatic call of the drop() method when a value goes out of scope When a value implementing the Drop trait goes out of scope, Rust automatically calls its drop() method. This call to drop() is implicit. It does not appear in the program’s source code unless you wish to customize the default behavior.
Execution order of drop() in nested structures In nested structures, Rust guarantees that drop methods are executed in a specific order: from the innermost value to the outermost value. This ensures proper cleanup and consistency when dealing with complex data structures.
struct Outer { inner: Inner, } struct Inner { data: String, } impl Drop for Outer {
50
fn drop(&mut self) { println!("Dropping Outer"); } } impl Drop for Inner { fn drop(&mut self) { println!("Dropping Inner"); } } fn main() { let outer = Outer { inner: Inner { data: String::from("Some data"), }, }; println!("Outer and Inner created."); } // Inner is dropped first, followed by Outer.
Outer and Inner created. Dropping Outer Dropping Inner
[playground]
Manually calling drop() In some cases, you might want to clean up a value before it naturally goes out of scope. To do this, you can use the drop() function from the std::mem module.
use std::mem; struct CustomResource {
51
name: String, } impl Drop for CustomResource { fn drop(&mut self) { println!("Releasing CustomResource: {}", self.name); } } fn main() { let resource = CustomResource { name: String::from("Resource 1"), }; println!("Custom resource created."); mem::drop(resource); // Explicitly drop the resource. // Accessing resource here would result in a compile‑ time error. }
[playground]
Implementing Drop When implementing the Drop trait, follow these best practices: • Keep the drop method simple: Avoid complex logic in the drop method, as you want others to be able to easily verify that it doesn’t create double-free errors and undefined behaviour. • Handle errors gracefully: If an error occurs during cleanup, a common strategy is to log it at a very high warning level and continue. You have a memory leak, which is usually not critical. However panicking in a drop() method can lead to a double panic and a program crash. Alternatively, your strategy can be to “fail fast”, and panic as soon as close to the error as possible.
52
• Avoid using std::mem::drop() explicitly: In most cases, you should let Rust automatically call the drop() method when a value goes out of scope. Only use std::mem::drop when you absolutely need to release resources early, and be aware of potential double-free errors and undefined behavior. • Do not rely on the order of drop calls: Although Rust guarantees a specific drop order for nested structures, it’s best not to rely on this behavior, as it can make your code more fragile and harder to refactor.
53
Deref In some sense, the Deref trait is the thing that enables smart pointers to exist so seamlessly within the Rust language. When you call a method on an objet of type
T
that implements
Deref
, then your value can call methods from U directly. [Sidebar: This functionality can actually be abused to create something that feels a little like sub-typing in Rust. This is generally known as an anti-pattern that will confuse your users.] To understand its usefulness, consider how nice it is to be able to call the methods implemented for the &str type from a String . Without this “auto-deref” behavior, working with Rust wiould be much more tedious. A related characteristic of smart pointers is “deref coercion”, more formally known as dereference coercion. Dereference coercion makes it easier to work with smart pointers by allowing them to be used in the same way as regular references. This reduces the need for explicit dereferencing and thus removes some of the syntatic noise in our programs.
Implementing the Deref trait for a custom smart pointer type The Deref trait has a single required method called deref() . deref() should return a reference to the underlying data, an associated type Target that’s defined by the implementor. You can read the ?Sized syntax as, “is not required to be Sized”. 54
trait Deref { type Target: ?Sized; fn deref(&self) ‑> &Target; }
Consider the following example where we create a custom smart pointer called Portal (if you remember from Section 6.1, I think that portal would be a better name than box) and implement the Deref trait for it:
use std::ops::Deref; struct Portal(T); impl Portal { fn new(value: T) ‑> Portal { Portal(value) } } impl Deref for Portal { type Target = T; fn deref(&self) ‑> &T { &self.0 } } fn main() { let p = Portal::new(5); assert_eq!(*p, 5); }
[playground] In this example, we define a custom smart pointer Portal and implement the Deref trait, allowing for easy access to the underlying value using the dereference operator ( * ).
55
Understanding dereference coercion Dereference coercion, more commonly referred to by its informal name “deref coercion”, is a feature in Rust that automatically converts a reference to a type implementing the Deref trait into a reference to its target type. This makes it convenient to work with custom smart pointers and use them interchangeably with standard references. For example, consider the following function that takes a reference to an i32 integer:
fn print_value(value: &i32) { println!("Value: {}", value); }
Let’s say that we wanted to print a value of that’s wrapped with our custom Portal smart pointer defined at Section 7.2.1. Rust allows us to pass it to print_value() directly—which only accepts an &i32 —without explicitly dereferencing it:
fn main() { let p = Portal::new(5); print_value(&Portal); }
struct Person { name: String, } impl Person { fn name(&self) ‑> &str { &self.name } }
56
fn main () { let person = Person { name: String::from("Alice") }; let boxed_person = Box::new(person); // We can call get_name directly on boxed_person, thanks to the Deref trait. let name = boxed_person.get_name(); }
57
DerefMut In addition to the Deref trait, Rust provides the DerefMut trait, which allows for overloading dereference operations for mutable references. It works similarly to the Deref trait but returns a mutable reference to the target type.
Implementing the DerefMut trait To implement the DerefMut trait for a custom pointer type, you need to define the deref_mut() method, which returns a mutable reference to Self::Target .
use std::ops::{Deref, DerefMut}; struct Portal { data: T, } impl Deref for Portal { type Target = T; fn deref(&self) ‑> &T { &self.data } } impl DerefMut for Portal { fn deref_mut(&mut self) ‑> &mut T { &mut self.data } }
58
fn main() { let mut p = Portal:: {data: 42} ; *p = 0; println!("{}", 100 + *p ); }
[playground] In this example, we implement both the Deref and DerefMut traits for a Portal type. Within the main() function, the DerefMut type is exercised with the expression *p = 0 , which sets the internal data field of p to 0 . 3. How DerefMut interacts with the Deref trait (47:40 - 48:00) The DerefMut trait builds upon the Deref trait to provide mutable access to the inner data. When you have a mutable reference to a type that implements both Deref and DerefMut, Rust will automatically apply dereference coercion for mutable methods, providing a consistent interface for working with the inner data.
fn main() { let mut portal = Portal { data: "Wow. ".to_string() }; // We can call mutable methods // on the inner data directly, // thanks to the DerefMut trait. portal.push_str(" I'm excited to learn more."); println!("data: {}", portal); }
In this example, we’re able to call the push_str() method on portal directly, without having to explicitly dereference it. This demonstrates how the DerefMut trait interacts with the Deref trait to provide a consistent interface for working with the inner data.
59
DerefMut best practices Here is some general advice for making use of DerefMut, and for building smart pointers generally. • Deref and DerefMut enable something to be called a “smart pointer”: You should consider implementing the Deref and DerefMut traits for your custom types when you want to provide a consistent and ergonomic interface for working with the inner data of your wrapper type. Smart pointers are dapper wrappers, if you forgive the terrible wording. Implementing these traits allows for dereference coercion, which simplifies code and makes it more readable. • Don’t confuse your users: When implementing both Deref and DerefMut traits, it’s crucial to ensure consistent behavior between them. This means that if your Deref implementation provides access to a specific field of a struct, the DerefMut implementation should also provide mutable access to the same data. This ensures that users of your type can rely on a predictable interface. • Overuse is abuse: Avoid implementing the Deref and DerefMut traits for cases where the relationship between the types is not clear or does not represent a pointer-like behavior. Doing so may lead to confusing and error-prone code. • For use with genuine ownership only: Be especially cautious when implementing the Deref trait for types with interior mutability, e.g. using RefCell or Mutex . This can lead to subtle bugs or race conditions if not handled correctly. • Be conservative: Make sure that your Deref and DerefMut implementations do not introduce any side effects or unexpected behavior, as they will be implicitly called by the compiler through dereference coercion. That means that your types users will find it difficult to track down a specific call site where an error was introduced. • Testing helps: Test your Deref and DerefMut implementations thoroughly to ensure they provide the expected behavior in 60
various situations, especially when dealing with edge cases, such as empty or invalid data.
61
Extension topics Many people want to know more than what’s on the surface of what the standard libary can offer them. This section is for readers who want to explore more.
62
Cyclic data structures Rust—well, safe Rust—does not like cycles. It would much prefer you to represent everything as a hierarchy. It turns out that Arc or Rc are available to implement a cyclic data structure, such as a cyclic linked list or a tree with cycles. This is because Arc and Rc offer shared ownership via their use of reference counting to keep track of the number of references to an object. Cyclic references will not cause memory leaks as long as all references are managed by Arc or Rc .
63
Rc from scratch If you’ll forgive the somewhat gnarly code, here is an implementation of the standard library’s Rc trait from scratch.
use std::cell::Cell; use std::marker::PhantomData; use std::ops::Deref; use std::ptr::NonNull; struct RcInner { count: Cell, data: T, } pub struct Rc { inner: NonNull, _marker: PhantomData, } impl Rc { pub fn new(data: T) ‑> Self { let inner = Box::new(RcInner { count: Cell::new(1), data, }); Rc { inner: unsafe { NonNull::new_unchecked(Box::into_raw(inner)) }, _marker: PhantomData, } } pub fn strong_count(&self) ‑> usize { let inner = unsafe { self.inner.as_ref() };
64
inner.count.get() } } impl Clone for Rc { fn clone(&self) ‑> Self { let inner = unsafe { self.inner.as_ref() }; inner.count.set(inner.count.get() + 1); Rc { inner: self.inner, _marker: PhantomData, } } } impl Drop for Rc { fn drop(&mut self) { let inner = unsafe { self.inner.as_ref() }; if inner.count.get() == 1 { drop(inner); let _free = unsafe { Box::from_raw(self.inner.as_ptr()) }; } else { inner.count.set(inner.count.get() ‑ 1); } } } impl Deref for Rc { type Target = T; fn deref(&self) ‑> &T { let inner = unsafe { &self.inner.as_ref() }; &inner.data } } fn main() { let a = Rc::new(123); let b = 456; let a_prime = Rc::clone(&a);
65
println!("a + b = {}", b + *a_prime) }
[playground] I won’t go into much detail explaining this code. Unpicking it is half of the fun! There is one concept that is completely new though, and that’s PhantomData .
66
PhantomData In Rust, PhantomData is a marker type that doesn’t actually hold any data but instead exists only to represent a certain type parameter. It can be used to inform the Rust compiler about certain data that is relevant for the type system, but isn’t actually used at runtime. One common use case for PhantomData is to ensure that the generic type parameter of a struct or enum is used in a certain way, without actually holding any values of that type. For example, consider a struct that wraps a raw pointer:
struct ExternalData { ptr: *const u8, _marker: PhantomData, }
In this case, the _marker field is an instance of PhantomData . It doesn’t actually hold any data, but its presence allows us to ensure that T is actually used in the struct in some way. The name _marker is commonly used to indicate that this field exists only to mark the type parameter T . Another common use case for PhantomData is to provide lifetime information to the Rust compiler. For example, consider a struct that stores a reference to an object of type T , as well as a reference to a value of type U that is associated with T :
struct ExternalData, }
In this case, the _marker field is used to tell the Rust compiler that the lifetime of u_ref is tied to the lifetime 'a . Without this marker, the Rust compiler might not be able to determine the correct lifetime relationships between the different references. Let’s revisit the definition of our custom Section 8.2.
Rc
implementation at
struct RcInner { count: Cell, data: T, } pub struct Rc { inner: NonNull, _marker: PhantomData, }
We’ve just heard that PhantomData is a tool for providing extra information to the Rust compiler that can help enforce certain guarantees about how generic types are used. But what does that mean? When using references, or a smart pointer like Rc , the lifetime of the pointer and its data may be different. The lifetime of the pointer is determined by how many references to it exist, while the lifetime of the data is determined by when it is dropped. In the case of Rc , the Rust compiler must ensure that all references to the data are dropped before the data itself is dropped. is a type in Rust that does not actually hold any data, but is used to inform the compiler about the relationship between types. In the case of Rc , the _marker field is used to tell the Rust compiler that the lifetime of the reference is tied to the lifetime of the data it points to. Without this marker, the Rust PhantomData
68
compiler would have difficulty inferring the lifetime relationship between the different references, which could lead to unsafe code or memory leaks. By including the _marker field with PhantomData in our Rc implementation, Rust’s borrow checker can correctly reason about the lifetime of the reference and ensure that it does not outlive the lifetime of the data it points to. This helps to ensure memory safety and prevent bugs caused by incorrect lifetime assumptions.
69
Recap First, we learned about the purpose of smart pointers, which is to provide additional functionality and guarantees compared to raw pointers. Rust smart pointers have ownership semantics and allow for safer memory management, shared ownership, and interior mutability. We covered several types of smart pointers in Rust, including Box , which is used for allocating memory on the heap and ensuring proper memory deallocation, and Rc and Arc , which provide shared ownership of values. We also explored RefCell and Mutex , which enable interior mutability and thread-safe shared state, respectively. The Drop and Deref traits play a crucial role in the implementation of smart pointers. The Drop trait allows for custom resource cleanup upon going out of scope, while the Deref trait allows for dereferencing smart pointers to access the underlying value. We also delved into the concept of interior mutability and concurrency safety, highlighting the usage of RefCell and Mutex for these purposes, and demonstrated how to use them through examples. That’s all for this tutorial on smart pointers in Rust. We hope you have found this informative and useful. It’s likely that you discovered errors or omissions as you were making your way through. Please do send them through to Tim by email [email protected] . 70
Cheat Sheet Box • • • •
Allocates memory on the heap Points to a single value of type T Automatically deallocates memory when it goes out of scope Provides ownership and move semantics
Rc • Points to a value of type T shared among multiple owners • Keeps track of the number of owners and deallocates memory when the count reaches 0 • Useful for scenarios where shared ownership is required in single-threaded environments Arc • Similar to Rc , but for thread-safe shared ownership in multithreaded environments • Uses atomic reference counting to ensure safe sharing among multiple threads RefCell • Provides interior mutability, allowing mutation of immutable values • Uses runtime borrow checking to enforce rules for shared mutable access • Useful for scenarios where immutable values need to be mutated, but ownership cannot be transferred 71
Mutex • Provides concurrency-safe shared mutable access to values of type T • Uses locks to enforce exclusive access, preventing race conditions and data races • Useful for scenarios where shared mutable access is required in multithreaded environments Drop trait • Provides a method for custom cleanup when a value goes out of scope • Useful for scenarios where resource management is required Deref trait • Allows a type to be dereferenced like a pointer • Useful for scenarios where a pointer-like interface is required for a custom type Interior mutability • Allows mutation of immutable values through the use of smart pointers like RefCell • Useful for scenarios where values need to be mutated but ownership cannot be transferred Common pitfalls • Lifetime issues, including dangling pointers and use-after-free errors • Memory leaks and resource management issues • Concurrency issues, including deadlocks and race conditions • Use Rust’s static analysis and testing tools to prevent common pitfalls
72
Afterword One of the hardest thing about learning something new is discovering all of the other things that need to be learned before the first thing makes sense. I came to Rust from Python and one of the things that I encountered was that the Rust community seemed to have a shared understanding of many topics that I knew nothing about. One of those topics was “smart pointers”. I created this guide to help others who might be feeling slightly lost. Over time, I’m hopeful that a series of accelerated guides will emerge. If you’ve ever felt lost and would appreciate a book to explain a problem, then please get in touch. My email address is [email protected] in case you ever need it. I wish you all the best for your career and hope to help you fulfil your aspirations for yourself, your family and your planet.
Tim McNamara May 2023
73
About Tim McNamara Tim—often known as timClicks online—is an experienced software engineer with a knack for being a supportive and encouraging communicator. Tim draws from a diverse set of experiences. He has successfully adapted to working in teams with just a few people, to one that has over a million employees (AWS/Amazon). While known for his contributions to software, his academic background is actually in the humanities. His undergraduate degrees are in philosophy and German. He also holds a Master in Public Policy degree from Victoria University of Wellington Te Herenga Waka with work focusing on the use of open data within the research sector. Outside of his employment, he has built long-standing connections with the open source software community. He has contributed thousands of code and documentation fixes to open source repositories over the course of his career. His work in the open led to him being hired by Canonical, the developers of one of the most widely deployed operating systems in the world, Ubuntu, as a software developer for their cloud orchestration system. His start with software development actually stems from humanitarian disaster relief, specifically to support the Sahana Disaster Management System. This area of interest continues with Tim continuing to maintain links with the Humanitarian OpenStreetMap project.
74