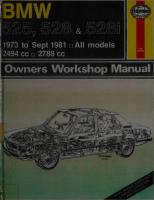
Haynes BMW 316 & 320 Owners Workshop Manual 0856962767, 9780856962769
“207 p. : 28 cm Cover title: BMW 320i Includes index”.
144 75 22MB
English Pages 216 Year 1978
Recommend Papers


- Author / Uploaded
- John H. Haynes
- A. K. Legg
- Similar Topics
- Technique
- Transportation: Cars, motorcycles
File loading please wait...
Citation preview
r 4
>
in BSF 22 mm AF % in AF 1 2 in BSF Zz in Whitworth;
0-937
8 in AF
Jaw gap (in)
Spanner size
0-944
24 mm AF
1-000 1:010 1:023 1-062 1-100 PAs
1 in AF 2 in Whitworth; 2 in BSF 26 mm AF 1% inAF;27 mm AF 2 in Whitworth; 2 in BSF 14 in AF
1-181
30 mm AF
1-200 1-250
# in Whitworth; ? in BSF 14 in AF
1-259
32 mm AF
1-300 1-312 1-390 1-417 1-437 1-480 1-500 1-574
2 in Whitworth; 12 in AF 8 in Whitworth; 36 mm AF 12in AF % in Whitworth; 14 in AF 40 mm AF; #2 in
1-614
41 mm AF
1-625 1-670 1-687
12 in AF 1 in Whitworth; 14 in BSF 1 in AF
1-811
46 mm AF
1-812 1-860 1-875 1-968 2-000 2-050
18 in AF 14 in Whitworth; 14 in BSF 1Z in AF 50 mm AF 2 in AF 11 in Whitworth; 12 in BSF
2-165 2-362
55 mm AF 60 mm AF
J in BSF
#8 in BSF 1 in BSF Whitworth
Chapter 1 Engine Contents
........+-++++25e40-
6
........++++++e4e:
20
25
Engine (without gearbox)— removal
Bho
12
Examination and renovation— general
Connecting rods and bearings — examination andrenovation
..
22
MeCN
CGrankcase;ventilationssystem
we
35
Flywheel (or driveplate — automatic transmission) and
.. Crankshaft and main bearings — examination andrenovation ..............
21 SV
............ starter ring gear — examination and renovation Flywheel (or driveplate — automatic transmission) — installation
30 38
................ Crankshaft and main bearings— removal ............. Cylinder bores — examination and renovation
Flywheel (or driveplate — automatic transmission)—removal ... hoon t mi a omc ono ds adn sow (Gkevnveteaioleoldisitiolan ..........-. Major operations with engine inpositionincar
18 1
...........
iS 23 31
es
43
@lmihei=atcchiiGil
DD oiobd-o core
33
Cylinder head — reassembly of valves, rocker shafts and orb od tthe Oro OOo rm eye cat ae Se eco ee ousMind GamSialmmeme Cylinder head —removal anddismantling ................
42
.......-....+-++.. Oil pump — examination and-renovation oss Sct eac okddecsooupoodmsmtage TEIMENE OOH @iliSeals==rreiewa lee serene ene en ree mee cree erm
32 15 34
Piston (connecting rods) — installation ..............-+4. Piston (connecting rods) — removal and dismantling .........
39 z/
Camshaft and camshaft bearings — examination and renovation oes seer sous Modus saw Fees
GanshathearenmOValien.
«5.6
Se
see
be ew
eee
eee
ee
Crankshaft and main bearings —installation
Cylinder head — decarbonising and examination Cvindetinead—installation:
2). sce
cen. eee Se
a
—cacliae
s oun eo ona. oper noo auvotruocods
esom er
otio oo Gamcakoa
Glee cS) weg Seas ...............
11 9 45
.......
50
Pistons and piston rings — examination and renovation
Engine (automatic transmission models) —removal ......... .. Engine (carburettor type) with manual gearbox — installation
7 47
Rocker arms and rocker shafts — examination andrenovation .. Rockeranms andisiatts — henn@valll me cmeseiecra snes rigts:leltmaitsntts
4
Start uprattenmalomoveniniclUi msec ncnemayenues tiem icici Noite neni meas
DisinanttinGgesGeMmera me twenae ss cs. 0c 6 Engine ancillary components — installation
Engine (automatic transmission models) — installation Engine (carburettor type) with manual gearbox—removal
.....
.
Engine (fuel injection type) with manual gearbox — installation
oom
oe sels
a cee sedate
enone
once eo ane mone etm mee
5
46
Timing chain and gears — examination and renovation
............-.20005
36
Timing components and covers—removal
3 10
Timing components — covers and oil pump — installation ..... Valve clearances adjustments men asic a.) siete ats seeeeneinens
Engine — removal method (general) ............0.000005 Engine — removing ancillary components ..............-...............
8
..................
49
Engine — separation from manual gearbox
Engine (without gearbox) — installation
oem
ein oe
a
...
Engine/manual gearbox —reconnecting
Sump — removal”
gy
..................
Engine (fuel injection type) with manual gearbox—removal Engine — preparation forreassembly
Sumo=sinstallation,
48
.......
.......
..........-...-
Valve guides — examination and renovation
..............--
Valves and valve seats — examination and renovation
........
Specifications
Engine type
Four-in-line, single overhead camshaft
Engine (general)
316
POLITE Gc ik Sake
awe
STOKC MEM oicihiiers oicre koe Soe slate CayoRXsHay ((GGCIING)) 5.5 oo Grol OlonononD OkoEero COMPLessiOMmatlOWnacs eee Ge ew ae
2.80 in (71 mm) 96.0 cu in (1573 cc) 33354
MaaeoutputibnpiDIIN}mis Naxatolquemerrmrrs
nails
sj2 65 66
tse as
ciel: core ss a4
320/320A 3.504 in (89 mm) 3.15 in (80 mm) 121.4 cu in (1990 cc)
3.307in (84 mm)
...........
3.504 in (89 mm) 3.15 in (80 mm)
Salieal
121.4 cu in (1990 cc) Seis 4
90 at 6000 rpm
109 at 5800 rpm
125 at 5700 rpm
90.4 Ibf ft
115.7 Ibf ft at 3700 rpm _
126.6 Ibf ft at 4350 rpm 112 Ibf ft at 3750 rpm
_
at 4000 rpm
Max. torque (North America)
320i
=
Governonmcutinspeed =o. 202. 625... 04. Compression test values ..............
6600 rpm
Good: above 150 psi (10.5 bar) Normal: 135 psi to 150 psi (9.5 bar to 10.5 bar) Poor: below 130 psi (9.0 bar)
Cylinder block ccs cat cere. cian a) srcweiee Matera ltmemieett: Bore Sivainoklgel- = Sods. cechoen ree pioncrone 6 0)Ge Ihr Getta Fate fzitvemyatie
aioe a peenemoes whahd-ovo vce
Cast iron
3.3077 in + 0.0002 in (84.015 mm + 0.005 mm) 3.3108 in + 0.0002 in
3.5045 in + 0.0002 in (89.015 mm + 0.005 mm) .5077 in + 0.0002 in
3.5045 in + 0.0002 in (89.015 mm + 0.005 mm) 3.5077 in + 0.0002 in
52
2
24
29 13 51
41 14
28 16
40 44 aay
26
Chapter 1/Engine
13
So
j EirstirebOnem aw. -eaetees set > os é SeEcondireoOreu ww we fe nis cae. eed ; MaxsovalitVayammamactoeiaen fon ras cepa
316 (84.095 3.3175 (84.265 3.3274 (84.515 0.0004
IMAXatane inertia
0.0004 in (0.01 mm)
ce. 6 ioe < a oa
ee
mm + 0.005 mm) in + 0.0002 in mm + 0.005 mm) in + 0.0002 in mm + 0.005 mm) in (0.01 mm)
320/320A (89.095 mm + 0.005 mm) 3.5144 in + 0.0002 in (89.265 mm + 0.005 mm) 3.5242 in + 0.0002 in (89.515 mm + 0.005 mm) 0.004 in (0.01 mm)
320i (89.095 3.5144 (89.265 310242) (89.515 0.0004
0.0004 in (0.01 mm)
0.0004
mm + 0.005 mm) in + 0.0002 in mm + 0.005 mm) sine aa O!0002—aiIn mm + 0.005 mm) in (0.01 mm)
in
(0.01
mm)
Piston Type
Aluminium
Diameter(standard).
«2.405. /. 0.2 Sak
intenmediateioversize,
o0..0. 06 cs we
flat crown
Aluminium
3.3059 in (83.97 mm) 3.3090 in
(84.05 mm) First oversize + 0.0098 Second oversize
in(0.25 mm)
+ in0.0197
Installed clearance wows
.....
in(0.50 mm)...
6 wa Wc duen
we ee
Swoon
flat crown
Aluminium flat crown
3.5027 in (88.97 mm) 3.5059 in
3.5027 in (88.97 mm) 3.5059 in
(89.05 mm)
Tin
(89.05 mm)
3.5126 in
3.5126 in
(84.22 mm)
(89.22 mm)
(89.22 mm)
3.3256 in (84.47 mm) 0.0018 in
3.5224 in (89.47 mm) 0.0018 in
3.5224 in (89.47 mm) 0.0018 in
(0.045 mm)
(0.045 mm)
(0.045 mm)
0.0118 in to 0.0197 in (0.30 mm to 0.50 mm) 2.0024 in to 0.0032 in (0.060 mm to 0.082 mm)
0.0118 in to 0.0197 in
0.0118 in to 0.0197 in
(0.30 mm to 0.50 mm) 2.0024 in to 0.0032 in (0.060 mm to 0.082 mm)
2.0024 in to 0.0032 in
0.0118in to 0.0177 in
0.0079 to 0.0157 in
0.0079 in to 0.0157 in
{0.30 mm
(0.020 mm
(0.020 mm to 0.040 mm)
Piston rings Top compression End gap
TOOL) 2). Oa aucery pute tat ee
apr
to 0.45 mm}
(0.30 mm to 0.50 mm) (0.060 mm to 0.082 mm)
to 0.040 mm)
0.0016 in to 0.0028 in (0.040 mm to 0.072 mm) NM A
EsDISLOINS fret. Ur ith
ne eet
take eae
KS pistons
0.0012 in to 0.0024 (0.030 mm to 0.062 0.0012 in to 0.0028 (0.030 mm to 0.072
0.0012 in to 0.0024 in (0.030 mm to 0.062 mm)
in mm) in mm)
0.0012 in to 0.0028 in (0.030 mm to 0.072 mm)
Third oil control
JRC AU
es we Sus, Siac cege eh© sve eins: Ce
Side Cieananiceh.
san.
makes os ores
0.0098 in to 0.0157 in
0.0098 in to 0.0157 in
0.0098 in to 0.0157 in (0.25 mm to 0.40 mm)
(0.25 mm
(0.25 mm to 0.40 mm)
to 0.40 mm)
0.0012 into 0.0024 in
Ae
(0.050 mm
Mae
DISCO mer feat
ens he ae tee, See
KS pistons
(0.030 mm
0.0012 into 0.0024 in (0.030 mm to 0.062 mm)
to 0.062 mm)
Gudgeon pins Offset from piston centre line ........... Diameter: Colour code white Colour code black
0.039 in (1 mm)
0.039 in
(1 mm) 0.8661 in + 0.00072 in (22 mm + 0.003 mm) 0.8661 in — 0.00012 in
0.8661 in + 0.00012 in (22 mm + 0.003 mm) 0.8661 in — 0.00012 in
0.8661 in + 0.00012 in (22 mm + 0.003 mm) 0.8661 in — 0.00012 in
0.039 in
—0.00024
(22 mm
CIS ArAniGe un PISKOM a
alerts etn
fin
eee
0.00008
—
0.003 mm)
—
0.006 mm)
Colour code black
Crankshaft
in
in
to 0.013 mm)
0.00031 in to 0.00063 in (0.008 mm to 0.016 mm)
Crankcase main bearing bore (red)
2.3622
in + 0.0004in
(60 mm
+ 0.010 mm)
Crankcase main bearing bore (blue)
2.3622
in + 0.0004 in
+ 0.010 mm)
+ 0.019 mm) 0.0012
in to 0.0028 in
—
0.00024
—
in
(22 mm —
0.003 mm)
0.00024 in
0.003 mm)
— 0.006 mm)
— 0.006 mm) 0.00008 in to 0.00024 in
0.0000 8in to 0.00024 in
(0.002 mm
(0.002 mm to 0.006 mm)
to 0.006 mm)
0.00020 in to 0.00051
in
(0.005 mm to 0.013 mm) 0.00031
in to 0.00063 in
(0.008 mm
to 0.016 mm)
2.3622 in + 0.0004 in (60 mm
+ 0.010 mm)
2.3622 in + 0.0004 in
+ 0.0007 in
+ 0.0007 in (60 mm
Main bearing running clearance (red)
—
(22 mm
to 0.006 mm)
0.00020 in to 0.00051 (0.005 mm
(1 mm)
in
in to 0.000024
(0.002 mm Clearance in small end bush Colour code white
to 0.062 mm)
0.0008 in to 0.0020 in (0.020 mm to 0.052 mm)
0.0008 in to 0.0020 in (0.020 mm to 0.052 mm) 0.0012 in to 0.0024 in
mm)
(60 mm
+ 0.010
0.0012
+ 0.019 mm) in to 0.0028 in
0.00020 in to 0.00051 in (0.005 mm to 0.013 mm) 0.00031 in to 0.00063 in (0.008 mm to 0.016 mm)
2.3622 in + 0.0004 in (60 mm + 0.010 mm) 2.3622 in + 0.0004 in
+ 0.0007 in (60 mm + 0.010 mm)
+ 0.019 mm) 0.0012 in to 0.0028 in
Chapter 1/Engine
14
Main bearing running clearance (blue) .....
Main bearing journal diameter (standard) Rec Menne
aa
te caedee ths ia are ten eles
316 0.0012 in to 0.0027 in
(0.030 mm to 0.068 mm)
0.0012 in to 0.0027 in (0.030 mm to 0.068 mm)
2.1654 in — 0.0004 in
2.1654 in — 0.0004 in
2.1654 in— 0.0004 in
— 0.0008 in (55.0 mm — 0.010 mm)
(55.0 mm — 0.010 mm)
—
0.020 mm)
2.1654 in — — (55.0 mm — —
0.0008 in 0.0011 in 0.020 mm) 0.029 mm)
0.25 mm
1s. & abe ota Ocho
act ae
1.8898 in — 0.0004 in — 0.0010 in (48 mm — 0.009 mm)
eno
— 0.025 mm)
—
— 0.020 mm) 2.1654 in — 0.0008 in — 0.0011 in
Big end bearing running clearance
Big end bearing bore diameter
Camshaft Bearing diameter (EN) 5 a oa Aso Bee oe
.......
..........
Ole eee
ae
(55.0 mm — 0.020 mm) — 0.029 mm) 0.25 mm 0.50 mm
0.25 mm 0.50 mm
0.75 mm
0.75 mm
1.8898 in — 0.0004 in — 0.0010 in
1.8898 in — 0.0004 in — 0.0010 in (48 mm — 0.009 mm) — 0.025 mm) 1.8898 in — 0.0013 in — 0.0020 in (48 mm — 0.034 mm) — 0.050 mm)
(48 mm — 0.009 mm)
— 0.025 mm) 1.8898 in — 0.0013 in — 0.0020 in (48 mm — 0.034 mm) — 0.050 mm)
0.25 mm 0.50 mm 0.75 mm 0.0033 in to 0.0069 in
0.25 mm 0.50 mm 0.75 mm 0.0033 in to 0.0069 in
0.25 mm
(0.085 mm to 0.174 mm)
(0.085 mm to 0.174-mm)
(0.085 mm to 0.174 mm)
5.315 in + 0.004 in (135 mm + 0.1 mm)
5.315 in + 0.004 in (135 mm + 0.1 mm) 0.0009 in to 0.0031 in (0.023 mm to 0.078 mm) 2.0472 in + 0.0006 in (52 mm + 0.015 mm)
0.0009 in to 0.0031 in (0.023 mm to 0.078 mm) 2.0472 in + 0.0006 in (52 mm + 0.015 mm)
1.3779 in — 0.0010 in — 0.0016 in 0.025 mm) 0.041 mm} — 0.0010 in — 0.0016 in 0.025 mm)
(42 mm — — 0.041 mm) 1.6929 in — 0.0010 in — 0.0016 in (43 mm — 0.025 mm) — 0.041 mm)
BINGhOdteeier (CAYTMII
Gh
rerio
ete ee we eas
soe craic
6 ale ee brace
2 a's 676 8 6 O06. 0.010 neCnEn ae
eno
0.75 mm
0.0033 in to 0.0069 in
5.315in+
0.004 in
(135 mm + 0.1 mm) 0.0009 in to 0.0031 in (0.023 mm to 0.078 mm) 2.0472 in + 0.0006 in
(52 mm + 0.015 mm)
1.3779 in — 0.0010 in — 0.0016 in
1.3779 in—0.0010
(35 mm — 0.025 mm)
(35 mm — 0.025 mm)
— 0.041 mm) 1.6535 in — 0.0010 in — 0.0016 in
— 0.041 mm) 1.6535 in — 0.0010 in — 0.0016 in (42 mm — 0.025 mm)
(42 mm — 0.025 mm) — 0.041 mm)
in
— 0.0016 in
—
0.041
mm)
(43 mm — 0.025 mm)
— 0.041 mm) 0.0013 in to 0.0030 in
— 0.041 mm) 0.0013 in to 0.0030 in
(0.034 mm to 0.075 mm)
(0.034 mm to 0.075 mm)
0.0008 in to 0.0051 in
0.0008 in to 0.0051
(0.034 mm to 0.075 mm) 0.0008 in to 0.0051 in (0.02 mm to 0.13 mm)
0.0013
in to 0.0030 in
in
1.69298 in — 0.0010 in —
0.0016 in
(0.02 mm to 0.13 mm)
(0.02 mm to 0.13 mm)
0.2766 in + 0.0031 in
0.2766 in + 0.0031 in (7.0267 mm + 0.080 mm)
0.2766 in + 0.0031
Light alloy
Light alloy
Light alloy
0.006 in to 0.008 in
0.006 in to 0.008 in
0.006 in to 0.008 in
(0.15 mm to 0.20 mm)
(0.15 mm to 0.20 mm)
(0.15 mm to 0.20 mm)
4.087 in + 0.008 in
4.087 in + 0.008 in
4.087 in + 0.008 in
(103.8 mm
(103.8 mm + 0.2 mm)
(103.8 mm
4.106 in + 0.008 in
4.106 in + 0.008 in
4.106 in + 0.008 in
(104.3 mm
(104.3 mm
(104.3 mm
+ 0.080 mm)
Cylinder head ane til a Sieodve face ew ae
0.50 mm
1.6929 in — 0.0010 in — 0.0016 in (43 mm — 0.025 mm)
(7.0267 mm
MIATCHIGIMME
0.010 mm) 0.020 mm)
1.8898 in — 0.0013 in — 0.0020 in (48 mm — 0.034 mm) — 0.050 mm)
(35 mm — — 1.6535 in
RUMNMINGICICATANCE
(55.0 mm — —
2.1654 in — 0.0008 in — 0.0011 in (55.0 mm — 0.020 mm) —0.029 mm)
Connecting rods ...
— 0.0008 in
0.0008 in
Big end bearing journal regrind stages (undersize)
Overall length (bearing centre tocentre)
3201
(0.030 mm to 0.068 mm)
0.50 mm 0.75 mm
(EN
320/320A 0.0012 in to 0.0027 in
(7.0267 mm
in
+ 0.080 mm)
Valves Valve clearances — cold (inlet and exhaust)
Valve overall length ey hae eck
Lilet
=eISe
ep note aana pearo ra oc
Valve head diameter Aen ericyah Ye] Ete el otpee
Pc TFOech oeDNC
+ 0.2 mm) + 0.2 mm)
1.6535 in — 0.0063 in
+ 0.2 mm)
1.6535 in — 0.0063 in
+ 0.2 mm) + 0.2 mm)
1.8110 in — 0.0063 in
Chapter 1/Engine DS
316
320i (46.0 mm — 0.16 mm)
1.3780 in — 0.0063 in
320/320A (42.0 mm — 0.16 mm) 1.3780 in — 0.0063 in
(35.0 mm — 0.16 mm)
(35.0 mm — 0.16 mm)
(38.0 mm
0.315 in — 0.0010 in —0.0016in (8.0 mm — 0.025 mm)
0.315 in — 0.0010 in — 0.0016 in (8.0 mm — 0.025 mm)
0.315 in — 0.0010 in
(42.0 mm — 0.16 mm)
PilGtient
Meee
ek) 8.
Sno
ee
—
0.040 mm)
0.315 in — 0.0016 in — 0.0022 in (8.0 mm — 0.040 mm) —
DENG!
eet
ore. Cer etee he (ok
rane en
0.055 mm)
0.039 in + 0.004 in (1.0 mm + 0.1 mm)
ea
cer
Ee
eR
Te
(1.0 mm + 0.1 mm) 0.059 in + 0.0061 in
1.7323 in + 0.001 in
(44.0 mm 1.4961
WNIENE
3
om ty
Nn
serne
+ 0.025 mm)
in + 0.001
(38.0 mm
in
1.7382 in — 0.0004 in — 0.0010 in (44.15 mm — 0.009 mm) 0.025 mm)
1.5020 in — 0.0004 in — 0.0010 in
Valve seat interference fit in cylinder head
. .
Waive SealiaiGlen tid A mest eae Sle os soseis Oiuperconeckion angle: o...8:s/asie.cis ssuels ces Valve seat width: ieee eee
ee
ee
eet
ue
eo
(38.15 mm — 0.009 mm) — 0.025 mm) 0.004 in to 0.006 in (0.10 mm to 0.15 mm)
45° 12 0.061 in to 0.081 in (1.55 mm to 2.05 mm) 0.059 in to 0.083 in (1.50 mm to 2.10 mm)
Valve guide overalllength ............. Valve stem clearance in guide: NGL
eerie
one (ae M A
RIB Su, hs Sine GPS
ce
iis fe
AS
tae cts EBA
...........0...
—0.0016 in (8.0 mm — 0.025 mm)
— 0.040 mm)
in
+ 0.025 mm)
1.7382 in — 0.0004 in —
0.0010 in (44.15 mm — 0.009 mm) — 0.025 mm) 1.5020 in —
0.0004 in
—
0.0010 in (38.15 mm — 0.009 mm) — 0.025 mm) 0.004 into 0.006 in (0.10 mm to 0.15 mm) 45° 15° 0.061 in to 0.081 in (1.55 mm to 2.05 mm) 0.059 in to 0.083 in
0.315 in — 0.0016 in — 0.0022 in (8.0 mm — 0.040 mm) -—— 0.055 mm)
0.039 in + 0.006 in (1.0 mm
+ 0.15 mm)
0.059 in + 0.004 in (1.5 mm + 0.10 mm) 1.8504 in + 0.0010 in (47.0 mm + 0.025 mm) 1.5738 in + 0.001 in (40.0 mm
+ 0.025 mm)
1.8563 in— 0.0004 — 0.0010 (47.15 mm — 0.009 — 0.025 1.5807 in — 0.0004 — 0.0010 (40.15 mm — 0.009 — 0.025 0.004 in to 0.006 in
in in mm) mm) in in mm) mm)
(0.10 mm to 0.15 mm)
45° 15°
0.059 in to 0.083 in (1.50 mm to 2.10 mm)
0.061 in to 0.081 in
(1.55 mm to 2.05 mm)
(1.50 mm to 2.10 mm) 2.047 in (52 mm)
2.047 in (52 mm)
0.001
0.001 in to 0.0022 in
0.001 in to 0.0022 in
(0.025 mm to 0.055 mm) 0.0016 in to 0.0028 in (0.040 mm to 0.070 mm)
(0.025 mm to 0.055 mm)
0.006 in (0.15 mm) 0.5512 in + 0.0017 in + 0.0013 in
0.006 in (0.15 mm)
0.5512 in + 0.0017 in + 0.0013 in
(14.0 mm
(14.0 mm
(14.0 mm
to 0.0022 in
0.0016 in to 0.0028 in (0.040 mm to 0.070 mm) Guide external diameter
in + 0.001
(38.0 mm
0.0063 in
— 0.16 mm)
2.047 in (52 mm)
(0.025 mm to 0.055 mm)
CHALICE Gmie RAMs
+ 0.15 mm)
1.7323 in + 0.001 in (44.0 mm + 0.025 mm) 1.4961
+ 0.025 mm)
—
(8.0 mm — 0.040 mm) — 0.055 mm)
(1.5 mm
in —
0.040 mm)
0.315 in — 0.0016 in — 0.0022 in
0.039 in + 0.004 in
0.059 in + 0.006 in (1.5 mm + 0.15 mm) VGNCiera
—
1.4961
0.006 in (0.15 mm)
+ 0.044 mm) + 0.033 mm)
+ 0.044 mm) + 0.033 mm)
0.0016 in to 0.0028 in (0.040 mm to 0.070 mm) 0.5512 in + 0.0017 in + 0.0013 in + 0.044 mm) + 0.033 mm)
Guide oversizes available: 0.555 in (14.1 mm)
0.555 in (14.1 mm)
0.555 in (14.1 mm)
0.559 in (14.2 mm) 0.563 in (14.3 mm)
0.559 in (14.2 mm) 0.563 in (14.3 mm)
0.3150
0.3150 in (8.0 mm)
0.559 in (14.2 mm) 0.563 in (14.3 mm) 0.3150 in
in
(8.0 mm) Cylinder projection incylinderhead.......
0.591
fewisen. oss oe eas
Valve springs
Free length
0.591
in + 0.020 in
0.0007 in to 0.0017 in (0.018 mm to 0.044 mm)
0.167 in (4.25 mm)
0.167 in (4.25 mm)
0.167 in (4.25 mm)
1.256 in + 0.008 in (31.9 mm + 0.2 mm)
1.256 in + 0.008 in
1.256 in + 0.008 in
(31.9 mm
(31.9 mm
1.713 in (43.5 mm)
1.713 in (43.5 mm) 1.811 in (46.0 mm)
1.713 in (43.5 mm)
0.6102 in — 0.0006 in — 0.0013 in
0.6102 in — 0.0006 in — 0.0013 in
(15.5 mm — 0.016 mm)
(15.5
(15.0 mm
+ 0.5 mm)
0.0007 in to 0.0017 (0.018 mm
VAT CSLTICKIICSSE sit reae he nleue nes Caries ao GoniextennalGiameten +.aw a6 no a eee oe
in + 0.020 in
(15.0 mm + 0.5 mm) 0.0007 in to 0.0017 in (0.018 mm to 0.044 mm)
(15.0 mm Internferencetitinead
0.591
in + 0.020 in
(8.0 mm)
in
to 0.044 mm)
1.811 in (46.0 mm) 0.6102
in — == (15.5 mm — —
0.0006 in QO0T3KIN 0.016 mm) 0.034 mm)
+ 0.5 mm)
+ 0.2 mm)
—
0.034 mm)
1.811
+ 0.2 mm)
in (46.0 mm)
mm
— 0.016 mm) — 0.034 mm)
Chapter 1/Engine 16 "ee pee 316 Rocker shaft running clearance
0.0006 in to 0.0030 in
Rocker arm running clearance
0.0006 in to 0.0020 in (0.016 mm to 0.052 mm)
(0.016 mm to 0.077 mm)
Camshaft chain nee
DiVGm
eee ic
eaghs: caccn's ehsoce pial «
IG Number of links 5 dt Ge Tensioner coil spring freelength
cee
a eee
.........
Ce gree
UGE
neni
0.0 ona guna Be8 ReBiG a
ac ROR
Gapacity (including filten)).
eee
2.5.4.2
re
5..4.-
Rotor type oil pump Clearance (outer rotor tohousing)........ Inner rotor to outer rotor clearance
.......
Rotor to housing flange clearance (inner and outer)
oe heomcherae Number of links in drive chain Free length of pressure relief spring Oil pressure: (GIHING) & Slt
onde ee
PUOMMMOM
ea
Petts ts
ee
ee
gee
3201 0.0006 in to 0.0030 in
(0.016 mm
(0.016 mm to 0.052 mm)
(0.016 mm to 0.077 mm) 0.0006 in to 0.0020 in
to 0.052 mm)
Duplex roller chain
Duplex roller chain
Duplex roller chain
3/8 in x 7/32 in 94 6.122 in (155.5 mm)
3/8 in x 7/32 in 94 6.122 in (155.5 mm)
3/8 in x 7/32in 94 6.122 in (155.5 mm)
Lubrication system W786) 0.018 OR MEE, ENO CRGR CNS Ce
320/320A 0.0006 in to 0.0030 in (0.016 mm to 0.077 mm) 0.0006 in to 0.0020 in
Crankshaft driven
Crankshaft driven
Crankshaft driven
rotor type pump
rotor type pump
rotor type pump
Full flow, external
Full flow, external
Full flow, external
7.44 Imp. pints 4.25 litres;
7.44 Imp. pints 4.25 litres;
4.46 US quarts
4.46 US quarts
7.44 |mp. pints 4.25 litres; 4.46 US quarts
0.0039 in + 0.002 in (0.1 mm + 0.05 mm) 0.0047 in to 0.0079 in
0.0039 in + 0.002 in
0.0039 in + 0.002 in
(0.1 mm
(0.12 mm to 0.20 mm)
(0.12 mm
(0.1 mm + 0.05 mm) 0.0047 in to 0.0079 in (0.12 mm to 0.20 mm)
0.0014
0.0014 in to 0.0037 in (0.035 mm to 0.095 mm) 46
0.0014 in to 0.0037in (0.035 mm to 0.095 mm) 46
2.677 in (68 mm)
2.677 in (68 mm)
11.4 to 17.1 psi (0.8 to 1.2 bar) 57 psi (4.0 bar)
(0.8 to 1.2 bar) 57 psi (4.0 bar)
0.0047 in to 0.0079 in
in to 0.0037 in
(0.035 mm to 0.095 mm) 46 2.677 in (68 mm) 11.4 to 17.1 psi (0.8 to 1.2 bar) 57 psi (4.0 bar)
Torque wrench settings Cylinder head bolts (engine cold)
+ 0.05 mm) to 0.20 mm)
Ibf ft
Main bearing caps
Connecting rod big end caps Flywheel bolts ENABLE MSIONOED Gime menky ararsisos A cksd cre. + Gra sodiece Sdudigcs whe wie OTR) GTI (SW) odin a.ont/iollont CROnORM CREE G eeSNOn oar Crit enc meen c nae a CamsnarwiubmcatingimollowSCreW 2.2.0. 6505 662005 sete one we ss Crankshaft pulley nut Pistnputomhousingibolts(small).. 2.26.66 654 cee wee oe Distiputomnousingibolts (lange)... 2.6... o8e4 ensue ee ese ces ROCKEMCOVERSCICWSEritn es fos siican Gos So muh st ode a lw dae es Sump bolts PMnOLCONCDO(Summer he ar skoc: cukys. cldinteie & eter edi gee alee ae se Belihousing toengine’bolts (small) 2.0.0... 06s eee a ee ee ne Bellmousingtorengineboltsi(large) 4... ...¢ sess sens eae ae we
11.4 to 17.1 psi
Nm
25 to 33
35 to 45
43 49 42 38
60 68 58 52
to to to to
47 52 46 41
to to to to
65 72 63 57
72 to 83
100 to 115
22 to 29 43 to 47 8 to 9.4 101 to 108 6.5 to 8.0 17 to20
30 to 40 60 to 65 Mitons 140 to 150 9to11 23 to 27
6.5 to 8.0 6.5 to 8.0 6.5 to 8.0
9 tori 9to 11 9to11
18 to20 34 to 37
25 to 27 47 to 51
Engine mounting brackert to crankcase (small)... ..........0005
18 to 20
25 to 27
Engine mounting bracket to crankcase (large)
34 18 49 31 22 18
47 25 68 43 30 25
Engine mupbenmmountingiMUtS
. oa.
6 6b oe
.............000%
ne
em
eee
es
GEA DOGOUlUEhANGemUten coo oak vas Gm ci a ale awe erase eee Propeller shaft front coupling nuts to output shaft flange .......... Exhaustimanitoldtoicylinderhead nuts .............0.8..0+.6Injector collar nuts
a 1 General description e Ee e ES 1 The engine is of the four cylinder, in line, single overhead camshaft type. The combustion chambers are hemispherical with inclined overhead valves. 2. The is based shaft. A The 3
crankshaft has five main bearings, and the lubrication system on a rotor type oil pump which is chain driven from the crank-
full flow oil filter is incorporated in the system. fuel system is either by carburettor or fuel injection according to the particular model, and cars destined for North America incorporate an emission control system.
4
Both the 1573 cc and 1990 cc engines are similar in construction
to 37 to20 to 55 to 35 to 24
to to to to to
51 27 76 48 33
but differ in bore and stroke, as will be evident from the details given in the Specifications. 5 The cylinder block is of cast iron construction, while the cylinder head is of light alloy. Valve seats and guides are renewable and are ‘shrunk fit’ into the cylinder head. 6 The engine is inclined at 30° to lower the centre of gravity, and to reduce the bonnet line.
——— Major operations possible with engine in position in car 2 —— 1
The following components can be removed and refitted while the
engine
is still in the car. Where
more
than one major internal com-
Chapter 1/Engine ponent is to be removed however, it will probably easier to remove the engine complete first.
be quicker and
a) b) c) d)
Cylinder head and rocker shafts. Sump (after releasing steering rack). Oil pump (after removal of sump).
e)
Timing cover oil seal.
f)
Crankshaft rear oil seal (after removal of gearbox and flywheel Piston/connecting rod assembly (after removal of cylinder head and sump), although engine removal is to be preferred.
g)
Upper and lower timing gear covers.
h)
Camshaft (after removal of cylinder head).
i) J)
Timing chain and sprockets. Flywheel (or driveplate — gearbox removal. All ancillary components
k)
17
automatic
transmission)
after
(alternator,
distributor,
water
pump, etc.).
3
ee it a
Engine — removal method (general)
1 On manual gearbox models, the engine may either be removed together with the gearbox or separately. The method chosen will largely depend on the load carrying capacity of the lifting equipment available, and on whether repairs are to be made to the gearbox as well as the engine. 2 On automatic transmission models, it is recommended that the engine is removed separately, due to the extra weight involved and to the location of the automatic transmission oil sump. 4
Fig.1.1. Removal
ea! H7003
of the air cleaner showing the rocker cover vent
hose (1)
Engine (carburettor type) with manual gearbox — removal
1. Open the bonnet fully and mark the position of the hinge plates. With the help of an assistant remove the bonnet as described in Chapter 12, and store it in a safe place where it will not slip and damage the paintwork. 2 Cover the top surfaces of the front wings with protective covers, and have a clean bench of adequate size ready to accept the engine components as they are removed.
3 With the engine cold, remove the radiator filler cap. Using a socket, unscrew the engine block coolant drain plug, which is located beneath the rear of the exhaust manifold, and drain the coolant into a container. Loosen the radiator bottom hose jubilee clip and pull off the hose to drain the radiator. A large container will be required as considerable splashing is bound to occur. Retain the coolant for further use if it contains antifreeze. 4
Detach
the terminal
leads from
the battery, unscrew
the clamp
rod, and remove the battery from its location, storing it in a safe place. 5 Remove the engine sump plug and drain the oil into a suitable
H7004 Fig.1.2. Brake servo hose (6) and heater hoses (4) and connections at the rear of the engine. Also starter plug (7)
container. Refit the plug and tighten it. Identify the air cleaner hoses and their connections and remove 6 the air cleaner (see Chapter 3). Note the location of the preheater to
exhaust manifold connecting hose. Disconnect the radiator top hose, unscrew the radiator cowling 7 retaining nuts, and place the cowling over the fan blades. Unscrew and remove the two radiator retaining nuts and withdraw 8 the radiator upwards from its mounting, being careful not to damage the radiator matrix on the fan blades. Remove the cowling from the fan blades. 9
Detach
the car interior heater hoses from the cylinder head and
inlet manifold by loosening the jubilee clips, and then tie them to the bulkhead, out of the way. 10 Remove the brake vacuum servo hose from the rear of the inlet -manifold, after slackening the clip. 11 Detach the fuel supply hose from the fuel pump and identify it with adhesive tape. 12 Detach the fuel return pipe from the return valve located in front of the carburettor, and identify it with adhesive tape.
13 the 14 15 and
Identify and then disconnect the LT leads from the coil located on right wheel arch, and unclip the cable from the bulkhead. Detach the HT lead from the coil. Disconnect the starter main supply cable at the starter solenoid withdraw it through the support bracket.
16 Lift off the fusebox plastic cover, and pull out the main engine of wiring harness plug from the side. Slide the cold start relay up out
Fig.
1.3. Fusebox locations of main wiring harness (9) and cold start relay (10)
(5)
ue 4.37 Gear linkage support plate mounting nut location
4.47a Removing the engine with gearbox
4.45a Left engine mounting and vibration damper
4.47b Engine with gearbox removed
SSS
enna
Chapter 1/Engine
ee
its location on the side of the fusebox.
17
Unclip the main engine wiring harness from the left wheel arch
panel. 18 Tie the wiring harness and coil leads to the engine. 19 Unbolt the earth lead from the left engine mounting bracket. 20 With a centre punch, mark the distributor body in relation to the distributor gear housing. 21 Prise open the distributor cap clips, remove the distributor cap, and disconnect the HT leads from the spark plugs. 22 Identify the distributor vacuum hoses and then detach them from the vacuum capsule. 23 Turn the engine until number 1 piston (nearest the front of the car) is at top dead centre (TDC) on its compression stroke, and check that the notch in the crankshaft pulley is in line with the TDC pointer on the
timing case. Check that the distributor rotor notch is now in line with the notch in the distributor body. 24 Loosen the distributor body clamp bolt and lift the distributor out
of the gear housing. 25 Detach the LT supply lead from the distributor. 26 Release the accelerator cable from the throttle linkage and remove it from the support bracket by slackening the locknuts and lifting the cable out of the location slot. 27 On cars equipped with an emission control system, disconnect all hoses, leads, and connections according to the system employed (see
Chapter 3). 28 Loosen the alternator mounting and adjustment bolts and swivel the alternator towards the engine. 29 Remove the fan belt from the front of the engine, over the fan blades. 30 Tap the fan blade locking tabs back, unscrew and remove the retaining bolts and withdraw the fan blade and belt pulley from the water pump centre hub.
31 now and 32
Unless the car is positioned over a pit, the front of the car must be raised and securely supported to provide access to the gearbox exhaust components. Detach the exhaust pipe from the exhaust manifold by unscrewing
the securing nuts. 33 Detach the exhaust pipe from the gearbox rear mounting plate by dismantling the clamp bracket. 34 Unscrew and remove the gearbox output flange to propeller shaft coupling bolts. If any difficulty is experienced in extracting the bolts, squeeze the rubber coupling inwards with a length of thick wire, using a tourniquet action. 35 Unscrew and remove the propeller shaft centre bearing mounting plate nuts and lower the centre bearing. 36 Temporarily pull off the reverse switch supply leads, and unscrew and remove the reverse switch from the rear of the gearbox, to allow access to the gear linkage support plate. 37 Unscrew the gear linkage support plate from the mounting projections on the rear of the gearbox, and then refit the reverse switch to prevent loss of gearbox oil when the engine is removed. 38 Release the gearstick selector rod from the gearbox selector rod by levering the ‘C’ ring out of its groove and separating the two selector rods. 39 Detach the clutch slave cylinder, and hydraulic pipe support bracket, from the gearbox bellhousing by unscrewing their respective nuts. 40 Unscrew and remove the speedometer cable locating bolt, and withdraw the cable from the gearbox. 41 Loosen the gearbox mounting and crossmember nuts. 42 Depending on the lifting tackle employed it may be necessary to lower the car to the ground at this stage. 43 Place a jack squarely under the gearbox, take the weight, and remove the mounting and crossmember from the gearbox and 7 bodyframe. positioned so slings, or chains using engine, the to hoist a Attach 44 that the engine will assume a steeply inclined attitude once the mountings are disconnected. side of 45 Unscrew and remove the engine mounting nuts from each rear the to located damper, vibration engine the detach and the engine nie of the left mounting, by unscrewing the nut.
46
Lift the engine off from the mountings, and position It forwards
g on the near the engine compartment front bodyframe. Dependin the pushing either by shed accompli be can this , employed lifting tackle an assistant car rearwards, or pulling the hoist and jack forwards. Have
support the propeller shaft during this operation.
19
eee ee
47
Lower the gearbox jack in unison with ‘e and gearbox from the engine assembly is raised sufficiently, withdraw it compartment, and lower it to the floor or stand.
5
raising the hoist and lift the compartment. When the over the front of the engine on to a suitable bench, or
Engine (fuel injection type) with manual gearbox — removal
1 The procedure is similar to that described in Section 4 but will require the following additional operations. 2. Slacken the jubilee clips on the air inlet cover and tube, and prise it away from the mixture regulator and induction manifold. 3 Mark the positions of the four injector fuel supply lines at the fuel distributor, and unscrew and remove the union bolts, being careful to retain the sealing ring washers. 4 Identify and then unscrew the union securing the warm up regulator control line to the fuel distributor. 5 Identify and then unscrew the union securing the cold start valve line and fuel filter hose to the fuel distributor. 6 Identify and then slacken the jubilee clip on the warm up regulator return and fuel tank return hose and detach it from the fuel distributor (on North American models, the fuel tank return hose is mounted independent from the warm up regulator return hose). 7 Carefully pull off the warm up regulator lead plug from the side of the mixture regulator venturi, and unclip the wiring harness from the bodyframe. 8 Remove the vacuum hoses from the vacuum regulator, which is mounted on the mixture regulator cover (North American models only). 9 Separate the fuel line holder, by unscrewing the clamp bolt, and bending up the fuel line clip on the mixture regulator cover. 10 Slacken the two mixture regulator mounting nuts, and lift the complete unit away from the bodyframe. 11 Unhook the accelerator inner cable from the throttle operating arm, loosen the support bracket locknuts, and remove the accelerator cable from the support bracket. 12 Identify and remove the vacuum hoses from the pressure converter located on the left bulkhead (North American models only).
13
Identify and remove the vacuum
hoses from the induction heater
assembly. 14 Detach the curved intake manifold from number 3 cylinder by unscrewing the retaining nuts, and remove the vacuum hoses from the throttle venturi.
15
Pull off the hoses from the EGR
valve (North American
models
only). 16 Remove the cold start valve from the induction header assembly by unscrewing the two retaining nuts. 17 Detach the header assembly and curved intake manifolds from their respective mountings on the cylinder head and intake manifold, and lift the assembly away from the engine.
6
Engine (without gearbox) — removal
1 Follow the instructions given in Section 4, paragraphs 1 to 19, and 26 to 33. On fuel injection models carry out the instructions given in Section 5, paragraphs 1 to 12. 2 Suitably support the weight of the gearbox by either using a jack or axle stand, after having lowered the car to the ground. 3. Attach a hoist to the engine, using chains or slings, so positioned that the engine can be kept on an even keel during the removal operation. 4 Unscrew and remove the engine mounting nuts from each side of the engine and detach the engine vibration damper, located to the rear of the left mounting by unscrewing the nut. 5 Lift the engine to clear the engine mountings and make sure that the gearbox is firmly supported. 6 Unscrew and remove all the gearbox bellhousing bolts — the starter can remain attached to its front support bracket. 7 Withdraw the gearbox bellhousing front cover plate. 8 Disconnect the reverse light sWitch leads from the rear of the gearbox and unclip the wiring harness from. the gearbox housing. Tie the harness to the engine.
9
Detach the clutch slave cylinder from the gearbox bellhousing by
unscrewing the two securing nuts. 10 Separate the engine from the
gearbox
by easing
it forwards,
20 ae
a
Chapter 1/Engine li ak
a
2
keeping it on an even keel to avoid damage to the flywheel pilot bearing and gearbox first motion shaft. 11 When the engine is clear of the gearbox, carefully lift it up from the engine compartment at the same time checking that it does not damage any of the components fitted on the engine compartment bodyframe. 12 When the engine is raised sufficiently, withdraw it over the front of
a
the engine compartment
9
and
lower it to the floor or on to a suitable
bench or stand.
7
Engine (automatic transmission models) — removai
1 The procedure is similar to that described in Section 6, but will require the following additional operations in lieu of paragraphs 8, 9, and 10.
2
Drain
the
automatic
transmission cooler pipes. 3 Disconnect the
transmission
lines at the
fluid,
radiator,
and
plugging
disconnect the ends
the
of the
automatic transmission throttle position cable from the carburettor or air intake (fuel injection models) by loosening the locknuts, pivoting the operating arm cover, and lifting the cable out
of its locating slot. 4 Unbolt the oil filler pipe from the transmission bellhousing. 5 After removal of the bellhousing bolts lower the front cover plate to expose the rear of the flywheel. 6 Turn the engine until the flywheel apertures can be seen and then, inserting a socket through the apertures in turn, unbolt the torque converter from the flywheel driving plate. 7 Remove the inspection plate from the bottom of the transmission bellhousing. 8 When separating the engine from the transmission have an assistant insert a piece of wood or flat steel into the inspection plate, in
order to retain the torque converter in the bellhousing.
Engine — separation from manual gearbox
1 Support the engine securely in the vertical position, unscrew and remove the bolts from the clutch bellhousing.
and
then
and remove
Unscrew
ee
the lower bellhousing bolts and withdraw
the cover.
Pull the gearbox from the engine, supporting its weight and 3 keeping it square to the engine until the input shaft is clear of the clutch mechanism, which is bolted to the rear face of the flywheel.
ag
ee
Dismantling — general
1 It is best to mount the engine on a dismantling stand but if one is not available, then stand the engine on a strong bench so as to be ata comfortable working height. Failing this, the engine can be stripped down on the floor. 2 During the dismantling process the greatest care should be taken to keep the exposed parts free from dirt. As an aid to achieving this, it is a sound scheme to thoroughly clean down the outside of the engine, removing all traces of oil and congealed dirt. 3. Use paraffin or a good water soluble solvent. The latter compound will make the job much easier, as, after the solvent has been applied and allowed to stand for a time, a vigorous jet of water will wash off the solvent and all the grease and filth. If the dirt is thick and deeply embedded, work the solvent into it with a wire brusn. 4 Finally wipe down the exterior of the engine with a rag and only then, when it is quite clean should the dismantling process begin. As the engine is stripped, clean each part in a bath of paraffin or petrol. 5 Never immerse parts with oilways in paraffin (ie; the crankshaft), but to clean, wipe down carefully with a petrol dampened rag. Oilways can be cleaned out with wire. If an air line is present all parts can be blown dry and the oilways blown through as an added precaution. 6 Re-use of old engine gaskets is false economy and can give rise to oil and water leaks, if nothing worse. To avoid the possibility of trouble after the engine has been reassembled always use new i
throughout. 7 Do not throw the old gaskets away as it sometimes happens that an immediate replacement cannot be found and the old gasket is then very
8
ee
useful
as
a template.
Hang
up
the
old
gaskets
as
they
are
removed on a suitable hook or nail. 8 To strip the engine it is best to work from the top down. The sump provides a firm base on which the engine can be supported in an upright position. When the stage where the sump must be removed is
iSAeaT) o ae
i
CAAA
On—
==e
ee
ze
—)
ape va
Ga?)
—
a,
ooo
Fig.
1.4.
Flywheel
AP
U
drivepiate (1) models
on
automatic
transmission
Fig. 1.5. Torque converter to flywheel securing bolts on automatic transmission models
Chapter 1/Engine
21
reached, the engine can be turned on its side and all other work carried out with it in this position. 9 Wherever possib'e, refit nuts, bolts and washers fingertight from wherever they were removed. This helps avoid later loss and muddle. If they cannot be refitted then lay them out in such a fashion that it is clear where they belong.
wiring harness. 2 Remove the seven nuts which retain the rocker cover. Note the wiring harness clips under certain nuts. Lift off the cover. 3 Disconnect the radiator hose from the thermostat housing and the hoses from the inlet manifold and branch pipe connection, also the heater hoses from the cylinder head, and inlet manifold.
10
4 ldentify and disconnect the carburettor choke cover hoses from the inlet manifold and crankcase. 5 On fuel injection models disconnect the air intake vacuum hoses
Engine — removing ancillary components
1. If a complete engine strip down is to be carried out, now is the time to remove the following ancillary components from the unit. The removal operations are described in detail in the appropriate Chapters of this manual. As the wiring harness has been removed with the engine, the first job to do is to systematically identify the leads with adhesive tape, and remove the complete harness from the engine.
Alternator and drivebelt (Chapter 10) Starter motor (Chapter 10) Inlet manifold (Chapter 3) Exhaust manifold (Chapter 3) Carburettor (Chapter 3) Water pump (Chapter 2) Fuel injection equipment (Chapter 3)
from the throttle housing and thermo valve, the latter being located in front of the timing chest, and only fitted to North American models. Identify the hoses with adhesive tape.
6
i
Unscrew and remove the starter front support bolt
manifold. 7 8
from the inlet
as
Detach the oil level dipstick holder from the inlet manifold. Unscrew the eight securing bolts and remove the timing gear
upper cover (on certain North American models it will be necessary to detach the air pipe from the exhaust manifold first). 9 Turn the crankshaft by applying a spanner to the crankshaft pulley nut until number 1 piston (nearest front) is at TDC on its compression stroke. This can be checked by making sure that both valves on number 1 cylinder are closed, and that the notch in the camshaft sprocket hub lines up with the housing lug, also that the notch on the rim of the crankshaft pulley is opposite the pointer on the timing chain
cover. 10 Unscrew
Fuel pump — mechanical (Chapter 3) Oil filter and dipstick (Section 33 of this Chapter)
the chain tensioner plug and extract the spring and plunger. 11 Flatten the lockplates and remove the camshaft sprocket bolts at
Clutch mechanism (Chapter 5) Emission contro/ equipment according to type (Chapter 3) 2 All of the above components can, if necessary, be removed from the engine while it is still in position in the car, with the exception of the clutch mechanism. oe UUEEEnyyEESEEEIIEI SSSEnESEIS
EEE EERE
11 Cylinder head — removal and dismantling a If the engine is in the car, fully open the bonnet and carry out following preliminary operations:Section 4, paragraphs 2, 3, 4,6, 9, 10, 11512, 13, 14,20, 21, 23949526, 27), 26,29),50) 32).and 33: In addition disconnect the top hose from the radiator, and, on injection models, carry out the following operations:Section 5, paragraphs 2,3, 4, 5,6, 7, 8,9, 11,12, 13, 14°15,
AT: On
automatic
transmission
models
carry
out
paragraph
the
22, fuel 1.6,
3 of
Section 7. 1
Identify and disconnect the electrical leads from their terminals on
the
inlet manifold,
2
carburettor,
and
cylinder
ys
11.3 Heater hose to rear of cylinder head
head,
and
remove
the
Fig. 1.6. Cylinder head twin branch manifold showing hose clips (1) and (2), and temperature sender plug (3)
ae
11.11 Wiring housing
mee
ae
=
the camshaft
sprocket
to the timing
=
chain tensioner
11.14e Showing location of valve sprin g seat and seal on the cylind er
head
be
4
OS§ dest
12.1 Fuel PUMP Operating rod
23
Chapter 1/Engine
Sammie
sete SX
ROA
Pay
> pSy
a
12.3a
Fork
tool
required
to
remove
the
camshaft
12.3b
;
Depressing
ses
J
\\
SSSS
es
4
*
the rocker
arms
during
Fig.
as “&% «©
1.8. Camshaft front guide plate withdrawal
camshaft removal
the same time maintaining tension on the chain in an upward direction so that it does not disengage from the teeth of the crankshaft sprocket.
to be removed from the cylinder head, refer to Chapter 3.
Retain the chain by wiring it to a convenient point on the crankcase. 12 Unscrew the ten cylinder head bolts, releasing them a turn at a time in diagonal sequence. 13 Lift the cylinder head complete with manifolds, carburettor or fuel injection components, as applicable. If the cylinder head is stuck tight, do not attempt to lever it off by inserting a tool in the gasket joint, but tap it gently all round with a soft-faced mallet or a heavy hammer using a block of hardwood interposed as insulator.
12
14 To dismantle the cylinder head completely, remove the camshaft and rocker shafts, as described in Sections 12 and 13. To remove the valves from the cylinder head, compress the valve springs using a compressor
with an extension
which
is necessary
to reach the deeply
recessed valve spring cap. Compress the valve spring and remove the split cotters then release the compressor gradually until the cap and valve spring can be extracted. Withdraw the valve from its guide.
15
Remove
ponents
all the valves
in strict sequence
in turn and retain them for exact
refitment.
and their com-
A sheet of stout card
with holes punched in it and numbered 1 to 4 left (inlet) and 1 to 4 right (exhaust) is ideal for retaining the valves. Number 1 is at the front
of the engine and left and right are when viewed from the driver's seat. 16 If full decarbonising is to be carried out, refer to Section 31. 17
\f the inlet, exhaust manifolds, or the fuel injection assemblies are
Camshaft — removal
If the engine is in the car, remove the cylinder head and withdraw the distributor, as described in Section 11. Remove the fuel pump and
partially withdraw the operating rod. 1 Remove the oil distribution tube (one bolt). 2 Release the rocker arm eccentric adjusters and open the valve clearances to the widest gap. 3 Before the camshaft can be withdrawn, all pressure on the cam lobes made by the rocker arms (which are depressing the open valves) must be released. To do this, a special tool is available from BMW dealers but an alternative method can be used. First make up two or three fork-ended tools from pieces of flat steel in accordance with the
photograph. Turn the camshaft until only three of the rocker arms are exerting pressure on the ends of their valve stems. With the help of an assistant, engage the fork-ended tools exactly as shown on the three rocker arms and depress them simultaneously. The camshaft can then be withdrawn from its bearings and the thrust plate extracted. Do not over depress the rocker arms with the tools but only enough to release the rocker arm slides from their cam lobes (photos). 4 Unscrew and remove the two bolts which retain the camshaft
guide plate and slide the plate downwards and withdraw it.
, 3
i
i
NEA
13.5b Extracting a rocker shaft spring
13.5d Removing a rocker arm from the rocker shaft
13.5e Extracting a rocker shaft collar
25
Chapter 1/Engine 13
Rocker arms and shafts — removal
1 Remove the cylinder head and camshaft, as described in the preceding Sections. 2 Move the rocker arms and thrust washers to one side and extract the locating circlips. 3 With the distributor already removed, unbolt and withdraw the distributor drive housing complete with oil pressure switch from the rear face of the cylinder head. Note the location of the self-sealing washer. On North American models it will be necessary to disconnect the EGR filter and control hoses from the exhaust manifold. 4 With a suitable drift, drive the rocker shafts out so that they emerge from the front of the cylinder head. Use a drift just less than the diameter of the rocker shaft, otherwise the shaft blanking plug will be driven into the shaft and block the oilways. 5 As each shaft is removed, extract the rocker arm components and keep them in strict order for exact refitting. Extracting sequence: spring — washer — rocker arm — collar — circlip.
14
Sump -— removal If the engine is in the car, drain the engine oil into a suitable con-
tainer, and then carry out the following preliminary operation. Unscrew and remove the steering rack to front suspension crossmember
securing bolts, and pull the steering rack towards
Fig. 1.9. Removing the distributor drive housing showing oil seal (2), gasket (3), and securing bolt (4)
the
rear of the car, and support it on axle stands.
1
Unscrew
all the
sump
securing
bolts
in diagonally
opposite
she
76s
3)
sequence, a turn at a time and remove them.
2 If the sump is stuck tight, do not lever it off but cut round the gasket with a sharp knife. 3 Withdraw the sump from the crankcase. Where the engine is still in the car, it will be necessary to turn the crankshaft until the big-end caps are all level, and then draw the sump forward, being careful not to damage the oil pump intake pipe.
wee
ale
=e
0
a
1
Remove the sump, as described in Section 14.
as
Flatten the tabs of the lockwashers and unscrew and remove the 2 oil pump sprocket bolts, and then extract the sprocket from the loop of the driving chain. 3
Unscrew
the
oil pump
securing
bolts
and
withdraw
the pump.
Note the O-ring seal around the pressure relief pipe.
Fig. 1.10. Rocker arm removal sequence (5) to (8) showing inlet valve rocker shaft (E) and exhaust rocker shaft (A)
\ AyWS
Inu / GNF =
ee
15.3 Oil pump supply pipe upper seal in crankcase
Fig.
es
UAL
(|
rae ll,
,
1.11. Steering rack mounting bolts (1) and (2), and sump drain plug (arrowed)
16.4b Alternator mounting bracket to crankcase location
16.10 Withdrawing the lower timing cover
16.9 Extracting the crankshaft pulley
16.13 Timing chain guide rail retaining clip
eer
ee
Chapter 1/Engine Engine, eapior
16 Timing components and covers — removal ——— rg 1 The timing chain covers comprise an upper and lower section. 2 To remove the upper cover, first withdraw the rocker cover, and then extract the eight bolts which secure the upper timing cover to the
cylinder head. On North American models detach the air pipe from the front of the exhaust manifold first. 3 To remove the lower cover, disconnect the battery negative terminal, drain the cooling system and remove the water pump (see Chapter 2). 4 Disconnect the alternator supply leads, and unbolt the alternator and mounting bracket from the engine. 5 On North American models detach the air hoses from the air pump, and unbolt the air pump and bracket from the engine. 6 Remove the upper timing cover as described in this Section. 7 Unscrew and remove the timing chain tensioner. To do this, unscrew the plug at the same time maintaining hand pressure against the action of the internal coil spring, which will fly out if not restrained. Extract the piston and spring.
8 Remove the cover plate from the lower half of the transmission bellhousing and jam the starter ring gear with a large screwdriver or cold chisel. 9 Unscrew and remove the crankshaft pulley nut, and pull off the pulley with a suitable two or three legged puller.
esti
a‘
10 Unscrew and remove the lower timing cover bolts and front sump bolts, and withdraw the cover. Use a knife blade to separate the bottom edge of the cover from the sump gasket so that the gasket will not be broken or distorted. Note also the two locating dowels at the base of the cover and exercise care in removal.
11
If the main timing chain only is to be removed, this can be carried
out without removing the sump. Where the oil pump drive chain is also to be removed, then the sump will also have to be detached. Before removing either chain, mark the chain with a dab of paint or a piece of
masking tape so that if it is going to be refitted it can be installed in the Original running direction. 12 To remove the timing chain, first remove the camshaft sprocket by flattening the lock tabs and unscrewing the securing bolts. 13 Extract the lower clip from the timing chain guide rail, and unscrew
the upper guide rail pin from the crankcase
until the guide
almost touches the exposed section of the head gasket. 14 Pull the guide rail off from the lower pin, at the same time releasing the timing chain from the crankshaft sprocket, and crankshaft pulley extension. 15 Swing the guide rail and timing chain to the right to expose the crankshaft sprocket. 16 Detach the oil pump sprocket to release the oil pump drive chain. 17 The crankshaft sprocket can be removed after extracting the Woodruff key. The sprocket is a very tight fit and a suitable extractor will be required.
Fig. 1.12. Alternator to lower timing cover mounting bolts and nut (arrowed)
bolts (arrowed) Fig. 1.14. Camshaft sprocket to camshaft securing and locktabs
27
Fig.
1.15. Removing the timing chain
28
Chapter 1/Engine 17
Piston/connecting rods — removal and dismantling
1 Remove the cylinder head and sump as previously described in this Chapter. 2 Turn the crankshaft by applying a spanner to the pulley nut so that the big-end of the piston/connecting rod assembly in question is at the lowest point. 3 Mark each connecting rod and big-end cap at adjacent points on the same side, commencing with number 1 at the front of the engine. 4 Unscrew and remove the big-end nuts and then withdraw the cap and push the piston/connecting rod assembly out of the top of the block. If there is a severe wear ridge at the top of the cylinder bore, this should be scraped away before removing the piston, otherwise the piston rings may break. 5 Before separating the bearing shells from the cap and rod identify them in respect of each component using a piece of masking tape or a spirit marker on the backs of the shells. This is absolutely essential if the original shells are being refitted. 6 The gudgeon pin can be removed after extracting the circlips and pushing out the pin with finger pressure. Before doing this however, note the relationship of the rod oil hole (below small end) to the front facing arrow on the piston crown so that piston and rod can be reconnected the correct way round. 7 Discard the original big-end bolts and nuts and obtain new ones. 8 The piston rings are very brittle and will break easily if opened too far during removal. Two or three old feeler blades or strips of tin may be inserted behind each ring at equidistant points to facilitate removal. Use a twisting motion and pull the rings from the top of the piston. The feeler blades will prevent a lower ring dropping into an empty groove as it is withdrawn.
18
Flywheel (or driveplate — automatic transmission) — removal
ee ee a
eee
The flywheel or driveplate can be removed with the engine still in the car if the transmission unit is first withdrawn (see Chapter 6).
1 Remove the clutch assembly (manual gearbox). 2 Mark the relative position of the flywheel or driveplate to the crankshaft rear flange. 3 Lock the starter ring gear with a heavy screwdriver or cold chisel and unscrew and remove the securing bolts. Discard the bolts and obtain new ones before refitting the flywheel as described in Section 38.
19
Crankshaft and main bearings — removal
1
With the engine removed, withdraw the clutch assembly, flywheel,
timing chain and oil pump.
17.6 Extracting a gudgeon pin retaining circlip
19.6 Lifting the crankshaft from the crankcase
Chapter 1/Engine 2
Unbolt and remove the rear oil seal retainer.
3
Normally the crankshaft will only be removed at the time of major
engine
overhaul
when
the piston/connecting
rods will already have
been removed but if required, the crankshaft and main bearings can be
withdrawn without disturbing the cylinder head or piston/connecting rod assemblies, providing the big-ends are disconnected and the
pistons pushed a little way up the bores, from their lowest position. Do not push the pistons too far up the bores, or the rings will be
ejected from the bores and full dismantling will then be necessary. Remember to mark each connecting rod and big-end cap at adjacent points on the same side, commencing with number 1 at the front of the engine. 4 Mark the main bearing caps in relation to their position on the crankshaft (ie. 1 to 5 from the front of the engine) and in relation to the crankcase, so that they can be refitted in exactly the same position. 5 Unscrew and remove the main bearing bolts and lift off the caps, complete with the bearing shells. Identify the shells in respect of position noting that the pressed lugs are adjacent when the cap is fitted
(see Fig. 1.16). 6 Lift the crankshaft from the crankcase, taking care that the bearing shells are retrieved and identified with regard to location, if they are to be refitted. 7 Remove the crankshaft chain sprocket at this stage if the crankshaft is to be renewed by using a suitable puller.
Fig. 1.16. Crankshaft main bearing shell locations 20
Examination and renovation — general With the engine stripped down and all parts thoroughly cleaned, it
is now checked
time
to examine
and where
everything
necessary
for wear.
renewed
The
or renovated
items should as described
be in
the following Sections.
21
Crankshaft and main bearings — examination and renovation
1
Examine
the
crankpin
and
main
journal
surfaces
for signs of
scoring or scratches. Check the ovality of the crankpins at different positions with a micrometer. If more than the specified out of round, the crankpin will have to be reground. It will also have to be reground if there are any scores or scratches present. Also check the main journals
in the same fashion. 2 If it is necessary to regrind the crankshaft and fit new bearings your local BMW garage or engineering works will be able to decide how much metal to grind off and the size of new bearing shells. 3 Full details of crankshaft regrinding tolerances and bearing undersizes are given in Specifications. 4 The main bearing clearances may be established by using a strip of ‘Plastigage’ between the crankshaft journals and the main bearing/shell caps. Tighten the bearing cap bolts to the specified torque, and then remove the cap and compare the flattened ‘Plastigage’ strip with the index provided. The clearances should be compared with the tolerances stated in the Specifications. Temporarily refit the crankshaft to the crankcase having refitted 5 the upper halves of the shell main bearings in their locations. Fit
H7T02°
Fig. 1.17. Flywheel pilot bearing (manual gearbox models)
number 3 main bearing cap only and tighten the securing bolts to the specified torque. Using a feeler gauge, check the endfloat by pushing
and pulling the crankshaft. Where the endfloat is outside the specified tolerance, number 3 main bearing shells will have to be renewed. Finally check the pilot bearing in the centre of the crankshaft rear 6 flange. If it is worn or damaged, extract it by packing the bearing hole with high viscosity grease, and driving it out with a drift of the same diameter as the section of the gearbox first motion shaft which locates in the bearing. The force of the grease will push the bearing out from ' the bottom of the hole. 7. When installing the new pilot bearing, pack the bearing with high melting point grease and make sure that the open end of the bearing perimeter is inserted first. The end face of the bearing should be driven in (3 mm) below the end of the crankshaft. in to a depth of 0.118
I 22
—————————e—
H7039
aaa
on Connecting rods and bearings — examination and renovati
within the Big-end bearing failure is indicated by a knocking from 1 os crankcase and a slight drop in oil pressure. and scoring. Examine the big-end bearing surfaces for pitting 2
Fig. 1.18. Installing a connecting rod small end bush
30 Oe
Chapter 1/Engine pi RE AI
ee
Renew the shells in accordance with the sizes specified in Specifications. Where the crankshaft has been reground, the correct undersize big-end shell bearings will be supplied by the repairer. 3 Should there be any suspicion that a connecting rod is bent or twisted, it must be replaced by one of similar weight. Without bearing shells, the new rod must be within + 1.4 oz (4 g) of the weight of the original component. 4 Connecting rods can be supplied with ready machined small end bushes, but, if a reamer can be obtained, the small-end bush alone can be renewed. Press out the old bush and when pressing the new bush into place, make sure that the seam in the bush is at 90° to the small oil hole to provide correct alignment of the oil drilling. Drili and deburr the oilway and then ream out the small-end bush. The gudgeon pin should slide through the bush with light pressure applied when it has been lubricated with a little engine oil. 5 Measurement of the big-end bearing clearances may be carried out in a similar manner to that described for the main bearings in the previous Section, but tighten the securing nuts on the cap bolts to the specified torque values.
23
eT Se
ee
temperature. If it is slack, both the piston and gudgeon pin should be renewed. Make sure that, when new pistons are fitted, the weight group 8 stamped + or — on the piston crown, is the same on each piston.
25 Camshaft tion
and camshaft
bearings — examination
and renova-
1 Carefully examine the camshaft bearings for wear. If there is any pitting, scoring or wear, the cylinder head will have to be renewed unless a specialist firm is available to build up the worn bearings and in-line bore them to the specified diameters. 2 The camshaft itself should show no signs of wear, but, if very slight scoring on the cams is noticed, the score marks can be removed by very gentle rubbing down with a very fine emery cloth. The greatest care should be taken to keep the cam profiles smooth. 3. Examine the skew gear for wear, chipped teeth or other damage.
26
Valves and valve seats — examination and renovation
i
Examine the heads of the valves for pitting and burning, especially
the
heads
Cylinder bores — examination and renovation
1 The cylinder bores must be examined for taper, ovality, scoring and scratches. Start by carefully examining the top of the cylinder bores. If they are at all worn a very slight ridge will be found on the thrust side. This marks the top of the piston ring travel. The owner will have a good indication of the bore wear prior to dismantling the engine, or removing the cylinder head. Excessive oil consumption accompanied by blue smoke from the exhaust is a sure sign of worn cylinder bores and piston rings. 2 Measure the bore diameter just under the ridge with a micrometer and compare it with the diameter at the bottom of the bore, which is not subject to wear. If the difference between the two measurements
is more
than 0-0004
in (0:01
mm) then it will be necessary to fit
special pistons and rings or to have the cylinders rebored and fit oversize pistons. If no micrometer is available remove the rings from a piston and place the piston in each bore in turn about jin below the top of the bore. Check the clearance with a feeler gauge, and then recheck the clearance at the bottom of the box, and compare with the tolerances in the Specifications. Oversize pistons are available as listed in the Specifications. 3 These are accurately machined to just below the indicated
measurements so as to provide correct running clearances in bores machined out to the exact oversize dimensions. 4 If the bores are slightly worn but not so badly worn as to justify reboring them, then special oil control rings and pistons can be fitted which will restore compression and stop the engine burning oil. Several different types are available and the manufacturer's instructions concerning their fitting must be followed closely. 5 If new pistons are being fitted and the bores have not been reground, it is essential to slightly roughen the hard glaze on the sides of the bores with fine giass paper so the new piston rings will have a chance to bed in properly.
of the
exhaust
valves.
The
valve
seatings
should
be
examined at the same time. If the pitting on valve and seat is very slight the marks can be removed by grinding the seats and valves together with coarse, and then fine, valve grinding paste. Make sure the valve rim thickness is not reduced below the specified limits.
2
Where
bad
pitting has occurred
to the valve
seats
it will be
necessary to recut them and fit new valves. If the valve seats are so worn that they cannot be recut, then it will be necessary to fit new valve seat inserts. These latter two jobs should be entrusted to the local BMW agent or engineering works. In practice it is very seldom that the seats are so badly worn that they require renewal. Normally, it is the valve that is too badly worn for refitting, and the owner can easily purchase a new set of valves and match them to the seats by valve grinding.
3
Valve grinding is carried out as follows: Smear a trace of coarse
carborundum paste on the seat face and apply a suction grinder tool to the valve head. With a semi-rotary motion, grind the valve head to its seat, lifting the valve occasionally to redistribute the grinding paste. When a dull matt even surface finish is produced on both the valve seat and the valve, wipe off the paste and repeat the process with fine carborundum paste, lifting and turning the valve to redistribute the paste as before. A light spring placed under the valve head will greatly ease this operation. When a smooth unbroken ring of light grey matt finish is produced, on both valve and valve seat faces, the grinding operation is completed. 4 Scrape away all carbon from the valve head and the valve stem. Carefully clean away every trace of grinding compound, taking great care to leave none in the ports or in the valve guides. Clean the valves and valve seats with a paraffin soaked rag then with a clean rag, and finally if an air line is available, blow the valves, valve guides and valve ports clean.
ee 24
Pistons and piston rings — examination and renovation
ee
reer
ee
a
eS
1 If the original pistons are to be refitted, carefully remove the piston rings as described in Section 17. 2 Clean the grooves and rings free from carbon, taking care not to scratch the aluminium surfaces of the pistons. 3 If new rings are to be fitted, then order the top compression ring to be stepped to prevent it impinging on the ‘wear ring’ which will almost certainly have been formed at the top of the cylinder bore. 4 Before fitting the rings to the pistons, push each ring in turn down to the part of its respective cylinder bore (use an inverted piston to do this and to keep the ring square in the bore) and measure the ring end
gap. The gaps should be as listed in Specifications Section. 5 Now test the side clearance of the compression rings which again should be as shown in Specifications Section. 6 Where necessary a piston ring which is slightly tight in its groove may be rubbed down, holding it perfectly squarely on an oilstone or sheet of fine emery cloth laid on a sheet of plate glass. Excessive tightness can only be rectified by having the grooves machined out.
7
The gudgeon
pin should
be a push fit into the piston at room
27
Valve guides — examination and renovation
1 Test each valve in its guide for wear. After a considerable mileage, the valve guide bore may wear oval. This can best be tested by inserting a new valve in the guide and moving it from side to side. If the stem of the valve deflects by over 0.006 in (0.15 mm) then it must be
assumed that the tolerance between the stem and the guide is greater than the permitted maximum as listed in the Specifications Section. 2 The new valve guides are available in diameters of oversize as
specified. 3 To remove the valve guides, drive them out with a suitable drift into the combustion chamber. If the bores in the cylinder head are unserviceable, they will have to be reamed out to suit an oversize valve
guide. 4 To install the valve guides, first heat the cylinder head to between 220°C and 250°C (428°F and 482°F) in a domestic oven.
5 Press in the new guides from the camshaft side. The valve guides must project 0.591 in --0.020 in (15 mm - 0.5 mm) above the surface of the cylinder head on the camshaft side when installed, and then ream them to specification.
Chapter 1/Engine 6 Unless the necessary reamers are available, leave valve guide renewal to your BMW dealer.
aI
it is preferable to
28 Timing chain and gears — examination and renovation 1 Examine the teeth on both the crankshaft gear wheel and the camshaft gear wheel for wear. Each tooth forms an inverted ‘V’ with the gear wheel periphery, and if worn the side of each tooth under tension will be slightly concave in shape when compared with the
other side of the tooth (ie; one side of the inverted ‘V’ will be concave when compared with the other). If any sign of wear is present the gear wheels must be renewed. 2 Examine the links of the chain for side slackness and renew it if necessary.
It is a sensible
precaution
to renew
the chain
at about
30,000 miles (50,000. km) intervals, or less, if the engine is stripped down for a major overhaul. The actual rollers on a very badly worn chain may be slightly grooved.
29
Rocker arms and rocker shafts — examination and renovation ae
1. Thoroughly clean the rocker shaft and then check the shaft for straightness by rolling it on plate glass. It is most unlikely that it will deviate from normal, but if it does, purchase new shafts. The surface of the shaft should be free from any wear ridges caused by the rocker arms. If any wear is present, renew the shafts. 2 Check the rocker arms for wear of the rocker bushes, for wear at the rocker arm face which bears on the valve stem, and for wear of the slide faces. Wear in the rocker arm bush can be checked by gripping the rocker arm tip and holding the rocker arm in place on the shaft, noting if there is any lateral rocker arm shake. If shake is present, and the arm is very loose on the shaft, a new bush or rocker arm must be fitted. 3. Check the roller which bears on the end of the valve stem, also the slide pads which bear on the cam lobes and renew as necessary.
28.1 Check the crankshaft sprocket teeth for wear
UU UU yeSnEEnISSSIISIIEII SIE
30 Flywheel (or driveplate — automatic transmission) ring gear — examination and renovation
and starter
|f the teeth of the starter ring gear are badly worn, the ring gear 1 will have to be renewed on a manual transmission flywheel. On automatic transmission models, the complete flywheel will have to be renewed. To remove a ring gear from the flywheel, drill a hole (6.0 mm in 2
ment components Fig. 1.20. Rocker arm valve clearance adjust to (4)
(1)
Fig. 1.19. Checking the side clearance of a piston ring
Fig. 1.21.
Drilling the starter ring gear prior to removal
Fig. 1.22. Splitting the starter ring gear with a cold chisel
é
°
a
Din.
st
32.3b Testing oil pump rotor endfloat
32.3c Testing oil pump inner to outer lobe wear
al,
,
32.2 Removing the oil pressure relief valve from the oil pump
33.1 Removing the oil filter
ee eeChapter 1/Engine Oe ee diameter) between the bases of two teeth. flywheel — 8.0 mm in depth should be enough. 3. 4
Do
not drill into the
Split the ring gear with a sharp cold chisel (see Fig. 1.22). Heat the new ring gear in an electric oven to between 200°C and
230°C (392°F and 446°F).
5 Place the ring on the flywheel (chamfer towards engine), and tap it squarely into position using a brass drift. Do this as quickly as possible because the ring gear will cool quite rapidly. 6 Where the machined face of the flywheel is scored or shows surface cracks, it should be surface ground, but the thickness of the driven plate contact area of the flywheel must not be reduced below 0.53 in (13.5 mm). 7 Refer to Section 21 for the instructions on renewing the pilot bearing.
piston rings.
32
Oil pump — examination and renovation
1 Unbolt and remove the cover from the oil pump. 2 Unscrew and remove the plug from the oil pressure and extract the plunger and spring.
3
c) Between
With the cylinder head removed,
use a blunt scraper to remove all
trace of carbon and deposits from the combustion spaces and ports. Remove the spark plugs. Remember that the cylinder head is aluminium alloy and can be damaged easily during the decarbonising operations. Scrape the cylinder head free from scale or old pieces of gasket or jointing compound. Clean the cylinder head by washing it in paraffin and take particular care to pull a piece of rag through the ports and cylinder head boit holes. Any dirt remaining in these recesses may well drop onto the gasket or cylinder block mating surface as the cylinder head is lowered into position and could lead to a gasket leak after reassembly is complete. 2 With the cylinder head clean, test for distortion if a history of coolant leakage has been apparent. Carry out this test using a straight edge and feeler gauges or a piece of plate glass. If the surface shows any warping in excess of 0.0039 in (0.1015 mm) then the cylinder head will have to be resurfaced which is a job for the specialist engineering company. The thickness of the cylinder head must not be reduced by more than 0.02 in (0.5 mm) and the depth of the upper timing cover must be reduced by an equivalent amount to compensate
(0.012 in or 0.3 mm on North American models). 3 Clean the pistons and top of the cylinder bores. If the pistons are still in the block then it is essential that great care is taken to ensure
that no carbon gets into the cylinder bores as this could scratch the cylinder walls or cause damage to the piston and rings. To ensure this does not happen, first turn the crankshaft so that two of the pistons are at the top of their bores. Stuff rag into the other two bores or seal them off with paper and masking tape to prevent particles of carbon entering the cooling system and damaging the water pump. 4 Rotate the crankshaft and repeat the carbon removal operations on the remaining two pistons and cylinder bores. 5 Thoroughly clean all particles of carbon from the bores and then inject a little light oil round the edges of the pistons to !ubricate the
relief valve
Using feeler blades check the following clearances: a) Between the from 0.0039 b) Between the from 0.0047
os 31 Cylinder head — decarbonising and examination se a ee 1
33 ES
outer rotor and pump housing which should be to 0.0059 in (0.1 to 0.15 mm). tips of the inner and outer rotors which should be to 0.0079 in (0.12 to 0.20 mm).
the rotor face and the cover mating face of the pump
housing which should be from 0.0014 0.095 mm).
to 0.0037 in (0.035 to
Where
renew
these tolerances
are exceeded,
the components
as necessary. 4 If the drive flange must be removed, use a two legged extractor. Press on the new flange so that the distance between the outer faces of flange and rotor is 1.681 in (42.7 mm).
33
Oil filter — renewal
1 A disposable screw-on type filter is fitted to a light alloy housing on the left of the engine. Simply unscrew and discard the old filter. Apply a thin film of engine oil to the sealing face on the new filter, and hand tighten it onto the filter housing. 2 Should the filter housing need to be removed, unbolt it from the crankcase (on North American models first remove the air pump blowoff valve). Use a new gasket when refitting the housing.
34
Oil seals — renewal
1 Atthe time of major engine overhaul, always renew the crankshaft front and rear oil seals. 2 The front seal which is located in the timing chain lower cover can be extracted using a hooked tool after the crankshaft pulley has been removed or if the timing cover has been removed the seal can be removed with a piece of tubing used as a drift. 3 The rear seal is housed in a retainer accessible after the clutch and flywheel (or driveplate — automatic transmission) have been removed. 4 After pressing the new seals into position, pack grease into the seals between the sealing lips, before refitting them to their respective components. If the crankshaft pulley has a scored groove on its sealing face, fit the timing cover oil seal so that its sealing lips locate on the unworn part of the pulley.
35
Crankcase ventilation system
1
A positive type system
is installed and is described
in detail in
Chapter 3, Section 34.
36
Engine — preparation for reassembly
1
To ensure maximum
life with reliability frorn a rebuilt engine, not
only must everything be correctly assembled but all components must be spotlessly clean and the correct spring or plain washers used where originally located. Always lubricate bearing and working surfaces with clean engine oil during reassembly of engine parts. 2 Before reassembly commences, renew any bolts or studs, the threads of which are damaged or corroded. 3. As well as your normal tool kit, gather together clean rags, oil can, a torque wrench and a complete (overhaul) set of gaskets and oil seals.
37 33.2 Removing the oil filter housing from the crankcase
Crankshaft and main bearings — installation
If the chain sprocket has been removed, press it into location on the end of the crankshaft — heating the sprocket beforehand, will assist
o
37.3 Installing number three main bearing cap
37.5a Crankshaft rear oil seal retainer
37.5b Installing the crankshaft rear oil seal retainer
38.3 Tightening the flywheel securing bolts
39.1a Piston position arrow — faces front of engine
Chapter 1/Engine
35
in this operation.
1 With the crankcase inverted, insert the bearing shells into their crankcase recesses. Make sure that both sides of each shell are absolutely clean before installing it. Number 3 shells incorporate the thrust flanges. 2 Oil the bearings liberally and carefully lower the crankshaft into position. 3 Fit the bearing shells to the main bearing caps and install them in their correct sequence as previously identified.
4
Screw
in and tighten the main
bearing cap bolts evenly to the
specified torque. 5 Check that the crankshaft turns smoothly with hand pressure, and then install the rear oil seal retainer complete with new oil seal and gasket.
38 Flywheel tion
(or driveplate — automatic
transmission)
— installa-
1 Install the flywheel to the crankshaft flange so that the marks made before removal are in alignment. 2 Discard the old securing bolts and screw the new ones into position finger tight, after applying ‘Loctite 270’ to the threads.
3 With a large screwdriver, jam the starter ring gear, and then tighten the bolts to the specified torque wrench settings, in diagonal
sequence.
39
Piston/connecting rods — installation
1 Assemble No. 1 piston to the connecting rod, making sure that with the arrow on the piston crown facing forwards (as if in the engine) the oil hole just below the small end bush on the rod faces in the same direction as the arrow. The sequence numbers on the cap and rod should be on the same side. 2 Push the gudgeon pin into position using finger pressure and insert two new circlips. 3 Install the piston rings by reversing the removal procedure given in Section 17. Note the sequence of fitting the ring cross sections in Fig.
1.24. 4 Stagger the piston ring end gaps at equal points of a circle. Insert the bearing shell into the connecting rod, apply oil liberally 5 to the bearing and the piston rings and smear some up and down the cylinder bore and fit a piston ring compressor. Insert the connecting rod into the cylinder bore taking care not to 6 scratch the bore surfaces. With the compressor standing squarely on the top of the cylinder block and the piston rings well compressed (but
not tight), place the wooden shaft of a hammer on the piston crown and then give the head of the hammer a sharp tap to drive piston/rod assembly down the bore. Remove the ring compressor.
39.8a Installing a big end shell to the cap
the
Fig. 1.23. Piston fitting and weight markings and connecting rod oil hole
H704 1
a
Oe
40.7a Installing the oil pump drive chain and sprocket
40.7b Installed positions of the oil pump and timing chains
40.8 Installed position of the timing chain tensioner
Chapter 1/Engine
37
7 Turn the crankshaft so that-the number 1 big-end journal is at its lowest point of travel and then pull down the connecting rod onto it. Make sure that the bearing shell is not displaced. 8 Fit the shell to the big-end cap, oil it and install it, making sure that the numbers
on cap and
rod are adjacent.
Recheck
that the piston
crown arrow faces the front of the engine. 9 The 10 rod
Install the big-end bolts and nuts and tighten to specified torque. narrower diameter of the nut is nearest the big-end cap. Repeat the operations on the three remaining piston/connecting assemblies.
40
Timing components — covers and oil pump — installation
1 If the crankshaft sprocket has been removed, press it into location on the end of the crankshaft — heating the sprocket beforehand will assist in this operation. 2 Insert the Woodruff key into the crankshaft keyway. 3. If the oil pump and drive chain have been removed, refit the oil pump drive chain to the rear teeth of the crankshaft sprocket and then install the double roller timing chain to the front teeth of the sprocket together with the guide rail. 4 Tighten the upper guide rail pin into the crankcase, and fit the two circlips to retain the guide rail. 5 Let the oil pump chain hang downwards pending installation of the oil pump, and draw the timing chain upwards and tie it over the top of the cylinder block. If the original chains are being refitted, make sure
Fig. 1.26. Location of oil pump O-ring seal (arrowed)
that the marks made before removal to indicate their running direction are correctly positioned. 6 If the oil pump was removed,
now is the time to refit it. The opera-
tions are a reversal
but make
of removal
sure that tne O-ring seal
round the pressure relief pipe is in position.
7 Locate the oil pump chain sprocket within the loop of the drive chain, and bolt it to the pump flange using new lockwashers. At this stage check the chain tension by applying light thumb pressure. Only a slight deflection should be observed. If the chain is slack a shim should be installed between the oil pump and crankcase, but note the location of the shim oil hole. 8 Install the timing lower cover complete with new oil seal, (Section 34), having first fitted the new joint gaskets to the crankcase with jointing compound., If the cover was removed without disturbing the sump, apply jointing compound to the exposed part of the sump gasket. Particular attention should be paid to ensure that jointing compound is smeared at the two lower points where the sump, crankcase,
and lower timing cover meet. Tighten the lower timing cover to the crankcase first, and then 9 tighten the relevant sump bolts. Fit the alternator bracket at the same time, tightening the crankcase bolt last. 10 Install the crankshaft pulley, tightening it to the specified torque after jamming the starter ring gear.
Fig. 1.27. Oil pump chain tension adjusting shim (1) showing the location of the oil hole
Bg
a
40.10a Fitting the crankshaft pulley
40.10b Tightening the crankshaft pulley nut
4 40.14 Camshaft sprocket hub TDC mark
40.17a Installing the chain tensioner plunger
40.15 Camshaft sprocket fitted to camshaft showing position of lockplates over dowel hole (lockplates not fitted)
40.17b Installing the chain tensioner spring
Chapter 1/Engine 11
If the
cylinder
head
has
been
removedy
39
tall the camshaft
sprocket and timing chain in conjunction with the instructions given in Section 43 — otherwise continue as follows. va
12
Insert the camshaft sprocket within the loop of the timing chain.
13 Turn the engine until number 1 piston is at TDC with the pointer on the lower timing cover in line with the notch on the crankshaft pulley. 14 Turn the camshaft until the notch on the sprocket hub is in line with the centre of the small lug at the top of the cylinder head. The
camshaft flange dowel pin hole will now be at its lowest point (Fig. 1.28). 15 Fit the sprocket to the camshaft flange without disturbing the crankshaft or camshaft. A certain amount of repositioning of the camshaft sprocket within the loop of the timing chain will be necessary, until the sprocket will engage with the camshaft flange
without having to move the flange in either direction. 16 Install the camshaft bolts using new locking plates (cover the dowel hole), tighten to specified torque and bend up the tabs of the locking plates. 17 Install the chain tensioner plunger, spring, and plug. 18 Install the upper timing cover, having smeared its mating flanges and gaskets with jointing compound. Pay particular attention to ensure that jointing compound is smeared at the two points where the crankcase, lower timing cover, and cylinder head meet. Some cylinder head gaskets have a hole at these two points, which should be filled with jointing compound (see Fig. 1.29). 19 Tighten the bolts which connect with the lower cover, after the bolts retaining the cover to the cylinder head have been tightened td the specified torque.
41
Sump — installation
1 Apply jointing compound to the sump mating surfaces of the crankcase, timing cover, and rear end cover. Be particularly liberal with the jointing compound where the lower timing cover and end cover joint the crankcase. 2 Offer the sump into position, screw in all the bolts finger tight, and then tighten them to the specified torque a turn at a time and in a diagonally opposite sequence.
42 Cylinder camshaft 1
head
—
reassembly
of valves,
rocker
shafts
and
Install the first valve to its guide having applied engine oil to the
valve stem.
;
2 \f the engine has covered 25000 miles (40000 km) on the original valve springs, renew them, also the valve stem oil seals on both inlet and exhaust valves.
Fig.
1.29.
Areas
to be covered with jointing compound installing the upper timing cover
40.17c Installing the chain tensioner spring plug Fig.
1.30. Using dowel rods to align the rocker shafts
when
B,.° my
42.6 Showing cylinder head bolt cut-out in a rockers haft
os
Ee
:
42.7 \nstalling the distributor drive housing
43.3 Jointing compound smeared on the cylinder head gasket around
the oil supply hole
BS
43.4a Installing the cylinder head to the engine block
43.4b Tightening the cylinder head bolts
Chapter 1/Engine
41
—_e enn
3 Install a spring lower cup, a valve stem oil seal, a spring, the cap and after compressing the spring insert the split cotters. 4 Remove the compressor and then repeat the operations on the
7 Before installing the rocker cover, adjust the valve clearances as described in Section 44. 8 Install the distributor, as described in Chapter 4, if the engine is in
remaining seven valves making sure that they are all returned to their original locations (or ground—in locations — if new valves are being
the car,
installed). 5 Drive the rocker shafts into their original locations, fitting
Cylinder head — installation
1.
Ensure
that the cylinder
head
and
block surfaces
reverse
the procedure
given
in paragraphs
44
Valve clearances — adjustment
1
The simplest way to adjust the valve clearances is to set number 1
piston
at TDC
on
its compression
stroke,
having
first removed
are absolutely
Obtain a new gasket for your particular engine type and compare it
with the old one before discarding it. The fuel injection engine cylinder head gasket can be used on a carburettor engine, but, a carburettor engine cylinder head gasket must never be fitted to a fuel injection engine. 3 Coat both sides of the new gasket (around the area of the timing cover mating surface only) with jointing compound and position the gasket correctly on the cylinder block. 4 Turn the crankshaft so that all the pistons are positioned a little way down the bores (this will prevent any valve head damaging the piston crowns until the timing is correctly set later). Lower the cylinder head into place and insert the securing bolts and then tighten them progressively to the specified torque setting in the sequence shown. 5 Fit the oil distribution pipe and tighten its single hollow bolt to
between
8.0 Ibf ft and 9.4 Ibf ft (11 Nm and 13 Nm). Overtightening
will restrict the flow of oil to the rocker arm contact pads and eccentrics. 6 Install the camshaft sprocket and upper timing cover as described in Section 40, paragraphs 12 to 19. It is essential that the notch on the camshaft sprocket hub is correctly aligned otherwise the valves could damage the crowns of the pistons.
the
spark plugs. To do this, apply a spanner to the crankshaft pulley nut and turn the crankshaft whilst placing a finger over number 1 plug hole. When compression can be felt, continue turning the crankshaft until the TDC notch on the crankshaft pulley is in alignment with the timing cover pointer. 2 Adjust the two valve clearances nearest the front of the engine. The left-hand valves are inlet and the right-hand valves exhaust, when ° viewed from the driver's seat. Both valves have the same clearance (cold) which is between 0.006 and 0.008 in (0.15 to 0.20 mm). 3 To adjust the gap, release the locknut on the rocker arm and insert a thin rod into one of the holes in the eccentric cam. Turn the cam until the appropriate feeler gauge is a stiff sliding fit between the cam and the end face of the valve stem. On no account check the clearance between the rocker arm slide pads and the lobes of the camshaft.
clean. Clean out the bolt holes, any oil left in them could create enough hydraulic pressure to crack the block when the bolts are screwed in. 2
1 to 7 of
the
rocker arms and springs also in their original positions as the shaft passes through. 6 Make sure that the rocker shafts are aligned to receive the cylinder head bolts into the shaft cut-outs. The rear end of the inlet rocker shaft is open but the rear end of the exhaust rocker shaft must be closed. A plug is used for this. Fit the rocker shaft circlips. 7 Install the distributor drive housing to the rear end of the cylinder head. Note the self-sealing washer under the bolt head which is located immediately below and to the left of the oil pressure switch. 8 Release all pressure from the rocker arms by using one of the methods described in Section 12. 9 Oil the camshaft bearings and install the camshaft, but do not push it fully home until the thrust plate is fitted. 10 Fit the camshaft thrust plate and securing bolts. Should the camshaft endfloat exceed 0.0051 in (0.13 mm) renew the thrust plate.
43
and
Section 11.
Fig.
1.31. Camshaft thrust plate location
Yee
44.2 Adjusting the valve clearances
42
Chapter 1/Engine
Fig. 1.32. Cylinder head bolt tightening sequence 4 Retighten the locknut without moving the eccentric cam. 5 Turn the crankshaft pulley nut until No. 3 piston is at TDC on its compression stroke. This can be judged by watching the high points of the camshaft No. 3 lobes. When they are pointing downwards, check the clearances of No. 3 valves. 6 Turn the crankshaft again until the high points of No. 4 camshaft lobes are pointing downwards and check and adjust the clearances of No. 4 valves (those nearest the back of the cylinder head). 7 Turn the crankshaft again until the high points of No. 2 camshaft lobes are pointing downwards and check and adjust the clearances of
No. 2 valves. 8 The sequence of adjustment just described follows the firing order of the engine and avoids unnecessary rotation of the crankshaft. 9 Finally check all rocker adjuster locknuts, remove the spanner from the crankshaft and install the rocker cover using a new gasket.
48
Engine (fuel injection type) with manual gearbox — installation
1 Carry out the instructions given in Section 47, but, in addition, after the engine is installed, reverse the operation given in Section 5.
49
Engine (without gearbox) — installation
1 Reverse the removal operations given in Section 6 including the relevant paragraphs in Section 4 and 5 as stated in the first paragraph.
10
Recheck the valve clearances after 600 miles (1000 km).
Be especially careful not to damage the gearbox first motion shaft and flywheel pilct bearing. 2 Carry out the instructions as given in Section 47, sub sections c, d, e, f, and g. The distributor can be fitted before or after installation of the engine.
45
Engine ancillary components — installation
50
1 The ancillary components may be fitted to the after it is installed. In either case, reverse the removal components listed in Section 10. Adjust the fan and American models) drivebelts as described in Chapters
engine before or operations of the air pump (North 2 and 3.
46
Engine/manual gearbox — reconnecting
1
This is a reversal of the separation procedure described in Section
Engine (automatic transmission models) — installation
1 Reverse the operations for removal given in Section 7 and the relevant paragraphs of Section 6, but observe the following: a)
8, except that the clutch driven and pressure plates must be fitted to the flywheel and centralised as described in Chapter 5.
b) c)
47
Engine (carburettor type) with manual gearbox — installation
1
Reverse the operations given for removal in Section 4, but observe
d)
Before joining the torque converter housing to the engine, check that the torque converter is fully to the rear. This is apparent if by placing a straight-edge across the mouth of the bellhousing, the tip of the torque converter shaft is below the rim of the bellhousing. If it is not, press the torque converter into full engagement with the oil pump, by turning the torque converter at the same time to engage the driving lugs. Tighten the driveplate to torque converter bolts to the specified torque. Adjust the throttle position cable as described in Chapter 6, part2. Fill the automatic transmission with the correct amount of recommended oil.
the following: a) b)
Use new self-locking nuts on the propeller shaft front coup!/ing, tightening the nuts only, keeping the bolts still. Before tightening the propeller shaft centre bearing mounting
2 Carry out the instructions as given in Section 47, sub sections c, d, e, f, and g. The distributor can be fitted before or after installation of the engine.
plate, position it 0.08 in (2.0 mm) towards the front of the car c) d) e)
f) g)
to give it the necessary preload. Tighten the transmission exhaust support bracket as described in Chapter 3. Adjust the accelerator cable as described in Chapter 3. Fit the distributor as described in Chapter 4 after installation. Fill the cooling system as described in Chapter 2. Fill the engine with the correct amount of recommended oil.
51
Start-up after major overhaul
1
Make
sure that the engine, cooling system and transmission
all been refilled with the correct quantity and type of fluid. 2 Check that all controls and leads have been reconnected. 3 Make sure that no spanners or rags have been left within engine compartment.
have
the
Chapter 1/Engine 4 Increase the engine idling speed adjustment offset the stiffness of the new components. 5 Start the engine in the normal manner. This
screw
setting
to
may take a little longer than normal as fuel has to be drawn from the fuel tank to fill dry components. 6 Once the engine has fired, keep it running until normal operating temperature has been reached and then check for oil and water leaks and rectify if necessary. 7 Due to the altered characteristics of the engine by the removal of carbon and valve grinding, the adjustment of the carburettor, ignition, fuel injection and emission control systems should all be checked as described in the relevant Chapters.
52
8
43
After the engine has had its first run, allow it to cool completely
and check the torque wrench settings of the cylinder head bolts. Similarly, after the first 6000 miles (1000 km) check the bolts again cold. This time slacken each bolt one quarter of a turn before tightening it to the specified torque. Always tighten the bolts in the sequence
given in Fig. 1.32). 9 If a number of new installed,
changed
engine
it is recommended
internal
components
that the engine
at the end of the first 600
oil and
miles (1000
have
filter are
been also
km) running. The
engine and road speeds should be restricted for the initial period to assist in bedding-in the new components.
Fault diagnosis — engine
Symptom
Reason/s
Engine will not turn over when starter switch is operated
Flat battery. Bad battery connections. Badconnections at solenoid switch and/or starter motor. Defective starter motor.
Engine turns over normally but fails to start
No spark at plugs.
No fuel reaching engine. Too much fuel reaching the engine (flooding). Engine starts but runs unevenly and misfires
Ignition and/or fuel system faults. Incorrect valve clearances. Burnt out valves.
Worn out piston rings. Lack of power
Ignition and/or fuel system faults. Incorrect valve clearances. Burnt out valves Worn out piston rings
Excessive oil consumption
Oil leaks from crankshaft, rear oil seal, timing cover gasket and oil seal, rocker cover gasket, oil filter gasket, sump gasket, sump plug washer.
Worn piston rings or cylinder bores resulting in oil being burnt by engine. Worn valve guides and/or defective valve stem seals. Excessive mechanical noise from engine
Wrong valve to rocker clearances. Worn crankshaft bearings. Worn cylinders (piston slap). Slack or worn timing chain and sprockets.
Start from the beginning of the check proceNote: When investigating starting and uneven running faults do not be tempted into snap diagnosis. of power and economy is not normally terms in engine an from performance Poor run. long the in time less take dure and follow it through. It will investigation needs to be made. further any assuming before first checked be must diagnosed quickly. In any event the ignition and fuel systems
Chapter 2 Cooling system Contents
PATHE eZ OMI IXCUNG Mere men rststrc denna ats cate (ide. as taatttts, waa Pence hate ey COoliMGisyStenteCaMNGi os ete ea dicee e ews cucre, Gee esMene te mages COOUNGSYStemic MUSING) worsictewetu ces Gee ite Ghercs wieivuel ole .osuehe COGHMGISV Stem TIHING mepsessicn cicdius Wis sicrmersute sen © winds, Gueuens Fan belt — adjustment and renewal ............25 eee eee FaimplagdeseVallatlOnmmamaryieaciel ates atc engcoe tt wnapt = eee, « FaiieciagnosissACOOUNGSVStGM: canes a cena aee see waa e
5 2 3} 4 A. 11 ils
General description
1
Radiator — removal, inspection, cleaning and installation Thermostat — removal, testing and installation
6 7
Waterpump — description. airs ns cevncsbel o cave Water pump — overhaul Water pump — removal and installation
sie
ne
eee
8
0 9
Specifications
System type
Pressurised, radiator, pump
Capacity (including heater)
7 litres, 7.4 US quarts, 12.3 Imp. pints
Thermostat opening temperature
Commences 80°C (176°F) Fully open at 95°C (203°F)
Thermostat extension, fully open
8 mm (0.315
Radiator filler cap pressure rating
in)
Pressure relief valve opens at 14.2 psi Vacuum
relief valve opens at 1.14 psi
Water pump Clearance between body andimpeller
..............00-0ee00-
Torque wrench setting
1 mm, (0.0394 in)
Water pump securing bolts
Ibf ft 20
1.
engine water-passages. 3 The cooling water is also directed to the car interior heater, the inlet manifold, and to a choke control unit on the carburettor.
General description
Nm 28
1 The cooling system is of a water pump assisted thermal syphon type, and is pressurised by means of a pressure valve filler cap. The
main items of the system include a radiator, impeller type water pump, heat sensitive thermostat, cooling fan, and connecting water hoses,
2
and the system operates as follows.
1 Before draining the system, make sure the car is on level ground, and that the coolant is not under pressure. In order to avoid scalding, it is preferable to wait until the engine is cold. 2 Set the interior heater left control on the fascia to ‘warm’. 3 Carefully open the filler cap, and, if the engine is still hot, do this
2
Cold water from the bottom of the radiator is drawn towards the
water pump, where it is then pumped into the water passages of the engine cylinder block, and cylinder head. Heat is absorbed by the water, which is then pumped to the top header tank of theradiator. Due to the passage of air through the radiator, by the action of the cooling fan, and also the entry of air through the radiator grille, the water cools as it passes down through the radiator matrix and the cycle is then repeated. In order to accelerate the process of warming
up, and to help the engine to achieve this most economical operating temperature in the shortest time, a thermostat is fitted between the radiator bottom hose and the water pump, and this has the effect of by-passing the radiator, and keeping the circulation of water within the
Cooling system — draining
with a substantial
cloth, as the sudden
release of pressure within the
radiator will cause the ejection of very hot steam. 4 Place a large container, of at least two gallons capacity, beneath the radiator. There is no provision of a radiator drain tap, and the removal of the bottom hose will undoubtedly result in a certain amount of splashing. 5 Slacken the radiator bottom hose clip, and carefully pull the hose
away from the radiator. If it is particularly obstinate, it may help to grip
Chapter 2/Cooling system the hose, and attempt to twist it off.
6 Drain the water from the cylinder block, by placing a receptacle beneath the rear of the engine, and then unscrewing the hexagon bolt, located at the right rear side of the engine block.
3
Cooling system — flushing
1
The radiator and waterways
in the engine after some
time may
become restricted or even blocked with scale or sediment which reduces the efficiency of the cooling system. When this condition occurs or the coolant appears rusty or dark in colour the system should be flushed. In severe cases reverse flushing may be required. 2 Remove the radiator filler cap, and place the interior heater controls to ‘warm’. Slacken the radiator bottom hose clip, and remove the hose, draining the coolant into a suitable receptacle. 3 When the engine is cold, and not before, place a hose in the radiator filler neck, and flush the system until clear water is seen to
45
ing. If it does not, there is probably an air pocket in one of the hoses, and it will be necessary to bleed the system again. 6 When handling antifreeze and corrosion inhibitor coolants, remember that they can have an adverse affect on body paintwork, and should some come into contact with the body, wash it off immediately with clean water.
5
Antifreeze mixture
1
In addition to normal checks on water level at regular intervals, the
complete cooling system should years. The concentration of the local climatic conditions, but in minimum percentage quoted in
be drained and replenished every two antifreeze will largely depend on the any case, should not be less than the the Specifications.
2 In areas where the water is particularly hard, the contamination of the coolant can be reduced by the use of distilled water, instead of water from the tap.
emerge from the bottom hose and radiator outlet.
3.
4 |n severe cases of contamination of the coolant, it may be necessary to reverse flush the system. To do this, remove the radiator top hose, and remove the radiator as described in Section 6. 5 Invert the radiator, and place a hose in the bottom outlet pipe.
water as described in Section 3, and to check the water hose clips are properly tightened, as most antifreeze solutions have a searching effect, and they also tend to cause hose shrinkage. 4 The system should be filled with water until the radiator matrix holes are covered, as seen through the filler neck. The correct amount of solution can then be added, and the system finally topped up as described in Section 4. 5 The quantity of antifreeze which should be used for various levels of protection, is given in the table below, expressed as a percentage of the system capacity.
Continue flushing until the water runs clear. 6 To flush the engine water jackets, disconnect the hoses from the twin branch connector on the left-hand side of the cylinder head. Place a cold water hose in one branch, and let the water flow until it emerges clear from the other branch. 7 Fit the radiator in position, and connect up the hoses as described in Section 6.
4
Cooling system — filling
1 Before filling the system, ensure that all the hose connections are sufficiently tight, and that the heater control is set to ‘warm’. The car should be on level ground. 2 Check that the coolant is correct in respect of antifreeze and inhibitor concentration. 3. Fill the radiator slowly, to allow the escape of air, and fit the filler cap. Now run the engine at 2000 — 2500 rpm, until it reaches its normal operating temperature, to ensure that the thermostat opens. 4 Stop the engine, and remove the filler cap slowly, Fill the radiator with more coolant, to a point no more than 2 cm (0.8 in) below the base of the cap, and then screw the cap on tightly. 5 Restart the engine and check that the interior heater is function-
3.6 Removing the twin branch connector manifold
Before adding antifreeze, it is best to flush the system with clean
Antifreeze
Protection to
Safe pump circulation
25% 30% 35%
—26°C (-15°F) —33°C (-28°F) —39°C (-38°F)
—12°C (10°F) —16°C (3°F) —20°C (-4°F)
6
Radiator — removal, inspection, cleaning and installation
1
The cooling system should first be drained as directed in Section
Dy, 2
On automatic transmission models it will also be necessary disconnect the oil cooler pipes from the radiator and plug them.
to
3 Disconnect the lower right hose from the radiator, and remove it. 4 There are two retaining bolts located at either side of the radiator, and these should be removed from the front body panel, and the radiator cowling placed over the fan blades. 5 The radiator may now be lifted out of the rubber support mount-
6.4 Radiator cowling placed over the fan blades prior to removing the radiator
H7350 Fig. 2.1. Testing the thermostat extension with a steel rule
Fig. 2.2. Thermostat hose connections
6.5 Radiator rubber mountings
siesermaes
ce
7.1b Thermostat hose connections
9.2 Removing the fan blade
Chapter 2/Cooling system
eee
ings, taking care not to damage the radiator matrix on the fan blades.
6
Carefully inspect the radiator for signs of damage
and leakage.
Clean away any debris from the matrix with a soft brush, or blow through it with an airline. The radiator should then be flushed out thoroughly as described in Section 3. 7 Radiator repairs can be rather tricky, and are best left to the experts, although minor repairs to the header tank may be tackled with a soldering iron, a good acid flux, and a low melting point solder. However, extreme care should be exercised, as, if too much heat is applied, the radiator joint may begin to separate. If the leak is very small, it will probably be possible to cure the fault by using one of the proprietary radiator sealants, which would have to be added when the system is filled. 8 Whilst the radiator is removed, check the filler cap valves for free movement, and, if any fault is suspected, have it checked by an expert. 9 Examine all the hoses and clips, and renew any which show signs of deterioration. Check the radiator rubber mountings for wear, and renew them if necessary. 10 Installation of the radiator is a reversal of the removal Refill and check for leaks as described in Section 4.
procedure.
——oooooooooooeeeeeeeeee
7
Thermostat — removal, testing and installation
1 The thermostat is located to the right of the water pump, and is connected to three separate water hoses. If it fails to open at the
47
facilities are not available it will be advisable to renew it. 3 If the water pump becomes excessively noisy, a few drops of engine oil through the bearing lubrication hole, may give temporary relief, until the unit can be dismantled.
9
Water pump — removal and installation
1 Drain the cooling system and remove the radiator as described in Sections 2 and 6. 2 Lever the locking tabs away from the fanblade securing bolts, remove the bolts, and lift the fan away from the water pump. 3 Remove the fan belt by slackening the alternator mounting, and adjusting bolts, and swivelling the alternator towards the engine. Pull off the fan pulley at the same time. 4 Loosen the two hose clips, and remove the water pump securing botls. Remove the water pump from its location, at the same time
disconnecting the hoses. If the unit refuses to move, do not damage the sealing faces with any form of lever, but carefully tap the water pump housing with a soft faced mallet. 5 Scrape away all remains of the flange gasket from the sealing faces. 6 When installing the water pump, use a new gasket, and new copper sealing washers under the bolt heads. Hold the gasket in position by using a small amount of grease on its surface.
correct temperature, the engine may overheat, and conversely, if it fails
to shut, the engine will not warm up as quickly as it should, and the heater operation will be affected. 2 Before removing the thermostat, drain the cooling system as described in Section 2. 3 Slacken the three hose clips, and remove the thermostat. 4 Test the operation of the thermostat by suspending it in a pan of water, heating it, and checking the temperature at which it commences to open, with a thermometer. This reading should be as indicated in the Specifications. Also check the full extension distance with a steel rule.
10
Water pump — overhaul
1 The hub and impeller are press-fitted to the shaft, and with new components, a press exerting approximately 1100 Ibf ft will be required. 2 Remove the pulley hub from the shaft with a suitable puller. 3. Extract the circlip and spacer ring, which are now exposed.
5 I|f the thermostat is at all faulty, discard it and fit a new unit. Installation is a reversal of the removal procedure, and remember to
bleed the system.
8
}MN
Water pump — description
1 The water pump is of light alloy construction, incorporating an impeller and it is belt-driven from the crankshaft pulley. 2 The water pump can be repaired, if leaking, as described in the following Sections, but where the necessary extractor and pressing
7
9.4 Removing the water pump
Fig. 2.4. Water pump shaft/bearing retaining circlip
Chapter 2/Cooling system Support the water pump housing, and apply pressure to the end of 4 the shaft, in the centre of the impeller. This will push the shaft from the
impeller, and the shaft/bearing assembly from the water pump housing. Drive out the water pump seal, and cover ring, from the water 5 pump housing. Fit a new seal, and check the condition of the impeller. If it is damaged or corroded, renew it. § To reassemble the water pump, press the bearing and shaft seal into the housing, and then press the impeller onto the shaft using Loctite 270. There must be a clearance between the face of the impeller and the housing of between 0.039 in and 0.047 in (1 mm and 1.2 mm), and this should be checked with a feeler gauge. 7 Press the pulley hub onto the shaft, so that the distance between the front face of the hub and the end of the shaft is betweeen 0.12 in
and 0.14 in (3 mm and 3.5 mm).
11.
Fan blades — variator
Depending on the operating and climatic conditions, there may be some variation in the dimensions and construction of the fan fitted.
Fig. 2.5. Pressing the water pump shaft through the impeller
12
Fan belt — adjustment and renewal
1 A single fan belt is used to drive the alternator and water pump/fan, from a single crankshaft pulley. 2 Adjustment or renewal of the bolt, is carried out by loosening the alternator mounting and adjusting bolts, and swivelling the alternator in towards the engine, to remove the fan belt, and then levering the alternator out to obtain the adjustment. Make sure the belt is properly fitted to the crankshaft pulley, before adjusting it. 3 The belt is correctly tensioned, when it can be depressed with the thumb between 0.2 in and 0.4 in (5 mm and 10 mm), at a point half way along the top run, between the alternator and the fan pulley. 4 When the adjustment is correct, tignten the alternator bolts, and recheck it again.
Fig. 2.6. Water pump shaft (1), shaft seal (2) and impeller (3)
Fig. 2.7. Water pump impeller to housing ciearance (B)
Fig. 2.9. Fan belt adjustment bolt and adjustment point
Chapter 2/Cooling system
13
Fault diagnosis — cooling system
Symptom
Reason/s
Overheating
Low coolant level. Slack fan belt. Thermostat not operating. Faulty radiator cap or of wrong type. Defective water pump.
Cylinder head gasket blowing. Radiator core clogged with flies or dirt. Radiator blocked. Binding brakes. Bottom hose or tank frozen. Inaccurate ignition or carburation settings. Perished or collapsed hose. Engine running too cool
Defective thermostat. Faulty water temperature gauge.
Loss of coolant
Leaking radiator or hoses.
Cylinder head gasket leaking. Cracked cylinder head. Leaking cylinder block core plugs. Faulty radiator filler cap or wrong type fitted.
49
Chapter 3 Carburation; fuel, exhaust and emission control systems Contents
Accelerator cable — removal and installation .............. Accelerator cable (fuel injection) — adjustment ............ Accelerator pedal — removal and installation .............. Additional air slide (fuel injection) — testing, removal and INSTA AtlOMmernwee tea eerie Sais aan Ain onde us Rat ered % Air cleaner — servicing and removal ............20+0 000% Air intake pre-heat valve — description and adjustment ....... Carpuretton—generalidesScriptiOn: cc0. acai ss Se eres wns (CarbunettOn——OVENMaul s etarenais cients: cis athe sare Boose Go als 5a,oiaon Carburettor — removal andinstallation ...............005. Carburettor — slow running adjustment .................4.
Cold start valve and heat/time switch (fuel injection), testing, FEMOVAANGUMStAallatiOni muss cc cued eyo nie oc es sw sake Crankcase emission control system — description and
Bil 30 6y) 27 2 3 10 is 22 11
28
MalatenanCeCmemmmatay sinleis aicnctcah chen aise cis sk e.8 Si a wle es Emission control systems — general description ............ Exhaust emission control system with air pump — description AMICI) Ala eM aM) CO Meier cecil say cdans andes, Guar sues 0 sean eye @ ootease Fallittdiagnosis=canbunettOrs cn. aces tea oe cn + oooh Fault diagnosis — emission control systems ............... Fault diagnosis — fuel injection system Fault diagnosis — fuel system general Filter (EGR system) — removal and installation .............
35 41 43
Fuel distributor (fuel injection)— testing
24
...............0..
34 33
36
Fuel evaporative emission control system — description and
FIREVITTIEENIVOEY
cc, Brio ce: DSC SPONSE
eT
cc
een
rr
Fuel Fuel Fuel Fuel Fuel
filter —renewal idle shut off valve injection system — injection system — injection system —
— testing, removal and installation description servicing slow running adjustment Fuel injection system — throttle butterfly valve adjustment Fuel pressure relief valve — testing and renewal
Fuel pressure storage unit — removal and installation Fuel pump (electric) — testing, removal andinstallation ....... Fuel pump (mechanical) — testing, removal and installation .... Fuel pumps — description Fuel pumps — routine servicing Fuel tank fuel level sensor — removal, testing and installation
Fuel tank — removal and installation General description Injectors (fuel injection) — removal and installation .......... Manifoldsiandiexhiaustisystemiae =. abe) ores eee erento Mixture regulator (fuel injection) — testing, removal and installation Reactor (EGR system) — removal and installation
........... Temperature sensors (air and coolant) — testing, removal and installing Vacuum regulator and auxiliary air valve (fuel injection) — removal and installation
Warm up regulator (fuel injection) — removal and installation
Gr
38
Specifications
Fuel pump (mechanical) Type Pressure at 4000 rpm Minimum delivery volume at 2000 rpm camshaft speed
Pierburg driven by rod from camshaft eccentric
4.27 \b/in? (0.30 kg/cm?) 12 Imp gals (14.5 US gals)/hour
Fuel pump (electric) Type Operating PleSsSuUlC etme tera ncni sen Delivery rate Fuel tank capacity
Bosch roller cell with expansion tank
cite. Svat
ee
Ae aye oa SG Se
Carburettor TED acecoesonsvsreusue toda0 00M ol DG 0 Clone iacleiDigiceciCininte
71 Ib/in? (5.0 bar)
24.2 Imp gals (29.1 US gals)/hour 11.4 Imp gals (13.7 US gals) 316
320/320A
Solex DIDTA 32/32 2 stage downdraft
Stage 1 Stage 2
X110 X 127.5
xX 120 X 135
Stage 1 Stage 2
130 120
V35 70
0.87 in (22 mm) 0.98 in (25 mm)
0.94 in (24 mm) 1.06 mm (27 mm)
Chapter 3/Carburation; fuel, exhaust and emission control systems KONE EeGVeD
is fitted to 320i models.
Fuel is drawn from the fuel
=
—
1 Control pressure 2 Return flow
P2QTITLT LLL
3 System pressure
EERE
4 Injection preSSUre queen
Fig. 3.29. Fuel injection system layout Fuel tank Fuel delivery pump Pressure reservoir
6 7
Fuel filter
Y)
Fuel distributor
10
System pressure regulator Warm-up regulator Safety switch Baffle plate Throttle butterfly
11 Idle speed adjusting screw 12 Additional air slide 13 Starting valve
14 Heat/time switch 75
Injectors
Chapter 3/Carburation; fuel, exhaust and emission control systems
62
Fig.
3.30
Fuel
injection
layout (North American
system
models)
Fuel tank Fuel delivery pump Pressure reservoir Fuel filter Fuel distributor
-S
System pressure regulator Warm-up regulator Safety switch Sensor plate DANDAARWNH™ Throttle valve /dle adjusting screw Auxiliary air regulator Start valve
Thermo timing valve Injection valves Air inlet Vacuum regulator
1 System pressure 2 Return flow 3 Injection pressure 4 Control pressure
Auxiliary air valve
2zzzz7zz7777z
@
») =
“
yy
yy =~ Go ~~ ry wwe
A BAY
Fig. 3.31. Idle speed regulating screw (4) on fuel injection models
Fig.
tank by an electrically operated pump, and is then fed, via a pressure
temperature additional air has the effect 4 Anormal plate and the
storage unit and filter unit, to the fuel distributor unit. The fuel is then pumped direct to the fuel injectors which are located near the inlet valves but mounted in four induction manifold branches. The system is of ‘continuous
acting’ type, and the amount
of fuel admitted
to the
3.32.
Adjusting the slow running (fuel injection showing air check valve (3) and supply hose (2)
models)
sensitive regulator, working in conjunction with an slide valve, is connected to the fuel distributor unit, and of increasing the amount of fuel injected by the injectors. type throttle butterfly valve, mounted between the baffle engine cylinders, is connected to the accelerator pedal.
injectors, by the fuel distributor, is governed by a pivoting baffle plate mounted
plate,
and
in the air intake. Air drawn
this action
moves
into the engine
a metering
lifts the baffle
shuffle valve
in the fuel
20
Fuel injection system — servicing
1
It is not
distributor. The ratio of air to fuel is thus controlled to a fine degree. After the mixture is drawn into the engine cylinder, the normal four stroke combustion cycle takes place. 2. The fuel is maintained at a constant pressure by a pressure relief
valve, incorporated into the distributor unit, excess fuel being diverted through a return line to the fuel tank. For cold starting, a solenoid valve injects fuel into the air intake for 3 a period determined by the coolant temperature. In addition, a
recommended
that
the
individual
components
are
dismantled, and servicing should be limited to diagnosis of faults, and the renewal of complete components as described in the following Sections. 2 The fuel injection system is self-priming and, if the fuel tank runs dry, it is only necessary to operate the starter until fuel reaches the injectors, and the engine starts.
a
Chapter 3/Carburation; fuel, exhaust and emission control systems reece meee ern DORAN SaMe ered Sl nn ee
ee
———eeeEEeEeEeEeEeE————————— ee ——————— eee 21
Fuel injection system — slow running adjustment
a
1 Before adjusting the slow running, it is necessary to check that the ignition timing and valve clearances are correctly set. Particularly check that the air cleaner element is clean. 2 Run the engine until normal operating temperature is reached. 3 The idle regulating screw is located beneath the throttle return spring on the induction manifold, and it should be turned to give an
engine idle speed of 850 rpm to 950 rpm. 4 Should the correct idle speed be difficult to achieve, accelerator cable may need adjusting as described in Section 30. 5 Connect a CO meter to the exhaust pipe;
the
6 On North American models detach the exhaust air check valve, located just in front of the valve rocker cover, from its supply hose, by slackening the jubilee clip. Plug the end of the check valve, by fitting a length of spare hose over its end, and inserting an old spark plug in the ; end of the hose. 7 Remove the wire handled plug from the fuel distributor housing and insert a suitable key into the adjustment hole. 8 With the engine at idle speed, adjust the CO volume to below 3% (North American versions — 2% for 49 States, 3-5% for California version). 9 After adjusting the slow running, refit the check valve (North
American versions).
22
Fuel injection system — throttle butterfly valve adjustment
1 Release the accelerator cable from the butterfly valve operating arm, by unclipping it. 2 Slacken the adjusting bolt locknut, and unscrew the bolt fully. 3 Screw the bolt in until the gap between the operating arm and the stop is between 0-04 is and 0-06 in (1 mm and 1:5 mm). 4 Loosen the butterfly valve pivot clamp nut, and make sure that the butterfly valve is in its fully closed position. Without moving the butterfly valve, tighten the clamp nut. 5 Screw in the adjusting bolt one further complete turn, to prevent the butterfly valve from sticking, and then tighten the locknut. 6 Refit the accelerator cable, and adjust it if necessary, by referring
63
does not touch the walls of the regulator. If necessary, slacken the central securing screw, and adjust the plate accordingly, tightening screw after. 5 If the resistance is still uneven, the fuel distributor control must be worn, and it will be necessary to renew the complete distributor. 6 The baffle plate should be positioned level with the start of
regulator
(fuel
injection)
—
testing,
removal
the case, the mixture regulator will have to be removed as described in the following paragraphs. A shaped spring mounted beneath the baffle plate should then be bent to give the desired adjustment level. 7 the 8 the
9
Mark the position of the fuel distributor outlet hoses, and unscrew unions from the distributor body. Unscrew the union securing the warm up regulator control line to fuel distributor.
Unscrew the union securing the cold start valve line and fuel filter
hose to the fuel distributor, and note in which order these are removed. 10 Slacken the jubilee clip on the warm up regulator return and fuel tank return hose and detach it from the fuel distributor. (On North American models, the fuel tank return hose is mounted independent from the warm up regulator return hose). 11 Carefully pull off the warm up regulator lead plug from the side of the mixture regulator venturi. 12 Remove the vacuum hoses from the vacuum regulator, which is mounted on the mixture regulator cover. (North American models only). 13 Separate the fuel line holder, by unscrewing the clamp bolt, and bending up the fuel line clip on the mixture regulator cover. (North American models only). 14 Unscrew and remove the mixture regulator cover securing screws,
and
1. Slacken the jubilee clips on the air inlet cover and tube, and prise it away from the mixture regulator and induction manifold. 2 The baffle plate is now exposed and its action must be checked. 3. Have an assistant switch on the ignition for a period of 5 seconds, and, during this period, lift the baffle plate slowly to its upper limit and then
lower
it quickly. The
resistance
must
be even
rod fuel
the tapered venturi when at its lowest end of travel, and, should this not be
to Section 30.
23 Mixture installation
the
4 Fig. 3.33. Throttle butterfly adjustment points (1 to 4)
whilst lifting the
baffle plate, and there must be no resistance on its return. Should the resistance be uneven, first check that the baffle plate 4
Fig. 3.34. Baffle plate (7) and adjusting screw (8)
Fig. 3.35. Baffle plate and level adjustment spring (9)
Fig. 3.37. Fuel distributor securing screws (10)
Fig. 3.39.
Removing
the injectors showing insulator (2)
rubber seal (1) and
Fig. 3.36. Removing the mixture regulator cover showing air flow meter (9) and fuel distributor (10)
Fig. 3.38.
Removing
the fuel distributor showing (10) and seal (arrowed)
operating
rod
Fig. 3.40. Warm-up regulator pipe connections (1 to 3), plug (4), and mounting (arrowed)
Chapter 3/Carburation; fuel, exhaust and emission control systems and withdraw the cover from its base, together with the sealing gasket. (On North American models, remove the complete unit by slackening the two mounting nuts, and lifting the unit out: then separate the cover from its base). 15 With the mixture regulator cover removed, inspect the baffle plate and control arm for wear, and also make the adjustment referred to in , paragraph 6. 16 Check the fuel distributor control rod movement by lifting the baffle plate. 17 The fuel distributor is secured to the mixture regulator cover, by three slotted screws. Unscrew and remove the screws and withdraw the fuel distributor from the cover.
18 Installation is a reversal of the removal procedure, but install new sealing washers and gaskets, and adjust the slow running (Section
21).
!
rr
24
Fuel distributor (fuel injection) — testing
————__—_—X an eae —— s—"—OO”_ }
1 Testing the fuel distributor involves the use of specialised equipment, for measuring the output quantities delivered to the injectors, anc the input pressures under varying conditions, and this work should be entrusted to a BMW service garage. However the functioning of the fuel distributor may be checked by observing whether fuel is delivered to the injectors. 2 Slacken the jubitee clips on the air inlet cover and tube assembly, and prise it away from the mixture regulator and induction manifold. 3 Remove the injectors as described in Section 25. 4 Lift the mixture regulator baffle plate, and switch on the ignition. 5 If fuel is sprayed out of each injector, the fuel distributor is functioning. 6 Refit the injectors as described in Section 25, and refit the air inlet cover and tube assembly in the reverse order of removal.
25
Injectors (fuel injection) — removal and installation
1 Slacken the jubilee clips on the air inlet cover and tube assembly, and prise it away from the mixture regulator and induction manifold. 2 Detach the inlet pipes, to cylinders 2 and 3, from the induction header assembly and the injector mounting intake, by unscrewing and removing the securing nuts. 3. The injectors may now be prised out of their locating holes, using a screwdriver placed beneath the injector unions, levering against the valve rocker cover. 4 Remove the rubber sealing rings and guide insulators, together
65
with the injectors, and then detach the injectors from the supply lines, marking each injector beforehand to ensure they are refitted to the same cylinders. 5 Installation is a reversal of the removal procedure, but, insert the guide insulators and injector sealing rings into the injector mounting intake before pressing the injectors into position. Renew the inlet pipe gaskets on the induction header assembly and the injector mounting intake.
26
Warm up regulator (fuel injection) - removal and installation
1 The warm up regulator is located on the left-hand side of the engine crankcase, next to the starter motor. Its function is to regulate the fuel distributor control pressure in relation to the temperature of the engine during the warm up period. A vacuum compensating mechanism is also incorporated in the regulator housing, which has the effect of weakening the fuel air mixture as the engine speed increases during the warm up period. 2 Mark the hoses in relation to the regulator body, and then remove them. 3. Disconnect the plug. 4 Unbolt the warm up regulator from the engine crankcase, and remove it. 5 Installing is a reversal of the removal procedure.
27 Additional installation 1
air slide
(fuel
injection)
— testing,
removal
and
With the engine cold, disconnect the air hoses from either side of
the additional air slide, which is mounted at the rear of the valve rocker _ cover. 2 Check that the air slide is approximately half open, by observing through the valve tube. 3 Pull the plug away from the valve terminals, switch on the ignition, and check that current is reaching the additional air slide with a test lamp. If it is not, check the relevant fuse and relay. 4 Reconnect the plug and refit the air hoses. 5 Run the engine for approximately five minutes. 6 Remove the air hoses and check the position of the valve which should now be completely shut. If it is not, renew the unit (see Fig. 3.41). 7 Disconnect the air hoses and electrical supply plug. 8 Unbolt the additional air slide unit from the valve rocker cover. 9 Installation is a reversal of removal.
Fig. 3.41. Checking the additional air slide valve showing plug (5)
Chapter 3/Carburation;
66
fuel, exhaust and emission control systems
Fig. 3.43. Testing the cold start valve showing relay terminal
Fig. 3.42. Heat/time switch terminals G and W and plug (19)
Fig. 3.44. Accelerator pedal stop adjustment on manual transmission models (D) and automatic transmission models (E)
4
28 Ccld start valve and heat/time switch (fuel injection) - testing, removal and installation 1
The
cold
start
valve
works
in conjunction
with
the
heat/time
Pull off the plug from the heat/time switch which is located on the
coolant twin branch assembly, and connect terminal ‘W’ to earth with a test lead. 5 Disconnect the starter solenoid lead at terminal 50. 6 At the electrical fuse box, lift changeover relay 1 until terminal 30
switch to provide extra fuel when the engine is cold. The period during which the fuel is injected into the induction header assembly, is dependent on the engine coolant temperature, and this period is
(terminal 87 on North American models) is visible. Connect a test lead between this terminal and the battery positive terminal. 7 The cold start valve should now inject fuel, and, should this not be
governed by the heat/time switch.
the case, renew the valve. 8 With the cold start valve removed from the induction header assembly, unscrew and remove the union from the fuel supply line and
2 3
The cold start valve is located on the induction header assembly. Unscrew and remove the two securing nuts, and withdraw the
cold start valve from the header assembly, together with the plug and
fuel line.
pull off the electrical plug. 9 To test the heat/time switch, first remove the electrical plug, and
Chapter 3/Carburation; fuel, exhaust and emission control systems Rye re
er ee EE NEL SRSegS OS nis pea
es
6N
2 ee
connect a test lamp between the battery positive terminal and terminal
‘W' on the heat/time switch. 10
The test lamp should
burn brightly if the coolant temperature
is
below (a) +15°C (+59°F), and conversely, should not be illuminated at temperatures above (b) +15°C (+59°F). [On North American models (a) +35°C (+95°F) (b) +35°C (+95°F)].
31
Accelerator cable — removal and installation
On carburettor models only, remove the air cleaner assembly as described in Section 2, and then proceed as follows.
11 If the heat/time switch does not function correctly, renew it by unscrewing it from the twin branch assembly, sealirig its location hole with cork or a similar material whilst it is removed. 12 Installation is a reversal of the removal procedure on both items.
LHD cars
eee a Ee Eee eee 29 Vacuum regulator and auxiliary air valve — removal and installation ee ee
RHD cars
1 This valve is fitted on North American models only, and is located by the fuel distributor. 2 Loosen the supply hose jubilee clips, and pull off the vacuum pipe.
3 Working in the engine compartment, loosen the cable locknuts, and withdraw the cable from the support bracket. At the same time,
3
Disconnect the unit from the mounting bracket.
4
Installation is a reversal of the removal procedure.
1 Working inside the car remove the lower fascia panel, and detach the accelerator cable from the operating arm, by lifting it out of the location slot. Pull out the cable holder.
2 From the front of the bulkhead, within the engine compartment, unhook the accelerator cable from the operating arm, and detach the support bracket.
unhook the inner cable from the throttle butterfly operating arm. 4 Withdraw the cable from the bulkhead panel, into the engine com-
partment. 5 Installing the accelerator cable is a reversal of the removal procedure, but adjust it as described in Section 11 or 30.
30
Accelerator cable (fuel injection) — adjustment
1 On fuel injection engines, first check the throttle butterfly valve adjustment as described in Section 22. 2 Adjust the accelerator pedal stop to a distance of 2:8 in(72 mm) for manual transmission models, and 2-2 in (58 mm) for automatic
transmission models (see Fig. 3.44). 3 Depress the accelerator pedal fully, and check that the throttle is fully open. If it is not, loosen the cable adjusting locknuts, and screw the outer cable either in or out to give an endplay on the inner cable of approximately 0-04 in (1 mm).
4
32
Accelerator pedal — removal and installation
1 2
Remove the lockwasher from the accelerator pedal operating arm. Lever the lower part of the accelerator pedal out of its connecting
pivot with a screwdriver inserted behind the pedal.
3.
Installation is a reversal of the removal procedure.
33
Emission control systems — general description
1.
Both carburettor and fuel injection engines are fitted with one or
Tighten the locknuts.
:
ie
31.2
Accelerator
bulkhead (RHD
cars)
cable
connection
on
y
a
rr
iad
£4
31.3a Accelerator cable support bracket
31.3b
Accelerator
ae
Tae Nee,
cable
throttle butterfly operating arm
Fig. 3.45. Removing the accelerator pedal base
attached
to
68
Chapter 3/Carburation; fuel, exhaust and emission control systems
x —
———
“,
(
TT
N
Fig. 3.46. Crankcase ventilation system showing vent (1) and vacuum control (2)
more of the following emission control systems, the particular system fitted depending on the regulations in force within the operating territory of the car. a) Crankcase emission contro! system b) Exhaust emission control systems with air pump.
engine combustion chambers, where they are burned during the normal combustion cycle. 2 Maintenance consists only of checking the hoses for tightness, and periodically removing them and cleaning out any residue which may have accumulated.
c) Fuel evaporative emission contro/ system 35 Exhaust emission and maintenance 34 Crankcase maintenance 1
A
positive
emission
control
system
—
description
and 1
type
system
is
installed
whereby
gases,
control system with air pump — description
which
accumulate in the engine crankcase, are drawn out through the rocker cover and into the air cleaner. The gases are then drawn into the
The exhaust emission control system
is divided into two separate
sections which each have independent functions, but which are interconnected during the normal operation of the engine. 2 The exhaust gas recirculation system (EGR) scavenges exhaust gases from
the exhaust
manifold,
and returns them
to the induction
69
4a
Z
| bezzzzarezz re eaamnanrererts
Fig. 3.47. Engine hose connections on North American versions Distributor
Auxiliary air valve Cold start valve Thermo valve
Timing valve EGR valve DaARWBNH™
7 8 9
Blow-off valve Auxiliary air valve Vacuum valve
70 11
Pressure converter Intake cowl
Fig. 3.48. EGR system layout 6 EGR valve 7 Blow-off valve 70 Pressure converter 171 Air pump
12 EGR filter 13 14 15 16
Check valve Manaircex manifold Injection tube Thermo valve
70
Chapter 3/Carburation; fuel, exhaust and emission control systems
Fig. 3.50. EGR filter showing
EGR
valve (5) and filter mountings
(6)
Fig. 3.52. Activated carbon filter pinch bolt (arrowed)
Fig. 3.51. Reactor front union (3) and cover plate securing bolt (arrowed) header assembly via a filter and control valve. The quantity scavenged
_ depends on (a) the engine coolant temperature, and (b) a comparison made, between the induction header assembly depression and the exhaust manifold pressure. This comparison is made by the thermovalve and pressure converter respectively, and vacuum lines from each
unit to the EGR valve effectively alter the amount
of exhaust gases
admitted to the induction header assembly. 3 The air pressure supply system, injects
air into the exhaust manifold through four separate injector tubes. The introduction of the
filter and EGR reactor is covered in Sections 36 and 37 respectively. Regularly check the tension of the air pump drivebelt as described in the following paragraph. 5 Loosen the adjustment bolt and pivot bolt. 6 Swivel the air pump in or out, until the drivebelt can be depressed by 0-197 in to 0:394 in (5 mm to 10 mm) half way along its upper stretch. Tighten the adjustment bolt. 7 Tighten the pivot bolt, and recheck the tension.
air encourages the burning of any excess fuel/air mixture remaining in the engine cylinders at t..e end of the power stroke of the pistons. This mixture remains ignited, and is transferred to the exhaust manifold
36
during the exhaust stroke of the piston. On California models, a reactor
is limited to
1 The EGR filter should be renewed every 12,500 miles, and this will be indicated by the service interval warning lamp on the interior instrument panel. 2 Remove the induction cover and tube assembly from the mixture
and making of the EGR
regulator and throttle housing. 3 Mark the vacuum hoses connected to the EGR
is fitted to the exhaust ports of the engine, instead of manifold, but it functions in the same manner. Maintenance of the exhaust emission control system 4 periodically checking the exhaust union nuts for tightness, sure that the vacuum hoses are securely fitted. Renewal
an exhaust
Filter (EGR system) — removal and installation
valve, and then
Chapter 3/Carburation; fuel, exhaust and emission control systems
71
disconnect them. 4
Disconnect the supply hose to the header assembly.
5 6
Unscrew and remove the EGR filter front mounting bolts. Mark the vacuum hoses to the pressure converter and
then remove them. 7 Detach the curved inlet branch to number 4 cylinder, by unscrew-
ing and removing the securing nuts, and withdrawing the item. 8 Remove the throttle housing heating supply hose, and then unscrew and remove the EGR filter rear mounting bolts. 9 Unscrew and remove the EGR filter rear union, and withdraw the complete filter forwards. 10 With the filter removed, detach the EGR valve from the filter. 11 Installation is a reversal of the removal procedure, but pay special attention to fitting the various hoses correctly. When a new filter has been installed, press the appropriate EGR button on the interval switch, in order to commence a further service period.
37
Reactor (EGR system) — removal and installation
1
The EGR reactor should be renewed
service
38 Fuel evaporative maintenance
Unbolt the reactor cover and lift it away. Unscrew and remove the air pipe union
system
— description and
Manifolds and exhaust system
miles, and this
will be indicated by the service interval warning lamp on the interior instrument panel. 2 Unscrew and remove the exhaust pipe securing nuts, and release the exhaust pipe from the rear of the reactor. 3 4
control
1 This system ensures that fuel fumes from the rear mounted fuel tank are initially collected in a storage tank, and then passed through a carbon activated filter, which is mounted within the engine compartment, beneath the battery support. When the engine is running, excess fumes are drawn into the engine combustion chambers and burned in the normal manner. 2 The system is free from maintenance except for the renewal of the carbon activated filter. 3 Toremove the carbon activated filter, first mark the location of the two hoses, and then detach them. 4 Unscrew and remove the mounting clamp pinch bolt, and withdraw the filter. 5 Installation is a reversal of the removal procedure.
39 every 25,000
emission
from
the front of the
reactor. 5 At the rear of the reactor, unscrew and remove
the filter supply
pipe and pressure converter line.
6 Unbolt the reactor from its rear mounting bracket, and withdraw the reactor. 7 Installation is a reversal of the removal procedure but renew the exhaust pipe gasket.
1 Removal and refitting of the inlet and exhaust manifolds, and the induction header assembly (fuel injection), is straightforward, but certain models will have coolant hose connections to the inlet manifold, for the purpose of induction heating, and car interior heating. Various electrical leads will need to be disconnected from their control switches and, in the case of carburettor engines, the complete air cleaner and carburettor will have to be removed. 2 Take particular note of the gaskets removed, as some of these should only be fitted a certain way round. They should always be installed to clean dry surfaces. 3 A sectional exhaust system is fitted, and incorporates a primary and secondary silencer. It will be necessary to jack up the car in order to remove either section of the exhaust system, and, where a fuel tank
7 Fuel tank 2 Fuel suction unit ef Fuel pump 4 Pressure reservoir § Fuel! filter 6 Fuel distributor 7 Warm-up regulator 8 Injection valve 9 Cold start valve Fuel compensation tank Activated carbon filter Tank cap without vent
Fig. 3.53. Fuel system layout (fuel evaporative emission control)
39.1d Exhaust manifold retaining studs on the cylinder head
39.5 Exhaust mounting rubber ring
Fig. 3.54. Alignment of the exhaust tailpipe
73
Chapter 3/Carburation; fuel, exhaust and emission control systems with a rigid centre panel is fitted, take particular care not to damage the heat resistant material on the upper surface of the panel. When installing new components, use new flange gaskets and 4 clamps. Do not tighten the clamps fully until the complete system is installed and its suspended attitude checked for proximity to adjacent suspension and bodywork components. Refer to Fig. 3.54. It is imperative that the exhaust mounting 5 bracket at the rear of the transmission unit is assembled free of stresses, otherwise resonance can occur when the car is running.
Assemble the bracket with all bolts finger tight. Then, with the 7 exhaust system centralised, tighten the bracket to the transmission. Next tighten the two intermediate bolts, and finally, tighten the clamp around the exhaust pipe.
Fig. 3.55. Exhaust to transmission mounting bracket sections
(1 to 3)
40
Fault diagnosis — fuel system general
Symptom
Reason/s
So
Excessive fuel consumption
Air cleaner choked. Leakage from pump, tank or fuel lines. Incorrect valve clearances. Faulty or incorrectly adjusted ignition components. Tyres under-inflated.
Binding brakes. Insufficient fuel delivery or weak mixture
Fuel tank vent pipe blocked.
Clogged fuel line filter. Inlet manifold or carburettor flange gaskets leaking. Fuel pipe unions loose.
= ee ee 41
as
EE
Fault diagnosis — carburettors
Symptom
ED
Reason/s
e eee ee O ir Excessive fuel consumption
Weak mixture or insufficient fuel delivery
Float
chamber
flooding
(incorrect
fuel
level
or
badly
seating
needle
valve or valve body loose in carburettor cover). Mixture too rich.
Incorrectly adjusted carburettor. Fuel pump lid or pipe connections loose. Fuel pump diaphragm split. Faulty fuel pump valves. Fuel inlet needle valve clogged or stuck.
a
SS
eSs e eee De 42
m Fault diagnosis — fuel injection syste
Reason/s
|
Symptom
pump operates Engine will not start from cold but
Empty fuel tank. Ignition fault. Start valve faulty. Fuel pump pressure too contact or worn pump).
low
(may
be
caused
by corroded
earth
lead
Chapter 3/Carburation; fuel, exhaust and emission control systems
74
Additional air slide inoperative. Baffle plate incorrectly set.
Faulty heat/time switch. Vacuum system leaking. Engine will not start when warm but pump operates
Empty fuel tank. Start valve not cutting off. Contre! pressure too high. Control pressure too low. Baffle plate incorrectly set. Injection leaking. Idle mixture incorrect. Vacuum system leaking.
Fuel pump does not operate
Fuse blown. Break in supply lead or corroded earth.
Erratic idling
Control pressure incorrect. Additional air slide inoperative. Start valve faulty. Baffle plate incorrectly set. Vacuum system leaking.
Injectors leaking. Idle mixture too lean. Idling speed too high or too low at normal operating temperature
Incorrect slow-running adjustment. Incorrect ignition setting. Incorrect accelerator linkage adjustment.
Engine backfires
Control pressure incorrect. Vacuum system leaking. Idle mixture too lean.
Engine power low
Control pressure incorrect. Start valve faulty. Baffle plate incorrectly set. Vacuum system leaking. Idle mixture incorrect. Throttle butterfly not opening fully.
Excessive fuel consumption
Control pressure incorrect. Start valve faulty. Fuel system leaking.
|
|
Idle mixture too rich.
43
Fault diagnosis — emission control systems
Symptem
Reason/s
Fumes emitted from engine and condensation in valve rocker cover
Crankcase ventilation hoses faulty.
Fumes emitted from exhaust
Air pump drivebelt slack. System hoses and pipes loose.
Incorrect ignition setting. EGR pipes corroded. Air check valve faulty.
EGR valve faulty. EGR filter blocked. Pressure converter inoperative. Air pump blow off valve faulty.
Chapter 4 Ignition system Contents
Coil — description and “SLO FETA aeescale enaro Aina, balan pate eae lon UR Condenser (capacitor) — removal, testing andinstallation .....
7 4
Distributor — removal, installation and ignition timing ........ General'descriptions = oo... 2 ccc ace stead ee eet emer
5 1
Contact breaker — adjustment anc tnicatlOne were sacar te Contact breaker points — removal and installation ...........
2 3
Ignitionisystem’—faultidiagnOstsi-.. cunt oiciesceeec manera eee Spark plugstanditil@adSi ea. .en. 0. er aes ke eee een ee
9 8
DIStHBULOlEOVET TAU ietytrencic. scieac sucueaeek Groeten Mabis, ateeuask eicon
6
Specifications
SVStOMNt VG ierk 5 es
apie
eek
reer eases Aenea
FEARING LOFGLOK acta trse rate vcs eek c cuca ic echobens ins Kr Distributor Make nema.
Seca.
Rio rational GIneCHONy:
cet oats
ees Rahs eset
lie Apa ack he Glas Furl nosn nds epee ietiottee
Mais. olatac 015, 5 4 nies teenie
Seesaw
mode suagenebett
12 volt negative earth. Coil ignition
1 —-3— 4 — 2 (1 nearest radiator) Bosch JFUD 4 Clockwise
Gohitact breaker Gaps cc.eia Oise cack ce teus wie Hae + sue Shas aoess Oe Contappbreakerawell.angle.« ai. sier.ci ms ere alee aes see adepatete
0-016 in (0-4 mm) 59° —— 652
Static IOMIMION tii
3° BIiDGE
pe ee
ere
a
aie
hearse
hen
-e-
Dynamic ignition timing: c clere od aims dwt rpannegte oks GBsbe a tsa a NE Cart EGE Rees bre ero dee TREE on soi © oe EE, ees Belty 2 2A 5 SRR lee eke ce noe ROS NRG) Groroyn amo ee -c ks capecas Ae SIGH,
BTDC BTDC BTDC BTDC
at at at at
2000 2300 1750 2200
rpm rpm rpm rpm
s7 buen: wm rm oe «25.656
25° 25° 25° 25°
Maximum centrifugal advance: ced Micatron Saietueates creas Orniad ica fl sade cere ra eee ES HAG CON Papa renca's ect PE Oe OO SUTO} aks t,o oie occ Reco ser eS ence ty oc BIH TISGaede oh Be A Bole seg Be
35° 362 30°
Vacuum ignition control adjustment range: Oriana pauld a alee Wa o Gea Beam Onde omen STA SPIOVEPIU banc Sacer ceia ec cger: OL EN Oe i COX |»alos ted ote
O-— 14° Advance. 0— 12° Retard O-— 12° Retard
BZ
ONO
AIencan Version)
Ignition advance (engine at operating temperature, vacuum ignition control disconnected): 316 g°-—14° VG Qa 2 23220" I6°— 32° 29° — 35° 330 = 590 36° — 42°
320/320A 8°- 14° 14° — 20° 20° — 26° 25° —-31S32 36° — 42° 39° -—45°
4200
ad
41°
4500
40° — 46° (ends)
—
RPM 1000 1500 2000 2500 3000 3500 4000
ignition control operation range: RRR 316/320/320A te: i ageaoae
Vacuum
OT
CROP
—
47°(ends)
Advance starts 4-25 — 6-61 in Hg Advance ends 9:45 — 10:24 in Hg
320i aie lth 22°-—24° 26°.— 282 28° — 30° 30° — 32° 31° -—33° Bee yle ——
33° - 39° (ends)
Ms,
=
76
Chapter 4/Ignition system Retard starts
1-38 — 3-54 in Hg
Retard ends 4-33 — 5-91 in Hg Retard starts 1:77 — 2:95 inHg Retard ends 3:74 —4-33 inHg
Coil Make) Ly Dear warren
rice mI
rc nor
ce ela outa osMisha wml
Nar
Bosch K12V or KW12V
Condenser (GRYSEYSIINE
lal
ae GI Oa
ee
0:18 to0-22
mfd
Spark plugs 316/320/320A W145T30 145/14/3A N10Y
Champion Eyquem
Spark plug gap
0-024 in to O- 028
320i W200T30 200/14/13A N8Y 750 LS in (0:6 mm
to O:7
mm)
Low tension voltage checks: MMC
OUMO GMINA
laos
a krctes
viene aia eet
oeiatawensta gale. care
2
Voltage drop at contact breaker and connectors
............
a) Offload current minimum 10-8 volts b) During starting minimum 9-0 volts Maximum 0:3 volts
Note: Contact points to be open for test 1 and closed for test 2.
Torque wrench settings RSET GD UG SMa
ie oy
eal
nis ee
Aeron.
Ghs 4,45 ceed westeiturtaee
Ibf ft 18-22
Nm 25—30
A vacuum unit is utilised to control the ignition timing in relation to 1.
General description
The main function of the ignition svstem, is to provide an electrical spark in the combustion chamber, in order to ignite the fuel-air mixture, which has been drawn into the cylinder by the induction stroke of the piston. There are three major components; (a) the coil (b) the distributor and (c) the spark plug, and all three play an important role in converting the electrical power available at the battery, and delivering it to the cylinder at precisely the right time. Since
the fuel-air mixture
is under
compression
at the point of
ignition, the voltage required to bring about the electrical discharge across the plug electrodes, could be as high as 12,000 volts, and, in order to produce this, the system is divided into two circuits; the low tension circuit and the high tension circuit. The low tension circuit (sometimes known as the primary), consists of the battery lead to the control box, iead to the ignition switch, lead from the ignition switch to the low tension or primary coil windings (terminal +), and the lead from the low tension coil windings (terminal —), to the contact breaker points and condenser in the distributor. The high tension circuit consists of the high tension or secondary coil windings, the heavy ignition lead from the centre of the coil to the centre of the distributor cap, the roter arm, and the spark plug leads and spark plugs. The system functions in the following manner. Low tension voltage is supplied from the battery to the primary winding in the coil, where an electro-magnetic field is produced around the secondary winding. This initial process is a controlled action, and the magnetic field gradually builds up, but when the contact breaker points separate, the collapse of the magnetic field induces a much higher voltage in the secondary winding. This high tension voltage is fed from the coil to the distributor cap, via a carbon brush to the rotor arm. In the distributor
cap are four segments, which are connected by high tension leads to the four spark plugs. The rotor arm turns at half engine speed, and
releases the high tension voltage to the four segments as required, ye the result that a spark jumps across the spark plug electrodes. The ignition is advanced and retarded automatically, to ensure the
spark occurs at just the right instant for the particular load at the prevailing engine speed. A mechanical
advance
the
ignition
in relation
governor mechanism
to the
engine
speed,
is utilised to
and
this is
embodied in the distributor housing. It consists of two weights, which move out from the distributor shaft as the engine speed rises due to
centrifugal force. As they move outwards, they rotate the cam relative to the distributor shaft and so advance the spark. The weights are held
in position by two light springs, and it is the tension of these springs which is largely responsible for the correct spark advancement. Lae
the load requirements, and operates directly with the depression in the inlet manifold and carburettor, (when fitted). It is mounted on the distributor, and is connected on one side to the manifold, and the other side to the contact breaker plate. Depression in the inlet manifold, which varies with engine speed and throttle opening, causes the
diaphragm to move, so moving the contact breaker plate, and advancing or retarding the spark. A fine degree of control is achieved by a spring in the vacuum
assembly.
On certain models, a heat sensitive valve, fitted into the cooling system on the twin branch manifold, is connected by a hose to the carburettor, and regulates the operation of the distributor advance vacuum unit, to minimise the emission of fumes during certain operational conditions, particularly during deceleration with the accelerator pedal released. On all models a resistor is fitted as standard
in the coil primary circuit, to prevent voltage drop and difficult starting when the starter motor is actuated.
2
Contact breaker — adjustment and lubrication
1 To adjust the contact breaker points, first remove the distributor cap by prising the spring clips away from each side. Check the carbon brush located in the cap for free movement and, if necessary, remove it and clean the locating hole. 2 Inspect the four segments in the cap, and clean away any loose carbon, but do not attempt to file or cut the segments, as this will have a detrimental effect on the strength of the spark of the spark plugs. Clean the cap interior with a dry cloth, and check the interior surface for signs of arcing. If there has been any arcing, it will be necessary to replace the cap with a new one.
3
Check the condition of the rotor arm for cracks, and the segment
tip for burning. Should any be evident, renew the rotor. 4 Prise open the contact breaker points and inspect them for pitting and wear. If they have a rough surface, with evidence of arcing, it will
be necessary to renew them, or re-surface 5 If the surface is acceptable, proceed turning the engine over until the heel of highest point of the cam lobe. 6 With a feeler gauge, check the gap
them by grinding. to check the points gap, by the breaker arm, is on the
is Specifications. If it needs adjusting, slacken screw, and, by placing a screwdriver between gap until it is correct. 7 Tighten the base plate screw and re-check
8
in accordance with the the breaker base plate the two studs, adjust the the gap.
This method is not as accurate as the dwell angle method, and,
Chapter 4/Ignition system should a dwell meter be available, this is to be preferred. The dwell angle is the number of degrees through which the distributor cam turns whilst the contact breaker points are closed. As the dwell meter reading is an average of four different cam lobe movements, the
my
overall adjustment by this method is much more accurate. Remember that, if the angle is greater than the range given in the specifications,
you must increase the the points gap. 9 Soak the felt pad, engine oil, and apply a lobes. 10 Refit the rotor arm
3
points gap to correct it, if too small, decrease
in the centre of the cam, with a few drops of smear of high melting point grease to the cam and distributor cap.
Contact breaker points — removal and installation
1 Remove the distributor cap by levering the two side spring clips away. Remove the rotor arm. 2 Pull off the flat pin connector from the supply tag by the condenser entry point. 3 Press the upper contact spring tail away from the terminal post and, at the same time, remove the base plate screw. Be careful not to drop the screw, as it may fall through into the main distributor body. 4 Lift the contact breaker assembly upwards. 5 Inspect the surfaces of the points, and if they are only lightly burned reface them by using a short length of emery tape wrapped around a small file. Alternatively, grind the points square with an oilstone. 6 If the points are badly pitted, it will be necessary to locate the fault, which may be in the condenser, or may be due to a poor earth from the distributor base plate. If the latter is suspected, carefully
tighten all securing
screws
and check
that the base plate earthing
strap is intact. 7 \f the condenser is suspected, check it as described in Section 4. 8 Re-assembly of the contact points is a reversal of the removal sequence, except that, before fitting the distributor cap, it will be necessary to adjust the points gap or dwell angle as described in the
preceding Section. mn
Condenser (capacitor) — removal, testing and installation 4 SSS SS SS ne The condenser acts as a ‘buffer’ in the low tension circuit of the 1 ignition system, by absorbing the surges of current which are produced by the contact breaker points opening and closing. This greatly reduces the arcing at the points, and its effect also assists in the rapid collapse of the magnetic field set up by the primary winding. Failure of the condenser will greatly reduce the spark plug voltage, and. if there is difficulty in starting accompanied by missing and badly pitted points, the fault may well be in the condenser.
ver 2.6b Adjusting the contact breaker gap with a screwdri
3.2 Contact breaker and condenser lead connections
77
78
Chapter 4/Ignition system 2 Testing for an unserviceable condenser may be effected by switching on the ignition and, with the distributor cap removed, separating the contact points by hand. If this action is accompanied by a blue flash across the points, condenser failure is indicated. The condenser resistance could be checked by an automobile electrician, but the cost of implementing this compared with the replacement cost may be prohibitive., 3 The condenser is to be found on the outside of the distributor body, and is removed by unscrewing its clamp screws and detaching its lead.
Leo
ul
‘
Sia
5
Distributor — removal, installation and ignition
1
The
distributor
is located
at the rear of the engine,
behind the
rocker cover, and the complete cap should be unclipped and removed. 2 Identify and remove the sadvance and retard pipes from the distributor vacuum capsule (only 1 retard pipe on 320i). 3 Remove the high tension lead from No. 1 spark plug at the front of the engine, and remove the plug. With a finger placed over the spark plug hole, turn the engine in a clockwise direction until pressure is felt, indicating that No. 1 piston is on its compression stroke.
5.5 Distributor rotor notch set in line with notch in distributor body
,
cn
5.8b Distributor rotor position prior to engaging with camshaft drive
as
5.15a Flywheel dynamic timing mark
5.15b Flywheel TDC mark (OT)
Chapter 4/Ignition system
79
4 Continue turning the engine, until the notch in the crankshaft belt pulley aligns with the pointer on the engine timing cover. 5 The notch in the distributor rotor segment, should now be in line with the notch in the distributor body. 6 Detach the lead from the terminal next to the condenser, and release the clamp bolt on the distributor housing. 7 The distributor can now be withdrawn from its locating hole. 8 To install the distributor, hold it in position over the locating hole, with the vacuum can facing the exhaust manifold. Then turn the rotor arm in an anticlockwise direction approximately 3.5 cm (1.4 in), and
insert the distributor into its locating hole, when it will engage with the camshaft drive. When the distributor is in its final position, the rotor arm will have moved around to coincide with the timing notch on the body. If it does not do this, recheck the crankshaft pulley timing marks are in the TDC position, and adjust them if necessary. 9 It is worth noting at this stage that the rotor arm incorporates an engine speed governor which operates under centrifugal force, and prevents over revving of the engine by short circuiting the HT current. Do not confuse the governor mechanism with the rotor arm segment, the latter having the timing notch. 10 There is no provision on the crankshaft pulley for static ignition timing, although a quick check may be made by turning the engine anticlockwise until the pointer on the timing case faces a position approximately 0.125 in (3.175 mm) to the right of the TDC notch in the crankshaft pulley. A static timing light, or simply a side light bulb with the necessary connecting leads, may now be linked from the distributor supply lead terminal to earth. The supply lead should then be connected to the distributor terminal, and the ignition switched on. The bulb will light when the contact points open, so the distributor body should be turned clockwise until the contact breaker heel comes off the No. 1 cylinder cam lobe, and the points are closed. Now move the distributor in an anticlockwise direction, until the timing light comes on, and this will indicate the exact moment that the points separate. Tighten the distributor holding clamp and then re-check the
d
Fig. 4.1. Rotor position prior to fitting distributor, showing rotor governor mechanism
setting. 11 It should be emphasised that the previous method of checking the ignition timing, is only approximate, and the accurate way to check it is to use a stroboscope, on the timing marks engraved on the flywheel. A revolution counter will also be required. The flywheel inspection hole is to be found to the rear of the cylinder head, on the upper part of the gearbox housing. 12 The engine should be run until it reaches its normal operating temperature, and the stroboscope and revolution counter connected up in accordance with their respective makers instructions. The stroboscope is normally inter-connected between No. 1 cylinder FA lead and No. 1 spark plug terminal. . 13 Disconnect the vacuum and retard pipes from the distributor vacuum can, and plug the ends. 14 Start the engine, and point the stroboscope at the flywheel inspection hole, when the timing marks should be visible, when the eigine reaches the speed as referred to in the Specifications. 15 The pressed-in steel balloon the flywheel should be showing above the lower edge of the sight hole, and the distributor should be
adjusted accordingly, and then tightened.
e (1 ) and retard (2) Fig. 4.3. Vacuum pipes for ignition advanc
Fig. 4.4. Flywheel timing marks
80
Chapter 4/Ignition system
16 Switch off the ignition, disconnect the stroboscope, and reconnect the distributor vacuum and retard pipes. 17 Note that, on automatic transmission models, the TDC timing mark is indicated by the short peg and the ignition point is indicated by the long peg.
are connected to their correct terminals. The supply lead, which can be ascertained by removing it and testing with a test bulb with the ignition switched on, should be connected to terminal 15 (+). 3 Check that the plastic terminal cover is firmly in place on the coil central HT connection.
6
8 Spark plugs and HT leads See Sh eS Se
Distributor — overhaul
1 Before attempting to dismantle a worn or faulty distributor, check with your local automobile electrician that spares are available, as it may be more economical to obtain a new, reconditioned, or good secondhand assembly.
2 Remove the distributor as described in Section 5. 3. Withdraw the cap, rotor arm, and contact breaker set. 4 Carefully prise the vacuum capsule link rod retaining circlip away from the pivot, and remove it. 5 Remove the vacuum capsule securing screws, tilt the capsule slightly, to disengage the link rod from the pivot, and withdraw the capsule. 6 Unscrew the baseplate securing screws, and lift it out of the distributor body. Note the position of the cam.
7 Using two screwdrivers inserted under the cam as levers, prise the distributor shaft upwards, until the spring retaining ring disengages. Leave the felt lubrication pad in position during this operation, as the retaining ring may be ejected from the top of the distributor shaft. 8 Secure the distributor in a soft jaw vice, and drill out the pin which secures the driven gear to the shaft. A drill of 0.118 in (3.0 mm) is suitable for this operation. 9 Before removing the gear, mark its position in relation to the shaft, and also note the position of the centrifugal weights and springs. 10 Remove the shaft and note the number of washers beneath the weight-carrying baseplate. 11 Clean each item in a suitable solvent, such as paraffin, and renew any that are worn or faulty.
12 Reassembly is a reversal of dismantling, but make sure that the two washers are fitted under the lower baseplate, before the shaft is installed to the body, and that the thrust washer is the washer which is furthest from the baseplate. 13 Apply some engine oil to the distributor shaft, and a minimal! amount of light grease to the weights pivots. 14 Use a new drive pin in the gear and shaft, and check that the cam retaining spring clip is not distorted. If it is renew it. 15 Install the distributor, as described in the preceding Section.
7
Coil—description and polarity
1 The coil is positioned in the engine compartment, over the righthand wheel arch. It has a thick main HT lead from its centre connection direct to the distributor cap, and two LT leads mounted on each side, one of which carries the current from the ignition switch, and the other which carries the LT current to the distributor. 2 Ensure that the coil is kept clean, and especially that the LT leads
Fig. 4.5. Drilling out the distributor gear securing pin
ae
ee
ee
1 The correct functioning of the spark plugs is vital for the correct running and efficiency of the engine. The plugs recommended at the time of publication are as stated in Specifications but always check with the plug manufacturer's guide at time of purchasing new ones as the type of plug specified is sometimes altered in the light of operating experience. 2 At the intervals specified, the plugs should be removed carefully, preferably with a box spannery making sure no undue pressure is applied to the insulator extension. 3. Inspect the electrodes and compare them with the plug chart, as the appearance and condition of them can indicate how well the
engine is performing. 4 If the insulator nose of the spark plug is clean and white, with no deposits, this is indicative of a weak mixture, or too hot a plug. (A hot plug transfers heat away from the electrode slowly — a cold plug transfers it away quickly). 5 If the top and insulator nose is covered with hard black looking deposits, then this is indicative that the mixture is too rich. Should the plug be black and oily, then it is likely that the engine is fairly worn, as well as the mixture being too rich. 6 If the insulator nose is covered with light tan to greyish brown deposits ,then the mixture is correct and it is likely that the engine is in
good condition. 7 If there are any traces oflong brown tapering stains on the outside of the white portion of the plug, then the plug will have to be renewed, as this shows that there is a faulty joint between the plug body and the insulator, and compression is being allowed to leak away. 8 Plugs should be cleaned by a sand blasting machine, which will free them from carbon more thoroughly than cleaning by hand. The machine
will also test the condition of the plugs under compression.
Any plug that fails to spark at the recommended
pressure should be
renewed. 9 The spark plug gap is of considerable importance, as, if it is too large or too small the size of the spark and its efficiency will be seriously impaired. 10 To set it, measure the gap with a feeler gauge, and then bend open, or close, the outer plug electrode until the correct gap is achieved. The centre electrode should never be bent as this may crack the insulation and cause plug failure, if nothing worse. 11 When refitting the plugs, remember to use new plug washers, and
to coat the threads with a small amount of graphite grease. Tighten the small nut on the top of the plug, and make sure the HT leads from the distributor are fitted to the correct plugs. The firing order is 1 — 3 — 4 — 2, No. 1 cylinder being the one nearest the radiator, and the distributor rotor moves in a clockwise direction.
Fig. 4.6..HT lead connecting sequence
Measuring plug gap. A feeler gauge of the correct size (see ignition system specifications) should have a slight ‘drag’ when slid between the electrodes. Adjust gap if necessary
Adjusting plug gap. The plug gap is adjusted by bending the earth electrode inwards, or outwards, as necessary until the correct clearance is obtained. Note the use of the correct tool
Normal. Grey-brown deposits lightly coated core nose. Gap
Carbon fouling. Dry, black, sooty deposits. and eventually misfire. Fault: over-rich fuel carburettor mixture settings, float level and operation and cleanliness of air filter. Plugs cleaning
increasing by around 0.001 in (0.025 mm) per 1000 miles
(1600 km). Plugs ideally suited to engine and engine in good condition
Will cause weak spark mixture. Check: jet sizes; choke can be re-used after
Oil fouling. Wet, oily deposits. Will cause weak spark and eventually misfire. Fault: worn bores/piston rings or valve
Overheating. Electrodes have glazed appearance, core nose very white - few deposits. Fault: plug overheating. Check: plug value,
guides; sometimes occurs (temporarily) during running-in period. Plugs can be re-used after thorough cleaning
ignition timing, fuel octane rating (too low) and fuel mixture
Electrode damage. Electrodes burned away; core nose has burned, glazed appearance. Fault: initial pre-ignition. Check: for ‘Overheating’ but may be more severe. Discard plugs and remedy fault before piston or valve damage occurs
Split core nose (may appear initially as a crack). Damage is selfevident, but cracks will only show after cleaning. Fault: preignition or wrong gap-setting technique. Check: ignition timing,
(too weak). Discard plugs and cure fault immediately
i cooling system, fuel octane rating (too low) and fuel mixture (too weak). Discard plugs, rectify fault immediately
82
Chapter 4/Ignition system
d)
e)
voltmeter. Then check that the LT current is reaching the coil, and that it is not below the minimum value as stated in the Specification. This is made on the coil terminal 15. Again with the ignition on, check coil terminal 1 with a voltmeter when a reading should be obtained. If there is no reading, there is a fault in the coil, probably an open circuit in the LT windings, and the coil should be renewed. Finally, check the LT voltage at the distributor terminals. Connect the voltmeter between the distributor supply ter-
minal and earth. If there is no reading, a faulty cable or loose connection is indicated. Then connect the voltmeter across the contact points, ensuring they are in the open position, and the heel of the contact breaker points is at the highest point of the distributor cam lobe. If there is no reading, remove the capacitor and check again, and if a reading is now made, the capacitor is faulty and should be renewed. (Refer to the Specifications for values).
f)
The remaining HT items to be tested are the rotor arm and the
g)
distributor cap, and both should be inspected for cracks and tracking. In addition, check that the distributor cap carbon brush is not seized in its locating hole, and that the pressure spring is intact. Check the contact breaker point as directedin Section 3.
Fig. 4.7. The coil supply terminal 15 (green), contact points lead 1
(Black), and distributor HT lead 4 12 The plug leads require no routine attention, other than being kept clean and wiped over regularly.
Engine misfires or runs sluggishly.
a) 9 1
Igniticn system — fault diagnosis Failure of the ignition system will occur in either the low tension or
high tension circuits, and tracing the fault will entail eliminating each section of the system, until the problem item has been located. Before embarking on the more involved checks, it will be worth while to ensure each lead is firmly connected to its correct terminal. 2 Engine will not start. a)
b)
marked difference in the speed and note of the engine if the
proprietary type spray. Next check whether the HT current is reaching the spark plugs, by removing one of the leads and holding it, with a insulated grip, about
4 in (3 mm).
away
from
(with cover removed), near the cylinder head with the engine running, as directed in the previous paragraph 2 (b). If a spark
b)
the
cylinder head, whilst the engine is turned over, with the ingition on. If a spark appears then the ignition system is functioning although the timing may need adjusting and the spark plugs may require attention. /f there is no spark the fault may lie in the distributor or coil. c)
particular cylinder is firing correctly. Should this not be so, check that HT current is reaching the plug by holding the lead
If the car has been /eft outside in damp weather conditions, check that the leads and distributor cap are dry. Remove the distributor cap, if necessary, and check inside for dampness. Clean the items with a dry cloth, or alternatively use a
suitably
Engine misfiring may be caused by mechanical or electrical faults, and it may not be apparent exactly where the problem is to be located. /f the misfire is regular, a quick check may be made by shorting-out each spark plug in turn with a screwdriver, while the engine is regulated at a fairly fast tickover. Make sure the screwdriver is suitably insulated, and remove the spark plug HT covers, when it will be possible to earth the HT current to the-eylinder head. There should be a
Check the condition of the battery either with a hydrometer or
occurs, a faulty spark plug is indicated or, alternatively, a lack of compression in the cylinder may be the cause. Eliminate the spark plug by checking it as directed in Section 8. Misfiring may also be caused by dirty, pitted contact points, a weak contact breaker spring, distributor cap and rotor arm
failures, and inaccurate ignition timing. These items may be checked and corrected as previously described.
c)
Finally, faults in the fuel system and carburettor can give very similar symptoms to those attributable to the ignition system, and reference should be made to Chapter 3 in order to correct
them.
Chapter 5 Clutch Contents
Clutch hydraulic system — bleeding
...............00005.
Clutch — inspection andrenovation .................0005 CHICHEAINStallalOny mereeoren es Me RAN hare ewe Ook an Seas Siete 2 ahs CNTCHELONROVGlE Mee een cre crocs: oe teak ee ie Aa cna altho aiere AteCAGnOSIS-aClIMtGMNa cnih. ais aie ae cnalopode sate can Na ees
5 W 3 6 10
General:description stvasdcas aon Gee eee Master cylinder — removal and installation ............ Pedal (cluch operation) — removal and installation Release bearing — removal and installation ........... Slave cylinder — removal, overhaul and installation
FPON
Specifications
US POE). ok ylMee
Soar Gretel
ne
cee
Mert
ie
Hydraulically operated, single dry plate, with diaphragm spring pressure plate
Driven plate Diameter:
SHIR EN S122 Otto RE 8 0) Ne Oe ears Mera Are lia eee Rear aeya SUAET bey, WOES, Ame (5° 9 oem Aare aie eed 3 Boye Deuce eteghe rs cea Thickness (individual lining) SDSL Or and SLO AIer err ck el eee en a!cra toed ld roa, eeGite wi SPUD) ee eee aus ones cottons Oe ees oie SARE Loare ye neee Thickness (total) SONORAN? Oem OREO ELL beara cbeliesee Secteur. ara eyis Maltake To 5 5) | RT REE Crate PRS ais TS rin gir cad ORNS Ae ee Sine de Minimum
or ate
Ghitchirelease bearing
5+
Free playviat pedals
oa) rei
Total'clutch pedal travel
Sache nO bere pase e epemens en anaes aie ceeem Cae. otter
eee oe cae hee eel eo
oe
BYR ba)
SE
ROR
RRO
sO Oe
oc REO
aes
a
ee eee
A
nO
cae
cael Ges. etre
OREM
acterEeTC
ete
seo An.Serres Gata
Torque wrench settings
Ee ee sie wile ecwete nape: tee 8 ee Eluitchito flywheellbOltSi. tiniatisketceieme th vo olen iene oe ereiel Guide NiasteiicyINGermoOltSwmwe > nian seth te a2)GeNoles ay SlavercyliidenbOlts ent atons cyte re a Oe ORG os 6 ooo ol De oO PEGE [OMONEOl? “3 oc
a "ee
i=
0-380 in to 0-411 in (9.65 mm to 10:45 mm) 0-396 in to 0-427 in (10:05 mm to 10-85 mm)
General description
Re
0-352 in (8:95 mm) 0-368 in (9:35 mm) Self-centring ball thrust bearing Approximately 0-2 in (5 mm)
ater
es see eeeesees 0... 22s-... .....
Master cylinder
1
0-146 in (3-7 mm) 0-154 in (3.9 mm)
total thickness
BHIGE SZO MAI eSZOU Ie ee resents wie ear ZONA. Ws Bra Wlisec natn COSC OLR ee Oe Bae
OTC
8-504 in (216 mm) 8-976in (228mm)
ee
The clutch major components comprise a pressure plate, and 1 a driven cover assembly, which is of the diaphragm spring type, and
6-1 in (155 mm)
0-75in (19:05 mm) 1:26 in (32 mm)
0-813 in (20-64 mm) 0-906 in (23 mm)
Ibf ft 16-17 16-17 18-20 18— 20
Nm 22-24 22-24 2028 25-28
plate, which incorporates torsion coil springs to cushion rotational shocks when the drive is taken up. 2 The clutch release bearing is of the sealed ball type, and is selfcentering. 3.
There
are no maintenance
requirements
for the clutch, and it is
84
Chapter 5/Clutch automatically adjusted by the hydraulic system at the slave cylinder. 4 The operation of the clutch is initially effected by depressing the clutch pedal, which moves the piston in the master cylinder forwards, so forcing hydraulic fluid through the fluid line to the slave cylinder. The piston in the slave cylinder moves forward, on the entry of the fluid, and actuates the clutch release arm by means of a short pushrod. 5 The release arm pushes the release bearing forward to bear against the diaphragm spring which, due to its pivoting action, disengages the pressure plate face from the driven plate. 6 When the clutch pedal is released, the diaphragm spring returns to its original position, and forces the pressure plate into contact with the high friction linings on the driven plate, and at the same time pushes the clutch disc a fraction forwards on its splines, so engaging the clutch disc with the flywheel. The clutch disc is thus sandwiched between the pressure plate and the flywheel, and the drive is transmitted directly through the clutch.
2
Fig. 5.1. Clutch pedal return spring and master cylinder pushrod connection
Pedal (clutch operation) — removal and installation
1 Working inside the car pull back the carpet from around the clutch pedal, and remove the fascia trim from the steering column by unscrewing the fixing screws. 2 €xtract the clutch pedal return spring from its locating hole. 3 Disconnect the master cylinder pushrod from the pedal arm, by removing the pivot bolt and nut.
Fig. 5.2. Clutch pedal adjustment dimension (C) and adjusting nut (1)
Chapter 5/Clutch
85
—— SSD
4 The clutch pedal pivot bolt also acts as pivot for the brake pedal, and, before removing it, obtain a short length of rod to insert through the brake pedal, to hold it in place. 5 Unscrew and remove the clutch pedal pivot bolt, and withdraw the pedal. 6 Refitting is a reversal of removal, but apply grease to the pedal sleeve and bush, after having inspected them for wear, and fit a new locknut to the pivot bolt. 7 Check the condition of the master cylinder pushrod bearing, and renew it if necessary. Smear a little grease around the pivot bush and use a new locknut. 8 The pedal position is adjusted by slackening the adjusting nut on the master cylinder pushrod, and turning the pushrod to the required position, tightening the nut when the correct pedal position has been obtained. Refer to the Specifications for the dimension, which should be taken from the bulkhead to the further edge of the pedal with the rubber grip removed. 3
Master cylinder — removal, overhaul and installation
1 Working inside the car, pull back the carpet from around the clutch pedal, and remove the fascia trim from the steering column by uns-
crewing the fixing screws. 2 Unclip the accelerator cable from the top of the control lever, and pull it through the bulkhead into the engine compartment (only necessary on LHD cars). 3 Unscrew and remove the pivot bolt from the clutch pedal.
4 Mark the position of the pushrod and locknut, and loosen the locknut just enough to release it from the pushrod. Unscrew the mounting bolt and locknut, and remove it from the master cylinder. 5 The clutch and brake fluid reservoir is a combined unit, and the hydraulic fluid should be syphoned out until the level falls below the feed pipe to the clutch master cylinder. 6 Pull out the supply line from the master cylinder. 7 Carefully unscrew the outlet pipe which connects with the slave cylinder, and remove the master cylinder securing bolts from the bulkhead. 8 Withdraw the master cylinder forwards from the bulkhead. 9 Be careful not to spill any clutch fluid on the bodywork, and preferably wrap the cylinder in a thick cloth before removing it from the engine compartment. 10 Prior to dismantling, clean all dirt from the external surfaces. 11 Peel back the rubber boot from the rear end of the master cylinder, and extract the circlip. 12 Withdraw the pushrod assembly, piston and spring. 13 Wash all the components in methylated spirit or clean hydraulic fluid — nothing else must be used. Examine the surfaces of the piston and cylinder bore and, if there are scratches, scoring or ‘bright’ wear areas evident, then the master cylinder must be renewed complete. 14 If the components are in good condition, discard all rubber seals and obtain the appropriate repair kit. Install the seals using the fingers only to manipulate them into position, and then dip the components in
clean hydraulic fluid before installing into the cylinder. 15
Installation is a reversal of removal, but bleed the clutch hydraulic
aaa IESine Fig. 5.3. Sectional view of clutch master cylinder 1 Dust cap
2 Lock ring
Fig. 5.4. Syphoning hydraulic fluid from the reservoir
3 Grooved rings
4 Sealing plug
Fig. 5.5. Clutch
master
5 Washer
cylinder fluid supply pipe and mounting bolts
86
Chapter 5/Clutch system as described in Section described in Section 2.
4
5, and
adjust
the
clutch
pedal
as
Slave cylinder — removal, overhaul and installation
1 The clutch slave cylinder is located on the left side of the gearbox and is held in position by two nuts.
2
First, syphon
off the hydraulic fluid from the reservoir, until the
level falls below the feed pipe to the master cylinder.
Fig. 5.6. Sectional view of clutch slave cylinder 1 Notched ring
3 Grooved sleeve
3 Disconnect the fluid supply pipe from the slave cylinder, and plug the end. Unscrew and remove the cylinder securing nuts, and withdraw the unit, from the gearbox housing. 4 Overhaul of the cylinder is similar to that described in the preceding Section for the master cylinder. 5 Installation is a reversal of removal, but remember to insert the cylinder into its location with the bleed screw facing down, and to put a small amount of grease on the lip of the pushrod. The hydraulic system must be bled as described in Section 5.
2 Dust cap
5
Clutch hydraulic system — bleeding
1 The need to bieed the hydraulic system arises when there is air present in the fluid, which may be the result of a faulty seal or joint, or the result of dismantling one of the system components. Bleeding is simply the process of venting the air out of the system. 2 Before proceeding to bleed the system, it is possible to determine the amount of release travel, on the slave cylinder pushrod. To do this, insert a short length of flat-steel, of suitable thickness, into the clutch slave cylinder cutout hole until it makes contact with the pushrod. Keep it pressed against the rod while an assistant depresses the clutch pedal fully, and a mark will then be made on the pushrod. 3 Remove the slave cylinder and measure this mark; if it is less than 0.8 in {20 mm), the clutch hydraulic system is not functioning correctly, and there is likely to be air present in the fluid. If the mark is more than 0.8 in (20 mm), the hydraulic system is operating correctly. 4 To bleed the system, first make sure the reservoir is filled to the
correct level, and obtain a piece of 3/16 in (4.8 mm) bore diameter
Fig. 5.7. Checking the clutch slave cylinder movement
rubber tube about 2 to 3 feet (0.6 m to 0.8 m) long, and a clean glass jar. A small quantity of fresh clean hydraulic fluid is also necessary. 5 Pull off the bleed nipple dust cap, and connect the rubber tube to the nipple. Put about 4 in (12.7 mm) of fluid in the jar, and place the other end of the tube in the jar, with its end below the level of the fluid. The jar can be placed on the ground under the car, and the nipple
loosened 4 turn. 6
The clutch pedal should then be depressed quickly, and released
slowly a number
of times, until no more
air bubbles are seen to come
from the pipe. Quick pedal action carries the air along rather than leaving it behind. 7 Remember to keep the reservoir topped-up, and, when the air bubbles stop, keep the clutch pedal depressed fully, and tighten the bleed nipple. 8 Unscrew the clutch slave cylinder securing nuts, and withdraw the cylinder. Press the pushrod back into the cylinder as far as possible and then release it slowly. This will ensure that any remaining air in the fluid reservoir is expelled. 9 Refit the slave cylinder, and check the operation of the clutch. If necessary check the slave cylinder pushrod movement as previously described. 10 Always use clean hydraulic fluid, which has been stored in an airtight container, and has remained unshaken for the preceding 24 hours. Never reuse fluid which has been bled from the system.
6
Clutch — removal
1 Access to the clutch is best obtained by removing the gearbox as described in Chapter 6 Section 2, but note the following. 2 The need for clutch renewal can be ascertained by inserting a short length of flat steel, of suitable thickness, into the clutch slave cylinder cutout hole until it makes contact with the pushrod.
3
Fig. 5.8. Diagram of fluid reservoir (1), clutch pedal (2) and clutch slave cylinder bleed nipple (3)
If, when the clutch pedal is depressed, the flat steel gauge is felt to
travel into the cutout hole a further 0.2 in (5 mm), the clutch lining is worn and should be renewed.
Chapter 5/Clutch
87
4 y)
Ey) GEL»,
S,
aa,
D>
.
3
3
N HN
NZ .
san
y
a KN
2
Ye ees
| Nip
\j
iN HN )
V7
‘.
6 .4
7
Q > SS SS
ed th O
A
Pa]
|
U
=
NI
tepggeZLee LLL rs a LIL
a
ni
|
|
KR
RS
SQOOHA
“oyu eae N ISS
al”——_ LLL IPIRBI A
SE
| wo
7ee ---—ZZ ZZ ODT ALL. Ba
Ge
Fig. 11.16. Cross-section of rear wheel stub axle showing dimension checks
placed
Chapter 11/Suspension and steering 6
judiciously under the body sideframe members. 2 Remove the roadwheels. 3
Unbolt
the semi-trailing
arm
wishbones,
from
the crossmember
pivot points. 4 Support the final drive with a trolley jack or axle stand, and then unscrew and remove the four securing nuts. 5 With a hexagon headed key, remove the support screws from the crossmember side mounting brackets. 6 Remove the stabiliser bar clamps from the crossmember. 7 Support the semi-trailing suspension arms with axle stands, and unscrew and remove the crossmember side mounting nuts, lowering the crossmember from the car.
177
spring, until it is released from the upper cap, and then remove the locking nuts from the top of the shock absorber piston rod. 7 Withdraw the cap, together with the supporting washers, and lift
off the coil spring. 8 To test the shock absorber, grip its iower mounting eye in the jaws of a vice and, with the unit in a vertical position, fully extend and com-
8 Check the condition of the crossmember mounting rubber bushes, and renew them if necessary, by removing the two securing bolts. If the knurled locating pin is to be renewed, the rear seats will have to be removed and the pin driven out from inside. 9 Installation is a reversal of removal, but tighten all nuts and bolts to the specified torque when the weight of the car is on the suspen-
sion. 10 Refit the roadwheels, and lower the car to the ground.
14
Zia Z
Rear shock absorber — removal, testing and installation
1 Jack-up the rear of the car, and support it. 2 Using a second jack, support the suspension semi-trailing arm, otherwise the driveshaft joints will be strained when the shock absor-
Fig.
11.17. Rear crossmember side mounting bracket
ber (which acts as a check link), is released from its mounting. 3 Disconnect the shock absorber from the suspension trailing arm (see photo 14.3). 4 Working insde the luggage boot, unscrew and remove the three rear suspension upper cap securing screws. 5 Lower the complete with the packing joint. 6
shock absorber, and coil assembly, together
Using a screw type compressor, compress the rear suspension coil
Fig. 11.19. (arrowed)
Rear
suspension
upper
mounting
and
ar 14.3 Rear shock absorbers lower mounting
14.4
Rear
suspension
luggage boot
upper
mounting
in
14.5
Removing
the
rear
bers/coil spring assembly
shock
packing
absor-
178
Chapter 11/Suspension and steering press it about ten times. If at any time, any lack of resistance is felt or, if the shock absorber locks, then it must be renewed. 9 Check the condition of the upper mounting cap, and the rubber auxiliary spring, and if these are faulty, renew them. Make sure that the conical end of the auxiliary spring, locates correctly in the distance sleeve. 10 Installation is a reversal of removal, but check that the coil spring locates in its end caps before the spring compressor is released, and that the upper cap packing joint is fitted. Tighten the mounting nuts to the specified torque, after the car has been lowered onto the suspension.
15 Rear coil spring — removal and installation odie Cree, DA TE a ee
H7IS2
Fig.
11.20. Semi-trailing arm pivot bolts
1. Jack-up and support the rear of the car. 2 Remove the rear shock absorber as described in Section 14. 3 The coil springs are colour cooled, to identify their rating and dimensions, and it is imperative to fit a new spring with the identical colour code of the spring being renewed. 4 Installation of the coil spring is a reversal of the removal procedure.
16
Rear stabiliser bar — removal and installation
1 This is simply a matter of unbolting the clamps, and the end fittings, and removing the bar. 2 When refitting, do not overtighten the securing bolts to the specified torque until the weight of the car is on the suspension.
17
Rear suspension semi-trailing arm — removal and installation
1 Jack-up the rear of the car, and support it under the body side members. Support the suspension-trailing arm with a trolley jack, and remove the roadwheel.
or
16.1 Rear stabiliser bar mountings
2 Disconnect and remove the stabiliser bar as described in Section 16. 3 Remove the shock absorber and coil spring assembly, as described in Section 14. 4 Disconnect the handbrake cable from the handbrake lever, by removing the locking nuts, and unclip it from the suspension arm. 5 With a hexagon headed key, unscrew and remove the driveshaft securing bolts from the rear stub axle driving flange. Tie the driveshaft up out of the way, but be careful not to strain the constant velocity joints. 6
Detach
the brake hose from the suspension
arm, by unscrewing
the union, and plug the end of the hose and the pipe. Place a piece of plastic sheeting under the brake master cylinder reservoir cap, and tighten it down to help prevent the loss of brake fluid.
7 Remove both semi-trailing arm pivot bolts from the crossmember, and withdraw the arm on the trolley jack, complete with the hub. 8 The rubber pivot bushes can be renewed by extracting and inserting them using a bolt, washers, and distance pieces. A little glycerine or hydraulic fluid, smeared over the bush and suspension arm mating surafces, will assist the bushes to locate. 9 Installation is a reversal of removal, but bleed the brakes and adjust the handbrake as described in Chapter 9, and remember to remove the plastic sheeting from the fluid reservoir. 10 Tighten all nuts and bolts to the specified torque, but delay tightening the suspension arm pivot bolts, until the weight of the car is on the suspension. 11 Refit the roadwheel and lower the jack.
18
Steering wheel — removal and installation
1 Set the ignition key to the ‘gauge’ position, and turn the steering wheel to the straight ahead position. 2 Remove the centre cover from the wheel by carefully prising it
away. 3
18.4 Steering wheel with centre cover and retaining nut removed
Mark the position of the steering wheel
in relation to the upper
steering shaft, and then unscrew and remove the retaining nut. 4 Withdraw the steering wheel from the steering shaft splines. If it is tight, a direct pull, with both hands gripping the outer rim, will usually
Chapter 11/Suspension and steering
179
SS
release it. 5 Install the steering wheel in its original straight-ahead position, making sure that the front roadwheels have not been turned, and use a new self-locking nut tightened to the correct specified torque.
19 Steering column — removal and installation a ee ee ee 1 Remove the negative lead from the battery terminal, and bend it away from the battery. Turn the steering wheel to the straight-ahead position. 2 Remove the steering wheel as described in Section 18. 3 Loosen and remove the lower fascia panel securing screws, and withdraw the panel. Disconnect the lower steering column surround by unscrewing the three securing bolts. 4 Detach the windscreen wiper and indicator switch assemblies from the top of the steering column, by removing the star headed screws, and release the cables from the steering column by disconnecting the cable straps. 5 Unscrew and remove the ignition switch securing screw, and withdraw the switch from behind the column, together with its cables. 6 With a suitable chisel, separate the shear bolts located under the upper steering column surround, and remove the surround. 7 Pull off the horn supply lead from its terminal 8 Steady the steering column and remove the lower bearing clip. 9 Mark the steering shaft lower splines in relation to the universal joint, and then remove the pinch bolt, from under the car. 10 Carefully withdraw the steering column and shaft from the universal joint. 11. Installation is a reversal of removal, but care should be taken to align the steering column and surrounds, to eliminate any stress which may effect the column bearings and universal joints. Prior to refitting the steering wheel, adjust the indicator switch assembly to give a clearance of 0.12 in (3 mm), between the end of the operating arm and the cancelling cam, with the indicator arm placed in its central position. 12 Check that the lower spline pinch bolt is located in the shaft safety groove, and then tighten all nuts and bolts to the specified torque.
20
Steering shaft (upper) — removal, inspection and installation
1 2
Remove the steering column as described in Section 19. Withdraw the indicator cancelling cam, and its shouldered
5 Extract the lower steering shaft bearing, by placing a piece of wood over the upper end of the shaft and carefully driving the com-
plete shaft through the outer tube. 6 Detach the spring clip from the locating groove, and withdraw the lower bearing from the steering shaft. 7 Inspect the shaft bearings for wear, and renew both of them at the same time if necessary. Check the steering shaft for alignment and bearing wear. 8 Installation is a reversal of removal, but take special care to ensure all the components are assembled in the correct order. The stem of each bearing metal ring should be facing towards the centre of the steering column, and the spring clips should be firmly held in position in the grooves. Press slightly against the upper shaft spring, to facilitate the fitting of the upper spring clip.
21
Steering shaft (lower) — removal, inspection and installation
1 Loosen and remove the lower fascia panel securing screws, and withdraw the panel. Disconnect the lower steering column surround, by unscrewing the three securing bolts. 2 Separate the shear bolts from the steering column upper surround mountings. 3 Slacken the steering column lower support bearing clip.
4 Mark the steering shaft lower splines, in relation to the universal joint, and then remove the pinch bolt from beneath the car.
ring
support, from the upper end of the steering shaft.
3 Lever the spring clip out of its locating groove, and withdraw the spring and washers, noting their order of assembly. 4 Lift the upper steering shaft bearing away from the column outer tube. Fig.
11.21. Indicator and wiper switch assembly securing screws
un
Fig.
11.22. Steering shaft upper bearing components 1 Cancelling cam 2 Shouldered ring 3 Spring clip
4
Washer
§ Spring
Fig.
11.23. Steering shaft lower bearing components 1 Spring clip 2 Ring 3 Shaft bearing
180
Chapter 11/Suspension and steering 5 Make sure the steering is in the straight-ahead position, and then pull the steering column and shaft away from the upper universal joint. 6 Check that the arrow, on the steering gear shaft dust seal, is positioned between the two steering gear housing lugs, and then slacken the lower pinch bolt. 7 Mark the position of the lower universal joint, in relation to the dust seal arrow, and then pull the joint off the splines. 8 Withdraw the lower shaft, complete with universal joints and joint disc. 9 Unscrew and remove the joint disc securing nuts from both sections of the lower steering shaft, and separate the disc noting the position of the ground (earth) spring. 10 Check the condition of the joint disc and the two universal joints and, if any wear is evident, renew them as necessary. 11 Installation is a reversal of removal, but make sure the earthing spring is located correctly in the joint disc, and that new self-locking nuts are used. Make sure the pinch bolts are entered through the safety grooves on the shaft splines, and tighten all the nuts and bolts to the specified torque.
22
Steering column lock — removal and installation
1 Disconnect the lead frorn the battery negative terminal. 2 Remove the steering wheel as described in Section 18. 3 Disconnect the lower steering column surround, by unscrewing the three securing bolts. 4 Detach the indicator and windscreen wiper switch assemblies, from the top of the steering column, by removing the star headed screws. 5 Separate the upper steering column surround shear bolts with a chisel or small punch. 6 Unscrew and remove the ignition switch securing screw, and withdraw the switch from behind the column, together with its cables. 7 Lift off the upper steering column surround, and separate the shear bolt which secures the steering lock barrel holder. By pressing in the retaining plunger, the barrel can be withdrawn from its case, exposing the key number. 8 Installation is a reversal of removal but make sure that.the upper surround is aligned correctly, before the shear bolts are assembled. Prior to refitting the steering wheel, adjust the indicator switch assembly, to give a clearance of 0.12 in (3 mm) between the end of the operating arm and the cancelling cam, with the indicator arm placed in its central position.
pile y r
’
cs Ad
23.6 Showing lower steering shaft universal joint and steering gear (pinch bolt arrowed)
Fig.
11.24. Lower steering shaft securing nuts on joint disc
23
Steering gear — removal and installation
1 Jack-up the front of the car, and support it with stands placed beneath the body main channel sections, to the rear of the steering gear. 2 Remove the front roadwheels.
Fig.
11.25. Removing the steering lock barrel
Chapter 11/Suspension and steering
181
SS A
3 Turn the steering wheei to the straight-ahead position, and then remove the split pins from the casteilated track rod securing nuts on each side. 4 Unscrew and remove the nuts and, using a suitable extractor, release the track rods from the stub axle steering arms. 5 Check that the arrow on the steering gear dust seal is between the two lugs on the steering gear housing, and mark the relative position of the steering shaft lower universal joint to the spline. 6 Unscrew and remove the universal joint pinch bolt (see photo 23.6)? 7 Support the steering gear with a trolley jack, and then unscrew and remove the securing bolts from the front crossmember. 8 Carefully lower the jack, at the same time easing the universal joint away from the steering gear shaft splines, and finally withdraw the steering gear from under the car. 9 Installation is a reversal of removal, but, in addition, check the condition of the track rod end rubber boots, and renew them if necessary, and use new self-locking nuts where this type of nut is used. 10 Refit the roadwheels, lower the front of the car, and check the front wheel alignment as described in Section 26.
24
Steering gear — overhaul and adjustment
Fig. 11.26. 1 Remove the steering gear as described in Section 23, and place it in a soft jawed vice. 2 If fitted, unscrew and remove the steering damper securing nut, trom the right retaining plate. (.HD cars — opposite for RHD cars). 3 Bend up the right locking tab, and push the rack to the left as far as it will go. With a suitable open-ended spanner unscrew and remove
Steering
gear alignment
marks
with lower universal
joint, (1) and (2)
the right track rod. (LHD cars). 4 Remove the locking tab and steering damper plate, and then detach the flexible bellows, by releasing the securing strap from the steering gear housing. 5 Release the left flexible bellows from the steering gear housing by removing the securing strap. (LHD cars — opposite for RHD cars). 6 Push the rack to the right, just far enough to allow a suitable spanner to be attached to the track rod, and then bend up the locking
tab. (LHD cars). 7 Unscrew and remove the left track rod, together with the locking plate. (LHD cars). 8 Unscrew and remove the dust cover from the rack pressure pad adjustment housing, and extract the split pin. Remove the castellated adjusting ring, by unscrewing it with a suitable hexagon headed key. If a key cannot be loaned from the local BMW garage, it is quite easy to make a substitute out of dowel rod, drilling the centre to accept the inner adjusting screw. 9 Remove the spring locating plate and the coil spring. 10 Force the pressure pad with its:sealing ring out of its location, by carefully pulling the steering rack towards the adjustment housing, and place the pad on the bench together with the components thus far removed. 11 From the splined shaft, withdraw the dust seal, remove the circlip, and iever out the notched ring. Place these on the bench separated
Fig. 11.28. Track rod (arrowed), locking tab (1) and steering rack
(2)
Fig. 11.29.
Moving the steering rack (2), to remove the pressure pad (6), and seal ring (7)
182
Fig.
11.30. Exploded view of steering rack
Housing Rack Bearing bush O-rings Coil springs Pressure pad
O-ring Spring plate SBANAGAAWNHx Adjusting screw
10 Split pin 11 Adjusting screw
Dust cap Ball bearing Pinion
Needle bearing race Washer Circlip O-ring Adjusting screw Notched ring Dust seal Circlip
183
Chapter 11/Suspension and steering
ES a
from the adjustment components.
12 Using the hexagon headed key, unscrew and remove the adjustment ring, and remove the rubber seal and washer. 13 Grip the splined shaft between two pieces of wood placed ina vice and, using a plastic or hide headed hammer, drive the housing off the shaft. This will effectively extract the shaft ball bearing. 14 Remove the bearing securing clip with circlip pliers, and press the bearing off the shaft with a suitable two or three legged extractor. Withdraw the rack from the housing. 15 If the shaft lower needle roller bearing is to be removed, either extract it with a suitable puller, or fill the bearing with thick grease and drive a dowel rod of suitable diameter into the bearing. The pressure of the grease will release the bearing. 16 From the opposite end of the steering gear housing, lever the rack bushing out of the housing with two screwdrivers entered diametrically opposite. 17 Clean all components thoroughly, and check them for wear, renewing them where necessary. 18 To reassemble the steering gear, firstly fit two new seal rings to the rack bushing, and locate it in the steering gear housing so that the lugs fit into the locking slots. 19 Refit the shaft needle roller bearing with the curved end facing downwards. 20 Position the shaft bearing on the shaft with the closed end facing the splines, and press it into location with a suitable extractor mounted on the gear end. Snap the circlip into its locating groove. 21 Coat the toothed section of the rack, with grease of the grade stated in the Specifications, and also coat the shaft bearings and pinion gear with the same grease. 22 Insert the shaft into the needle roller bearing, and fit the plastic washer and sealing ring onto the shaft. 23 Refit the adjusting ring, and tighten it to the the torque stated in the Specifications, and snap the circlip into position. Press the notched ring into position. 24 Adjust the steering rack to its central position, which will give an extension of 3.03 in (77 mm) measured from the right of the steering
gear housing (LHD cars), to the end of the rack. 25 Pack grease into the area between the shaft dust seal and the notched ring, and then refit the dust seal so that the arrow on the seal is between the two location lugs on the steering gear housing. 26 Fit a new sealing ring to the pressure pad smear the mating surfaces with a little grease, and refit the pad to the housing 27
Reassemble
the coil spring, locating plate, and adjusting ring, and
tighten the ring fully, Unscrew the central adjusting screw, until it protrudes from the face of the housing by approximately 0.47 in (12
mm). 28 Using the hexagon headed key, loosen the castellated adjusting ring, and then tighten it to a torque of 4.3 Ibf ft (6 Nm). Turn the ring back to the nearest slot that is in line with the split pin hole. 29 Push the rack fully left and right, and check for any tight spots in
Fig.
11.31. Removing the steering gear bushing (3)
the movement. If there is any sign of stiffness, loosen the adjusting ring by one further slot, and fit the split pin. Do not unscrew the adjusting ring by a further slot. If the rack is still stiff, the gear teeth on the rack are worn or distorted, and it will be necessary to renew the rack. Alternatively, the steering gear housing may be distorted, in which case the complete steering gear will have to be renewed. 30 Assuming the rack moves freely, push it to its central position, and align the marks on the dust seal and housing. The turning torque must now be adjusted at the central screw with a hexagon key. Attach a friction gauge to the pinion shaft splines, or alternatively use a card and spring balance, and turn the shaft half a turn each side of the straightahead position. If the torque (see Specifications) is not correct, adjust the screw accordingly, checking it to the left and right of the straightahead position. 31 The adjusting screw is self-locking and, if it has worn too loose, renew it. It should be screwed clockwise to increase the friction turning torque, and anti-clockwise to reduce it. 32 Refit the dust cap to the pressure pad adjustment housing, and then install the track rods and steering damper (if fitted), in the reverse order of dismantling. Make sure each component is tightened to the correct torque, and check that the locking tabs are firmly engaged. 33 Refit the steering gear to the car as described in Section 23.
25
Trackrods and balljoints — removal and installation
1. To disconnect a balljoint taper pin, first remove the split pin and caste!lated nut, and then use an extractor, or a forked, tapered wedge, to separate the balljoint from the stub axle steering arm. 2 Another method, is to place the head of a hammer (or other solid metal article), on one side of the arm into which the pin is fitted. Then hit the opposite side of the arm, smartly, with have the effect of squeezing the taper out.
a hammer,
and this will
3 To detach the trackrod from the pinion end of the steering gear, first remove the flexible bellows, by unclipping the strap, and then bend up the steering rack locking tab. Push the rack into the housing, just far enough for a spanner still to be fitted to the trackrod, in order to give the rack good support, and then unscrew the trackrod and remove it. When removing the trackrod from the end opposite the pinion end of the steering gear, it is not necessary to remove the flexible bellows. If a steering damper is fitted, first remove the securing screw, bend up the locking tab, and unscrew the trackrod. 4 Balljoints cannot be overhauled or repaired, and they should be renewed if they are worn, or show any slackness in the movement of the ball within its housing. No provision is made for lubrication 5 When refitting the trackrods, check that the locking tabs are correctly engaged, and adjust the distance, between the ball journal pivots, to the dimension given in the Specifications, as a basic setting, before adjusting the wheel alignment as described in the next Section.
25.1 Left track rod end location (front stabiliser bar to lower suspension arm securing nut, arrowed)
184
26
Chapter 11/Suspension and steering
Steering angles and front wheel alignment
1 Accurate front wheel alignment is essential for good steering and tyre wear. Before considering the steering angle, check that the tyres are correctly inflated, that the front wheels are not buckled, the hub bearings are not worn or incorrectly adjusted and that the steering linkage is in good order, without slackness or wear at the joints. 2 Wheel alignment consists of four factors: Camber which is the angle at which the front wheels are set from the vertical when viewed from the front of the car. Positive camber is the amount (in degrees) that the wheels are tilted outwards at the top from the vertical. Castor is the angle between the steering axis and a vertical line when viewed from each side of the car. Positive castor is when the steering axis is inclined rearward. Steering axis inclination is the angle, when viewed from the front of the car, between the vertical and an imaginary line drawn between the upper and lower suspension leg pivots. Toe-in is the amount by which the distance between the front inside edges of the roadwheels (measured at hub height) is less than the diametrically opposite distance measured between the rear inside edges of the front roadwheels. 3. All steering angles other than toe-in are set in production and are
not adjustable.
Front wheel tracking (toe-in) checks are best carried
out with modern setting equipment by a reasonably accurate alternative and adjustment procedure may be carried out as follows: 4 Place the car on level ground with the wheels in the straight ahead position. 5 Obtain or make a toe-in gauge. One may be easily made from tubing, cranked to clear the sump and bellhousing, having an adjustable nut and set screw at one end. 6 With the gauge, measure the distance between the two inner rims of the front roadwheels, at hub height and at the rear of the wheels. 7 Pull or push the vehicle so that the roadwheel turns through half a
turn (180°) and measure the distance between the two inner rims at hub height at the front of the wheel. This last measurement should be less than the first by the specified toe-in (see ‘Specifications’ Section). 8 Where the toe-in is found to be incorrect, slacken the clamps on
28
each outer trackrod and rotate each trackrod an equal amount but in opposite directions, until the correct toe-in is obtained. Tighten the clamps ensuring that the balljoints are held in the centre of their arc of
travel during tightening. 9 Wear in the rear trailing arm bushes can cause incorrect tracking of the rear wheels with consequent heavy tyre wear.
27
Wheels and tyres
1 The roadwheels are of pressed steel type. 2 Periodically remove the wheels, clean dirt and mud from the inside and outside surfaces and examine for signs of rusting or rim damage and rectify as necessary. 3 Apply a smear of light grease to the wheel studs before screwing on the nuts and finally tighten them to specified torque. 4 The tyres fitted may be of crossply or radial construction according to territory and specification. Never mix tyres of different construction and always check and maintain the pressures regularly 5 |f the wheels have been balanced on the vehicle then it is important that the wheels are not moved round the vehicle in an effort to equalise tread wear. If a wheel is removed, the the relationship of the wheel studs to the holes in the wheel should be marked to ensure extract refitment, otherwise the balance of wheel, hub, and tyre will be upset. 6 Where the wheels have been balanced off the vehicle, then they may be moved round to equalise wear. Include the spare wheel in any rotational pattern. If radial tyres are fitted, do not move the wheels from side to side but only intercharige the front and rear wheels on the same side. 7 Balancing of the wheels is an essential factor in good steering and road holding. When the tyres have been in use for about half their useful life the wheel
should be rebalanced
to compensate
for the lost
tread rubber due to wear. 8 Inspect the tyre walls and treads regularly for cuts and damage and where evident, have them professionally repaired. Periodically, remove any stones or flints which may be lodged in the tyre tread. 9 Tyre pressures should be checked regularly, and adjusted to suit the operating and load conditions (see Specifications).
Fault diagnosis — suspension and steering
Before diagnosing faults from the following chart, check that any irregularities are not caused by:
a) Binding brakes b) Incorrect ‘mix’ of radial and crossply tyres
c) Incorrect tyre pressures d) Misalignment of the body frame
Symptom
Reason/s
Excessive steering wheel play
Wear in the steering gear or track rod ends, or loose steering gear mountings.
Steering wanders
As above.
Wheel alignment incorrect (indicated by excessive or uneven tyre wear). Front wheel hub bearings loose or worn. Worn suspension unit swivel joints.
Steering stiff and heavy
Incorrect wheel alignment (indicated by excessive or uneven tyre wear). Excessive wear of one or more steering joints, or balljoints.
Excessive wear in the steering gear unit.
suspension
Chapter 11/Suspension and steering
29
Wheel wobble and vibration
Roadwheels out of balance. Roadwheels buckled. Wheel alignment incorrect. Wear in the steering linkage or suspension balljoints.
Excessive pitching and rolling on corners and during braking
Defective shock absorbers.
Fault diagnosis — tyres
Wear description
Reason/s
Excessive central tread wear
Tyre over inflated.
Excessive wear of tyre shoulders
Tyre under inflated.
Tyre tread with fins or feathers
Incorrect wheel alignment (causing scuffing).
Wear on the edge of the tyre: Front wheels only Rear wheels only
Steering geometry needs checking. Check rear suspension for damage.
Flat or rough patches on the tread
Caused by harsh braking — check the brake adjustment.
Cuts and abrasions on the wall of the tyre.
Caused by driving over rough terrain or into the kerbstone.
185
Chapter 12 Bodywork and fittings Contents
Air conditioning system — general ................00 ee ee Air outlet moulding (rear) — removal and installation ......... Bonnet lid — removal, refitting and adjusting .............. Bonnetiock= adiustment. «cca clam «ses cuss sie ese) es en ns Bumper shock absorbers — removal and installation ......... Bumpers — removal and installation ..................5. Demisting and fresh air ducts — removal and installation ...... Door lock — removal, refitting and adjusting ............... Door — removal, refitting and adjusting .................. Doors — tracing rattles and their rectification .............. Fascia panel (front upper) — removal and installation ......... EauitdiagnoOsis-Neatelann . cram tet «cls hie o skeen eae ce Front door rubbing strip — removal and installation .......... Front seat — removal, refitting and adjusting .............. Genenralcesch Punnett esd ie marie cots. eteas o.soeutuwixpes cual tnus Glovercompantment—inemOVall sc 66 ac6 ie oe oe wees © Heater and ventilation system — description ............... Heater matrix — removal andinstallation ................. Heater motor — removal and installation .................
1
Genera! description
1.
The body and underframe
is of unitary, all welded
36 21 14 15 19 18 35 8 11 7 26 37 22 2a 1 24 31 33 34
construction,
and is designed with safety ‘cells’ at the front and rear of the car. All models have an integral roll-over bar built into the side pillars and roof, and the fuel tank is positioned beneath the floor of the rear seats in order to be protected from any rear impact damage. The versions covered by this manual have two door bodywork.
2
Maintenance — bodywork and underframe
1 The general condition of a car's bodywork is the one thing that significantly affects its value. Maintenance is easy but needs to be regular. Neglect, particularly after minor damage can lead quickly to further deterioration and costly repair bills. It is important also to keep watch on those parts of the car not immediately visible, for instance, the underframe, inside all the wheel arches and the lower part of the engine compartment. 2 The basic maintenance routine for the bodywork is washing - preferably with a lot of water, from a hose. This will remove
Heater— removallandnstallation) 2... .. sc) ei lpn sea Luggage bootlid lock — removal, refitting and adjusting ....... Luggage bootlid — removal, refitting and adjusting .......... Maintenance — bodywork and underframe ................ Maintenance ninges amallOCKSimr-tek-ten ickyieie ts ie niied iment ae Maintenance — upholstery and carpets ...............--. Miajofibodyidamage:—tepallm 1. 41.454 eam coat a seo one Minombody ddimage = epalte mart miss suc1-tarrt rea enon eects Radiator grille — removal andinstallation ................ Rear seat — removal andinstallation ...............-.00.5 ReEanview MibOrs — TOMOVGime vrcusme ale crenepone nee ae oni eam Shelf compartment (gearstick) — removal and installation ..... Side window — removal andinstallation ................. SliGingmoor—aGjUstnmen tires earertees Ghee cunee tie ieee eee Sliding roof —removal and installation ................... Window glass — removal and installation ................. Window regulator — removal and installation .............. Windscreen and rear window — removal and installation ......
32 17 16 2 6 S: 5 4 20 28 23 25 13 29 30 10 S, 12
renovations are necessary. Steam cleaning is available at many garages and is necessary for removal of the agcumulation of oily grime which sometimes is allowed to cake thick in certain areas near the engine, gearbox and back axle. If steam cleaning facilities are not available, there are one or two excellent grease solvents available which can be brush applied. The dirt can then be simply hosed off. 4 After washing paintwork, wipe off with a chamois leather to give an unspotted clear finish. A coat of clear protective wax polish will give added protection against chemical pollutants in the air. !f the paintwork sheen has dulled or oxidised, use a cleaner/polisher combination to restore the brilliance of the shine. This requires a little effort, but is usually necessary because regular washing has been neglected. Always check that the door and ventilator opening drain holes and pipes are completely clear so that water can be drained out. Bright work should be treated the same way as_ paintwork. Windscreens and windows can be kept clear of the smeary film which often appears if a little ammonia is added to the water. If they are scratched, a good rub with a proprietary metal polish will often clear them. Never use any form of wax or other body or chromium polish on glass.
all the loose
solids which may have stuck to the car. It is important to flush these off in such a way as to prevent grit from scratching the finish. The wheel arches and underframe need washing in the same way
3
Maintenance — upholstery and carpets
3 Periodically it is a good idea to have the whole of the underframe of the car steam cleaned, engine compartment included, so that a
1. Mats and carpets should be brushed or vacuum cleaned regularly to keep them free of grit. If they are badly stained remove them from the car for scrubbing or sponging and make quite sure they are dry before refitting. Seats and interior trimpanels can be kept clean by a wipe over with a damp cloth. If they do become stained (which can be more apparent on light coloured upholstery) use a little liquid detergent and a soft nail brush to scour the grime out of the grain of the material. Do not forget to keep the head lining clean in the same way as the upholstery. When using liquid cleaners inside the vehicle do
thorough inspection can be carried out to see what minor repairs and
not over-wet the surfaces being cleaned.
to remove any accumulated mud which will retain moisture and tend to encourage rust. Paradoxically enough, the best time to clean the
underframe
and wheel
arches
is in wet weather
when
the mud
is
thoroughly wet and soft. In very wet weather the underframe is usually
cleaned of large accumulations automatically and this is a good time for inspection.
Excessive damp could get
Chapter 12/Bodywork and fittings into the seams and padded interior causing stains, offensive odours or even rot. If the inside of the car gets wet accidentally it is worthwhile taking some trouble to dry it out properly, particularly where carpets are involved. Do not /eave oil or electric heaters inside the vehicle for this purpose. 4
Minor body damage — repair
The photographic sequence shown on pages 190 and illustrates the operations detailed in the following sub-Sections.
191,
Repair of minor scratches in the car’s bodywork If the scratch is very superficial, and does not penetrate to the metal of the bodywork — repair is very simple. Lightly rub the area of the scratch with a paintwork renovator or a very fine cutting paste, to remove loose paint from the scratch and to clear the surrounding bodywork of wax polish. Rinse the area with clean water. Apply touch-up paint to the scratch using a thin paint brush, continue to apply thin layers of paint until the surface of the paint in the scratch is level with the surrounding paintwork. Allow the new paint at least two weeks to harden; then blend it into the surrounding paintwork by rubbing the paintwork in the scratch area, with a paintwork renovator, or a very fine cutting paste. Finally apply wax polish. An alternative to painting over the scratch is to use a paint patch. Use the same preparation for the affected area; then simply pick a patch of suitable size to cover the scratch completely. Hold the patch against the scratch and burnish its backing paper; the patch will adhere to the paintwork, freeing itself from the backing paper at the same time. Polish the affected area to blend the patch into the surrounding paintwork. Where the scratch has penetrated right through to the metal of the bodywork, causing the metal to rust, a different repair technique is required. Remove any loose rust from the bottom of the scratch with a penknife, then apply rust inhibiting paint to prevent the formation of rust in the future. Using a rubber or nylon applicator, fill the scratch with bodystopper paste. If required, this paste can be mixed with cellulose thinners to provide a very thin paste, which is an ideal way of filling narrow scratches. Before the stopperpaste in the scratch hardens, wrap a piece of smooth cotton rag around the top of a finger. Dip the finger in cellulose thinners and then quickly sweep it across the surface of the stopper-paste in the scratch; this will ensure that the surface of the stopper-paste is slightly hollowed. The scratch can now be painted over as described earlier in
this Section.
Repair of dents in the car’s bodywork When deep denting of the car's bodywork has taken place, the first task is to pull the dent out, until the affected bodywork almost attains its original shape. There is little point in trying to restore the original shape completely, as the metal in the damaged area will have stretched on impact and cannot be reshaped fully to its original contour. It is better to bring the level of the dent up to a point which is
about + in (3 mm)
below the level of the surrounding bodywork.
In
cases where the dent is very shallow anyway, it is not worth trying to pull it out at all. If the underside of the dent is accessible, it can be hammered out gently from behind, using a mallet with a wooden or plastic head. Whilst doing this, hold a suitable block of wood firmly against the outside of the dent. This block will absorb the impact from
the hammer blows and thus prevent a large area of the bodywork from being ‘belled-out'’. Should the dent be in a section of the bodywork which has double skin or some other factor making it inaccessible from behind, a
different technique is called for. Drill several small holes through the Then metal inside the dent area - particularly in the deeper sections. them screw long self-tapping screws into the holes just sufficiently for out to gain a good purchase in the metal. Now the dent can be pulled of pliers. by pulling on the protruding heads of the screws with a pair The next stage of the repair is the removal of the paint from the damaged area, and from an inch or so of the surrounding ‘sound’ brush or bodywork. This is accomplished most easily by using a wire just as abrasive pad on a power drill, although it can be done the effectively by hand using sheets of abrasive paper. To complete preparation
for filling,
score
the
surface
of the
bare
metal
with a
in the screwdriver or the tang of a file, or alternatively, drill small holes paste. affected area. This will provide a really good ‘key’ for the filler . To complete the repair see the Section on filling and respraying
187
Repair of rust holes or gashes in the car’s bodywork Remove all paint from the affected area and from an inch or so of the surrounding ‘sound’ bodywork, using an abrasive pad or a wire brush on a power drill. If these are not available a few sheets of abrasive paper will do the job just as effectively. With the paint removed you will be able to gauge the severity of the corrosion and therefore decide whether to renew the whole panel (if this is possible) or to repair the affected area. New body panels are not as expensive as most people think and it is often quicker and more satisfactory to fit a new panel than to attempt to repair large areas of corrosion. Remove all fittings from the affected area except those which will act as a guide to the original shape of the damaged bodywork (eg. headlamp shells etc). Then, using tin snips or a hacksaw blade, remove all loose metal and any other metal badly affected by corrosion.
Hammer the edges of the hole inwards in order to create a slight depression for the filler paste. Wire brush the affected area to remove the powdery rust from the
surface of the remaining metal. Paint the affected area with rust inhibiting paint; if the back of the rusted area is accessible treat this also.
Before filling can take place it will be necessary to block the hole in some way. This can be achieved by the use of one of the following materials: Zinc gauze, Aluminium tape or Polyurethane foam. Zinc gauze is probably the best material to use for a large hole. Cut a piece to the approximate size and shape of the hole to be filled, then position it in the hole so that its edges are below the level of the surrounding bodywork. li can be retained in position by several blobs of filler paste around its periphery. Aluminium tape should be used for small or very narrow holes. Pull a piece off the roll and trim it to the approximate size and shape required, then pull off the backing paper (if used) and stick the tape over the hole; it can be overlapped if the thickness of one piece is insufficient. Burnish down the edges of the tape with the handle of a screwdriver or similar, to ensure that the tape is securely attached to the metal underneath. Polyurethane foam is best used where the hole is situated in a section of bodywork of complex shape, backed by a small box section (eg. where the sill panel meets the rear wheel arch - most cars). The usual mixing procedure for this foam is as follows: Put equal amounts of fluid from each of the two cans provided in the kit, into one container. Stir until the mixture begins to thicken, then quickly pour this mixture into the hole, and hold a piece of cardboard over the larger apertures. Almost immediately the polyurethane will begin to expand, gushing frantically out of any small holes left unblocked. When the foam hardens it can be cut back to just below the level of the surrounding bodywork with a hacksaw blade.
Bodywork repairs — filling and re-spraying Before using this Section, see the Sections on dent, deep scratch, rust hole and gash repairs. Many types of bodyfiller are available, but generally speaking those proprietary kits which contain a tin of filler paste and a tube of resin hardener are best for this type of repair. A wide, flexible plastic or nylon applicator will be found invaluable for imparting a smooth and well contoured finish to the surface of the filler. Mix up a little filler on a clean piece of card or board — use the hardener sparingly (follow the maker's instructions on the pack) otherwise the filler will set very rapidly. Using the applicator, apply the filler paste to the prepared area; draw the applicator across the surface of the filler to achieve the correct contour and to level the filler surface. As soon as a contour that
approximates the correct one is achieved, stop working the paste — if
you carry on too long the paste will become sticky and begin to ‘pickup’ on the applicator. Continue to add thin layers of filler paste at twenty-minute intervals until the level of the filler is just ‘proud’ of the
surrounding bodywork. Once the filler has hardened, excess can be removed using a metal plane or file. From then on, progressively finer grades of abrasive paper should be used, starting with a 40 grade production paper and finishing with 400 grade ‘wet-or-dry’ paper. Alwayswrap the abrasive
paper around a flat rubber, cork, or wooden b filler will not be completely flat. During the smoothing of the filler surface the ‘wet-or-dry’ paper should be periodically rinsed in water. This will ensure that a very smooth finish is imparted to the filler at the final stage. At this stage the ‘dent’ should be surrounded by a ring of bare
188
Chapter 12/Bodywork and fittings
metal, which in turn should be encircled by the finely ‘feathered’ edge of the good paintwork. Rinse the repair area with clean water, until all of the dust produced by the rubbing-down operation has gone. Spray the whole repair area with a light coat of primer — this will show up any imperfections in the surface of the filler. Repair these imperfections with fresh filler paste or bodystopper, and once more smooth the surface with abrasive paper. If bodystopper is used, it can be mixed with cellulose thinners to form a really thin paste which is ideal for filling small holes. Repeat this spray and repair procedure until
6
Maintenance — hinges and locks
1 Oil the hinges of the bonnet, boot, and doors with a drop or two of light oil periodically. A good time is after the car has been washed. 2 Oil the bonnet release mechanism and runners periodically. 3 Do not over lubricate door latches and strikers. Normally a little oil on the rotary cam spindle alone is sufficient.
you are Satisfied that the surface of the filler, and the feathered edge of the paintwork are perfect. Clean the repair area with clean water and allow to dry fully. The repair area is now ready for spraying. Paint spraying must be carried out in a warm, dry, windless and dust free atmosphere. This condition can be created artificially if you have access to a large indoor working area, but if you are forced to work in the open, you will have to pick your day very carefully. If you are working indoors, dousing the floor in the work area with water will ‘lay’ the dust which would otherwise be in the atmosphere. If the repair area is confined to one body panel, mask off the surrounding panels; this will help to minimise the effects of a slight mis-match in paint colours. Bodywork fittings
(eg: chrome strips, door handles etc) will also need to be masked off. Use genuine masking tape and several thicknesses of newspaper for the masking operations. Before commencing to spray, agitate the aerosol can thoroughly, then spray a test area (an old tin, or similar) until the technique is mastered. Cover the repair area with a thick coat of primer; the thickness should be built up using several thin layers of paint rather than one thick one. Using 400 grade ‘wet-or-dry’ paper, rub down the surface of the primer until it is really smooth. While doing this, the work area should be thoroughly doused with water, and the wet-or-dry paper periodically rinsed in water. Allow to dry before spraying on more paint. Spray on the top coat, again building up the thickness by using several thin layers of paint. Start spraying in the centre of the repair area and then using a circular motion, work outwards until the whole
repair area and about 2 inches of the surrounding original paintwork is covered. Remove all masking material 10 to 15 minutes after spraying on the final coat of paint. Allow the new paint at least 2 weeks to harden fully, then, using a paintwork renovator or a very fine cutting paste, blend the edges of the new paint into the existing paintwork. Finally, apply wax polish.
5
Major body repairs Where
serious damage
due to neglect,
it means
has occured or large areas need renewal certainly that completely
new
sections
or
panels will need welding in and this is best left to professionals. If the damage is due to impact it will also be necessary to completely check the alignment of the bodyshell structure. Due to the principle of construction the strength and shape of the whole can be affected by damage to a part. In such instances the services of a BMW agent with specialist checking jigs are essential. If a frame is left misaligned it is first of all dangerous as the vehicle will not handle properly and secondly uneven stesses will be imposed on the steering, engine and transmission, causing abnormal wear or complete failure. Tyre wear may also be excessive.
8.2a Armrest rear securing screw
7
Doors —tracing rattles and their rectification
1.
Check first that the door is not loose at the hinges, and that the
latch is holding the door firmly in position. lines up with the aperture in the body.
Check
also that the door
2 If the hinges are ioose or the door is out of alignment, it will be necessary to reset the hinge positions, as described in Section 11. 3 If the latch is holding the door properly, it should hold the door tightly when fully latched, and the door should line up with the body. If it is out of alignment, it needs adjustment. If loose, some part of the lock mechanism must be worn out and requiring renewal. 4 Other rattles from the doors may be caused by wear or looseness in the window winders, window channels, and interior latch release mechanism.
8
Door lock — removal, instailation and adjusting
1. Open the door to its fullest extent. 2 Remove the armrest retaining screws. The upper accessible after prising off the cover. Withdraw the armrest.
screw
is
3. Prise off the cover and then remove the interior door handle (one screw), noting its position. 4 Prise off the cover plate from the window regulator handle, and remove the now exposed screw. Pull off the handle, noting its position. 5 Insert the fingers between the interior trim panel and the door, and release the securing clips which are located all round the door. 6 _Lift the panel away, noting the coil spring located on the shaft of the window regulator. The larger diameter end of the spring faces the trim panel. 7 Peel the waterproof sheet from the inside of the door. 8 Remove the securing bolt from the window rear guide channel, pull the guide a little way out of the channel, and then withdraw the channel downwards. 9 Unhook the short rod from the handle and lock mechanism. 10 Release the interior door handle control mechanism, by removing the three securing bolts. 11 Unclip the long remote control arm from its guide, which is located behind the central door stay. 12 From the edge of the door, remove the guide plate by unscrewing the two key-headed securing screws. 13 Move the door lock cam to the closed position, and unscrew and remove the star headed securing screws to release the remote mechanism. 14 The complete lock control assembly can now be withdrawn from the door.
15 To rernove the lock barrel, pull the holding plate away from the
8.2b Armrest front securing screw
8.2c Armrest upper securing screw
Fig.
12.2.
Location
of door
lock
holding
plate and
direction
removal (arrowed)
Fig. 12.1. Removing the door handle to lock connecting rod
:
A
~~
,
retaining screw
8.4 Window regulator handle retaining screw
8.6 Window regulator shaft coil spring
8.10 Interior door handle remote Fa
mechanism securing bolts
of
This sequence of photographs deals with the repair of the dent and scratch (above rear lamp) shown in this photo. The procedure will be similar for the repair of a hole. It should be
In the case of a dent the first job - after removing surrounding trim - is to hammer out the dent where access is possible. This will minimise filling. Here, the large dent having been hammered
noted that the procedures given here are simplified - more
out, the damaged
area is being made slightly concave
explicit instructions will be found in the text
Now all paint must be removed from the damaged area, by rubbing with coarse abrasive paper. Alternatively, a wire brush or abrasive pad can be used in a power drill. Where the repair area meets good paintwork, the edge pf the paintwork should
In the case of a hole caused by rusting, all damaged sheet-metal should be cut away before proceeding to this stage. Here, the damaged area is being treated with rust remover and inhibitor before being filled
be ‘feathered’, using a finer grade of abrasive paper
Mw
Mix the body filler according to its manufacturer’s instructions. In the case of corrosion damage, it will be necessary to block
i
off any large holes before filling - this can be done with zinc
... applying the filler. Filler should be applied with a flexible applicator, as shown, for best results: the wooden spatula being used for confined areas. Apply thin layers of filler at 20-minute
gauze or aluminium tape. Make sure the area is absolutely clean before ...
surrounding bodywork
intervals, until the surface of the filler is slightly proud of the
Initial shaping can be done with a Surform plane or Dreadnought file. Then, using progressively finer grades of wet-and-dry paper, wrapped around a sanding block, and copious amounts of clean water, rub-down the filler until really smooth and flat. Again,
The whole repair area can now be sprayed or brush-painted with primer. If spraying, ensure adjoining areas are protected from over-spray. Note that at least one-inch of the surrounding sound paintwork should be coated with primer. Primer has a
feather the edges of adjoining paintwork
‘thick’ consistency, so will fill small imperfections
Again, using plenty of water, rub down the primer with a fine grade of wet-and-dry paper (400 grade is probably best) until it is really smooth and well blended into the surrounding paintwork. Any remaining imperfections can now be filled by carefully applied knifing stopper paste
When the stopper has hardened, rub-down the repair area again before applying the final coat of primer. Before rubbing-down this last coat of primer, ensure the repair area is blemish-free - use more stopper if necessary. To ensure that the surface of the primer is really smooth use some finishing compound
The top coat can now be applied. When working out of doors,
After a period of about two-weeks, which the paint needs to harden fully, the surface of the repaired area can be ‘cut’ with a mild cutting compound prior to wax polishing. When carrying out bodywork repairs, remember that the quality of the finished job is proportional to the time and effort expended
pick a dry, warm and wind-free day. Ensure surrounding areas are protected from over-spray. Agitate the aerosol thoroughly, then spray the centre of the repair area, working outwards with a circular motion. Apply the paint as several thin coats.
192
BB
on
OREO
Raha
Se
10.3 Window glass lower rail to guide plate
securing bolts
a
10.6 Window
ing screws
guide rail upper cover secur-
Chapter 12/Bodywork and fittings
193
——————————
barrel towards the front of the car. This will release the barrel from the door and it can then be pushed out of its locating hole. The key number
is stamped on the barrel housing. 16 The exterior door handle can be removed by unscrewing the two securing screws located under the handle, and then releasing it from the interior mechanism. 17 Installation is a reversal of the removal procedure, but make sure that the door handle mechanism in the door cavity is correctly located on the door handle, before finally tightening all the securing bolts.
9
Window regulator — removal and installation
1 Remove the interior trim panel as described in Section 8. 2 Peel back the waterproof sheet, to expose the window regulator securing bolts. 3 Temporarily refit the window regulator handle and fully close the window. 4 Unscrew and remove all but one of the window regulator securing bolts. 5 Holding the window in the closed position, remove the last securing boit, and then slide the regulator operating arm out of the window glass lower rail. 6 Withdraw the window regulator from the door cavity, and lower the door glass onto its stop. 7
Installation
is a ‘reversal
of the removal
procedure,
but smear
a
little grease onto the door glass lower rail before inserting the operating arm.
mounting.
Unscrew
the star headed
screws
and remove
the mirror
mounting from the door (see Section 23). 8 Installing is a reversal of the removal procedure, but rivet over the door stay pivot pin, and adjust the door as follows. 9 The outer surface of the door panel should be level with the front wing and rear side panel. Adjust the front of the door with shims inserted behind the hinge on the door. Adjust the rear of the door by slackening the catchplate located on the centre pillar. The catchplate also adjusts the vertical position of the door, which is easily checked by aligning the doormoulding with the rear side panel moulding. The door must also be centrally positioned between the front wing and the side panel, and this adjustment is made with shims inserted behind the hinges on the front pillar.
12
Windscreen and rear window — removal and installation
1 It is recommended that both these operations are left to professionals. Where the work is to be attempted, however, proceed in the following way. 2 Remove the wiper arms, the interior mirror or disconnect the leads from the heated rear window as appropriate. 3 Prise the bright trim from the rubber surround. 4 Runa blade round the lips of the rubber surround to ensure that it is not stuck to the body. 5 Have an assistant press one corner of the glass outwards while you pull the lip of the rubber over the body flange and restrain the glass from being ejected too violently. In the case of the windscreen,
the pressure is best applied by sitting in the front seats and wearing 10
Window glass — removal and installation
1 2 3
Remove the interior trim panel as described in Section 8. Peel back the waterproof sheet from the inside of the door. Detach the window glass lower rail from its guide plate by removing the two securing bolts. 4 With the window glass held in its closed position, lower the guide plate, and withdraw it from the guide channel. 5 Slide the regulator operating arm out of the window glass lower rail, whilst holding the window in the closed position.
6
soft soled shoes, placing the feet on the glass. 6 Unless the rubber surround is in perfect condition, renew it. Apply black mastic or sealant to the glass channel in the rubber surround and fit the surround to the glass. With the windscreen it is recommended that the bright trim is inserted into the rubber at this stage but with the rear window it is best to fit it after the glass has been installed. The use of a tool similar to the one shown will make the fitting of this trim easy.
Detach the window front guide channel from the door by removing
the lower securing bolt and the upper securing bolt. Lever back the door weatherseal to expose the guide rail upper cover securing screws. Remove the bolts and lower the front guide channel away from the window glass, at the same time, removing the upper cover. 7 Tilt the window glass forwards, so that the upper rear corner moves out over the top door trim, and then lift the complete glass away from the door. 8 Installation is a reversal of the removal procedure, but adjust the window top edge by loosening the guide plate securing bolts, fully closing the window, and then retightening the bolts. Lightly grease the window glass lower slide rail and the guide channel, before fitting the door interior trim panel.
11
Door -—removal, installation and adjusting
1 Remove the door interior trim panel, as described in Section 8. Disconnect the battery to prevent it discharging when the courtesy lamp switch is actuated.
2
Open the door fully, and support its lower edge on jacks or blocks
with some thick rag to protect the paintwork. Drill away the lower end of the door stay pivot pin, and then drive 3. the pin upwards and out of the bracket. Unscrew the two door stay securing bolts, and withdraw the assembly from inside the door cavity. Mark the position of each door hinge in relation to the door panel 4 and door pillar. Steady the door and then remove the hinge bolts. The
door can then be released from the hinges. Remove the door lock, window regulator, and window glass as 5 described in Sections 8,9, and 10 respectively. The window glass exterior weatherstrip can be removed by 6 carefully tapping it upwards with a narrow piece of wood, and the window guide strips can be removed from the upper frame of the door by levering them out of the location groove. To remove the driver's door exterior mirror, slacken the clamp 7
screw at the rear of the mirror base until the mirror is released from its
Fig. 12.5. Method of removing the windscreen
194
Chapter 12/Bodywork and fittings
7 Locate a length of cord in the rubber surround, in the groove which will engage with the body. Allow the ends of the cord to cross over and hang out of the groove at the bottom of the glass. 8 Offer up the glass and surround to the body aperture engaging the bottom groove. Push the glass downwards and inwards and have your assistant pull the ends of the cords evenly which will have the effect of pulling the lip of the surround over the body flange. 9 If necessary the nozzle of a mastic gun can be inserted under the outer lip of the rubber surround and a bead of sealant supplied all round to make a positive seal. Clean off any sealant according to the manufacturer's instructions and then refit the wiper arms, interior mirror or connect the heater element on the rear window.
13
Side window — removal and installation
1
Remove
the rear seat cushion
and back as described
in Section
28. 2 Insert the fingers behind the lower edge of the side trim panel, and pull it away from the securing clips. Lift the panel up to disconnect it from the upper spring clips. 3 Slide the seat belt guide out of the trim panel, and remove the trim panel. 4 Have an assistant press the top corner of the glass outwards, while you pull the lip of the rubber over the body flange and restrain the glass from being ejected too violently. Place a thick piece of rag against the window glass for the assistant to press on with his feet. 5 If the outer lip of the rubber surround sticks to the body free it with a knife blade, being careful not to damage the surrounding paintwork. 6 With the window removed, pull away the rubber surround, and check its condition. If it shows signs of wear, renew it, but, if the old surround is being reused, clean the sealing compound from its surface. 7 Refit the rubber surround to the window glass. 8 If the chrome moulding strips have been removed from the sur‘round, it is suggested that these be reinserted before the window is installed. Insert the vertical strip first, then the upper strip, and finally, the lower horizontal strip.
9
Press
a length
of sealing
card
into the
upper
section
of the
window's aperture, and apply some sealing compound to the corners of the aperture. 10 Locate a length of card in the rubber surround, in the groove which will engage with the body, and allow the ends of the cord to cross over and hang out of the groove at the bottom of the glass. 11 Place the window against the aperture while an assistant presses from outside, pull the cord out of the surround groove, which will effectively locate the inner lip of the rubber surround onto the window aperture inside the car. 12 Firmly strike the exterior of the window with the flat of the hand a number of times around the edges, to ensure it is fully located, and then seal the surround with sealing compound. 13 Install the interior side trim panel and then refit the rear seat as
described in Section 28.
14
Bonnet lid — removal, installation and adjusting
1
Release the bonnet lock by pulling the handle located beneath the
14.2 Bonnet lid hinge plates
front fascia shelf. On right-hand drive cars it will be necessary to first open the glove box. 2 Fully open the bonnet lid and mark the position of the hinge plates on the bonnet.
3 Unscrew and remove three of the hinge bolts from each side, and loosen the remaining bolts. 4 Detach the support arms from the front body panel, by unscrewing and removing the nuts and pulling the arms off their pivots, at the same time, holding the attached bonnet springs in tension. 5 Note the position of the arms on the bonnet springs, and then unhook them. 6 Close the bonnet to its safety position and, working under the front of the bonnet, unscrew the remaining hinge bolts while an assistant presses rearwards on the spring tensioned pivot bar. This will assist in removing the bolt and prevent the bar from springing forwards. 7 Carefully release the pivot bar to its stop position, and lift the bonnet away from the car. 8 Installation is a reversal of the removal procedure but, before finally tightening the hinge bolts, make sure that the bonnet is centrally
positioned when shut. The gap between the front door and the bonnet should be uniform and equal on both sides. 9 The bonnet outer side panel should be approximately 0-04 in (1 mm) wider than the door panel to eliminate wind noises, and this position can be adjusted on the catch located on the bodyframe and the
bonnet guide wheel located on the bonnet. Loosen the securing bolts and move each item as necessary before finally tightening. 10 The adjustable buffers located on each front corner of the bonnet should be adjusted, so that the bonnet is firmly supported when shut.
15
Bonnet lock — adjustment
1
Inside the car push the bonnet catch release lever against its front
stop.
2 With the bonnet fully opened, loosen the cable locking bolt on the lock mechanism. 3 With the cable free, make sure the lock is in its fully shut position and then tighten the cable, and bend the end over. 4 Have an assistant pull the release lever inside the car, and check that the lock functions correctly. 5 Close the bonnet and press it into its locked position. 6 In the event of the release cable breaking with the bonnet shut, remove the front left grille and, with the aid of a screwdriver, slacken the lock catch stop screw, on the front of the lock.
16
Luggage boot lid — removal, installation and adjusting
1 Fully open the luggage boot lid and mark the position of the hinge bolts. 2 Unbolt the hinges and lift the lid from the car taking care not to damage the paintwork. 3 Installation is a reversal of the removal procedure, but adjust the lid to give a uniform gap between the rear side panel and the lid, by moving it within the limits of the elongated bolt holes. 4 Remember that if the position of the lid is altered, then the lock and striker plate will need adjustment, after loosening their securing
14.4 Bonnet lid side support arms
15.2 Bonnet lock location
195
F
g. 12.7. Bonnet lock cable locking bolt
H7067
see
16.2 Luggage boot lid hinge
Fig. 12.8. Emergency lock release screw, on the bonnet lock
96
Chapter 12/Bodywork and fittings
ak
bolts. 5 Adjust the rubber support buffers on the luggage bootlid, so that the lid is firmly supported when shut without any tendency to rattle.
17
Luggage bootlid lock — removal, installation and adjusting
1 Open the luggage bootlid and mark the position of the catch securing bolts. 2 Unscrew and remove the catch securing bolts, and lift out the catch. 3 With a box spanner inserted from inside the luggage compartment, unscrew the lock securing ring and withdraw it. 4 Push the lock out of its locating hole and withdraw it from the rear of the car. 5 The key number is stamped on the shank of the pushrod. 6 Installation is a reversal of the removal procedure, but adjust the catch so that the bootlid is level with the rear side panels. 7 The rubber support buffers should be adjusted to give firm support to the bootlid when shut.
Fig. 12.9. Bumper rubber strip clip positions (arrowed) and retaining nut (3) 18
Bumpers— removal and installation
1 The front and rear bumpers are each assembled with three sections — one centre section and two side sections. 2 To remove the complete bumper, simply unscrew the retaining bolts and nuts at the brackets and wheelarches. On North American models it will be necessary to detach the centre section from the shock absorber brackets. 3 The procedure for removing the rear bumper is the same as for the
front, but remove the number plate light leads first. 4 With the bumper removed, each section can be separated by unscrewing the securing bolts, after unclipping the rubber strip. 5 Installation is a reversal of the removal procedure, but any worn or perished rubber mountings should be renewed, together with any
unserviceable retaining clips.
19
Bumper shock absorbers — removal and installation
1 These are fitted to North American models, and access to them is gained by removing the front or rear bumper as necessary. 2 In the case of the front shock absorbers, it will be necessary to remove the lower grille panels. 3 Unscrew and remove the clamp pinch bolt. 4 Unbolt the shock absorber from the bodyframe and withdraw it from its location. 5 Installation is a reversal of the removal procedure.
20
Radiator grille — removal and installation
1
Pull the bonnet release handle inside the car, and open the bonnet
Fig. 12.10.
Bumper
shock
absorber clamp bolt (North American
models) fully. 2 The centre section grille is retained by two self-tapping screws located on the top flange of the grille. Unscrew and remove them and
H7055 17.1 Luggage boot lid catch
Fig. 12.11. Radiator side grille retaining screws
Chapter 12/Bodywork and fittings lift the grille out. 3 Before removing a side grille it is necessary corresponding indicator lens and bulbholder.
to withdraw
197
the
4 Unscrew the two lens securing screws and pull the lens away. 5 Inside the bulbholder, unscrew and remove the two retaining screws, and withdraw the complete bulbholder complete with lead. Separate the connecting plug located by the fusebox in the engine
compartment, and then lever the rubber grommet out of its locating hole and pull the lead through. 6 The side grille can now be released by removing the star headed retaining screws. 7 Installation is a reversal! of the removal procedure, but make sure the plug connector and grommet are firmly in place.
21
Air outlet moulding (rear) — removal and installation
1 Remove the side window as described in Section 13. 2 Unscrew the topmost securing screw, and push the roof moulding forwards. 3 Remove the remaining securing screws, and lift the air outlet moulding away from the body. 4 Installation is a reversal of the removal procedure, but seal the upper edge of the moulding before assembling it to the body.
22
Fig. 12.12. Exterior mirror retaining screw
Front door rubbing strip — removal and installation
1 Fully open the front door. 2 The rubbing strip is attached to the door panel by nuts at the front and rear ends, and by clips along the centre section. First unscrew and
remove the nuts, located on the inside of the door panel flanges. 3 Lift the rubbing strip off the clips and away from the door. 4 Before installing, check that the clips are in good condition and make sure that the strip is positioned in line with the rubbing strips on the front wing and side panel.
23
Rear view mirrors — removal
1 car, 2 the
The interior mirror is removed by pulling it towards the rear of the and, at the same time, bending it upwards. The external mirror mounted on the door is removed, by prising up rubber cover and unscrewing the retaining screw.
24
Glove compartment -— removal
1.
Open the glove box, and unscrew the hinge retaining bolts at the
Fig. 12.13. Central shelf securing screws
rear of the compartment. €xtract the plastic pin from the stop bracket, and lift the glove box 2 away towards the rear of the car.
25
Shelf compartment (gearstick) — removal and installation
Unscrew and remove the two securing screws on each side of the 1 shelf compartment. Unscrew the gear lever knob, and withdraw the rubber bellows 2 and gear lever cover from the gear lever. 3 Pull out the shelf floor. 4 Disconnect the battery negative terminal. From the now exposed interior section of the shelf, unscrew and 5 remove the shelf clamp bracket retaining nut. Separate the plug connection from the supply lead to the ashtray 6 light and, should a radio be fitted, disconnect the earth lead, speaker leads, supply lead, and aerial lead. Withdraw the shelf compartment towards the rear of the car. 7 Installation is a reversal of the removal procedure. 8
26
Fascia panel (front upper) — removal and installation
1 2
Disconnect the battery negative terminal. Remove the instrument panel as described in Chapter 10, Section
Fig. 12.14. Central shelf clamp bracket retaining nut (arrowed)
198
Chapter 12/Bodywork and fittings
rE, >
(= gies)
H7058
3
4
Fig. 12.15. Heater panel retaining screws (1 to 4) 26. 3 Remove the glove compartment as described in Section 24. 4 Remove the now exposed cover panel from its location next to the centre console by unscrewing the upper and lower retaining screws. 5 Carefully pull off the heater control knobs and slide buttons, and unscrew the star headed securing screws located in each end of the slide slots. Do not remove the screws in the temperature control slot, the lower screw in the warm air slot, or the upper screw in the right ventilation control slot, as these do not retain the panel (see Fig.
221.5)e
a i \\ eee AN
6 Withdraw the heater control panel and separate the connector plug in the supply lead. 7 Disconnect the heater fan switch supply lead, and the clock supply
lead (when fitted). 8 Remove the loudspeaker supply leads (when fitted). 9 Prise the heater control cable clips away, and release the inner cables from the operating arms. 10 From behind the heater control panel aperture, carefully press out towards the rear of the car the press button switches for the fog lights and heated rear window, when these items are fitted. Mark, with adhesive tape, the location of the supply leads and then pull them off their respective switches.
11 Insert a short rod of suitable diameter into the main light switch shaft, to prevent it from turning, and unscrew the control knob. 12 Using a pin screwdriver, unscrew the main light switch lockplate, withdraw the switch from the rear of the panel, and detach the multipin plug.
13
Disconnect the connector plug from the hazard warning switch.
14
From
within
the
instrument
panel
aperture,
pull the instrument
light bulbholders out of their brackets on the underside of the fascia panel, and release the supply cable from the securing clips.
Fig. 12.17. Headrest adjusting holders and locknuts (1 and 2)
15 Unscrew the fascia panel retaining nut, located above the bonnet release handle. 16 Unscrew and remove the fascia panel retaining screw, located in the instrument panel aperture. 17 Detach the glove box hinge, and remove the glove compartment light, and supply cable. 18 Release the fascia panel brackets from the crossmember above the glove compartment, by unscrewing the retaining nuts concealed in the crossmember. The access hole is in the crossmember. 19 Unscrew the fascia panel retaining nut, located on the extreme right, and, on North American models, disconnect the service interval plug connector.
Chapter 12/Bodywork and fittings 20 Remove the lower fascia panel from its location over the steering column, by unscrewing the retaining screws. 21 Snap open the springclips located at the left and right of the heater motor cover, and remove the complete panel at the same time disconnecting the heater air hoses. This is best accomplished by removing one end of the panel first and then removing the remainder, working across to the further end. 22 Installation is a reversal of the removal procedure, but push the fascia panel fully forwards before finally tightening the securing nuts and bolts. Make sure the electrical wires are firmly fitted to their respective terminals, before reconnecting the battery terminal.
27
Front seat — removal, installation and adjusting
1 Pull up the seat adjustment lever located below the outer edge of the seat, and push the seat fully rearwards. 2 Unscrew and remove the two retaining bolts from the front of the
199
the front edge of the sliding roof is about 0-040 inches (1 mm) lower than the front roof panel. 3 Tighten the star headed screws. 4 The rear height adjustment is made by slackening the two star headed screws on each side, and moving the sliding roof within the elongated holes. Ideally, the rear edge of the sliding roof should be 0-040 inches (1 mm) higher than the outer roof panel, to eliminate wind noises. 5 After adjusting, tighten the star headed screws, and refit the headlining frame. 6 When the sliding roof switch is set to the lifting position, the roof must be positioned centrally within the roof aperture. If this is not the case, open the roof fully to expose the runner and stop pin bracket. 7 Loosen the two screws and move the bracket to give the correct stop position. Tighten the screws securely, after the adjustment.
30
Sliding roof — removal and installation
1
Fully open the sliding roof.
seat slide channels. 3 With the seat adjustment lever lifted, push the seat fully forwards to expose the rear retaining bolts. 4 Unscrew and remove the two retaining bolts from the rear of the seat slide channels, and lift the seat out. 5 Installation is a reversal of removal, but, should the seat require adjusting, loosen the catch retaining bolts, and move the catch until it engages with the seat runner. Tighten the bolts after adjusting. 6 The headrest can be adjusted by removing the panel from the rear of the seat, to expose the adjusting locknuts. Turn the cable holders to give the required movement, and then tighten the locknuts and refit the panel.
2 On each side of the aperture, unscrew and remove the guide retaining screws and lift out the guide rails. 3 Shut the sliding roof to within 2 inches (5 cm) of the fully closed position, and carefully pull down the front edge of the headlining frame, sliding it back as far as it will go. 4 Shut the sliding roof, and unscrew and remove the triangular spaced
retaining nuts at the rear of the roof. Take particular care to
remove
any shims which may be fitted behind the mounting bracket
for height adjustment. 5 Carefully lift the sliding roof away from the car.
6 Inspect the sealing rubber around the sliding roof perimeter, and renew it if it is worn or perished. 28
7 Installation is a reversal of the removal procedure, but apply a thin smear of grease to the guide rails before assembling them.
Rear seat — removal and installation
1. Prise open the plastic covers located beneath the front edge of the rear seat cushion. 2 Unscrew and remove the retaining bolts and lift out one end of the seat cushion first. 3 Remove the cushion to expose the backrest retaining screws. 4 Unscrew and remove the backrest retaining screws, and lift the backrest upwards out of its location. 5 Installation is a reversal of the removal procedure. nn ne caeeUUUEEnEnENEE SSSIEEUU
29 Sliding roof — adjustment oe Be So ele ee a
EE
EERE
31
Heater and ventilation system — description
1 A fresh air type heater is installed, which gives a very wide choice of temperature and air flow pattern according to the setting of the fascia panel control levers.
2 The heat for the system comes from the engine coolant, and fresh air is admitted through the grille just below the windscreen, while stale air is exhausted through slots below the rear window, which are connected to ducts located on the rear edge of the side windows.
———
1 If the sliding roof needs adjusting, first open it by about 2 inches (5 cm) and carefully pull down the front edge of the headlining frame, and slide it back as far as it will go. 2 Shut the roof and adjust the front height, by loosening the two star headed screws on each side, and turning the adjustment screw until
\ \
\ H7060
(arrowed) Fig. 12.18. Sliding roof rear height adjustment screws
32
Heater — removal and installation
1 2
Remove the central gearstick shelf as described in Section 25. Remove the centre cover panel located by the giovebox,
by
Fig. 12.20. Location of heater cover securing screws
iw
Fig. 12.23. Heater impeller cover spring clips
Fig. 12.22. Removing the heater matrix
Fig. 12.24. Heater motor supply lead connectors
Chapter 12/Bodywork and fittings unscrewing and removing the retaining screws. 3 Move the temperature control on the heater panel to ‘warm’, and drain the coolant from the cooling system as described in Chapter 2. 4 Loosen the jubilee clips, and remove the two heater bores located
on the front of the engine compartment bulkhead. 5 Prise the cover panel away from the bulkhead, over the heater outlet pipes. 6
Remove
the
heater
control
panel
as described
and withdraw in Section
it 26,
paragraphs 5, 6 and 7, from inside the car. 7 Release the heater control lever bracket by unscrewing the four retaining screws now exposed (see Fig. 12.19). 8 Snap open the heater cover clips located inside the car beneath the heater motor, and remove the cover. 9 Unbolt the heater lower retaining clamp from inside the car. 10 Carefully withdraw the heater motor supply plug from the rear of the heater casing. 11 With the bonnet opened, detach the bonnet rear rubber seal, and unscrew the heater cover retaining screws. Remove the cover to expose the heater motor. 12 Prise the water deflector shields off each end of the heater motor. 13 Unscrew and remove the heater upper mounting nuts and washers. 14 From inside the car, lower the complete heater assembly and
control bracket at the same time turning it and withdrawing it into the car. Disconnect the demister bellows as the heater is removed. 15 Installation is a reversal of the removal procedure, but fill the cooling system as described in Chapter 2.
34
and unscrew the heater upper mounting nuts. 3 Snap open the two impeller cover clips, pull out the plastic retaining studs, and lift off the two covers. 4
Snap
open
the
heater
motor
retaining
clip, separate
the supply
lead connectors and lift the motor away from the casing. 5 Unbolt the supply pipes from the heater matrix, unscrew the pipe retaining nut and lift out the pipes. 6 Separate each half of the heater assembly by removing the spring clips and feeding the supply cable through the rubber grommet. 7 Lift out the now exposed heater matrix. If it is blocked, flush it out with water, but, if it is damaged, renew it. 8
Snap
open
the heater
motor
retaining
clip, separate
the supply
lead connectors, and lift the motor away from the casing. 5 The heater motor is finely balanced by the manufacturers, and no attempt should be made to remove the impellers or shaft from the motor. 6
Installation is a reversal of the removal procedure.
35
Demisting and fresh air ducts — removal and installation
1
Access to the demisting and fresh air ducts is gained by removing
the front upper fascia panel as described in Section 26.
2 Removal is simply a matter of unscrewing the retaining nuts and disconnecting the air hoses. 3 Installation is a reversal of removal.
Air conditioning system — general
Heater matrix — removal and installation
1 Remove the heater as described in Section 32. 2 Snap open the two impeller cover clips and pull out the plastic retaining studs. 3. Lift off the two covers. 4
Heater motor — removal and installation
1 The heater motor can be removed from the engine side of the bulkhead. First remove the heater cover retaining screws and lift off the cover. Disconnect the battery negative terminal. 2 Prise off the water deflector shields from each side of the heater,
36 33
201
Installation
is a reversal
following checks. When
of the removal
procedure,
but make the
refitting the two halves of the heater together,
make sure that the air flap bearings are seated correctly in the pivot holes. Check the condition of the rubber foam, and matrix gasket, and renew them as necessary.
1 Where the car is equipped with an air conditioning system, the checks and maintenance operations must be limited to the following items. No part of the system must be disconnected, due to the danger from the refrigerant which would be released. Your BMW dealer or a refrigeration engineer must be employed if the system has to be evacuated or recharged. 2 Regularly check the condition of the system hoses and connections. 3 Inspect the fins of the condenser, and brush away accumulations of flies and dirt. 4 Periodically check the adjustment of the compression drivebelt. 5 Keep the air conditioner drain tube clear. This expels condensation produced within the unit to a point under the car. 6 When the system is not in use move the control to the ‘off’ position. During the winter period, operate the unit for a few minutes every three or four weeks to keep the compressor in good order. 7 Every six months, have your BMW dealer check the refrigerant level in the system and the compressor oil level.
i
32.4 Heater hose location at bulkhead
34.1
Heater motor location
202
37
Chapter 12/Bodywork and fittings
Fault diagnosis — heater
Symptom
Reason/s
Insufficient heat
Faulty or incorrect type cooling system thermostat. Coolant level too low. Faulty heater cock. Faulty ventilator valve.
Insufficient airflow
Ventilator or heat valve not operating correctly. Blower speed too low or non-existent due to blown fuse.
Faulty air deflection or temperature generally
Incorrectly adjusted cables. Disconnected demister hoses.
Use of English As this book
has been written in England, it uses the appropriate
English component
names, phrases, and spelling. Some of these
differ from those used in America. Normally, these cause no difficulty, but to make sure, a glossary is printed below. In ordering spare parts remember the parts list will probably use these words:
Glossary English
American
Accelerator Alternator
Gas pedal Generator (AC)
Leading shoe (of brake) Locks Re
Primary shoe Latches Freeway, turnpike etc.
Anti-roll bar
American
Stabiliser or sway bar
Motorway
ae
Energizer
Number plate
Licence plate
Bonnet (engine cover Boot lid nf
Hood Trunk lid
Paraffin Petrol
Kerosene Gasoline
Boot (luggage compartment)
Trunk
Petrol tank
Gas tank
Bottom gear
1st gear
‘Pinking’
‘Pinging’
Firewall
Propellor shaft
Driveshaft
Camfollower or tappet
Valve lifter or tappet
Quarter light
Quarter window
Carburettor
Carburetor
Retread
Recap
Catch Choke/venturi
Latch Barrel
Reverse Rocker cover
Circlip Clearance
Snap ring Lash
Roof rack Saloon
Back-up Valve cover Car-top carrier Sedan
Crownwheel Disc (brake)
Ring gear (of differential) Rotor/disk
Seized ce Side indicator lights
Drop arm
Pitman arm
Side light
Drop head coupe
Convertible
Silencer
Dynamo Earth (electrical)
Generator (DC) Ground
Spanner ss Sill panel (beneath doors)
Battery
Bulkhead
=
English
ae
ae
Frozen Side marker lights Parking light
Ba
Muffler
Wrench Rocker panel Split cotter (for valve spring cap) Lock (for valve spring retainer)
Prussion blue
Engineer's blue Estate car
se
Split pin
Exhaust manifold Fast back (Coupe)
Station wagon Header Hard top
Steering arm Sump
Cotter pin Spindle arm Oil pan
Fault finding/diagnosis Float chamber
Trouble shooting Float bow
Tab washer Tailgate
Tang; lock Liftgate
Free-play Freewheel Gudgeon pin
Lash Coast Piston pin or wrist pin
Tappet Thrust bearing Top gear
Valve lifter Throw-out bearing High
as
ive
Tie-rod (or connecting rod)
Trackrod (of steering
Shift
Gearchange
se
Secondary shoe
Gearbox
Transmission
Trailing shoe (of brake)
Halfshaft
Axle-shaft
Transmission
Handbrake Hood
Parking brake Soft top
Tyre Van
Tire Panel wagon/van
Heat riser
Vice
Vise
Turn signal Dome lamp Counter shaft
Wheel nut Windscreen Wing/mudguard
Windshield Fender
Hot spot
Indicator Interior light Layshaft (of gearbox
= ae
:
Whole drive line
Lug nut
,SO”O”CT””C*“E
ane
i
S
e
Neen
eee
Miscellaneous points ———
ee
ee
en
a
ne
components lubricated by grease!
“Oil seal” is fitted to of bump impact. Both names are correct, and both tahoe is a “Shock absorber” it damps out bouncing, and absorbs shocks
type that is common in America, so different descriptive names result, ‘ aa peasant bien brakes are different from the Bendix ited pivot; interconnection between the shoes as on Bendix aint a on is cylinder wheel hydraulic the The ae end furthest from to be Leading or ibaa tedA foe na said is shoe A apply. not does shoe ”’ ‘’Secondary or uncommon. Therefore the phrase “Primary” before the the hydraulic cylinder
reaches the shoe at the end worked by shoe is one on which a point on the drum, as it rotates forward, servo from the wrapping effect of the rotating drum. self no has one this and shoe, trailing a is anchor end. The opposite
Metric conversion tables Decimals
0.015625 0.03125 0.046875 0.0625 0.078125 0.09375 0.109375 0.125 0.140625 0.15625 0.171875 0.1875 0.203125. 0.21875 0.234375 0.25 0.265625 0.28125 0.296875 0.3125 0.328125 0.34375 0.359375 0.375 0.390625 0.40625 0.421875 0.4375 0.453125 0.46875 0.484375 0.5 0.515625 0.53125 0.546875 0.5625 0.578125 0.59375 0.609375 0.625 0.640625 0.65625 0.671875 0.6875 0.703125 0.71875 0.734375 0.75 0.765625 0.78125 0.796875
0.8125 0.828125 0.84375 0.859375 0.875 0.890625 0.90625 0.921875 0.9375 0.953125 0.96875 0.984375
Millimetres
0.3969 0.7937 1.1906 1.5875 1.9844 2.3812 2.7781 3.1750 3.5719 3.9687 4.3656 4.7625 5.1594 575562 5.9531 6.3500 6.7469 7.1437 7.5406 7.9375 8.3344 8.7312 9.1281 9.5250 WIZI9 10.3187 10.7156 11.1125 11.5094 11.9062 12.3031 12.7000 13.0969 13.4937 13.8906 14,2875 14.6844 15.0812 15.4781 15.8750 16.2719 16.6687 17.0656 17.4625 17.8594 18.2562 18.6531 19.0500 19.4469 19.8437 20.2406 20.6375 21.0344 21.4312 21.8281 22.2250 22.6219 23.0187 23.4156 23.8125 24.2094 24.6062 25.0031
Millimetres to Inches mm Inches
0.01 0.02 0.03 0.04 0.05 0.06 0.07
0.00039 0.00073 0.00118 0.00157 0.00197 0.00236 0.00276 0.00315 0.00354 0.00394 0.00787 0.01181 0.01575 0.01969 0.02362 0.02756 0.03150 0.03543 0.03937 0.07874 0.11811 0.15748 0.19685 0.23622 0.27559 0.31496 0.35433 0.39370 0.43307 0.47244 0.51181 0.55118 0.59055 0.62992 0.66929 0.70866 0.74803 0.78740 0.82677 0.86614 0.90551 0.94488 0.98425 1.02362 1.06299 1.10236 1.14173 1.18110 1.22047 1.25984 1.29921 1.33858 1.37795 1.41732 1.4567 1.4961 1.5354 1.5748 1.6142 1.6535 1.6929 1.7323 1.7717
Inches to Millimetres Inches mm
0.001 0.002 0.003 0.004 0.005 0.006 0.007 0.008 0.009 0.01 0.02 0.03 0.04 0.05 0.06 0.07 0.08 0.09 0.1 0.2 0.3 0.4 0.5 0.6 0.7 0.8 0.9 1 2 3 4 5 6 ih 8 9 10 id 12 13 14 15 16 17 18 19 20 21 22 23 24 25 26 27 28 29 30 31 32 33 34 35
0.0254 0.0508 0.0762 0.1016 0.1270 0.1524 0.1778 0.2032 0.2286 0.254 0.508 0.762 1.016 1.270 1.524 1.778 2.032 2.286 2.54 5.08 7.62 10.16 12.70 15.24 17.78 20.32 22.86 25.4 50.8 76.2 101.6 127.0 152.4 177.8 203.2 228.6 254.0 279.4 304.8 330.2 355.6 381.0 406.4 431.8 457.2 482.6 508.0 533.4 558.8 584.2 609.6 635.0 660.4 685.8 TAN 736.6 762.0 787.4 812.8 838.2 863.6 889.0
index A Accelerator cable — 67
fuel injection — adjustment — 63 removal and installation — 67
Accelerator Linkage — 113 Accelerator pedal — 67 Air cleaner — 51
Air conditioning system — 201 Air intake pre-heat valve — 52 Air outlet moulding — 197 Alternator
windscreen and rear window — 193
brush renewal — 138 removal and installation — 138
Braking system brake drum — 129
testing — 138
brake force limiter — 135
Antifreeze — 45 Automatic transmission
brake pedal — 129 brake pressure differential switch — 135 caliper — 128 fault diagnosis — 135 flexible brake hoses — 132 front brake disc — 128
Accelerator Linkage — 113 fault diagnosis — 115 front oil seal —
luggage boot lid - 194 maintenance — 186 major body damage — 188 minor body damage — 187 radiator grille — 196 rear seat — 199 rear view mirrors — 197 shelf compartment — 197 side windows — 194 sliding roof — 199 window glass — 193 window regulator — 193
114
general description — 113 rear oil seal— 114 removal and installation — 113 routine maintenance — 113 specifications — 110
front disc pads — 125 general! description — 125 handbrake adjustment — 125
speedometer driven gear pinion O-ring — 115 speed selector lever and switch — 113 speed selector linkage — 113 transmission selector lever shaft sealing ring— 115
B Battery
charging — 138 electrolyte replenishment — 138 maintenance and inspection — 138 removal and installation — 137 Bodywork and fittings bonnet lid — 194 bonnet lock — 194 bumper shock absorbers — 196 bumpers — 196 demisting and fresh air ducts — 201 door lock — 188 door — 188 fascia panel — 197
fault diagnosis — 202 front door rubbing strip — 197 front seal — 199 general description — 186 glove compartment — 197 heater and ventilation system — 199 heater matrix — 201 heater motor — 201 heater removal — 199
handbrake cable -- 134 hydraulic system — 132 master cylinder-- 129 rear brakes— 125, 127 rear wheel cylinders — 129 rigid brake lines — 132 specifications — 124 vacuum servo — 131
Bulbs— 141 Buying spare parts — 5
Caliper overhaul — 128 removal and installation — 128 Carburettor fault diagnosis — 73 general description — 55 overhaul — 56 removal and installation — 56 slow running adjustment — 55 specifications — 50 Clutch
bleeding hydraulic system — 86 fault diagnosis — 89 general description — 83 inspections and renovation — 87 installation — 88 master cylinder — 85 pedal — 84
206
Index release bearing — 88 removal — 86 slave cylinder — 86 specifications — 83
Coil — 80 Cold start valve and heat/time switch — 66 Condenser — 77 Contact breaker adjustment and lubrication — 76 points removal and installation — 77 Cooling system antifreeze mixture — 45 draining — 44 fan belt — 48 fan blades — 48 fault diagnosis — 49 flushing — 45 filling — 45 general description — 44 radiator — 45 specifications — 44 thermostat — 47 water pump — 47 Crankcase emission control system — 68 ventilation system — 33 Crankshaft and main bearings examination and renovation — 29 installation — 33 removal — 28 Cylinder head decarbonising and examination — 33 installation — 41 reassembly of valves, rocker shafts and camshaft — 39 removal and dismantling — 21
D Distributor overhaul — 80 removal, installation and ignition timing — 78 Doors lock — 188 removal, refitting and adjusting — 193 tracing rattles and their rectification — 188 Driveshafts flange oil seals — 121 removal and installation — 123
E Electrical system alternator — 138 battery — 137 bulbs — 141 clock— 147 direction indicator — 143 electrolyte replenishment — 138
fault diagnosis — 153 fuel gauge — 149 fuses — 141 general description — 137 head and side light switch — 145 headlamps — 143 heater fan switch — 145 horns — 149
ignition switch — 145 indicator and dip switch — 145 instrument panel and instruments — 147 radios and tape players — 149 reversing light switch — 146 service interval switch — 146 specifications — 136 speedometer head and cable — 147 starter motor — 138 tachometer— 147
temperature gauge — 149 transmission switch — 145 warming buzzer system — 149 windscreen wipers — 143 wiring diagrams — 156 — 167 Emission control systems—17 72 Engine ancillary components — 21, 42 automatic transmission, flywheel — 35 automatic transmission, installation — 42 automatic transmission, removal — 20 camshaft — 23 connecting rods — 28, 35 crankcase ventilation system — 33 crankshaft and main bearings — 24, 33 cylinder bores — 30 cylinder head — 21, 33,39, 4 dismantling — 20 examination and renovation — 29 fault diagnosis — 43 flywheel — 28, 31 general description — 16 installation (carburettor type) — installation (fuel injection type) —
installation (without gearbox) — major operations with engine in position — 16
oil filter — 33 oil pump — 25, 33 oil seals — 33 pistons — 28, 30 preparation for reassembly — 33
removal (carburettor type) — 17 removal (fuel injection type) — 19 removal, general — 17
removal (without gearbox) — 19 rocker arms — 25, 31 specifications — 12 start-up — 42 sump — 25, 39 timing chain and gears— 31 timing and components — 27, 37 valve clearances — 41 valve guides — 30 valve and valve seats — 30 Exhaust emission control system — 68 F
Final drive unit and driveshafts driveshaft flange oil seals — 121 driveshafts — 123 fault diagnosis — 123 final drive unit removal and installation — flexible bellows — 123 general description — 119 pinion oil seal— 121 routine maintenance — 119 specifications — 119 Fuel system
119
additional air slide — 65 air cleaner — 51 air intake preheat valve — 52 cold start valve — 66 fault diagnosis — 73 filter (EGR) — 70 fuel distributor —65 fuel evaporative emission control system — 71 fuel filter — 52 fuel idle shut off valve — 59 fuel injection system description — 61 fuel injection system servicing — 62 fuel injection system slow running adjustment— 63 fuel injection system throttle butterfly valve — 63 fuel pressure relief valve — 59 fuel pressure storage unit — 61 fuel pump (electric) —
Index fuel pump (mechanical) — 53 fuel pumps— 53
ee
ae
SS
EE
SSS
R
fuel tank level sensor— 61 fuel tank removal and installation — 54 general description — 51 injectors —65 mixture regulator — 63 specifications — 50 temperature sensors — 59 vacuum regulator — 67 warm up regulator — 65
Radios and tape players
fitting — 149 removal and installation — 149 suppression of interference — 151 Reactor (EGR) system — 71 Rear wheel cylinders overhaul — 129 removal and installation — 129 Routine maintenance — 8
Speedometer drive bushing sealing ring — 92 driven gear pinion O-ring — 115 head and cable — 147 Starter motor
Gearbox (manual) fault diagnosis — 110 general description — 90 input shaft oil seal — 93 oil seals — 92 output flange oil seals — 92 overhaul — 93 overhaul (5-speed) — 103 removal and installation — 90 selector shaft oil seal — 92
description and testing — 138 overhaul — 140 removal and installation — 140 Sump installation — 39 removal — 25
specifications — 90
speedometer drive bushing sealing ring — 92 General dimensions and capacities — 6
Suspension and steering fault diagnosis — 185 front front front front
H Headlamps
crossmember — 171 hub bearings — 170 lower suspension arm — 173 stabiliser bar — 175
front suspension — 171
beam alignment — 143 removal and installation — 143 Heater description — 199 fan switch — 145 matrix — 201 motor — 201 removal and installation — 199
7 Ignition system coil — 80 condenser— 77 contact breaker — 76 contact breaker points — 77 distributor — 78 fault diagnosis — 82 general description — 76 spark plugs — 80 specifications — 75
general description — 170 maintenance and inspection — 170 rear axle crossmember — 176 rear coil spring— 178 rear hub bearings — 175 rear shock absorber — 177 rear stabiliser bar — 178 rear stub axle— 175 rear suspension — 178 specifications — 168 steering angles — 184 steering column lock — 180 steering column removal — 179 steering gear overhaul — 181
steering gear removal and installation — 180 steering shaft — 179 steering wheel — 178
trackrods and balljoints — 183 tyres, fault diagnosis — 185 wheels and tyres — 184
Tools and working facilities — 9
Jacking and towing points — 6
M Vacuum
servo
filter renewal — 132
Maintenance bodywork and underframe — 186
hinges and locks — 188 upholstery and carpets — 186 Master cylinder (braking system)
general description — 131 non-return valve renewal — 132 removal and installation —.132 Vehicle identification numbers — 5
overhaul — 131 removal and installation — 131
Ww
P Propeller shaft
centre bearing — 118 fault diagnosis — 118 flexible coupling — 116 general description — 116 removal and installation — 116 specification — 116
Water pump description — 47 overhaul — 47 removal and installation — 47
Windscreen wipers blades and arms — 149 delay relay — 143 motor and linkage — 149 switch — 145
ee
207
Printed
Haynes Sparkford
by
Publishing
Group
Yeovil Somerset England
Models covered BMW
316, 4-cylinder, 1573 cc, 1975 to 1977
BMW 320, 4-cylinder, 1990 cc, 1975 to 1977
:
BMW 320i, 4-cylinder, 1990 cc, 1975 to 1977
Haynes Owners Workshop
Manuals are written with the home
luxury of a well equipped
workshop
model.
A second-hand
example
mechanic
or factory service tools. Each
is purchased
ae
in mind who does not have the
manual
covers a specific make
and is used as the basis for the manual.
and
Before overhaul
begins the author undertakes considerable research into the model range and modification history, talking
with the manufacturers, dealers, repair specialists and owners.
Each
manual
presents
the dismantling,
overhaul
and reassembly
in a logical sequence
component parts in the minutest detail. Also included are comprehensive fault finding charts together with details of routine maintenance.
describing the
specifications and extensive
What the press say... “These are really worthwhile manuals which can save you a lot of money.’
Autocar
‘Haynes manuals are outstanding for giving the learner mechanic an easy to follow guide to doing most any type of repair or maintenance work on his or her car.’ Road & Track
written for the intelligent owner who wants to understand the construction and working of his car, and Safer Motoring
who is not afraid to pick up a spanner and dismantle it.’
‘These authentic manuals are actually written from practical experience
.
Car Mechanics
‘Excellent value for money, beginners and experts should find it equally useful, overall
a mine of information.’
aoe
Motor See
_
‘It is thus’opportune that a simply splendid Owners Workshop Manual has just come out. Every imaginable job is
illustrated
. . .. Autosport
‘For the home mechanic Haynes pictures. Sunday Mirror plus some
DIY workshop
very useful photographically
|
x
_————
manuals
illustrated
show
clearly step-by-step
step-by-step
assembly
servicing operations
and reassembly
in
procedures.’
Motor
‘Another book well worth buying.’
Hot Car
‘All instructions given on a step-by-step basis with a minimum of cross-references and vast number of illustrations roughly one per step. Great use of photographs but well taken and clearly printed. Motor
written particularly for the do-it-yourself chap with the object and aim of saving money.’ Conversions . covers absolutely everything you could wish to know.’
Cars and Car
a: —
Popular Motoring
‘Every conceivable aspect is covered down to the minutest accessory. invaluable asset.’ Safer Motoring
2211/276
;
. . excellent value for money, and is an
ISBN
0 85696 276 7
rN N N
==