Digital Photography: Acquisition and Processing Techniques
This book you through every aspect of digital photography, from shooting through postproduction and printing, to help yo
391 11 8MB
English Pages 104 Year 2004
Recommend Papers


![Digital Photography Expert Techniques [2 ed.]
0596526903, 9780596526900](https://ebin.pub/img/200x200/digital-photography-expert-techniques-2nbsped-0596526903-9780596526900.jpg)

- Author / Uploaded
- Ron Reznick
File loading please wait...
Citation preview
TableofContents Introduction ..........................................3
Acquisition
Processing
ExposureandtheHistogram DeinitionofTerms ...........................4 TheHistogramDeined ....................6 EvaluatingLuminosity .....................7 UnderstandingColor ........................10 WorkingwithColor ..........................11
TheDigitalWorklow TheTransferProcess.........................29 IPTCCaption/TransferOptions .......30 PerformingaTransfer .......................31 BatchProcessing ................................32 TheSelectionProcess ........................33 ImageProcessing NikonCaptureProgramSetup .........34 GreatEgret ........................................37 BlackCrownedNightHeron ............41 Jean-Claude........................................46 ChileanJasmine ................................50 TheVietnamMemorial ....................55 HardRockStratocaster.....................58 MooseatSunrise...............................61 TomboftheUnknownSoldier.........65 DigitalDEE:anoverview .................68 JacksonLake,GrandTetons.............71
Metering WhichonedoIchooseandWhy?.....13 Matrix .................................................15 Spot .....................................................16 Center .................................................17 Composition “theruleofthirds”............................18 Guidingtheeye .................................19 Angles,near/fartechnique...............20 Closeupwork.....................................21 Usingthefocusedplane....................22 Breaksinconvention&luck............23 Architecturallines ............................24 TipsandTricks ...................................26 ImagesforyourEnjoyment...............28
PhotoshopProcessing CSRAW—BCNightHeron .............74 Post-processing ..................................78 Lenses(fromDigital-Images.net).........86 ThanksareduetoDaveCheatham,AndrewChan, MikeWorley,KevinGallagher,VinceBattagliaand RickWallacefortheirassistanceinthisproject.
Alltext,graphicsmaterialandimages
©2004—RonReznick AllRightsReserved RRDesign
2
636E.HarvardRdunitB Burbank,California91501 Telephone:(818)843-8212 http://www.digital-images.net
T
hebestphotographsresultfromwellexposed, well-composed, properlyprocessed images. This book is not intended to be a camera or software manual which expounds on features… instead I prefer to go into detail regarding various techniques which I use for the acquisition and processing of images. While I use Nikon gear, the techniques which I will describe are applicable to other manufacturers’ products, and techniquesdescribedforprocessingimagesin Nikon Capture are applicable to other RAW processingprogramsandimageeditorswitha fewalterations. Some acquisition techniques which will bediscussedincludetheuseofthehistogram todetermineproperexposure;theuseofthe variousmeteringmodesalongwithexposure compensation to achieve that exposure in varioussituations;somereasonsfortheuseof aperture priority, shutter priority or manual mode;techniquesforcompositionofvarious sortsofsubjects;andtheuseofdepthofield forsubjectisolationortoassistinthecreation ofawide-anglecomposition.
3
Specialattentionwillbepaidtothedigital worklow, including organizational methods; batch-processingforpre-selection(toremove unwanted duplicates or mistakes from the grouptobeprocessedmanually);theselection processitself;andacomprehensivetreatiseon imageprocessingusingNikonCaptureaswell as some post-processing techniques in Photoshop. In my worklow, most of the image processing including the color work, White Balance, EV, Levels, Curves and Gamma processing are done in Capture, with postprocessingbeingprimarilyusedfortouch-up, rotation, cropping, resizing, etc. The section onprocessingisdocumentedwithscreencapturesandpresentedineasily-understandable language.Zoomintoexamineimagedetails. AnarticleonLensSelectionandsample images are also included, along with lessons showing step-by-step processing of these images, which were selected to illustrate commonhistograms.Therewillalsobeauxiliary ilesincludedtohelpyoutounderstandluminosityandcolor,andhowtheyapplytoboth meteringandevaluationofthehistogram.
ExposureandtheHistogram:ADeinitionofTerms
M
any people reading this book are probably aware of the terms and features I’m going to discuss. If you already knowthisstuff,bearwithmeorskipforward abit. One of the most powerful things about digitalcamerasistheabilitytoseewhatwe’re doing…notonlycanweseetheimageitself, but we can turn on a Histogram: a graphic distribution chart that shows the image in termsoflightlevelsandthenumberofpixels thatarepresentateachlevel.Thehistogramis achartrunninglefttorightfrom0(Black)to 255(White)withdivisionsat64,128(middle grey),and192(seeimagetoright). The histogram allows us to see the exposure. If you can evaluate the light levels (luminosity) of the scene, you can look at thehistogramanddeterminewhetheryouare underexposedoroverexposed—forinstance, IwaswithastudentinYellowstoneNational Park recently, and we were shooting some pronghorns in strong light. I pointed out to himthatthewhitepartofthepronghornwas 240,andtoexposeaccordingly.Hetookashot, checkedhishistogram,andsawthehighlights droppingoffjustpastthe192divisiononthe histogram. He applied +0.7 EV (Exposure ValueCompensation)andtookanothershot, nailingtheexposurerightonthemoney.
The numbers below the vertical divisions correspond to luminosity level at each division inRGBvalue(RGBisRed,Green,Blue).There are also greyscale (K) equivalents to each of thesevalues,fromlefttorightonthehistogram they are 100%K (Black), 75%K (64RGB), 50%K (128RGB), 25%K (192RGB) and 0%K(White).Thegreyscalevaluescorrespond tothepercentagesseeninthegreyscalebelow.
What does the EV control do? The EV controlalterstheexposurebyraisingorlowering the aperture or shutter speed. If you have your camera set to Aperture Priority, the aperture (lens opening) is ixed. When inShutterPrioritytheshutterspeedisixed. TheEVcontrolalterstheonethatisn’tixed, openinguptheapertureonthelensorloweringtheshutterspeedforpositiveEV,andclosing down the aperture or raising the shutter speedfornegativeEV.
Ifyouoverexposeanimage,thecontrastis loweredanditispossibletoseverelyoverexpose highlights.Thiswillresultinalargespikeonthe rightsideofthehistogram(255)andalossof highlightdetail. Ifyouunderexposeanimage,theshadows and midtones start to get too dark (block up), andtorecoverthisunderexposureyieldsanoisy result.
4
Another powerful feature of the digital camera is the ability to alter the ISO (ilm speed)withoutchangingilm(sincewedon’t useilm).Thisworksthesameasthevolume controlonyourstereo--itcranksupthegain. Asthesignal-to-noiselevelisixed(thenoise isincreasedalongwiththesignallevelwhen you“raisethevolume”),raisingtheISOspeed increases the shutter speed for a given apertureandexposureatthecostofahigherlevel ofnoise. Onthefollowingpages,Iamgoingtoget into some rather exhaustive detail regarding thehistogram,andwillshowyouhowtouse agreyscaleandcolorchartstotrainyoureye toseeluminosity(lightlevels)inthesubjects aroundyou.Thiswillgiveyouareferenceto lightlevelsthatwillassistyouwhenlooking atyourhistogram,soyoucanjudgewhenan imageisoverexposedorunderexposed. Iamprovidingyouwithseveralilesthat will allow you to calibrate your eyes (and incidentally adjust the brightness and contrastofyourmonitorincaseyouaren’tusing calibration tools), teach you about color and greyscaleluminosities,andRGBcolorlevels. Ifyouspendsometimestudyingtheseasoutlinedinthepagestocome,youwillsoonturn intoahumanlightmeterandwillbeableto closely estimate the level of highlights and midtones, and therefore will be able to look at the histogram and you will know whether or not you have the exposure correct. The freedomthisgivesyouistremendous.Iwish youcouldseethelooksonthefacesofmystudentswhentheyrealizetheyareconsistently hitting exposures within one-third stop, and oftenwithinone-tenth.BIGsmiles.
Ifyousetyouraperturetogetthedepthof ieldyouwant,andtheexposureiscorrectbutthe shutterspeedistoolow,raisingISOincreasesthe shutterspeedattheexpenseofadditionalnoise. You’llhaveasharpershot,butwithmorenoise.
shadows
midtones
highlights
The left side of the histogram shows the shadows, the right side shows the highlights. Midtonesareinthemiddle.Youwanttoacquire theabilitytoestimateluminosityvaluesofthe midtonesorhighlightssoyoucanadjusttheEV. ThehistogramaboveshowstheRGBvalues associatedwitheachdivisionofthehistogramas wellasagreyscale,andaveryimportantpieceof information:thedistanceinEVbetweeneachof thedivisionsfromthemid-shadowstowhite.If youpractice,youwilllearntoevaluatethesubjectandhighlightluminosities,andcanlookfor themonthehistogram.Withknownvalues,you canmakeadjustmentsbasedonaknowledgeof thedistancebetweenthedivisionsandadjustthe exposureascloseasyourcamerawillallow.
Plan on reading the following informationseveraltimestounderstandit.Thisisnot rocketscience,ofcourse,buttheinformation requires some digestion before it becomes second nature. Open the greyscale and color chartsinyourimageeditorseveraltimesper week. Put your mouse cursor over the color patchesandgettoknowtheRGBlevels(look inyourInfopalette).Soon,you’llhaveagood feelforluminosity. 5
ExposureandtheHistogram:TheHistogramDeined
P
roperly exposing an image makes a majordifferenceintheamountofimpactanimagehas,thecharacterofhighlights and shadow detail, and noise levels among other things. It also reduces the amount of processingeffortconsiderably. Ourgoalistoconsistentlyexposeimages withinone-thirdofastop(underexposureis preferred to overexposure to avoid blowing highlightsandlosingdetail),althoughitispossibletorecoverimagesthatareunderexposed byasmuchasawholestoporoverexposedby as much as 2 stop depending on your standardsfornoiseorlossofhighlightdetail. Underexposed images generally leave a gapontherightsideofthehistogramandare bunchedontheleftside,overexposedimages generallyleaveagapontheleftsideandare bunchedontheright.Itispossibletohavean overexposedorunderexposedimagethatdoes notlookthisway,forinstanceifthebrightest highlightwas200andyoushow250,you’re 2/3stopoverexposed. To the right are two histograms of the samesubjectfromNikonCapture(oneunderexposedandoneoverexposed). Note in the upper histogram how the highlight data, shown at the bottom of the graph, drops from the midtone region just after the centerline (128 division), and the brightest highlight peters out just after the irstdivisionleftoftheright-sidemargin(192 division).Theproperexposureforthisimage would have shown the drop down from the uppermidtonesat200andthebrightesthighlightsjustbarelyhitting255.Theupperimage isunderexposedby1stop. The lower image is overexposed by just underastop.Notethespikeatthe255margin(rightside)thatgoesallthewaytothetop, andespeciallytheheightofthedataabovethe baselinebeforeitrisestothespike.Also,noticethesigniicantgapontheleftside.When youseethesethreecharacteristicstogether,it indicatesoverexposure. 6
EvaluatingLuminosity
T
Ihaveprovidedyouwithanumberofileson theCD.Throughoutthissection,youwillwant tohavetheseilesopeninyourimageeditortobe abletofollowalongwiththeexplanations.
his image to the right is what you will see when you open the ile “Greyscale.tif”.Youwillnoticethat128Grey (thestripabovethegreyscale)isequalto50% grey.Thiscorrespondstothecenterdividing line on your histogram. You can verify the RGBluminosityofeachoftheK-percentages (listedinthewhitestripbelowthegreyscale) byusingthemousecursorinyoureditor(e.g. Photoshop)andlookingattheRGBvaluesin theInfopalette.Thisisaneasywayforyou togetfamiliarwiththeRGBlevelsatvarious luminosities,itwillmakeitmucheasiertoestimatewherehighlightsandmidtonesshould fallonthehistogram,andwillgreatlyimprove yourabilitytogetthecorrectexposure. The vertical lines on the histogram correspondtothegreyscaleasshowninthetable tothelowerright.Thedivisionsfromtheleft totherightmarginarelistedinbothK-values (asseenontheGreyscale)andasRGB-values (whichcanbeseenonthegreyscalebyholdingyourmousecursorovereachpatch).The RGBvaluesarealsoshownonthehistogram shownabovethetable,whichyou’llrecognize astheoneseenonpage5. By memorizing the various luminosity levels in the greyscale above, and comparing your knowledge of these luminosity levels withwhatyouseearoundyou,youwillhave an extremely good feel for how much EV compensationtoapplytoanygivenscenedependingonthemeteringmodeyouareusing. Remember that the meters will average the scenetoANSIgrey,whichisroughly102grey or60onthegreyscaleabove.Itismostuseful foryoutoknow128grey,however,asitcorrespondstothemid-lineonyourhistogram. Ifyoumeteronasubjectthatis128grey, you’ll see a spike in the center of the histogram. If the spike doesn’t appear where it’s expected,youneedtoapplyEVcompensation —ifitisleftoftheexpectedpointyouapply positiveEV,andifitisrightoftheexpected point you apply negative EV. Clear as mud, right?I’llgivemoredetailonthenextpage…
Opentheile“Greyscale.tif”ontheCD.
A5%greyscale.ThepercentageslistedbelowthegreyscaleareinK-values(derivedfrom CMYK: Cyan, Magenta, Yellow and Black). Black is 100% K (100% Black), and white is 0%K(0%Black).
7
DivisiononHistogram
%K
RGB
LeftMargin betweenleft¢er Centerdivision betweencenterandright RightMargin
100 75 50 25 0
0 64 128 192 255
To the right is the familiar histogram, andbelowitisanimagethatshowsgreyscale luminositiesthatcorrespondtothedivisions inthehistogram.Youhavealargeversionon theCDcalled“PrintGrey.tif”.Youcanprint thisimagetocreateatest-target(itwillprint onaletterpageat10”x7.75”.Thetesttarget can be used to help you learn how to adjust EV(exposurecompensation).Noticeinyour shotoftheprintwhereeachspikeshowsup onthehistogram,andapplyEVasnecessary to adjust the result so that each spike lands oneachdivision.Thiswillbethecorrectexposure. ThereisoneEVbetween192and255, and 1.3 EV between 128 and 192. (There is1.7EVbetween64and128,buthopefully you will rarely underexpose by this much). This information is very useful to help you determinehowmuchtoaltertheexposureto correctforwhatyouseeonthehistogram. If you are metering something that you know is 192, for instance, and it just hits the right border of the histogram, you are 1 stop overexposed. If you apply -1.0EV, you willeitherberightonthemoneyorjustabit over-orunderexposed,andcanmaketheinal adjustment in Capture, knowing you’ve preservedthehighlights.Youcanadjustexposure in1/3stopincrementsbysettingyourcamera to1/3stopinthemenus(thisisthedefault). OnethingthatIshouldemphasizehere: many people try to preserve all highlights, eventhosespecularhighlightsthatareblown inreallife(e.g.sparklesonwater,etc.).This isamistakethatwillresultsinunderexposed images,andshouldbeavoided.Ifit’swhitein reallife,youshouldexposeaccordinglyandallowaspikeinthehistogramontherightside —otherwiseyouaregoingtoseverelyunderexpose the rest of the image, and recovering thisusinggammaandEVcompensationafter the fact will result in lowered shadow detail andnoiseindarkerareasoftheimage.Iwill discuss how to use gamma and EV to adjust animageintheprocessingsection.
There is a larger version of this image aboveonyourCDcalled“GreyPrint.tif”which willprintonan8.5”x11”letterpage.Youcan use this print to practice making EV adjustments,asyouwillseespikesatthecorrespondingdivisionsonthehistogramwhentheimage isproperlyexposed.
Letitgoifit’swhite. Don’ttrytoholdthehighlight. 8
Thehistogramstotherightshowthesame subject which has a balanced character and midtones that occur exactly at 128. The top histogramisproperlyexposed,themiddleone isoverexposedby0.33EV,andthebottomone isunderexposedby0.33EV.Ofcourse,this canbecorrectedafterthefactinCapture,but it’s good practice to correct it in-camera. By memorizingtheluminositygreyscaleandthe regionsofthehistogram,andtakingtestshots forawhile,youreyewillbecomesensitiveto subjectluminositiesandyouwillsoonbeable to estimate the luminosity closely without taking test shots… if you do have time you cancheckyourselfandmakerequiredEVadjustmentsasnecessary. Oneotherthingwhilewe’reonthissubject… many people seem to think that the histogram has to show an even distribution, or that it has to show an exposure that goes allthewaytotherightmargin,orsomeother preconception of what the histogram should show. What this means is that they really don’t know what a histogram is: a distribution curve that shows how many pixels are at a given luminosity value. There simply is nospeciicrequiredlooktoahistogram…if there is no white in a scene, and the brightest highlight is 200, your histogram should showthedatadroppingoutjustpastthe192 divisionmark.Ifthereiswhiteinthescene, andthereisafairlystrongspecularhighlight, you will have a spike at 255 (right margin). If there is an odd color balance, you could conceivablyachievefullsaturationatalower valuethan255(e.g.whenshootingaredrose onablackbackground—asubjectthatisoftenoverexposedtothepointwherealldetail intheroseislost). In the next few pages, I will show you some iles that I have provided which will helpyoulearnaboutcolorandgreyscale,and discusshowyoucanusetheseiles.Thesewill assist you in understanding how the camera seescolor,andhowvariouscolorswillbeexposedsoyouwillknowwhattodowiththat peskyhistogramtomakesureyouaregetting the proper exposure in situations where the colorbalanceofthesceneisunusual. 9
UnderstandingColor:DeiningtheSituation
T
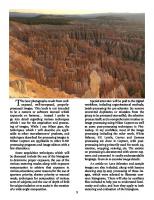
Some situations where people — even professionals who are used to working with their light meters but who don’t have an instinctive feel for color — make this mistake arewhenshootingredrock(e.g.atBryceCanyon(Introductionpageandtheimagebelow) or Sedona, AZ), or when shooting primary redsubjectslikeroses,etc.
he differences between exposing for grey and for color are somewhat complex.Iamgoingtotiethetwoprinciples togetherwiththeaidoftwotoolsthatIhave providedforyouontheCD: “RGB135_Grey.tif”and “RGB135_Converted.tif”.
An example of how this will help you is thecaseoftheredrockImentioned…atBryce Canyon’s Visitor’s Center, there are a number ofprintedphotographstakenprofessionallyand printed in everything from books to NPS’s brochures.EverysingleshotIlookedatshowedoverexposureofthereddish-orangerocktoyellow.If yousetexposureproperly,youcanmaintainthe redchannelwithoutblowingittoyellow,orlosinghighlightdetail.
Nowthatyouknowwhatthehistogram is showing you — the number of pixels at each luminosity level from 0 (black) to 255 (white)—andyouknowthatthehistogram shows you a greyscale average because there are no separate Red, Green and Blue (RGB) histograms displayed, you need to be able to understandhowthecameraevaluatescolorso youcanbiasyourevaluationofthehistogram dependingonthecolorbalanceinthescene. IfthescenehasagoodbalanceofRed,Green andBlue(RGB),therewillnotbeaproblem, butquiteoftenyouwillindyourselfinsituations where one color predominates, or the colorbalanceisskewedinawaythatfavors onecoloroveranother. Theimagesensor,whichreadsgrey,has a ilter over it that limits the light that enters each well. Most of the sensors we use have what’s known as a Beyer Pattern ilter (whichisshownonpage12),thatalternates RGRGRGorGBGBGBpereachrow,limiting thecolorthatenterseachwelltowavelengths corresponding to these colors. This means that the sensor, which has twice as many Green-sensing wells as Red or Blue, has a color bias towards green and yields a higher resolution when there is green blended with redorblue. Theissueisthatyoucanachievefullsaturation in the red channel quite easily, and in situationsthathaveapredominanceofred,you willoversaturatetheredchannellongbeforethe histogramshowsthehighlightsat255.Youneed tobeabletoevaluatecolorbalancetoknowwhen this will be a problem, and the only way to do thatistoknowhowcolorsareputtogetherand theirgreyscaleequivalents. 10
WorkingwithColor You can familiarize yourself with the composition of various colors by working withthecolorchartsI’vegivenyou. Open the two color charts together in your image editor. Place your cursor over any color (note the color patch’s row and column). Now, look on the Info palette… you can see the RGB colors and the balance of R, G and B in each color (using the ile “RGB135_Grey.tif”). Ifyouplaceyourcursorontheexactsame row/columninthegreyscaleversionoftheile (“RGB135_Converted.tif”),Youcanseethe RGBgreyluminosityseenbythecamerawith the 25% Red, 50% Green, 25% Blue ilter overthesensor.Thisilehasbeenconvertedto greyscaleusingthechannelmixersetto25% Red,50%Greenand25%Blue,justlikethe Beyer Pattern ilter in the camera (shown to the right). This grey luminosity corresponds tothepositionwherethatcolorwouldshow up on the histogram at the proper exposure. Comparetothecorrespondinggreyvalueseen inthe5%greyscale“Greyscale.tif”. Ifaparticularcolor’sgreyluminosityis64, forinstance,thatcolorwouldshowaspikeatthe divisionbetweentheleftmarginandthecenter division on the histogram (the division that shows64Grey).Ifacolor’scorrespondinggrey luminosityis150,youwillseeaspikebetween the center division (128) and the center-right division (192). The way we use this is to estimateeithermidtoneorhighlightlevelssowecan avoidoverexposure. Thissortofthingisnotlearnedinaday, so it will require some study, but once you haveagoodfeelforthewaycolorsequateto greyscale equivalents, you will ind that you can closely estimate how far below the right margin (255) you need to set the exposure to get correct saturation for a speciic color. While you will not require this information for most shooting, in situations where there isanoddcolorbalance,knowingtheinformationhereandonthenextpageswillmeanthe difference between properly-exposed images andablownredchannel.
W
orkingwithcolorisdifferentthan workingwithgreyscalebecauseof the different luminosity values inherent in color,andbecauseofthewaytheimager(and ourbrains)seecolor.Theimagersplitsthe colorsothat100%ofthecolorisdistributed 25%Red,50%Greenand25%Blue.Most imagers use a Beyer pattern ilter over each image well: one row would be RGRGRGRG andthenextrowisGBGBGBGB,followedby another RGRGRGRG, etc. A graphic representationofthisisbelow:
Colorinterpolationisdoneonthedatato derivetheactualcolorbasedontheintensities recordedandtheinformationinthesurrounding cells, to simplify the process radically. However,ifthesubjectisprimaryredorblue, asyoucanseeonly25%oftheimagingwells willrecorddata,reducingtheresolution.This canbiteyouoccasionally,reducingtheresolutionofredandbluesubjects. Whatwereallyneedtoknowaboutcolor when it comes time to expose it properly is the overall luminosity of the color, and how itcorrespondstogreyscaleluminosities.This can be a tricky thing to learn, so I’m giving yousometoolstolearnthis.Youcansurvive without knowing this, of course, but if you do learn this it will make it easier to nail exposures consistently when working with color,whichwillbenearlyallthetimeasyou know. On the next page, I will show you the RGB135 iles and we will again go over the methods you will use to learn color and greyscaleequivalentsusingtheseiles.Iknow thisisratheresoteric,anditwillprobablyrequirequiteawhileworkingwiththeilesbeforeitbecomessecondnaturetoyou,butthe timewillbeworthitwhenyouindyourself properlyexposingverydificultsubjects. 11
I have provided you with “RGB135_ Grey.tif”ontheCD…openthatilenow.If youareaskedwhattodowiththeile’scolor space when opening the ile in your editor, leaveitas-is. This ile, shown at the top of the next column, has the familiar greyscale, a strip of Cyan, Magenta and Yellow (CMY), and a standardsetofgreyandcolorpatches.We’re goingtousethistolearnaboutcolorandthe correspondinggreyluminosities. “Whylearnthecorrespondinggreyluminosities?”Goodquestion.Thereasonisthat thehistogramdoesnotshowR,GandB,so weneedtohaveafeelfortheaverageluminosityasseenbytheimagerwithit’s25%Red, 50% Green, 25% Blue ilter over the wells. I’ve also supplied you with a version of this ilethathasbeenconvertedtogreyscaleusing the25/50/25mix:“RGB135_Converted.tif”. Thecombinationoftheseileswillteachyou aboutcolor. HoldyourmouseoverthedarkblueatE6 andyou’llseethattheRGBvaluesshownin yourInfopaletteare0,0,153.Now,checkthe same color patch in the converted greyscale versionandyou’llseethatthiscolorisequivalentto38grey.
Above is “RGB135_Grey.tif” from the CD, and below is “RGB135_Converted.tif”. Followalongwithbothilesopeninyourimageeditor.
By doing a conversion to greyscale on the Converted ile (discarding color info), you will see that this color patch is equivalent to 85%K—notewherethatpatchfallsonthe5% greyscaleontopofeachcolorchart. You’llnoticethatsameKvalueforI6,G2, and H13. Now, check H15. This is primary red,255,0,0.Itcorrespondsto75%Kor64 grey.
Practice with these iles and the 5% greyscalebyviewingthemregularly,checking luminositiesbyusingyourmousecursorand theInfopalette.
To expose 255 Red to full saturation withnoothercolorpresent,youshouldsee aspikeat64grey.Tryseveralothercolorsto seethecorrespondinggrey.
Whenyougoout,seeifyoucanjudge thelevelofthingsyousee…signs,cars,trees, houses, and anything else you come across. Takesomeshotsandcheckthehistograms. 12
TheLightMeters:WhichonedoIchooseandwhy?
N
owthatyouknowwhatEVis,how to evaluate the exposure with the histogram, and how to adjust the exposure shownonthehistogramwithEV,wearegoingtodiscussthemeteringsystems:howthey work, which ones should be used in various situations,andwhyyoumightwanttoselect onemeteringmodeoveranother. You have three metering systems: Matrix, Spot and Centerweight. These meters arecalibratedtoANSIgrey(roughly102grey, or 60% K on your greyscale). Keep this fact inmind.Ifthesubjectyouaremeteringisnot ANSIgrey(theyrarelyare),youneedtoapplyEVcompensationtocorrectlyexposethe image.
Ifyoursubjectissigniicantlybrighteror darkerthanthescene,thematrixmeterwill exposeforthesceneandeitherunderexpose or overexpose the subject. Your job is to applyEVasnecessarybasedontheluminosity differenceofthesubjectincomparisontothe scene. Sometimes,it’sagoodideatousethematrixmeter,indoutwhatthecorrectexposure is,thenswitchtoManualmodeandsetthat exposure manually. When in manual mode, your EV adjustments will not work — you setEVbyeitheralteringtheshutterspeedor aperture,dependingonwhetheryouwantto maintainaspeciicdepthofieldornot.
MatrixMetering
Ifthesituationcallsformanualmode, useit.Itcangettheshotinsituationswhere usinganyoftheothermodeswillnot.
The Matrix meter uses a special CCD (imagingsensor)toevaluatetheentirescene. Ifyourlenscommunicatesdistanceinformation (D-type), the sensor evaluates subject distanceandcoloraswellasoverallluminosityandbalance,comparesittoalargeonboard database, and recommends the correct exposureforthescene.
For instance, recently I was shooting wildlifeatanaturepreserve,andthesubjectofthemomentwasalockofseveral hundred Pelicans (white birds), a large number of cormorants (dark birds), plus SnowyEgrets,GreatEgrets(whitebirds) andGreatBlueHerons(middle-greyluminosity).Thewaterwasjustabovemiddle grey with highlights around 200-210 in the light, and 140-150 in shadows. The sky was overcast and very bright. There were dark foliage backgrounds as well as midtonebackgrounds. Whenusinganyofthemetersexcept Spot, the changing backgrounds usually forcedthewhitebirdstobeoverexposed. What I inally had to do was take a test shot,indthecorrectexposureforthebird at that moment, then set that exposure manually.AllIhadtodothenwasvarythe exposureusingeithertheshutterspeedor acombinationofshutterandaperture(if Iwantedtovarythedepthofield).This madeaverydificultsituationmanageable —ifthelightchangedalittleIdialedina littlemoreoralittlelessexposure.
ThebesttimestouseMatrixarethose where you need to meter the scene itself, whetherornotyoursubjectisdifferentin luminositythanthescene. It frees you to follow action and compose as necessary, without having to lock theexposure.YouwillofcourseneedtoapplyEVcompensationasnecessary. IusuallysetmycamerainAperturePrioritysoIcancontrolthedepthofield.IfIgointo manual mode, I will continue to work with a ixedapertureandadjustEVforchangesinthe lightorsceneusingtheshutterspeed.Occasionally,youmusthaveacertainshutterspeed,and in that case you will want to work in Shutter Priority or adjust in manual mode using the apertureadjustment. 13
SpotMetering
CenterweightMetering
pot metering is used to measure the subject itself and set your exposure basedonthesubject.Yousetwhichfocusing reticle(thelittlebracketintheviewinderyou focuswith)youwantbasedonthecomposition,andthisreticlebecomestheonewhichis usedformetering.Youputthereticleonthe areaofthesubjectyouwanttometer,andthe metersetsthatareatoANSIgrey. Your job, as with the other metering modes, is to know the luminosity difference betweenthesubjectandANSIgrey,andapply thecorrectEVcompensation. Ifthesubjectismoving,youcanusethe AELock(Auto-exposurelock)buttontohold theexposure.Thiscanbesomewhatofapain intheneckthough,soifthesubjectismoving I will generally use Matrix except in special circumstances. The Spot meter is the only one that allows you to move the area selected (some camerabodiesallowyoutoselectmorethan one spot). This can be a very powerful tool unless you are tracking action. Remember, youcanalwaysmetertheexposurewithspot, determinethecorrectEVadjustment,thenset exposuremanually.
heCenterweightmeterworkssortof like a giant spot meter that stays in the center of the frame. You can go into the menu and alter the size of the centerweight metering area from the preset (shown as a circleintheviewinder).Iusuallysetmineto 6mmsoitactslikealargecentralspotmeter. The centerweight meter works just as you’d expect from the name: it averages the luminositiesinthecenterandsetstheaverage to ANSI grey. This can be useful in portrait situations and many other situations where yoursubjectiscentered,butjustlikethespot meter, the subject must remain centered or yourexposurewillchange. Of course, as always you apply EV compensationtoadjustforthedifferencebetween thecenteraverageandANSIgrey. IfyouworkwiththeCenterweightmeter the same way that you work with the spot meter,keepinginmindthatyouwillonlybe meteringthecenterregionbasedonthesize ofthecircleselectedinthemenu,you’llgetit right.
S
T
If you understand luminosity levels and know what your histogram should be showing,youcanusethemeteringmethod whichmakessenseforthescene,andadjust EVaccordingly.
The best times to use Spot are those where the subject is relatively static and is widely different in luminosity from the scene. You have to follow the subject with thefocusingreticle,soitrestrictsyourcompositional abilities unless you use the AE Locktoixtheexposure.
On the following three pages, I show examplesofshotstakenwiththethreemeteringsystems,alongwiththehistogramsofthe originalexposuresandtheprocessedimages, andexplainmyreasonsforusingthemetering modeandhowIusedit.
IhaveincludedtheNEFandprocessed TIF of each of the shots on the CD, and theseimagesareusedintheprocessingsectionofthebook. 14
MatrixMetering
T
ChileanJasmine_2625,MatrixMetered
15
heimagetotheleftisanexampleof abalancedimagetakenneartheend ofthedayinsemi-shade,leavingalittleroom forprocessing.Asyoucanseefromtheupper of the two histograms, there is a gap on the rightofthehistogramequallingabout0.3EV —oncetheimagewasbroughtinforprocessing, the white balance was adjusted and the basicUnsharpMaskwasapplied,itrequired +0.17EVtogettotheinalexposuresetting shown in the lower histogram. You can also seetheshadowandgammaadjustmentsthat were applied in processing (this will be discussed in detail in the processing section of thisbook). Thereweretwogoodwaystometerthis exposure:onewaywouldhavebeentospotmeter off the highlight on the far right petal oftheJasmine,whichis246,237,249inthe inalprocessedimageand236,223,230inthe original. Note that this is relatively neutral, butissigniicantlybrighterthanthegrey-level that the meter is calibrated to. This means that if you spot-meter on this highlight, you will yield an underexposed image when the camerasetsthatpointtoANSIgrey.Youmust thereforeapply+EVof1.7stopstoyieldthe correctexposure.Theotherwaywouldbeto useMatrixmetering--thisusesaspecialCCD alongwithadatabaseofimagestolookatthe entiresceneandaveragethatsceneusingdepth data to the focused subject (which assumes the use of a lens that communicates depth information) along with the information in thedatabaseofimagestocreatetheexposure reading.Inimagesthathaveapreponderance ofshadowinformation,thesubjectwouldbe overexposedasaresult,and-EVneedstobe appliedtotheMatrixmeterreading.Inother imageswherethereismoremidtoneandhighlightinformationthanshadow,youwoulduse +EV to compensate for the underexposure (checking the histogram and adjusting). In thiscase,thebalancewasnearlyperfectand theresultsoftheMatrixmeterwereusedasis,withnoEVcompensation.
SpotMetering
H
ere’s a tricky one. This image was takeninthelateafternoononChincoteagueIsland,VA.Ithasbeencroppedfrom theoriginalNEF(onyourCD).Inthiscase, spotmeteringwasusedasthebirdwasstayinginthesamegeneralareawhileishing(he waswithoutdoubtthemostsuccessful“isherman”I’veeverseen—hewasinthisarea for over an hour, and got 3-4 of these little silversidesperminute… Icouldhavemeteredeitherthewateror thebird,andthetechniquewouldhavebeen slightlydifferent.Inthiscase,Imeteredoffof thebirdandused+1.0EVexposurecompensation(seeupperhistogram).Thelowerofthe twohistogramsshowstheinalprocessedresults.IfIwouldhavemeteredoffofthewater, -0.3 EV exposure compensation would have been required as the water was under ANSI greyandwouldhaveslightlyoverexposedthe image. The bird was signiicantly above and sotheimagewouldhavebeenunderexposed. Imeteredthelowerwingonaspotjustabove and behind the top of the thigh — a spot at about185grey.Thus,+1.0EVnailedtheexposurerightonthemoney. Often, when shooting birds and other wildlife, subjects are moving around a lot (esp.whenshootingactionorlightshots).In thiscase,itcanbedificulttomaintainyour focusing reticle on the subject. In situations likethis,itisusuallybesttouseMatrixand EV compensation, as you are then exposing forthescene.Unlessthelightchanges,orthe subjectmovestoanareawithasigniicantly different light and shadow balance, you will be more free to compose without worrying aboutexposurechanges. Icanachievemoreconsistentresultswith action when I either use Matrix along with EVcompensationasoutlinedabove,ormeter asceneandtakeatestshot,thensettheexposureinmanualmodebasedontheresults.EV adjustmentscanbemadebyadjustingshutter speedassumingyouwanttocontrolthedepth ofield(DOF)bykeepingtheapertureixed.
GreatEgret_Fish_4156,SpotMetered
16
CenterweightMetering
W
hile I rarely use Centerweighted metering, on some occasions it makes sense as you want to place the subject in the center (in this case to frame water droplets trailing behind the duck) and the luminosity of the scene in the center is similar. In this case, I was pressed for time due to the action at hand, so based on my judgementofthesceneIswitchedtoCenterweightand+0.7EV.Asyoucanseefromthe histogramstotheleft,theimagewas0.33EV underexposed(notethelatspotjustafterthe datadropoffatthehighlightendintheupper histogram,andthespikeat255inthelower onecausedbythewhitestripesontheother female Mallard’s wing). When shooting action,oftenyouhaveverylittletimetomake decisions as to how to meter and adjust the exposure…inthiscaseIhadtoevaluatethe scene,altercamerasettings,focusandirein about2secondtogettheshot.Insituations likethis,beingconservativecanmeanthedifferencebetweengettingtheshotandblowing highlights…itwassafertotakeashotthatI knew would be a little underexposed rather than taking a chance on blowing the white stripes.
DuckFight_1926,Centerweightmetered
Agoodruleofthumb:
17
If the scene is balanced, use Matrix. If thesubjectismovingwithinasceneandyou need freedom to compose without worrying about placement of the subject, use Matrix. If the subject is essentially static and is signiicantlydifferentinluminositythantherest ofthescene,andisnotgoingtobecomposed inthecenterordoesnotillthecenterofthe frame,useSpot.Inthosesituationswherethe subjectisgoingtobecomposedinthecenter oftheframe,andthesubjectluminosityand therestoftheareawithinthecenter-circleare relativelyclose,centerweightmeteringcanbe used.Usually,MatrixissomuchmoreeffectivethatIuseitfarmoreoftenthananyother meteringsystem.
AcquisitionTechniques:Compositionofvarioussubjects
T
hereareavastnumberofvalidcompositional styles, some of which are more valid for some subjects than others… Oftenastylethatworksforonesortofsubject also works for another. This makes learning variousstyleseasierasyougainmoreexperience—whatyouhavelearnedshootingportraitcanapplyinmanycasestomacrowork, aswellaslowers,wildlife,etc. Many people have heard or read about “the rule of thirds”. This “rule” states that yoursubjectshouldbeplacedone-thirdofthe wayfromthetop,bottom,orsideoftheframe. Sometimes,thismakessense,especiallywhen youareshootingaportrait—alotdependson whatyouaretryingtoconveytotheviewer. Theimagebelowiscomposedusingtherule ofthirds,withthesubjectfacingintotheopen space.Inthiscaseitmakesalotofsensetouse thistechnique…
Intheimageabove,however,thesubject isplacedinthecentertoallowthesymmetry oftheheaddress,the‘chestplate’ofthefeathered tunic, and the dancer’s face to balance eachother.Eachofthesearevalidwithinthe contextoftheimages. My point is that the “rule of thirds” should not be looked at as a rule, but as a guidelinetobeusedinthosesituationswhere itmakessense.ThetechniquesthatIwilldiscussshouldbeconsideredtobeguidelinesas well, and I recommend that you experiment andtrytodeveloptechniquesthatmakesense to you, using these guidelines as a basis for experimentation. You should use the frame edges and corners to help guide the eye of the viewer in the direction that you want it to go as well as to help you to align subject elements,etc. 18
An example of a portrait composed in the center of the frame, using a line leading from the corner to guide the eye to the subject, is the giraffe image below. You’ll note thatspaceisleftinfrontofthegiraffeforhim tolookandwalkinto,andalargeamountof negativespacewascreatedbydefocusingthe background—negative(empty)spaceinthe upperleftandrightcornersdrawstheeyetowardsthesubject,asdoesthelineoftheneck leadingto/fromthelowerleftcorner. Mygoalistoguidetheviewer’seye. Anexampleofusingtheupperleftcorner tocarrytheviewer’seyetothesubject:inthis shot the line of the trees and bushes is used tocarrytheeyetothebuilding,whichcarries theeyeup. IntheshotbelowofaGreenViolet-eared Hummingbird, the lines of the subject are usedtocarrytheeyethroughthecomposition, andemptyspacecarriestheeyetothesubject. Usingthe135mmlensatf/2fromcloserange defocusedthebackground,creatingtheempty space.Thelineofthebirdcarriestheeyefrom upperlefttolowerright,andtheeyeiscarried outoftheimagebythelineofthebranch. Astudyofalargenumberofpeoplewas performedtodeterminehowpeoplelookedat images, page layouts, and advertisements. It wasfoundthatthemajorityofpeoplestartin theupperleftcornerandlookthroughanimageoradineitherofthesetwopatterns:the letter“Z”orthenumber“2”.Theystartinthe upperleft,theneitherlookdirectlytotheright ordownandtotheright-center,thendownto the left corner and directly to the right corner.Dependingontheirculturalbackground, some people start in the upper right corner and look down irst, then up to the left and down(sortoflikealetter“Z”rotated90degreesclockwise).Otherstakeapageorimage inassortofapatternlessgestalt. Theruleofplacingsubjectsinoneofthe thirds is not the only valid way of working withacomposition.Theprimaryobjectisto guidetheviewer’seyethroughtheimageina waythatallowsyoutoconveyyourmessage. 19
Agoodwaytoworkwithmanywide-anglescenics isthe“near/far”technique(usingaclosesubject, asubjectinthemid-ield,andadistantsubjectto drawtheeyeinusingdistanceanddepthofield). Thistechniqueisusedintheimagesbelow,theirst takenintheGrandTetons,andthesecondtakenat MammothHotSpringsinYellowstoneoftheLibertyCap.TheLibertyCapitselfisplacedintheleft thirdoftheframetoallowtheuseoftheshadowto carrytheeyetotherightintheforeground…coincidentallyfollowingthe“ruleofthirds”. Often,theangleyoutakethesubjectfrommakes anenormousdifferenceinthepresentation,asin thisshotofaYellowstoneBison.Alwaystrytolook forattractiveangleswhenpreparingtocomposea shot. While you can’t always do so with wildlife, oftenyouwillbeabletoinspectthesubjectfrom several different angles. There will nearly always beanglesthataremoreattractivethanothers. There are several things going on in the image below,takenonaslightlyhazyfalldayatJackson LakeintheGrandTetons.Notethedivisioninto verticalsegments,aswellastheplacementofthe boat,thegapinthetrees,andthemountainpeak at the “rule of thirds” point. Also, note how the bouysbothcarrytheeyefromtheboatoutofthe image to the lower right, or into the image from thelowerrighttotheboat,upthemast,andtothe mountain peak (depending on how you tend to lookattheimage).Again,theideaistocarrythe eyethroughtheimage.ImadesureIwasshooting fromananglethatallowedthebouyline,gap,and mountainpeaktobeinthepositionsIwanted,and waitedforthewindtopushtheboataroundsoit wasbroadsidetomyposition.
I’llbetbynowyou’vegottentheideathatIdon’t thinkofthe“ruleofthirds”asaruleatall,even though I make use of it along with anything else thatallowsmetocreatesymmetry,carrytheviewer’seyeinto,through,andoutoftheimageinthe mannerIintend,andmakeproperuseofspacein theimage. Onthenextpage,we’lllookatsomethingdifferent: compositional methods in closeup photography. Muchofthetime,you’regoingtobeconcentrating onlinesandviewingangleswhenshootingmacro, especiallywithlowersandsmallcreatures.
20
IntheimagebelowofaMosquitoHawk, therearetwotechniquesusedtocarrytheeye in:thearcoftheleaffromtheupperleftcorner,andthestemplacedintherightthirdof theframe. Whenshootingclose,youmustselectthe aperturecarefullysothatthedepthofieldis largeenoughtomaintainfocusonthedesired partofthesubject.Often,itisbesttosetup soyouarebroadsidetothesubjectifyouwant the entire subject in focus, but you’ll notice that in the Katydid and Fly pictures, I took theshotatanangleallowingthemoredistant partsofthesubjecttodefocus,usingthatdefocustosoftenthe3Dlook.Itisbesttofocus ontheeyeofacreatureifyoucanseeit,anditis bestnottoshootthecreaturefromarear-angle. Watchthecornerswhencomposingtosee how the lines of your image are interacting withthecorners,lookforanattractiveangle, and carefully consider subject placement in relationtothelinesoftheimage.
InthephotosaboveofaKatydidnymphonadaisy andagoldenLadybug,thelinesusedtocarrythe eyearefromtheupperleftcornerintotheimage, andfromthelowerleftcornerintotheimage,(the linecarryingtheeyetotheKatydidistheantenna, the line in the ladybug shot is the lower petal). Thesubjectsareinthecenter,butitworksbecause oftheplacementofthelowerstheyareonandthe useofthelinestocarrytheeye.Intheimagebelow oftheFlyonadaisy,theeyeiscarriedintothesubjectbothfromtheupperleftcorneracrossthearc ofthepetals,andfromthelowerleftcorneracross thecoreofthedaisyandupthepetaltothely.
21
An example of combining the two techniques is shown in the Dahlia shot below, where the right facing lower in front has a very sharp transitional edge, but the rear lowerhasaverysoftlook. Whenyou’reshootinglowers,youwantthe crownofthelowertobesharp,soeitherplacethe focusedplanebetweenthefrontofthelowerand thecrown(softlook),orbetweenthecrownand therearedgetomakethelower“pop”.
Theconcepthereistheuseofthefocused plane to affect the dimensional character of thesetwoshots.Noticeintheleftimagethat thefocusedplaneissetsotherearedgeofthe crownisinsharpfocusandtheforwardpart ofthecrownisdefocused,butintherightimagethefocusedplaneisplacedinbetweenthe frontandcentralbuds,andtherearbudsare defocused.Theirstmethodgreatlyincreases the isolation from the background, the subject“pops”outofthedefocusedregionmuch morethantheothertechnique,whichblends therearedgeswiththebackground,givinga softlook,whichisquiteoftenusedinportrait techniques. The “pop” method results in a highly 3D look that has a lot of impact, and thistechniquecanbeusedforalargenumber ofdifferentsubjects.The“wow”factorisvery high for images taken using this style, and manypeoplewhenshownotherwiseidentical imagesusingthetwotechniquesoftenchoose theonewithmore“pop”. 22
TheimageabovewasacquiredbyfollowingthispairofSandhillCranesacrossacreekcrossedsnowymeadow,waitingforanopportunity.Iwasrewardedbygettingachanceto seethematingdanceoftheSandhillCranes, which occurs quite rapidly and doesn’t last verylongatall.Inthisimage,theviewer’seye iscarriedusingtheattentionofthecranes… whatIdidherewasusethecreeklinetoinitiate movement of the eye across the frame, andletthecranesdotherest.Themaledidall sortsofmaneuversforabout12seconds. Alittleearlierthatsameday,notfarfrom themeadow,Ihadanopportunitytogetthis image of a coyote pouncing on a small marmot.Thishadtobetakenrapidly,andIused the body line of the coyote to lead from the lowerleftcornerinanarc,usinghisattention toleadtheeyebackoutthelowerrightcorner. Iwasluckythatthecollapsedsnowoverthe creekoccupiedtheupperright,avoidingatotalwhite-outinthetopoftheframe—Ihad nothing to do with that, or the fact that the coyote’s ear line exactly followed the line of thesnowbank.Justluckandgoodtiming…
FromYellowstoneNP.Inthiscolumn,the primarysubjectisinanunusualposition,facingoutoftheframe.Thepronghornisaligned withtherightedge,andthelineofthesubject’s rumpcarriestheeyedowntotheyoungerdoe atthelowerleftcompletingthelinefromthe upperrighttothelowerleft.Thecomposition belowusesthenear/fartechnique,butwitha telephoto lens’s DOF. The negative space in the upper left brings the eye to the roadway with the oncoming car, the road carries the eyepastthemid-ielddefocusedbisontothe yellow double-line, the line carries the eye tothebisonontherightwhoisblockingthe road,thenoutoftheimage.
23
The photographs on the next two pages showmethodsofworkingwitharchitectural lines. In the image above, the eye is carried intotheimagebyaligningtherooflinewith thetoprightcorner.I’musingtheleftframe edge for alignment of my vertical reference, butallowedaslightanglebetweentheedges to hold the perspective I was trying to retain in this image. My horizontal reference (the lowest front-facing window on the rear building) is slightly rotated clockwise with referencetotheloweredgeoftheframe.The imageaboverightusestheserpentinerailing tocarrytheeyeinfromtheupperright—it terminates at the wide structural corner at bottomcenter,whichthencarriestheeyeup thebuilding.Notetheplacementoftheright edgeofthebuildingintheapexofthecurve oftherailing.TomaintainperspectiveIhad toleaveaslightdeviationbetweenmyvertical referenceontheleftsideofthebuildingand theleftframeedge.
The image of the diner interior below usesthehallwayopening(rightcenter)asthe verticalreference,theclockattheupperleftto bring the eye into the image, the perspective convergencetocarrytheeyethroughtheimagepastthecookstothewaitress,thecounter linetocarrytheeyebackintotheimagefrom therightcenter,andthelineofglassblocksto carrytheeyeoutatthelowerrightcorner.A verytrickyshottosetuprapidly(45mm).
24
TheimagesonthispagearetakenatvariousfocallengthsoftheDisneyConcertHall. The top three were taken at 22mm, 24mm and 28mm as the light changed in the lateafternoon, and the lower shots were taken the previous day in the late afternoon with the 45mm. Each was taken from a different perspective selected to take advantage of the radicallinesofthisbuilding.Asthesteelpart ofthebuildinghasnotrueverticalorhorizontal lines, it allows you to select the shooting angle and focal length based on what you’re tryingtoconvey.IntheupperimageIframed to create a balance between the converging linesofthetwohighesttowersandcentering thosetowers,aswellasbringingthetwoarcs together at right center. In the next image, I usedtherightsidearcofthetowerasaquasivertical reference, the line of the lower portionofthebuildingasahorizontalreference, andcarriedtheeyeoutoftheimageusingthe lineatthelowerleftcorner.Thethirdimage uses the line leading down from the peak of thetowerasaverticalreferenceandagaincarriestheeyeoutoftheimagewiththelinein thelowerleftcorner.Theimageatthebottom left,takenthepreviousdaywiththe45mmin someextremelynicelight,usesthearcatthe topofthetowertocarrytheeyefromtheupperrightcornertothebrightlineatthelower left,whichcarriestheeyeoutoftheimageat thelowerleftcorner.Theinalimagebelow, taken earlier with the 45mm, uses the line leading from the peak of the left tower as a verticalreferenceandthearcofthattowerto carrytheeyeright,thenusestherightedgeof therighttowertocarrytheeyeoutoftheimageatthelowerrightcorner.
25
TipsandTricks 1. To control the “look” of a photo, I primarily shoot in either aperture priority or manual mode — this allows me to control depth of ield by selecting the aperture that will give me the character I want. If you’reshootinginconditionswherethelight remains nearly constant but backgrounds change often, once you know the exposure youcanswitchtomanualmodeandmakethe alterations in exposure using the command dialtoaltertheshutterspeed. 2. Know the best range of aperture and distanceforeachofyourlensesandtrytostay within these ranges to yield the best results. There will be times when you need to compromise on ultimate quality due to the light levels that are present, or the need for more isolation,etc.,butgenerallyyouwillbemore satisiedwiththeresultsifyoustaywithinthe sweetspotofyourlens. 3.Whentheshutterspeedgetsmarginal, useastableholdifyoucan’tuseasupportdevice.Thenearly-baldgeektotheright(yours truly)isdemonstratingastablelandscapeand portraithold.Usingtheseholdswillgiveyoua farhigheryieldatlower-than-normalshutter speeds. These holds yield consistent results at 1/10 sec. with a 28mm lens. Practice to achievehighyieldsatunder1/2thereciprocal ofthefocallength(